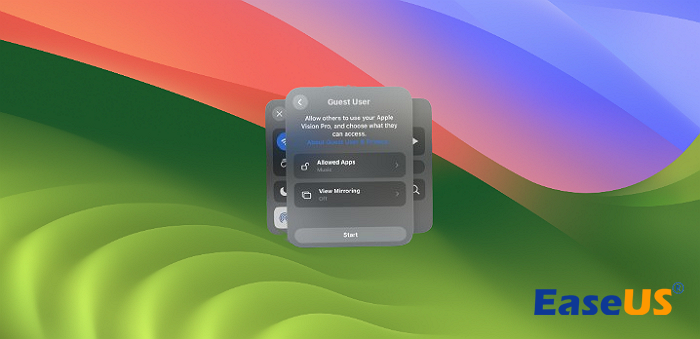
Preparations Before Using Your Mac with Vision Pro
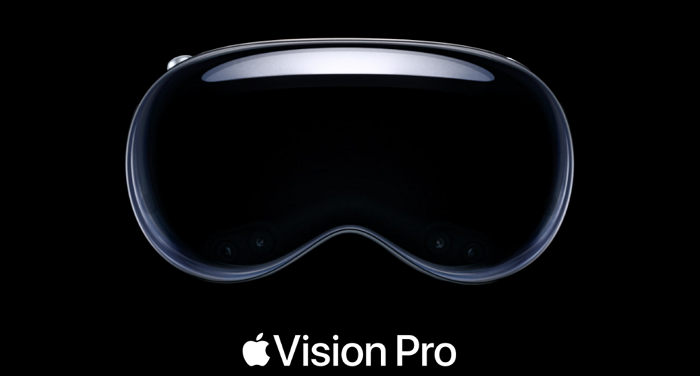
Apple has officially inaugurated its first MR headset, the Apple Vision Pro, which is now widely available throughout the USA and has a buzz on the internet. With more than 2,00,000 Apple Vision Pro headsets traded, this cutting-edge MR headset is endowed with premium AI features and a 180-degree 3D 8K display.
Is it possible to use your Mac with Apple Vision Pro? Sure, Apple Vision Pro allows hassle-free integration with MacBook's display via its Mac virtual display feature and Apple Mac. This turns on the display window to clear within the 3D view open doors by the Vision Pro. One of Vision Pro's leading features is its ability to serve as an external display for your Mac. But prior to linking both Mac and Vision Pro, some preparations are needed.
- Ensure that both devices are logged in with the same Apple ID.
- Your PC must be running on the latest macOS 14 or Sonoma or any previous OS.
- The Vision Pro device must be operating on the newest OS.
- Both devices must be placed within 10 meters.
- The devices must have their Wi-Fi and Bluetooth turned on.

Wondering how to use your Mac with Apple Vision Pro? Keep reading this article, as it will demonstrate the best possible ways to do that. Let's get started!
How to Connect Your Mac with Apple Vision Pro
Mac virtual display allows you to see your Mac screen on Apple Vision Pro, and the trackpad can be used to share the pointer between two devices.
The first thing to do before using your Mac with Apple Vision Pro is connect your Mac to the device (download macOS Sonoma in advance); go through the automatic steps below:
Step 1. Allow the Apple Vision Pro to remain on > See the PC's display > Hit the "Connect" button.
Step 2. You may connect both devices by going to the "Control Center"> Hit the logo of PC and Vision Pro > Opt for "MacBook."
Step 3. If you would like to disconnect the devices, hit the "X" button.
The manual steps to connect your Mac with Apple Vision Pro are the following:
Step 1. Launch "Control Center" while wearing Apple Vision Pro > Tap the "Control Center button"> Hit the "Mac Virtual Display button"> Select your "Mac."
If you're using a MacBook, you might be able to look at it and hit the "Connect button."
Step 2. Resize your Mac screen and drag it towards or away from you, like an application window in visionOS.
Step 3. Link your trackpad with your Mac while staying connected. You may also move the pointer past the Mac screen's edge until it pops up in an open VisionOS application.
Step 4. Tap the "Cross" symbol to disconnect.

Here's a video from Apple's official website to help you understand the tutorial better:
- 00:00 A brief introduction to Apple Vision Pro
- 00:14 How to connect Vision Pro with your Mac
- 00:51 Turn on Visual Display
- 01:57 End a Mac Visual Display session

This passage will present a helpful guide to help you use your Mac with Vision Pro; don't hesitate to share it with more friends!
How to Share Your Mac Screen with Vision Pro
In order to share your Mac screen with Vision Pro, both devices must be signed into the same Apple ID, which implies if you possess a work-issued laptop, in all probability, signed into a managed isolated Apple ID, you can't reap the benefits of this feature.
If you're using a MacBook Pro or Air, please ensure the screen is locked and on. Then, look at your MacBook and hit the "Connect" button.
On the other hand, if you have a Mac Studio, iMac, or a Mac Pro, and the Connect button can't appear, you have to trigger the "Mac Virtual Display" from Vision Pro's Control Center. Follow the steps below:
Step 1. Notice at the top middle of the field of view and hit the tiny bubble.
Step 2. Hit the center-right button (the symbol of a toggle switch) to launch "Control Center."
Step 3. Hit the center-left button (the symbol of a Vision Pro and MacBook) to launch the "Mac Virtual Display" menu.
Step 4. Select your MacBook from the list.
After some time, you will notice your Mac desktop goes into the 3D environment. The real-world display of Mac will appear dark.

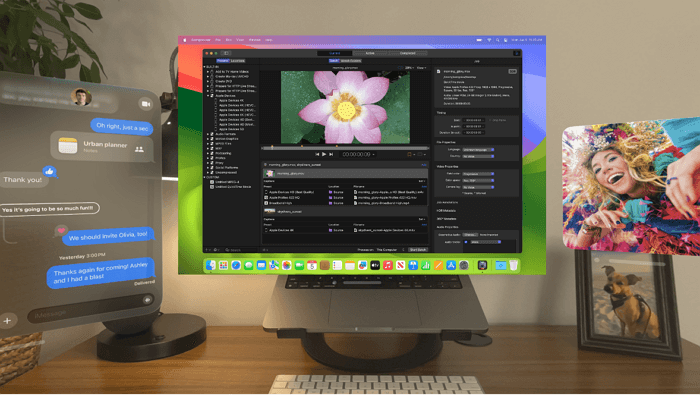
The virtual display panel appears in VisionOS as any other window, presenting as a Vision Pro application. You can shift it around in three dimensions by using the window bar located below it. You can also place it on the opposite side of the room or on top of the previous display. To adjust the window's size, look on either lower side.
How to Connect Mac Accessories to Vision Pro
Using universal control is the best way to connect your Mac accessories to Vision Pro. The trackpad and keyboard control your MacBook. Universal Control lets you share keyboards, trackpads, and mice between several Apple devices so that you can utilize your Mac's trackpad and keyboard with other VisionOS applications. In case you're ready to employ your Bluetooth keyboards with your Vision Pro, follow the steps below to enable Universal Control to use with Vision Pro:
Step 1. Handoff needs to be turned on on Vision Pro and MacBook if you intend to share the pointer between the VisionOS and macOS apps.
Step 2. Navigate to "Settings" on Apple Vision Pro > Select "General"> "Handoff" on your Apple Vision Pro. For Mac, you need to move to "Settings"> "General"> "AirDrop & Handoff."
Moreover, you must enable "Allow your pointer & keyboard to move between any nearby iPad or Mac." Finally, navigate to "Settings"> "Display" and hit "Advanced."
What Can You Do on Mac with Vision Pro
Apple Vision is scheduled to go on sale on February 2, 2024, and pre-orders will start taking place on January 19. The much-awaited characteristics of Vision Pro include:
- ⭐A life-centric user interface.
- ⭐An enchanted eye-tracking framework.
- ⭐Intuitive hand motions.
- ⭐Full-fledged amusement.
- ⭐Multidimensional gaming.
The lowest model, the $3,500 Vision Pro, will offer 256GB of storage.
Connecting Mac with Vision Pro provides outstanding features, which are the following:
💻Mirror Vision Pro to Mac
Apple Vision Pro supports screen mirroring through FaceTime or AirPlay. While wearing Vision Pro, you may select a Mac from the VisionOS Control Center to imitate content from the headset, letting you share your view with others and minimize isolation.
🥰Build a virtual desktop
Regarding Mac, the keystone characteristic of Apple Vision Pro is the Mac virtual display. It uses AirPlay 2 and lets you connect your Mac wirelessly to the headset by seeing your PC throughout your Vision Pro. It assists you in placing and resizing a virtual representation of your Mac's display in space and employs Vision Pro as a significant 4K display.
🔖Link Mac accessories
In addition to wirelessly connecting Mac peripherals like the Magic Keyboard and Magic Trackpad for more standard sensory input, Vision Pro comes with a simulated keyboard for use in virtual reality events. With Vision Pro replacing the Mac display, a standard Mac operation can be carried out by connecting Bluetooth devices.
If you've unintentionally deleted vital files while using the Vision Pro, you may consider using EaseUS Data Recovery Wizard for Mac to restore them quickly. It's a powerful data retrieval software for Mac and a useful one for different data loss situations, such as virus attack, formatting, unforeseen file deletion, system crash, and more. Download this top-notch data recovery tool now!
Conclusion
As of this moment, Mac Virtual Display is only compatible with a single screen. With Vision Pro, the Mac Virtual Display option only appears on the main screen if your Mac is connected to several displays. Accessing your Mac's System Settings is necessary to modify the primary screen.
Despite these limitations, you can easily use your Mac with Apple Vision Pro. One excellent method to work within the headset employing your Mac's keyboard and trackpad is to share your screen with Vision Pro. You may fit a plethora of Vision Pro-compatible apps around your massively enlarged Mac display.
Now, you can mark and share this page on social media to help more users!
Use Vision Pro with a Mac FAQs
These are the best FAQs to consider:
1. Can macOS Sonoma Mac connect to Apple Vision Pro?
Any Mac running macOS 14 Sonoma or subsequent can be used with Mac Virtual Screen. Next, make sure that your Mac and Apple Vision Pro are both in working order. Make sure that two-factor authorization is enabled on your account and log in to both machines using the identical Apple ID. Activate both devices' iCloud Keychains.
2. How to disconnect the Mac and Apple Vision Pro?
To disconnect your Mac and Apple Vision Pro, navigate to "Settings"> "General"> "Shut down." Then, drag the slider.
3. What can I do with Vision Pro & Mac?
You can build a virtual desktop with Vision Pro and Mac. As far as Mac is concerned, the main feature of Apple Vision Pro is AirPlay 2, which lets you link your Mac to the headset wirelessly without noticing your PC through Vision Pro.
Was This Page Helpful?
Dany is an editor of EaseUS who lives and works in Chengdu, China. She focuses on writing articles about data recovery on Mac devices and PCs. She is devoted to improving her writing skills and enriching her professional knowledge. Dany also enjoys reading detective novels in her spare time.
Related Articles
-
Best Method | Install macOS Monterey on Unsupported Mac
![author icon]() Dany/2024-05-30
Dany/2024-05-30 -
How to Lock Mac Screen [7 Fast Ways to Lock Mac]
![author icon]() Brithny/2024-07-01
Brithny/2024-07-01 -
How to Solve Bitlocker Keeps Asking For Recovery Key? [Full Guide]
![author icon]() Tracy King/2024-03-14
Tracy King/2024-03-14 -
Easy Ways to Fix 'Unrecognized Database Format' Error
![author icon]() Cici/2024-07-01
Cici/2024-07-01
EaseUS Data Recovery Services
EaseUS data recovery experts have uneaqualed expertise to repair disks/systems and salvage data from all devices like RAID, HDD, SSD, USB, etc.
