How to Upgrade Nintendo Switch SD Card without Losing Data
How many of you guys have the experience that you'll have to upgrade and change the SD card when it gets full? And do you know how to change the Switch SD card to a bigger card and transfer all saved game files?
It seems that it's no longer a new problem for ordinary people to change their SD card to a bigger one due to different reasons. So do you know how to effortlessly migrate and transfer all saved games to a new SD card so to upgrade the Switch SD card? Here in the below, you'll find two recommended methods and you may just follow one of them to start changing your Switch SD card without losing any files now.
Note: If you prefer a straightforward way to directly move all games and hidden files to the new SD card, Method 1 with powerful Disk clone software will help.
If you want to just upgrade and change the Switch SD card on your own, Method 2 will help you to complete the task.
You May Also Like:
Solved: Nintendo Switch Keeps Asking Format SD Card
Several Nintendo Switch users encounter issues where their Nintendo gaming console keeps showing notifications to Format SD cards. It happens due to the incompatibility of the SD card.
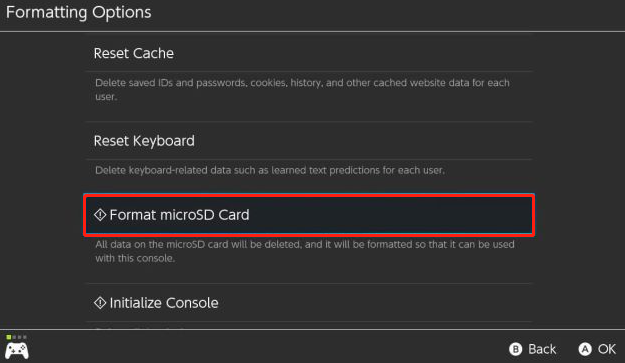
Method 1. Clone and Upgrade Switch SD Card for Free in 3 Steps
To ensure you with a smooth Switch SD card upgrade process, we highly recommend you follow guidelines in the below step by step to fully transfer saved game files to the new SD card:
1. Prepare both new and old Switch SD card ready
1. Format the new SD card and set the file system to NTFS.
2. Turn off Nintendo Switch complete by holding the Power button and wait until the Power option pops up.
3. Select Turn off and unplug the old Switch memory SD card out of Switch box.
2. Upgrade and clone old Switch SD card to new SD card
Here you'll need professional disk clone software - EaseUS Todo Backup for help. It allows you to use sector by sector clone feature to fully clone files and games on the old SD card by simple clicks.
Secure Download
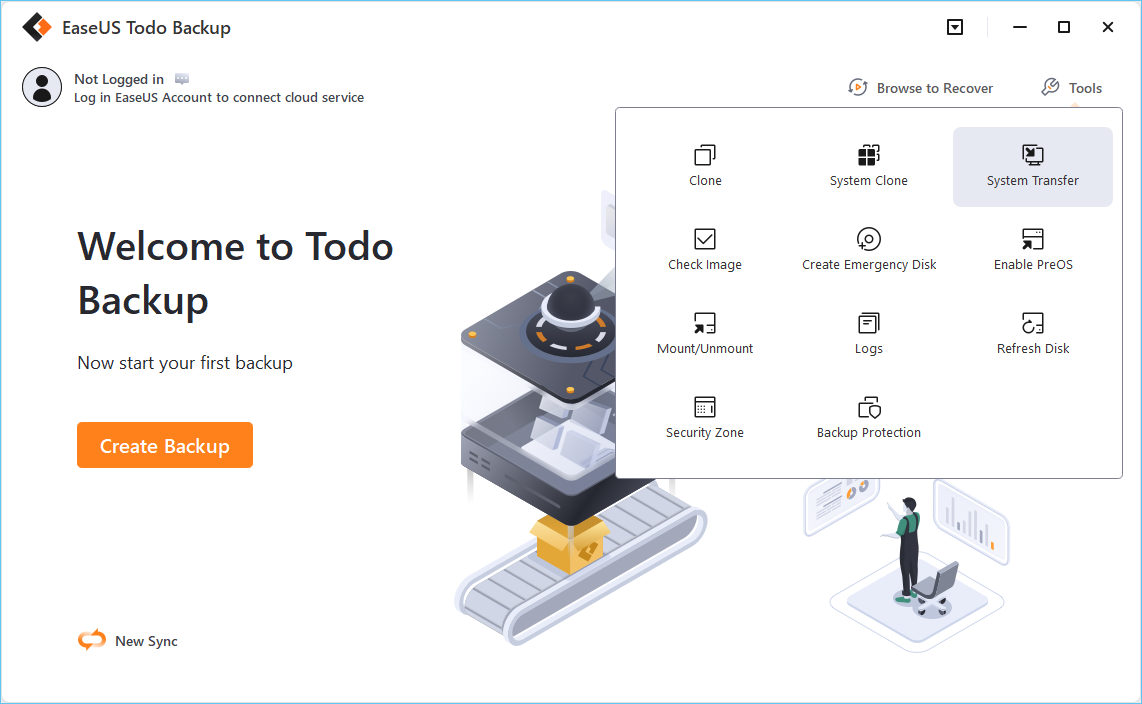
Step 1. Launch EaseUS Todo Backup and click "Tools" at the top right corner, you can see clone and other utilities.
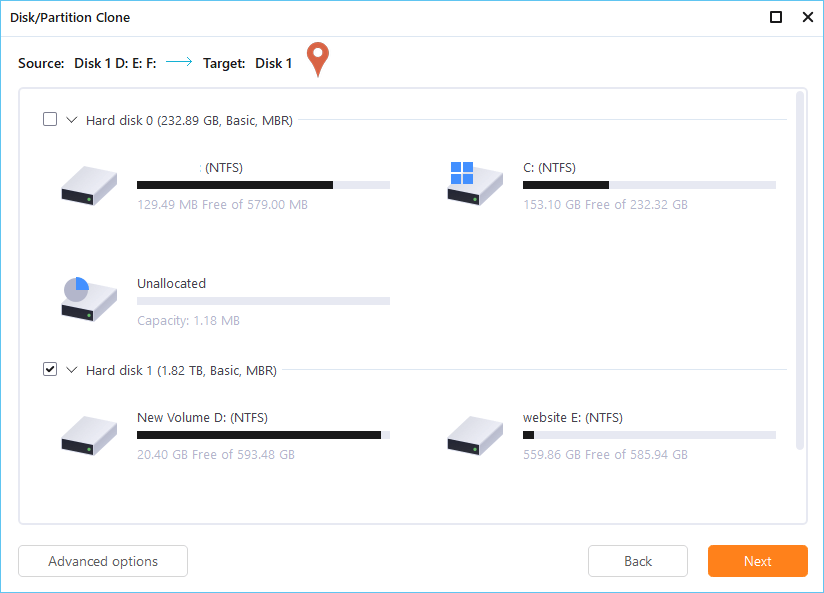
Step 2. Choose the source disk or partition as well as the target disk. (Make sure the space of the target disk is larger than that of the source disk or partition.)
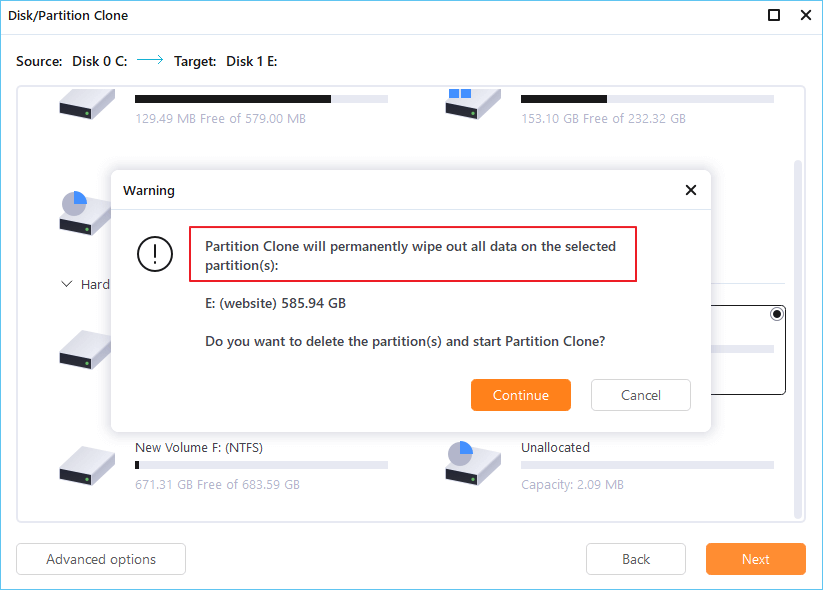
Step 3. The clone would permanently wipe out all data on the target disk/partition. If you have backup your data in advance, just click "Continue."
Step 4. Click "Proceed" to start cloning.
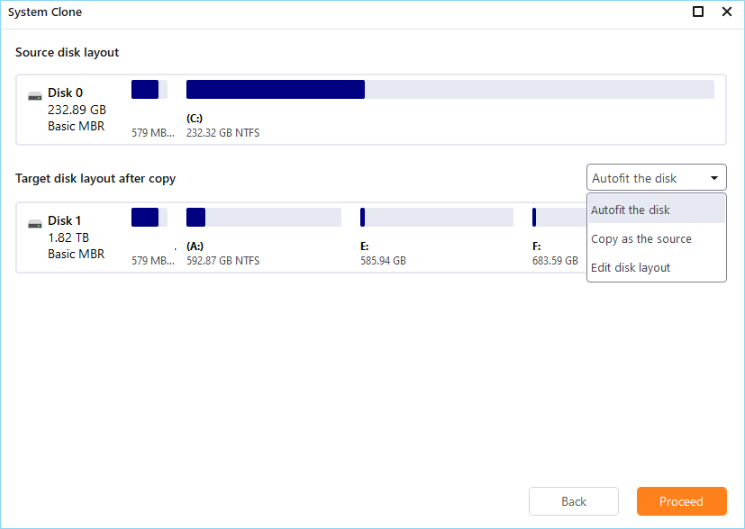
When the process completes, unplug the SD cards and continue with Step 3 to insert the new SD card into your Switch box and make it works again.
3. Add new SD card to Switch and make it work normally
1. Insert SD card into the Switch game box.
2. Turn on Switch and perform a system update to so make the new SD card detectable and work normally with Switch:
Click on "System Update", and then click "Update", finally, click "OK" to confirm the operation.
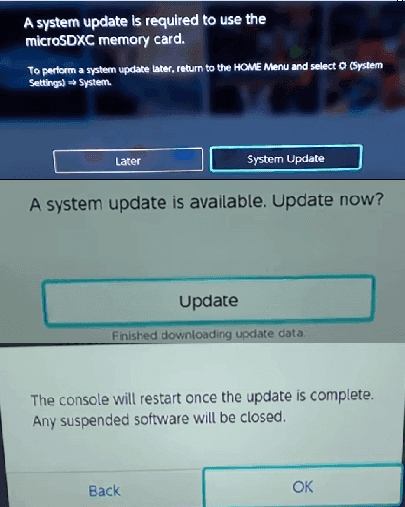
After this, you can play games on your Switch with all games saved on the new SD card now.
Method 2. Change Switch SD Card and Copy Game Files to New Card
Step 1. Turn off Switch by holding the "Power" button and remove the old SD card from Switch.
Step 2. Insert the new SD card into Switch and let it format, and update it in Switch system if it's required.
Step 3. "Turn off" Switch again and remove the new SD card.
Step 4. Insert both new and old SD card to your PC and copy files from the old SD card to your new SD card.
- Notice:
- 1. Be sure to copy files to the same location or folders on the new card.
- 2. If you receive a prompt asking if you want to overwrite a file that already exists on your new card, click NO. Just copy files that don't exist on your new card.
Step 5. Put your new SD card back in Switch and turn on the box.
There, you can play games with the new SD card on Switch again.
Was This Page Helpful?
Sherly joined EaseUS in 2022 and she has always loved writing articles and enjoys the fun they bring. She receives professional training here, focusing on product performance and other relative knowledge. She has written over 200 articles to help people overcome computing issues.
Written by Tracy King
Tracy became a member of the EaseUS content team in 2013. Being a technical writer for over 10 years, she is enthusiastic about sharing tips to assist readers in resolving complex issues in disk management, file transfer, PC & Mac performance optimization, etc., like an expert.
Related Articles
-
How to Check RAM on MacBook Pro/Air | 3 Tested Ways to Free Up It
![author icon]() Brithny/2025-01-24
Brithny/2025-01-24 -
Tutorial on PowerShell Format Disk on Windows [Easiest Way]
![author icon]() Sherly/2025-01-24
Sherly/2025-01-24 -
[Solved] How to Fix Windows Update Error Code 0x8024402c
![author icon]() Jaden/2025-01-24
Jaden/2025-01-24 -
Fix Windows 10 Computer Keeps Freezing Randomly
![author icon]() Tracy King/2025-01-24
Tracy King/2025-01-24
EaseUS Data Recovery Services
EaseUS data recovery experts have uneaqualed expertise to repair disks/systems and salvage data from all devices like RAID, HDD, SSD, USB, etc.