You may worry about your backups if your Time Machine icon disappears from the menu bar. Time Machine is essential for data security; thus, its absence from the menu bar may signify a problem. Fortunately, there are simple ways to restore it and keep your backups on track.
This article will examine why Time Machine not in menu bar and how to restore it. We'll also show you EaseUS Data Recovery Wizard for Mac, a powerful tool for recovering lost files and protecting your data. To keep your Mac running smoothly and your backups safe, we'll take you through each step, from restarting to changing system settings. Let's get started and restore your Time Machine's functionality.
First Aid: Recover Inaccessible Time Machine Backups
When Time Machine backups fail, you need a reliable way to recover your data. Thousands of consumers rate EaseUS Data Recovery Wizard for Mac 4.8/5. It works with even the latest macOS versions, making it versatile for all Mac users.
This powerful Mac data recovery tool recovers data after unintentional loss, system failures, and file system damage. EaseUS's simple interface lets you recover documents and multimedia assets with a few clicks. The tool's thorough scan handles even the most complex data loss cases, offering you peace of mind when needed.
Recovery of inaccessible Time Machine backups is safe and reliable with EaseUS Data Recovery Wizard for Mac. This software may recover your important data from a failed Time Machine disk or inaccessible backups. Are you ready to recover lost files on Mac? Use these fixes to retrieve your Time Machine backups rapidly.
Step 1. Search for lost files
Select the disk location to search for lost files (it can be an internal HDD/SSD or a removable storage device) on macOS Sierra, High Sierra, Mojave, Catalina, Big Sur, Monterey, Ventura, and the latest Sonoma. Click the "Search for lost files" button.

Step 2. Go through the scanning results
EaseUS Data Recovery Wizard for Mac will immediately scan your selected disk volume and display the scanning results.

Step 3. Select the file(s) and recover
In the scan results, select the file(s) to preview and click the "Recover" button to have them back.

You can share this post with your friends in need
Fix 1. Restart Your Mac to Fix the Time Machine Not Showing in the Menu Bar
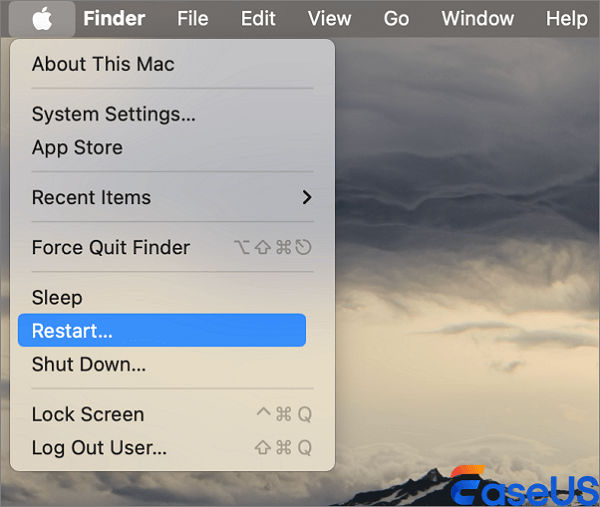
If Time Machine isn't shown in your menu bar, a short restart may fix the problem. Restarting your Mac may clean up any transient faults in the system. Here is how:
Step 1. Click the "Apple logo" in the upper left corner of your screen.
Step 2. Select "Restart" from the dropdown menu.

Step 3. If you are requested to restart, confirm.
After your Mac resumes, check whether the Time Machine icon has returned to the menu bar. This easy procedure often restores lost icons and is the most basic initial step in troubleshooting.
Fix 2. Boot Mac in Safe Mode to Fix the Time Machine Not in the Menu Bar
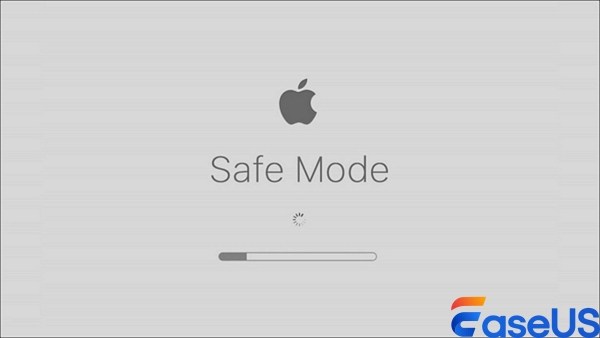
If restarting your Mac does not return the Time Machine icon, booting into Safe Mode may assist. Safe Mode disables unwanted programs and loads essential system files to fix third-party apps or damaged data. Here's how to boot Safe Mode:
Step 1. Shut down your Mac entirely.
Step 2. Turn it on and hold the Option key until you get to the login screen.
Step 3. Choose the Apple menu and then "System Information". Check "Software" in the sidebar; if it says "Safe", you’re in safe mode.

Note. Once in Safe Mode, check whether the Time Machine symbol is displayed in the menu bar. If this happens, restart your Mac normally to escape safe mode. This approach assists in determining if background applications or services are causing the problem.
Fix 3. Set the Time Machine to Show to Fix Time Machine Not in Menu Bar
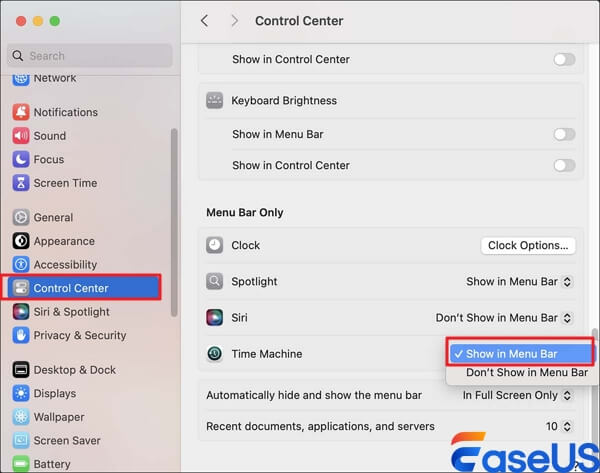
The "Show in Menu Bar" option may be off if Time Machine is not on the menu bar. Here's how to get Time Machine to the menu bar:
For macOS Ventura and macOS Sonoma users:
Step 1. Click the "Apple" menu in the upper left corner of your desktop.
Step 2. Select "System Settings" and "Control Center" in the sidebar.
Step 3. Scroll down to Time Machine and choose "Show in Menu Bar" from the pull-down.

For MacOS Monterey and previous users:
Step 1. In the upper left corner of your desktop, click the "Apple" menu.
Step 2. Select "System Preferences," then "Dock & Menu Bar."

Step 3. Scroll down to Time Machine and choose "Show in Menu Bar" from the pull-down.
After these steps, the Time Machine icon should appear in the menu bar for easy backup access. Restart your Mac to update the system settings if the icon does not display.
Conclusion
This article covers efficient ways to repair Time Machine's failure to appear in your Mac's menu bar. Restarting your Mac, booting in Safe Mode, and manually setting Time Machine in the menu bar should let you retrieve your backup files quickly.
EaseUS Data Recovery Wizard for Mac is reliable for unavailable Time Machine backups or data loss. The simple interface and powerful recovery capabilities enable it to easily recover data from system failures, file corruption, and accidental loss. EaseUS Data Recovery Wizard for Mac protects and speeds up data recovery. This information on social media may assist others with similar concerns.
FAQs
To help you troubleshoot common issues with Time Machine and your Mac's menu bar, we've compiled some frequently asked questions:
1. How do I get Time Machine on my menu bar?
To show Time Machine on your menu bar, take these steps:
For macOS Ventura and Sonoma, go to the Apple menu > System Settings > Control Center > Time Machine, then choose "Show in Menu Bar."
2. Why is the time not showing on my Mac menu bar?
Your system settings can disable the time on your Mac's menu bar. To activate it, enter System Settings (or System Preferences on previous macOS versions) and choose "Menu Bar" or "Control Center." Then, check the menu bar time display.
3. Why is my Time Machine not showing up?
Time Machine may not display in your menu bar if "Show in Menu Bar" is unchecked. Manually check Time Machine in System Settings or System Preferences. Restart your Mac or boot it in Safe Mode to fix system issues if it's already been checked.
Was This Page Helpful?
Finley is interested in reading and writing articles about technical knowledge. Her articles mainly focus on file repair and data recovery.
Related Articles
-
[Fixed] The Object Invoked Has Disconnected from its Clients
![author icon]() Daisy/2025-01-24
Daisy/2025-01-24 -
How to Fix Spotlight Search Not Working Ventura/Sonoma
![author icon]() Brithny/2025-01-24
Brithny/2025-01-24 -
Can't Install macOS Sonoma? Fixed in 10 Proven Ways (2025)
![author icon]() Jaden/2025-02-14
Jaden/2025-02-14 -
We Couldn't Find Any Drives Error Appears? Fixed! [2025 Guide]
![author icon]() Tracy King/2025-01-24
Tracy King/2025-01-24
EaseUS Data Recovery Services
EaseUS data recovery experts have uneaqualed expertise to repair disks/systems and salvage data from all devices like RAID, HDD, SSD, USB, etc.