Has your PC stopped working abruptly? If yes, the chances are higher that you have issues related to the code memory management in Windows. "Stop Code Memory Management" in Windows is one of the most common computer errors. The error turns the screen to blue, interrupting the user's access. The guide will help you to fix the stop code memory management in Windows.
| Workable Solutions | Step-by-step Troubleshooting |
|---|---|
| Fix 1. Reboot your Windows | Rebooting Windows is an efficient fix when facing Stop Code Memory Management...Full steps |
| Fix 2. Check Windows Updates | Older versions of Windows may also lead to one of the reasons behind the annoying...Full steps |
| Fix 3. Quick Scan PC Memory | It is one of the most effective built-in tools that help users protect their PCs against...Full steps |
| Fix 4. Boot into Safe Mode | If you have tried the solutions mentioned above but didn't have to find the perfect solution...Full steps |
| More Fixes | Other 4 fixes are available here for you to follow and fix the error: stop code memory...Full steps |
What is Windows Memory Management?
Windows Memory Management is one of the essential parts of the Windows operating system designed to take control of the system ideally. The tool maintains the main memory perfectly and transfers the processes from the primary storage to the disk storage during the execution of the different methods. The Windows Memory Management System coordinates the memory perfectly and keeps the RAM usage steady.
Windows Memory Management is responsible for everything, whether it's about providing support to the large memory or copy-on-write memory or assisting the cache manager or memory-mapped files. It is the main thing that perfectly manages the transaction of memory between the physical memory and the RAM of the computer system during the execution of the processes. Here are the features of Windows Memory Management:
- 🎁The best thing about Windows Memory Management is the memory allocation for each method.
- 🔧The tool ensures the remembrance of the allocated memory spaces when and wherever required.
- 🖲️It keeps track of the memory space and releases it whenever and wherever necessary for sharing and changing status.
- ⌛It is the essential part of the computer system that serves to be the main reason behind the smooth and seamless functioning of the overall performance.
Even a minor issue with the Windows Memory Management can effectively affect your complete operating system and cause a Stop code Memory Management error.
Why is Windows Stop Code Memory Management?
Just think of the situation where you are trying to get access over your Windows, but a blue screen is blocking your way consistently—really a very annoying problem.
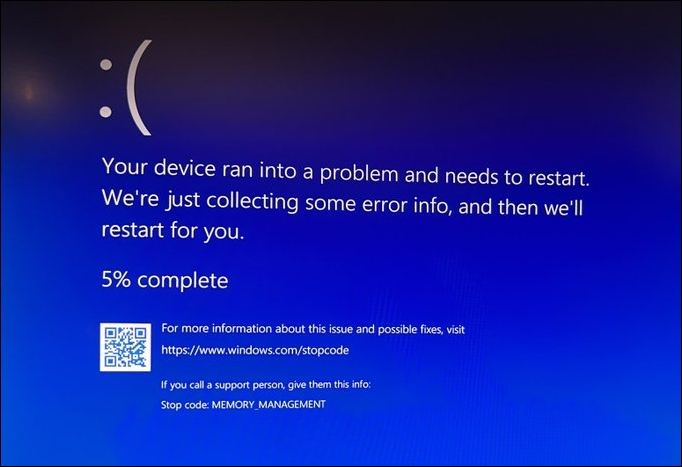
Windows Stop Code Memory Management is one of the worst and most annoying error issues that prevent you from accessing Windows. Several reasons are behind this annoying error; if you are eager to know what exactly they are, check out the few we provide below.
- Corrupted system files
- Corrupted or damaged RAM
- Disk Errors
- Virus or malware attack
- System hard drive issues
- Issues with the graphic cards
How to Fix Stop Code Memory Management on Windows?
It is utmost required to fix Stop Code Memory Management on Windows whenever it occurs. If you don't know how to do it, don't worry. We are here with the complete solutions for you. Before proceeding further with the solution parts, safeguard your data and look at your security.
- Fix 1. Reboot your Windows to Fix Stop Code Memory Management
- Fix 2. Check for Windows Updates
- Fix 3. Quick Scan your PC Memory Management Using Windows Security
- Fix 4. Boot Windows 11 into Safe Mode
- Fix 5. Update GPU Driver on Windows
- Fix 6. Perform a Memory Management Test
- Fix 7. Run the CHKDSK to Fix Stop Code Memory Management
- Fix 8. Reset Windows OS
Fix 1. Reboot your Windows to Fix Stop Code Memory Management
Rebooting Windows is one of the most common and efficient fixes when facing Stop Code Memory Management in Windows. Windows OS is quite efficient and can efficiently fix different problems independently. One can quickly reboot their Windows system by making a few clicks and can get rid of minor glitches efficiently.
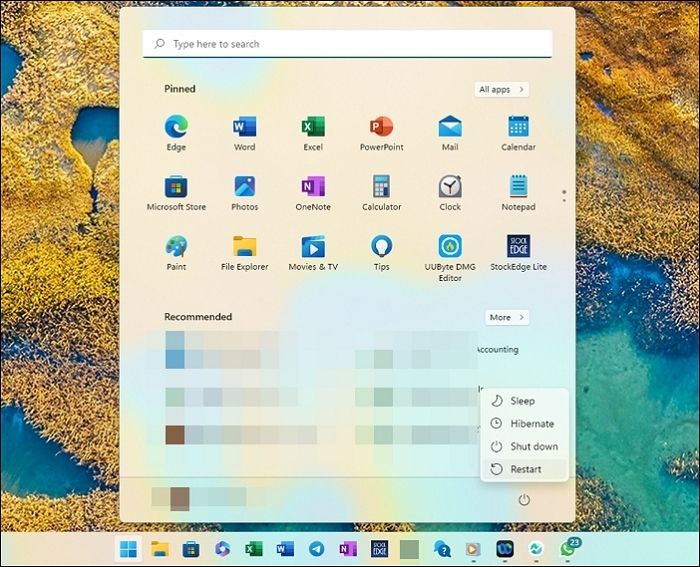
Step 1. Click the Start menu icon in the desktop's bottom left corner.
Step 2. Click the Power button in the bottom left corner of the Start menu.
Step 3. Select Restart from the list of options that appear.
Step 4. If prompted, save any unsaved work before continuing.
Step 5. Click the Restart button to confirm the reboot.
Fix 2. Check for Windows Updates
Older versions of Windows may also lead to one of the most common reasons behind the annoying error issue Stop Code Memory Management in Windows. If you haven't updated your Windows for a longer time, the chances are higher that the error issue you are currently facing is due to this only. You can quickly check for the Windows updation by:
Step 1. Please tap the Windows key and the I button to open the Menu option.
Step 2. Go to the Settings option and move forward with the Update & security section.
Step 3. Once done with the above process, you must next check for the pending updates under the Windows Update section in the league.
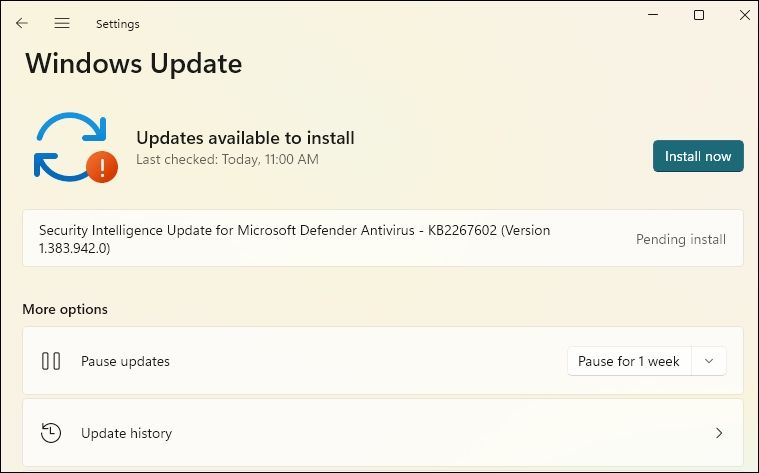
Step 4. Tap on the Install now an option to enable the successful downloading and installing of the Windows update.
Step 5. Wait patiently for the Windows update; save the unsaved work and tap the Restart Now button.
Fix 3. Quick Scan your PC Memory Management Using Windows Security
It is one of the most effective built-in tools that help users protect their PCs against malware or virus attacks. You can efficiently perform the successful scan and fix the stop code: memory management by the following steps:
Step 1. Tap on the Start button and then go to the Settings option.
Step 2. Now move towards the Update & Security section.
Step 3. Once done, select the Windows Security option from the left pane.
Step 4. Now tap on the Virus & threat protection in the right pane and proceed to the Windows Security setting.
Step 5. Next, move to the Current threats section and tap the Quick scan option.

Step 6. Once done, Windows Security will initiate a successful scan on your PC, save you from the potential traits, and fix them.
Fix 4. Boot Windows 11 into Safe Mode
If you have tried the solutions mentioned above but didn't have to find the perfect solution, you can quickly boot your Windows 11 into safe Mode. It will run your Windows with the lowest possible drivers and programs and help you secure access to your Windows. The things you have to do here are:
Step 1. Launch the Menu option by pressing the Windows key, and I button together.
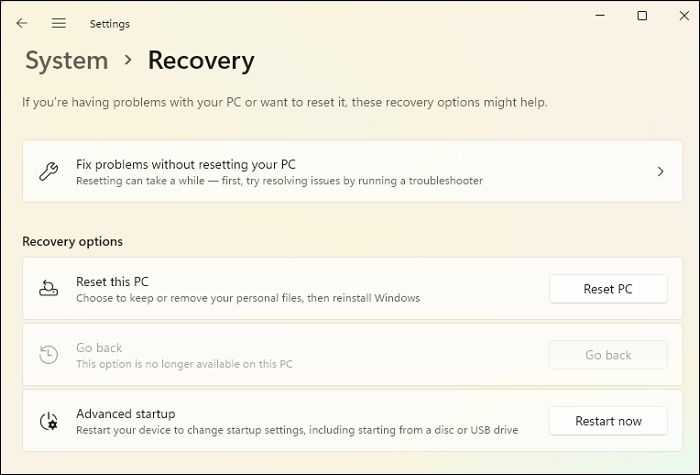
Step 2. Now select System > Recovery.
Step 3. Click on the Restart button next to the Advanced Startup option.
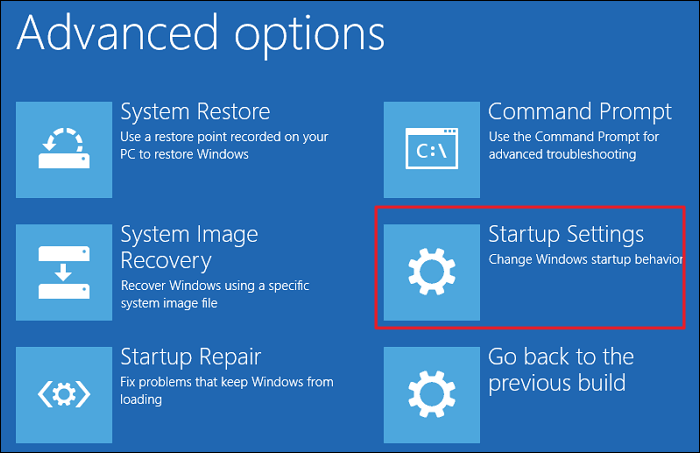
Step 4. It will reboot your PC to advanced recovery. There, select Troubleshoot and then Advanced Options to proceed with the process.
Step 5. The next thing you have to tap on the Startup Settings.
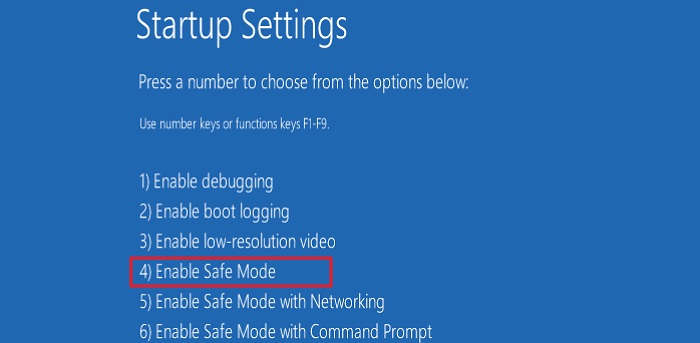
Step 6. Now select the Startup Settings option, followed by selecting the Restart button.
Step 7. Once done, select Restart in Safe Mode to enjoy smooth access to your computer system.
Step 8. Make sure to leave your computer system in safe Mode for a while to check whether the error has been resolved successfully or not.
Your Windows PC should now be rebooted in Safe Mode, allowing you to troubleshoot any issues and hopefully resolve the error you were experiencing.
Fix 5. Update GPU Driver on Windows
Outdated or brand-new GPU drivers are also one of the significant reasons behind BSOD Errors. Updating GPU Drivers can work effectively and can help you in getting rid of this annoying error issue. All you have to do here is:
Step 1. Type dxdiag in the search box and launch the Windows memory Diagnostic tool on your device.
Step 2. Tap on the Display tab in the tool window, and once done, the detailed list of your system's GPU details will flash up on your screen.

Step 3. Go to the GPU manufacturer's website and select the related GPU driver.
Step 4. Once done, download and install the driver and restart your computer system to enable smooth access.

You should now have the latest GPU driver installed on your Windows PC, which should improve performance and resolve any issues you are experiencing.
Fix 6. Perform a Memory Management Test
Memory test is a beautiful way to effectively fix Stop Code Memory Management in Windows. The things you have to do here are:
Step 1. Tap the Windows key and type Windows Memory Diagnostic in the search bar.
Step 2. Now tap on the corresponding app followed by tapping on Restart now and check for the option of the problem.
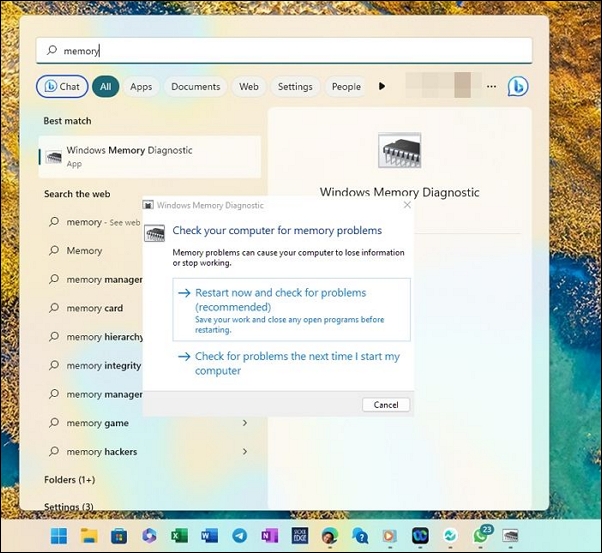
Step 3. Wait for the Memory Test to run efficiently.
Step 4. Once done, the results will flash up on your screen. If you find any issue, you can quickly resolve the related solutions effectively.
You should now have run the Windows Memory Diagnostic tool on your PC, and if any issues are found, you can take the necessary steps to resolve them.
Fix 7. Run the CHKDSK to Fix Stop Code Memory Management
Corrupted system files or disks are the primary reasons behind the annoying error Windows Stop Code Memory Management. The same prevents you from accessing the Windows processes. One can easily use the System File Checker for troubleshooting Windows 10. It perfectly detects and repairs the corrupted system files in two working orders.
Step 1. Type the command prompt in the search bay and tap the Run as Administrator option.
Step 2. Once done, type the chkdsk/r command in the provided space and press the Enter button.
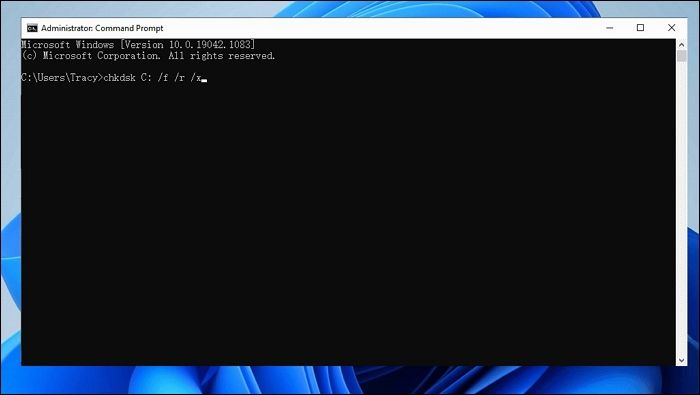
Step 3. Wait for the process to get accomplished, and once done, it will initiate the scan for the system-related files and repair them effectively.
You should now have successfully run the chkdsk command on your Windows PC to scan and repair system-related files if any issues were found.
Fix 8. Reset Windows OS
If you have tried all the solutions above but have not gotten the related result, resetting Windows OS will help you acquire an absolute and sure fix. The same resolve the memory management issues and clears these issues effectively.
Step 1. Tap on the Start button and then launch the Settings option on your device.
Step 2. Tap on the System > Recovery option to move further with the process.
Step 3. Click on the Reset PC button to start the reset.
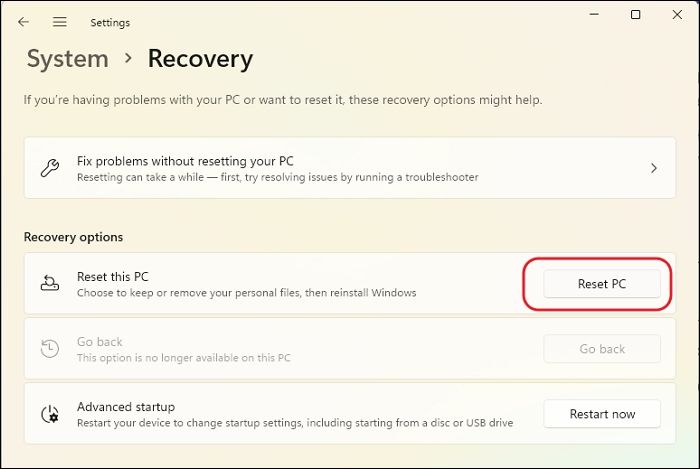
Step 4. Once done with the above process, your PC will get restarted immediately.
Step 5. Save any unsaved data before proceeding further with the Get Started tab.
Step 6. Please wait for the PC to restart, and once done, select the preferable option from the Keep my files or Remove everything option.
Step 7. Please wait for the process to complete and check whether it fixes the blue screen memory management errors have been resolved.
That's it! You should now have reset your PC using the Windows settings to fix any blue screen memory management errors you may have been experiencing.
Several Windows users have proved the efficacy of these 8 fixes. If one of the methods is helpful to resolve the stop codes: memory management, share it on Facebook, Twitter, Instagram, and other social media platforms!
How to Recover Lost Data Due to BSOD Error on Windows
Data loss is one of the most common things one usually faces while fixing the Stop Code Memory Management in Windows. If you are also going through such an annoying issue now, you can opt for the tool to assist you to recover deleted files.
EaseUS Data Recovery Wizard is one of the most powerful data recovery tools designed to provide absolute assistance in recovering data loss in case of a file system malfunction; system crashes, unintended file deletion, or other scenarios. The platform has a simple and user-friendly interface that everyone can handle conveniently.
The tool can recover data from everything, whether USB flash drives or cameras, memory cards, or SD cards. It features a loaded option and comes up with a very affordable budget that makes access even much convenient.
Download the software and follow the steps:
Note: To guarantee a high data recovery chance, install EaseUS data recovery software on another disk instead of the original disk where you lost files.
Step 1. Launch EaseUS Data Recovery Wizard on your Windows 11, Windows 10, Windows 8, or Windows 7 computer. Select the disk partition or storage location where you lost data and click "Search for Lost Data".

Step 2. This recovery software will start scanning the disk to find all lost and deleted files. When the scan process completes, click "Filter" > "Type" to specify lost file types. If you remember the file name, you can also search in the search box, which is the fastest way to find the target file.

Step 3. Preview and restore lost Windows files. You can double-click to preview the scanned files. Then, select the target data and click the "Recover" button to save them to another safe spot in the PC or Cloud drive.

Final Words
Fixing Stop Code Memory Management in Windows is a more straightforward task now. We have provided different reasons and detailed solutions to resolve this annoying error effectively. Using data recovery software like EaseUS during enabling fix serves to be a great assistance. It helps you acquire lost data effectively and secure your data online.
Stop Code Memory Management on Windows FAQs
Although we have provided detailed solutions for the annoying error and introduced you to the possible reasons, here are the most common FAQs for you if you have some issues or queries.
1. Can insufficient RAM cause memory management errors?
Yes, If you don't have enough RAM on your PC, and the memory demand keeps increasing, Windows will not be able to handle the data and process running on it. This leads to memory management issues where the computer can get BSOD, Freeze, Crash, etc.
2. Why does my PC keep a blue screen after the RAM upgrade?
Two different memory modules serve behind the bluescreen after RAM upgradation. Motherboard RAM timings and voltages are among the most common reasons that do to be significant reasons here.
3. Does Windows 11 have better memory management?
Windows 11 has more features and programs than previous versions, giving users more RAM. Windows 11 features a better memory management system, resulting in lower performance issues. However, a lot depends on the OEM as well. For example, Intel offers Optane memory, which remembers you frequently access files and programs, resulting in less RAM and better result times.
4. Why do I get a memory management error while installing Windows 10?
One of the most common causes is faulty or incompatible hardware, such as RAM or hard disk issues. The best would be to run a hardware check, and replace whatever is necessary. I everything is alright, you should upgrade your RAM i.e. add more memory to the PC.
Was This Page Helpful?
Updated by Larissa
Larissa has rich experience in writing technical articles and is now a professional editor at EaseUS. She is good at writing articles about data recovery, disk cloning, disk partitioning, data backup, and other related knowledge. Her detailed and ultimate guides help users find effective solutions to their problems. She is fond of traveling, reading, and riding in her spare time.
Jaden is one of the editors of EaseUS, who focuses on topics concerning PCs and Mac data recovery. Jaden is committed to enhancing professional IT knowledge and writing abilities. She is always keen on new and intelligent products.
Related Articles
-
4 Solutions | Fix Bootable USB Not Working in Windows 10/8/7
![author icon]() Jean/2025-07-10
Jean/2025-07-10 -
[Solved!] Can't Sign into iMessage on Mac? 8 Solutions Here
![author icon]() Brithny/2026-06-17
Brithny/2026-06-17 -
Fix Hard Drive Won't Power Up/Turn on Without Data Loss
![author icon]() Tracy King/2026-06-18
Tracy King/2026-06-18 -
What Is Mds_Stores High CPU Usage and How to Fix It?
![author icon]() Tracy King/2025-07-04
Tracy King/2025-07-04
EaseUS Data Recovery Services
EaseUS data recovery experts have uneaqualed expertise to repair disks/systems and salvage data from all devices like RAID, HDD, SSD, USB, etc.