Do you want to install Python Mac? If you are not well-versed in programming languages, you might not know about Python. Besides, its wide range of benefits makes it an absolute favorite among programmers.
While Python comes with multiple advantages, using it on MacBook Pro/Air is also beneficial. It has extensive libraries and is easy to learn. As it is platform-independent, Python doesn't face any issues while running on Mac, irrespective of the macOS Sonoma or Ventura.
One of the primary advantages of using Python on Mac is the Unix-based foundation. The powerful hardware and software allow programmers to enjoy a fantastic coding experience. In this guide, we will talk in detail about how to install Python Mac and run the Python script.
Check Preinstalled Python on Mac
Firstly, you must check if Python is installed on your system. For that, you need to take a look at the following steps:
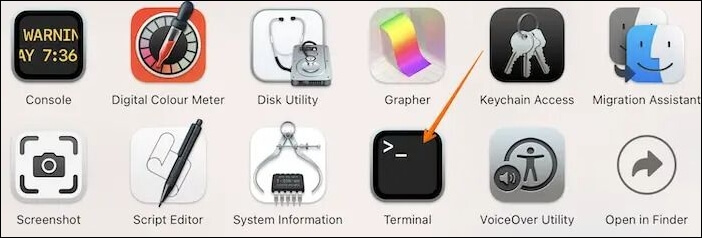
Step 1. Open "Terminal". To do so, please follow the path "Applications>Utilities>Terminal".
Step 2. Type python3.
Step 3. If you see the message "Python 3.x.x", it means Python is already installed, and "3.x.x" indicates Python version number.
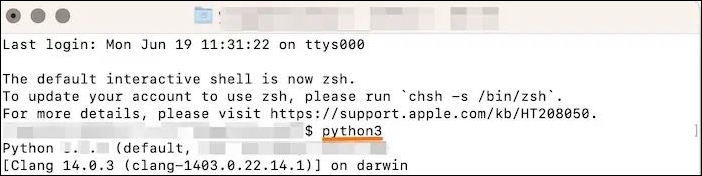
Step 4. If you get an error message that Python is not found, it is not pre-installed.
Use Official Installer to Install Python Mac
There are various ways to install Python on Mac. One of the simplest methods is to do it from the official Python website. To help out users, we have also attached a video tutorial.
- 01:33 - Install Python from the official website.
- 03:16 - Use IDLE to write the Python program.
- 05:28 - Install any text editor to write the Python program.
- 07:35 - Use VS Code.
For that, here are the steps to follow:
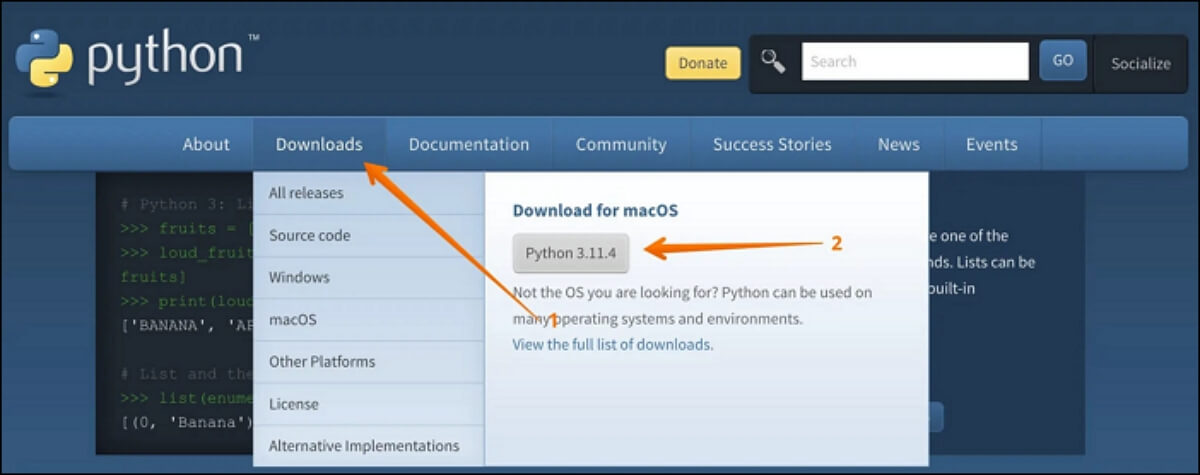
Step 1. Visit the Python official website: Python.org.
Step 2. Click the "Downloads" button on the website menu. Click on the Python version below the "Download for macOS" label. It will download the latest macOS version.
Step 3. Go to the "Download" folder.
Step 4. Locate the python-macosx.pkg file and double-click on it.
Step 5. Now wait as the Python installer initiates the process.
Share this article on social media to help others learn how to install Python on Mac.
Install Python Mac Using Terminal
Another method to install Python Mac is to use Terminal. The simplicity and efficiency of Terminal have made it popular among Mac users. Here, you can install Python on the system using Xcode and Homebrew commands.
Method 1. Install Python M1 Mac Using Xcode
To install Python using Xcode on your Mac, you should check out these steps:
Step 1. Open "Terminal" and type python –version.
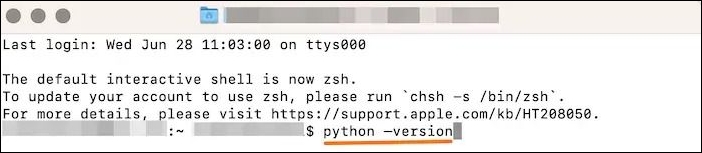
You will get the message "1| no developer tools were found at '/Applications/Xcode.app', requesting install. Choose the option in the dialog to download the command line developer tools".
You can also get a prompt asking you to install command-line developer tools.
Step 2. Click the "Install" button.
Step 3. If you don't get the prompt, enter $ xcode-select –install. This will install Python 3 on your Mac.

How to Fix Zsh: Command Not Found: Python [with Video]
This article discusses 4 proven ways to solve the zsh: command not found: python issue on Mac. Read more >>
Method 2. Install Python M2 Mac with Homebrew
You can also use Homebrew to install Python on Mac. What is Homebrew? Homebrew is a free and open-source software package management system that simplifies the installation of software on macOS.
Here are the steps to follow:
Step 1. Install Homebrew on your Mac, and open "Terminal" on Mac.
Step 2. Install Homebrew to Path. Type 1 |$ export PATH="/usr/local/opt/python/libexec/bin:$PATH.
Step 3. Type 1 | $ brew install python to install Python.
Still, Mac Terminal can be dangerous sometimes if you are a novice Mac user: you may accidentally delete files using Terminal.
In this case, you can't recover permanently deleted files Mac Terminal unless you use a professional data recovery tool like EaseUS Data Recovery Wizard for Mac, which can recover permanently deleted files by command line.
With the EaseUS data recovery software, you can quickly restore data with a few clicks:
Step 1. Launch EaseUS Data Recovery Wizard for Mac and choose the hard drive where you lost data. Click "Search for lost files" to start scanning.

Step 2. The software will automatically scan for lost data on MacBook/iMac. When the scan completes, filter wanted data through the "Type" and "Path" buttons.

Step 3. Double-click a file to preview it. Then, click the "Recover" button to restore the lost data to another place.

EaseUS Data Recovery Wizard for Mac Review [Update in 2023]
This article discusses EaseUS Data Recovery Wizard for Mac reviews from customers, including its main features and powerful recovery ability. Read more >>
Run Python Script on Mac to Check the Installation
Once you install Python on your Mac, you can use Terminal on Mac to run Python scripts to check if the installation is successful. Take a look at the steps:
Step 1. Open "Terminal".
Step 2. Use the cd command to locate the directory. For example, cd ~/scripts.
Step 3. You will now go to the scripts directory.
Step 4. Run the Python script as a parameter of the python3 command. For example, python3 HelloWord.py.
Step 5. You will see Hello World as the output of the script, which means you can use Python on your Mac normally.
Suppose the Python installation on Mac failed. Two main causes are lack of storage and Mac permission denied. In this case, you should first check RAM on Mac, and free up Mac storage to reinstall Python or check the installation permission on your Mac.
Conclusion
Installing Python on Mac is an excellent idea. The wide array of benefits that comes with this programming language makes it an obvious choice for Mac. Moreover, it is easy to install Python on Mac, irrespective of your macOS version.
For instance, you can go to the official website of Python and get the installer from there. Apart from that, you can also use Terminal to install Python. You can use XCode or Homebrew for that. The steps are easy to follow, and the installation of Python occurs seamlessly.
Install Python Mac FAQs
If you want to know more about installing Python on Mac, read the questions and answers listed below:
1. How do I install Python 3 on a Mac Terminal?
To install Python 3 on a Mac Terminal, you should open "Terminal" and type python –version. You will get the message "1| no developer tools were found at '/Applications/Xcode.app', requesting install. Choose the option in the dialog to download the command line developer tools".
And you can also get a prompt asking you to install command-line developer tools. You need to click the "Install" button. If you don't get the prompt, enter $ xcode-select –install. This will install Python 3 on your Mac.
2. Is Python automatically installed on Mac?
No, Python is not installed on Mac automatically anymore. Previously, Mac came with a pre-installed Python 2.7. However, you can easily install Python on Mac from Python's official website or using Terminal commands.
3. Where is my Python installed on my Mac?
Follow the steps below to find Python on your Mac if it was preinstalled:
Step 1. Open the Terminal using the "Spotlight Search" or navigate to "Applications > Utilities > Terminal".
Step 2. Type python3 and press "Enter": This will open the Python 3 interpreter in the Terminal.
Step 3. Type the following command and press "Enter": import sys; print(sys.executable). This command will print the path to the Python executable file. The path to the Python executable file should be displayed in the terminal. This path will be the path to the Python interpreter on your Mac.
4. How to uninstall Python on Mac?
To uninstall Python on Mac, you need to follow these steps:
Step 1. Open "Finder" and go to "Applications" under the "Go" option in the menu.
Step 2. Drag Python folders to Trash. If you see a pop-up asking permission to move Python files to the Bin, give it.
Step 3. After that, delete the Python framework from the Library Directory.
5. How to update Python on Mac?
You can use the official Python installer to update Python on Mac. Once your macOS is detected, download the latest Python version for your system. Double-click on the install package and click "Continue" to begin the installation. Follow the on-screen instructions, and don't forget to verify if the Python version you installed works correctly.
6. How to fix the Python command not found on Mac?
To fix the Python command not found on Mac, you must check if Python3 is installed. Make sure to type python3 instead of python in Terminal. You also need to check and update the Python path.
Was This Page Helpful?
Daisy is the Senior editor of the writing team for EaseUS. She has been working at EaseUS for over ten years, starting as a technical writer and moving on to being a team leader of the content group. As a professional author for over ten years, she writes a lot to help people overcome their tech troubles.
Brithny is a technology enthusiast, aiming to make readers' tech lives easy and enjoyable. She loves exploring new technologies and writing technical how-to tips. In her spare time, she loves sharing things about her game experience on Facebook or Twitter.
Related Articles
-
How to Resolve reCAPTCHA Not Working in Any Browser
![author icon]() Daisy/2024-01-11
Daisy/2024-01-11 -
Stardew Valley Saves Location: All You Want to Know
![author icon]() Rel/2024-11-25
Rel/2024-11-25 -
How to Fix Windows Boot Manager Boot Failed [Full Guide]
![author icon]() Cici/2024-11-27
Cici/2024-11-27 -
What Happens If an SD Card Is Corrupted [Full Guide on 10 Fixes]
![author icon]() Sherly/2024-08-26
Sherly/2024-08-26

EaseUS Data Recovery Services
EaseUS data recovery experts have uneaqualed expertise to repair disks/systems and salvage data from all devices like RAID, HDD, SSD, USB, etc.