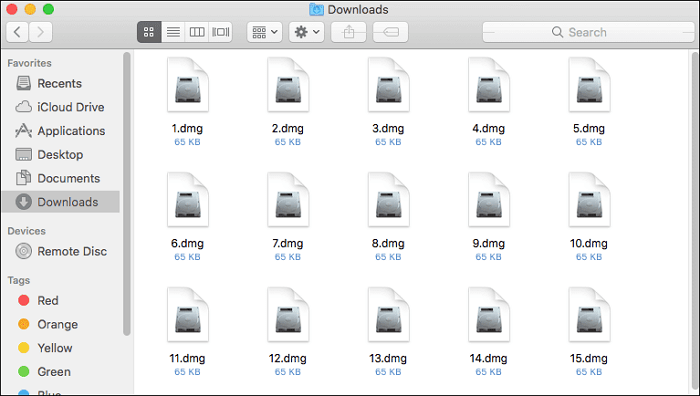
Disk Image files, popularly known as DMG files, are file extensions used on macOS. These are digitally reconstructed physical discs that are used for storing software installers that are compressed and used instead of physical discs. It supports the spanning of files, compression, encryption, and a password may protect some.
For using your Mac VM (Virtual Machine) program, a DMG file is the most straightforward thing you can opt for. So if you have a query in mind of "how to install DMG file on Mac," then you are at the right place.
| Workable Solutions | Step-by-step Troubleshooting |
|---|---|
| Fix 1. Install from Command Line | You can customize your Mac by installing the required software to perform some particular...Full steps |
| Fix 2. Terminal Install DMG Files | You can use Terminal to install DMG files on Mac. If the menu on the right tap gets grayed out...Full steps |
| Fix 3. Install DMG Files from Store | When you double-tap on DMg files, there is a possibility of receiving a notice that the file...Full steps |
| Fix 4. Disk Image Mounter | In case you recently double-tapped on the disk image but cannot open it using your Mac...Full steps |
As a Mac user, you can find many benefits of DMG files as they are used daily as backup software and include checksums. Luckily, macOS presents every function quickly; you have to double-tap, and the DMG file mounts on your device. However, sometimes problems occur while downloading them as they do not function on macOS 9. However, you may need to become more familiar with these files, and sometimes, if you download them from unknown sources, they may contain malware or viruses hampering your system.
Let us lighten the installation and use of DMG files on Mac.
Why: Mac Makes Use of DMG Files
Apple has developed a specific format of a file named DMG, which is used mainly on Mac. These are containers used for apps in macOS, including a checksum that verifies files are as intact as 100%. But do you know how to install DMG files on Mac? If not, then check our write-up for your reference.
But first, here are some reasons why Mac uses DMG files. Check them out;
Proper download: It ensures the files get downloaded in the appropriate format and have not been tampered with.
Compression: DMG files reduce to an advanced level, along with encryption facilities.
Multipurpose: You can open DMG files as removable disks as well. For example, it can include background images, content encryption, text descriptions, etc.
Readable /Writeable: You can read and write on DMG files and add files.
Easily Operable: You can do their installation without using decompression.
Saves Space: You can save a lot of space on your PC using DMG files.
Fixes: How to Install DMG File on Mac
There can be various ways of installing DMG files on your Mac. However, we recommend ensuring the security of your data and then proceeding with the fixes suggested below to solve your issue.
Fix 1. Install DMG File on Mac from Command Line
You can customize your Mac by installing the required software to perform some particular tasks. For example, you can use the internet to download the software and then complete its installation through trusted sources. You can see app distribution of various apps in the binary form available in a compressed format. You can mount it automatically in Finder by double tapping on the disk image. Then you can go ahead with dragging the icon to the folder of Applications. Command Line also helps accomplish this task by using commands like cp and hdiutil.
For OS X, you can install a popular VNC client called 'Chicken of the VNC.' You can use it as a remote desktop client for Mac, Linux, or Windows hosts. You can also notice the downloaded file's name as "content-20b4.dmg."
Step 1. Mounting the Disk image
First, do mounting of the disk image and use the following command: $ hdiutil mount content-20b4.dmg
You will receive output as a result. Then in Finder, you will see a mounted disk image on your desktop screen. You will also notice a directory in the section for /Volumes. In this case, the last line you will receive as an output will be the exact place where the mounting of your disk image took place.
For confirmation of the disk image mounting, you can also use the following command: $ diskutil list
Quite several times, when you start mounting a disk image, you will be prompted to agree to its license. You will notice that the text appears in the Terminal window while it was supposed to appear in the dialog box of GUI. As soon as you reach the end of the license while scrolling, you can type Y to go on or N for stop.
Step 2. Installation of the Application
Now you have to use the cp command to copy the application to /Applications: $ sudo cp -r "/Volumes /Chicken of t
Herein, 'R' denotes copying in a recursive manner, which means copying every bit from the provided location. It includes subdirectories along with files given below. Most importantly, you should leave the trailing off '/' from the directory 'Chicken of the VNC.app.' If you do not do this, the command cannot copy the manual but its contents. Once you enter the password, you will notice that the application is available.
You will also notice that you can copy most applications to the \Applications directory. However, if they are in the format of .pkg, you should install them not using cp but by the installer command.
For installation of .pkg, you can use the command below: '$ sudo installer -package /path/to/.'
Step 3. Unmounting the Disk Image
For tidying up, you should get back to the home directory and do unmounting of a disk image as:
$ cd -
S hdiutil unmount "/Volumes/Chicken of the VNC/."
Once the unmounting takes place, you will notice the message as under;
/Volumes/Chicken of the VNC/" unmounted successfully.
Step 4. Removing the App in the Finder
For this, you need to follow the given steps;
- Once in Finder, try navigating to the folder of Applications.
- Now make a selection of applications you are looking to uninstall and go ahead by dragging it to Trash.
- Then do authentication as a Local Administrator.
- Choose Finder, then Empty Trash, and then use the confirmation dialog to tap on the "Empty Trash." command.
Fix 2. Install the DMG with the Terminal
You can also use Terminal to install DMG files on Mac. You can do this if the menu on the right tap gets grayed out. Alternatively, you can go for this option if all the "Open With" options are not working. You can drag your file to the desktop section and proceed with the steps.
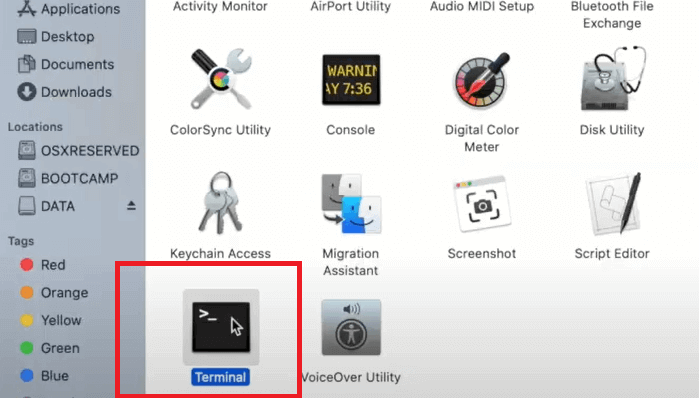
Step 1. Start by opening "Finder," tapping on "Applications," and then fetching "Utilities." Then go for opening the Terminal on Mac.
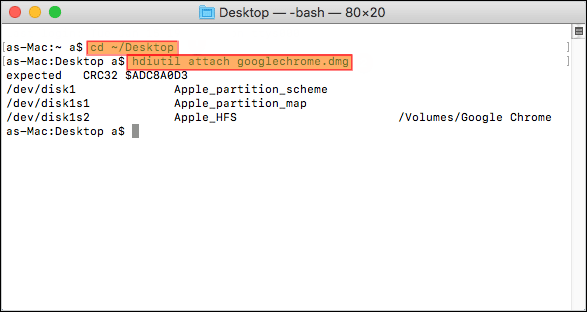
Step 2. Now write the command. "cd ~ /Desktop" into the window for Terminal and press Enter key.
Step 3. Now go for typing the command. "hdiutil attach filename.dmg," then press the "Enter" key. Also, make changes to filename.dmg to the actual.dmg file.
Step 4. You will notice that the DMG files are mounted on your Mac after fulfilling the command line operation.
Fix 3. Install the DMG Files from the Store
When you double-tap on DMg files, there is a possibility of receiving a notice that the file cannot be opened. However, it may happen on account of the reason that it was not downloaded using the App store.
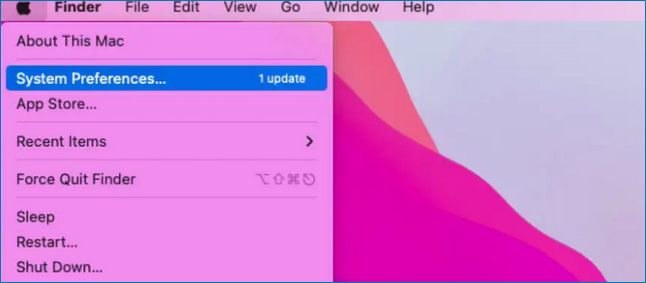
Step 1. From the screen's top left corner, tap on the Apple logo. Then choose "System Preferences."
Step 2. Under System Preferences, select "Security and Privacy."
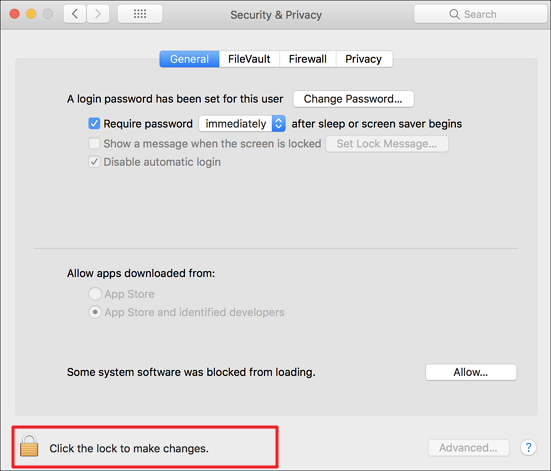
Step 3. From the left corner at the bottom, tap on the lock icon.
Step 4. It is needed to make an entry for your password for updating the page.
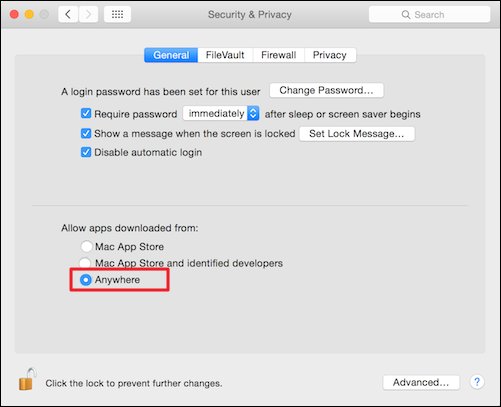
Step 5. Select the "Anyway" option and open DMG files.
Fix 4. Open DMG Files Using the Disk Image Mounter
In case you recently double-tapped on the disk image but cannot open it using your Mac device. Or you received an error message like "No mountable file system." It may be possible because of some corruption, so you can still download it again. In this case, Disk Image Mounter can help you out.
Step 1. Start by opening a DMG file by right tapping on it. Or you can tap on "Command +" to go ahead.
Step 2. There will be an option list under the button for "Open with," then select "Disk Image Mounter."

Step 3. You can see content for the DMG file directly on your screen once you have mounted it.
Bonus Tip: Recover Deleted DMG Files on Mac
There can be numerous reasons behind destroying your files permanently. You can also experience data loss frequently, and DMG files are not excluded from this list. So you may require recovery of your data on an occasional basis, for which you might practice data safety. For example, being a Mac user, a specialized recovery tool can help you recover dmg files on macOS..
Therefore, you can install EaseUS Data Recovery Wizard for Mac, a robust data recovery program. It was structured to aid in recovering the lost data that occurred due to malfunctioning of the file system, the crash of the system, or file deletion that occurred unintentionally. Even as a novice user, you can recover deleted files Mac quickly owing to the software's user-friendly interface.
- The advanced functionality offers various functions, including previewing files, so you know what you are recovering.
- There are "Quick" and "Deep" modes available for scanning.
- It assists in scanning the hard drive on Mac along with locating the DMG files.
- It helps in successfully recovering DMG files that you deleted accidentally.
- It helps to extract data from backup using Time machine/ iTunes.
- It supports almost all video file formats.
Here is a step-by-step tutorial on how to use a professional DMG recovery tool to recover deleted files on Mac.
Step 1. Select the location to scan
Launch EaseUS Data Recovery Wizard for Mac and choose the hard drive, SSD, SD card, USB flash drive, or TF card where you lost data. Click "Search for lost files" to start scanning.

Step 2. Filter lost Mac data
The software will automatically scan for lost data on MacBook/iMac. When the scan completes, filter wanted data through the "Type" and "Path" buttons.

Step 3. Recover lost data or files
Double-click a file to preview it. Then, click the "Recover" button to restore the lost data to another place.

Final Thoughts
Once you become a Mac user, you might continuously install programs while uninstalling them if you do not require them anymore. However, using the right software, you can make various customizations on your Mac to quickly achieve any task. For example, when you install or download DMG files on Mac, it allows you to use different apps not present on Mac earlier, helping you with additional file installation.
We have already discussed various ways how to install DMG files on Mac. But what if you lose your data and want it back? After your data is lost, you lose the ability to recreate your document from scratch. The software EaseUS Data Recovery Wizard for Mac hops in to rescue from a troublesome situation. It allows you to get your critical information back seamlessly.
Install DMG File on Mac FAQs
After going through our fabulous read on DMG files, if you have any further queries related to the topic, check them out here.
1. How do I open DMG files on Mac?
For this, you need not make any extra effort. Instead, it would be best if you double-tap the DMG file, which opens automatically and gets mounted on your device.
2. How to install the DMG file on Mac without an admin password?
For installing DMG files on Mac without using an admin password, follow the steps;
- Start by downloading your DMG file.
- Shift it on the Mac desktop and open it.
- Now by right tapping on the app icon, tap on show package contents.
- Copy them.
- By closing the window, create a new folder by the name of 'App' on the desktop.
- Go ahead by pasting the contents into the folder.
3. Can you mount the DMG file on Mac?
You can mount a DMG file on Mac by tapping right or double tapping on the dmg file. Then tap on the 'Open With' option and tap on 'DiskImage Mounter.'
4. How to install DMG files in Ubuntu?
Follow the steps:
- Start by opening the Terminal.
- Enter the command as
Dmg2dmg /path/to/name.dmg/path/to/name.img
Herein 'name' relates to the DMG file name.
- Now enter the order as
Sudo mkdir /media/name sudo modprobe hfspllus sudo mount -t hrsplus -o loop name.img /media/name
Herein, 'name' relates to the IMG file name.
- Now open Ubuntu's native program Brasero from the section for 'Sound & Video.' Choose 'Data Disk' and tap on 'Enable Side Panel.'
- Tap on 'Image file' and then on the option of 'Burn.' Let it finish.
- Now in Terminal, enter the command as;
Sudo mkdir /media/name sudo modprobe hfsplus sudo mount -t hfsplus -o loop name.iso /media/name
It will start the installation. Herein, 'name' is the ISO name.
Was This Page Helpful?
Jaden is one of the editors of EaseUS, who focuses on topics concerning PCs and Mac data recovery. Jaden is committed to enhancing professional IT knowledge and writing abilities. She is always keen on new and intelligent products.
Related Articles
-
What to Do When Windows Update Keeps Failing on Windows 11
![author icon]() Jerry/2024-11-25
Jerry/2024-11-25 -
How to Activate Windows 11 for Free Permanently | 3 Easy Ways
![author icon]() Jerry/2024-11-25
Jerry/2024-11-25 -
PS5 Can't Start Game or App, Everything You Want to Know in 2024
![author icon]() Sherly/2024-11-27
Sherly/2024-11-27 -
Dragon's Dogma 2: How to Locate and Backup Game Save Files🔥
![author icon]() Larissa/2024-10-25
Larissa/2024-10-25

EaseUS Data Recovery Services
EaseUS data recovery experts have uneaqualed expertise to repair disks/systems and salvage data from all devices like RAID, HDD, SSD, USB, etc.