We all have something to hide, don't we? No, not in that aspect of dirty secrets. Here, we are talking about documents; essential documents. Data encryption is a security measure to protect your data from unauthorized access. Whether you are transferring or want to keep it on your PC disk, data encryption ensures that your data stays private. However, there are times when you can't encrypt data because encrypted contents to secure data are greyed out. This article discusses just how you can solve this issue without any hassle.
About the "Encrypt Contents to Secure Data" Option Greyed Out
Data encryption is a way to keep your file safe from unauthorized access. On Windows, the Encrypting File System (EFS) is in charge of encrypting files.
As a part of the NTFS file system, the encryption file system lets users control who has access to their files with its encryption. To encrypt a file or folder on Windows, users only need to check the encrypt box under file/folder properties. This option may, however, be greyed-out sometimes, which means you can't use encryption.
Some of the known reasons why encrypted content to secure data is greyed out are:
System file corruption
A corrupted system file means that the system function stops working. The same goes for EFS. Once any one of its files goes missing or gets corrupted, users won't be able to encrypt files using the built-in Windows encryption system. This is because the system will lose the files required to make encryptions.
Windows Version
Windows versions like Windows 10 Home do not support content encryption. This might be the cause of the encryption option being greyed out. This implies that file encryption cannot be done on Windows 10 Home using the built-in method.
EFS Disabled
The encryption file system might be disabled by default. This will cause the encryption option to be greyed-out. Users will have to enable it manually using the Windows registry. The method to go about this will be discussed later in the article.
How to Fix Encrypt Contents to Secure Data Greyed Out
Fixing the greyed encrypt contents option is easy. This article highlights six methods to apply the encryption option greyed-out fix.
- Method 1. Set Encrypting File System to Automatic
- Method 2. Enable EFS Using Windows Registry
- Method 3. Enable EFS Using Command Line
- Method 4. Perform an SFC and DISM Scan
- Method 5. Ensure You're Using NTFS Drive
- Method 6. Use File Compression Tools/Software
Method 1. Set Encrypting File System to Automatic
By default, most EFS startup manually, to change it to automatic and fix the greyed-out content encryption options,
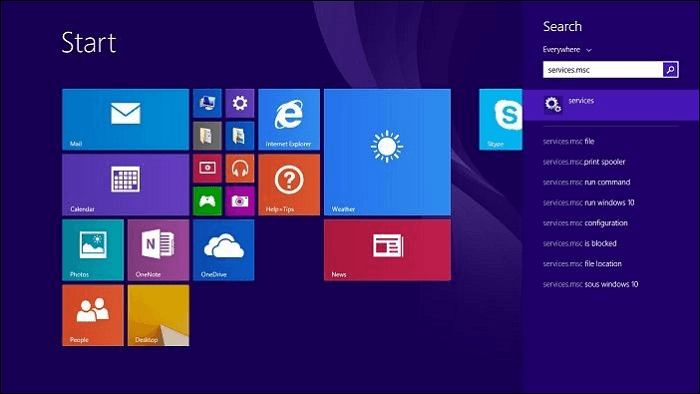
Step 1. Open Services. Click on your "start" and search services.msc.
Step 2. Open the "Encryption File System directoryen."
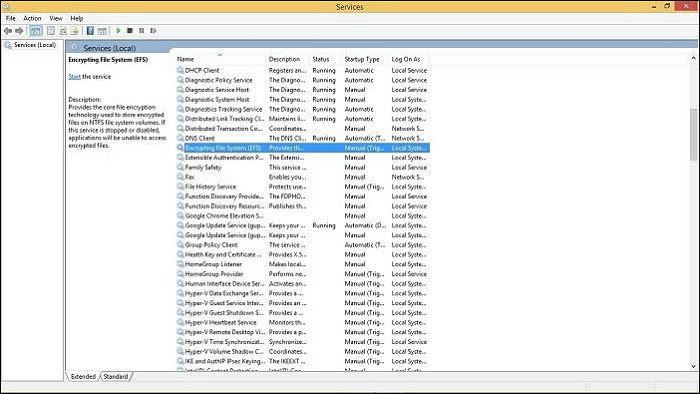
There are a bunch of other services listed here. Navigate and locate the "Encryption File System (EFS)." Double-click to open the "EFS pop-up" box.
Step 3. Under General, look for "Startup type" and change to Automatic.
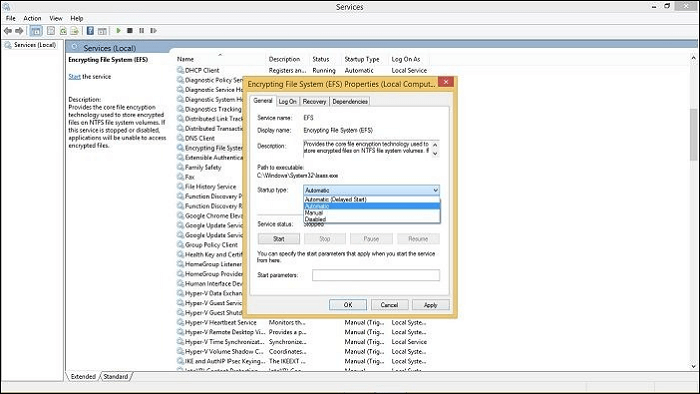
Step 4. Restart your PC to apply the changes.
Method 2. Enable EFS Using Windows Registry
Meanwhile, you can use the Windows registry to fix the greyed-out content encryption option by:
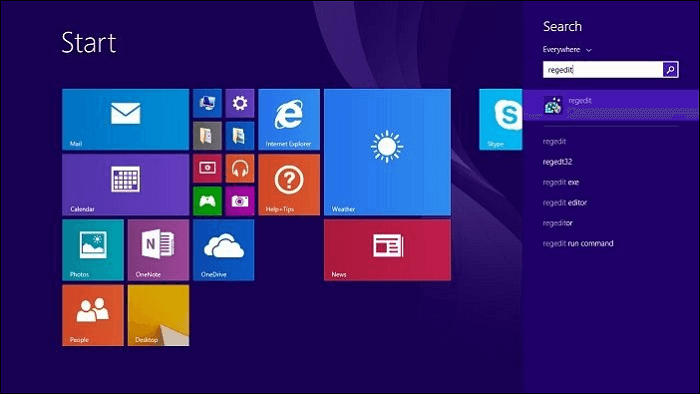
Step 1. Open Windows Registry. Click on "start" and search Regedit.
Step 2. Navigate to the "File system."
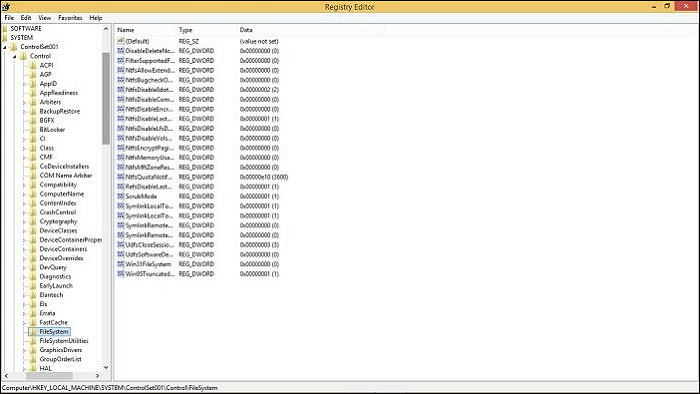
Follow this: HKEY_LOCAL_MACHINE>System>CurrentControlSet>Control>FileSystem.
Step 3. Open NFTSdisableencyption.
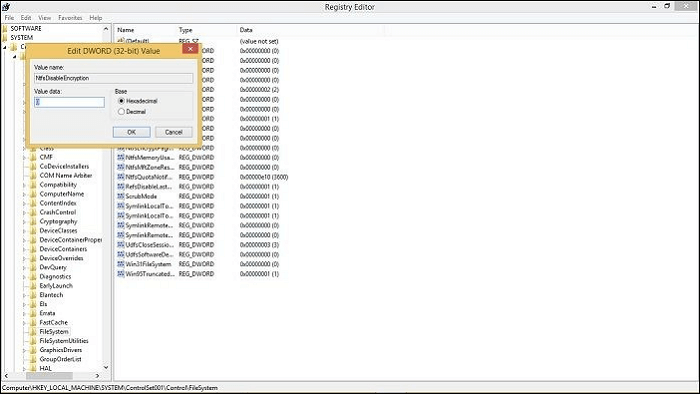
From the options under File system, locate NTFSDISABLEENCRYPTION. Double-click and change the Value data to zero. Click on "OK" to save.
Step 4. Restart your PC when you are done to let Windows properly apply changes.
Method 3. Enable EFS Using Command Line
Command line or Prompt, whichever you would prefer to call it, can also be used to fix content encryption greyed out. How?
Step 1. Open Command Prompt.

Click on your start-up icon and search command prompt/line. Make sure to Run as an administrator.
Step 2. Type command.
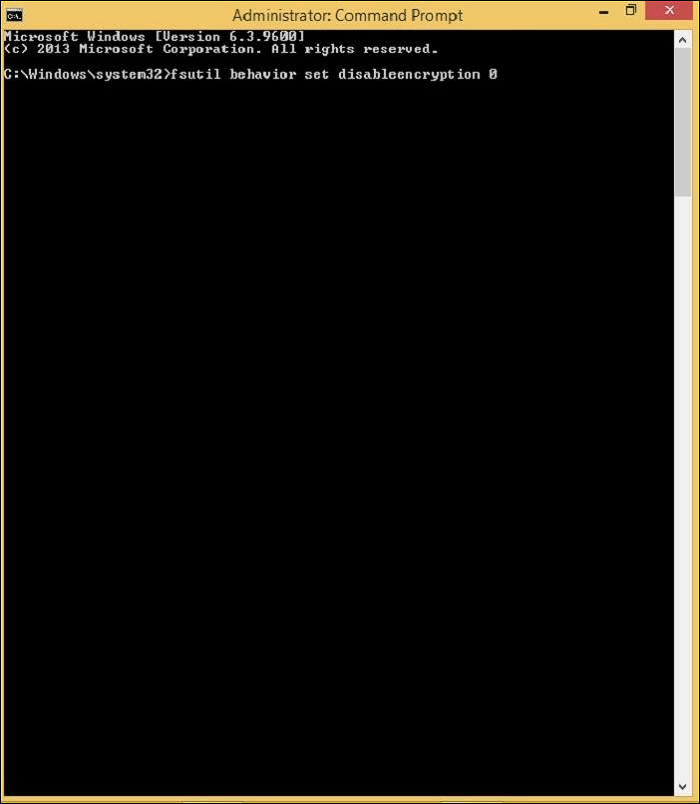
Carefully type in: fsutil behavior set disableencryption 0. Hit "Enter" to input the command.
Step 3. You will get a prompt to restart your PC for the change to take effect.
Method 4. Perform an SFC and DISM Scan
Using the same Command Prompt:
Step 1. Open Command Prompt.
Launch the Command Prompt and make sure it is as an administrator.
Step 2. DISM/SFC Scan
For the SFC scan, type in the command: sfc/scannow.
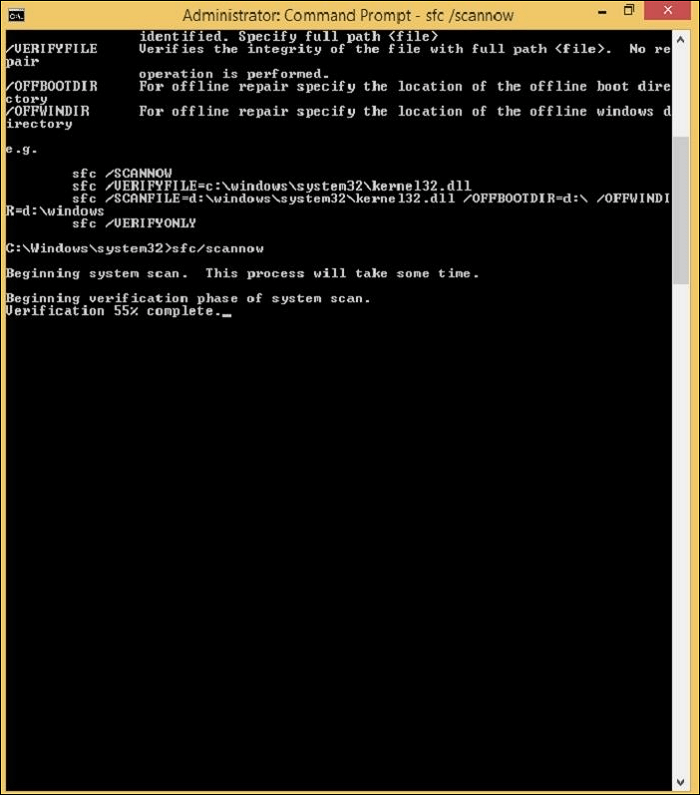
For DISM command, type in the command dism /online /cleanup-image /checkhealth.
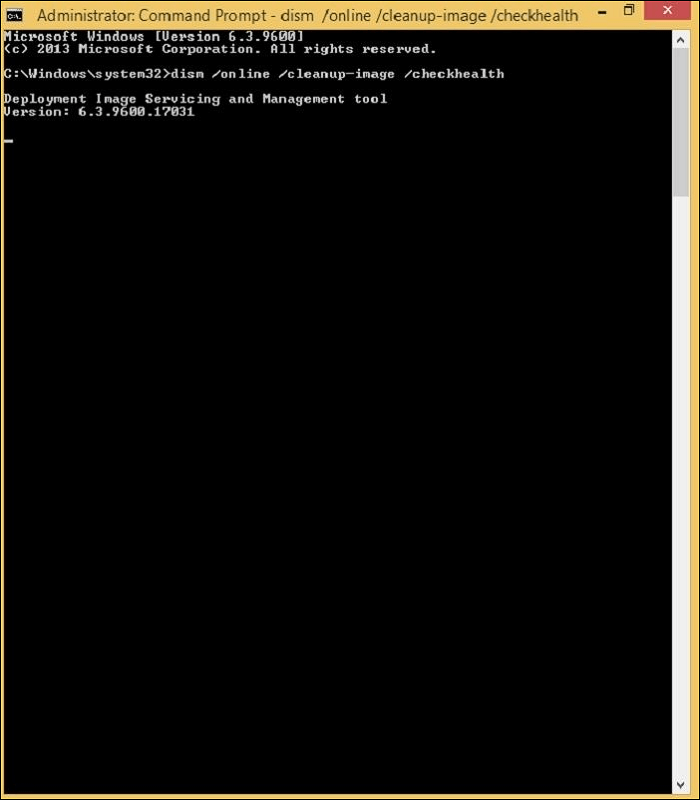
Add a space before each "/". Hit the "Enter" key to send the command. Wait until the scan is complete.
Step 3. Restart your PC to permanently apply any fixes the scan might have done to your PC.
Method 5. Ensure You're Using NTFS Drive
For this method, there is no complicated step:
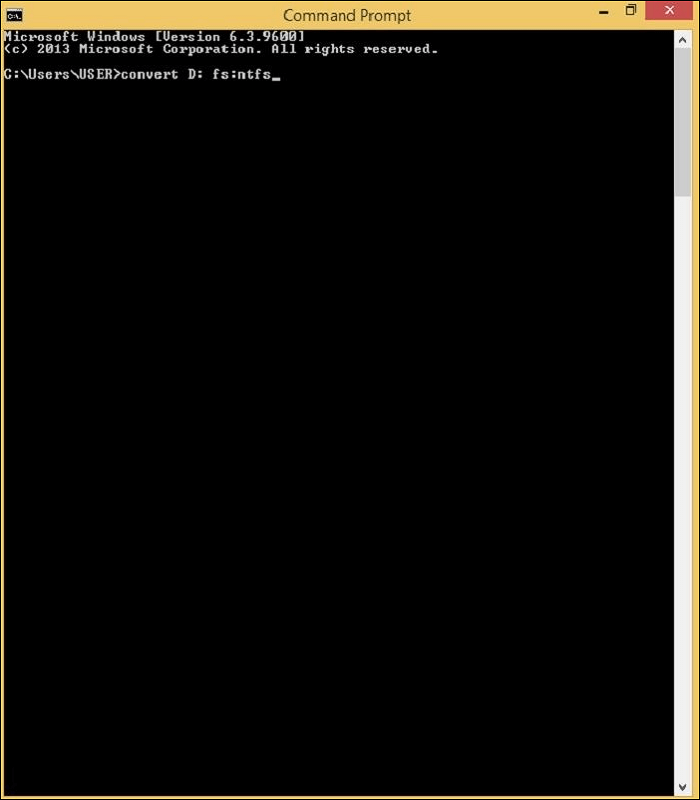
Step 1. Launch your command prompt.
Step 2. Type in the following command: convert D: fs:ntfs. Hit "Enter."
Step 3. Restart your PC.
Method 6. Use File Compression Tools/Software
File compression software like 7zip, EaseUS Todo Backup, WinRAR, and WinZip, to mention a few, serve as an alternative to Windows built-in encryption. They can be downloaded easily from their website. Their compression and encryption are also really tight.
Using 7zip as our model:
Step 1. Download, install and run the software.
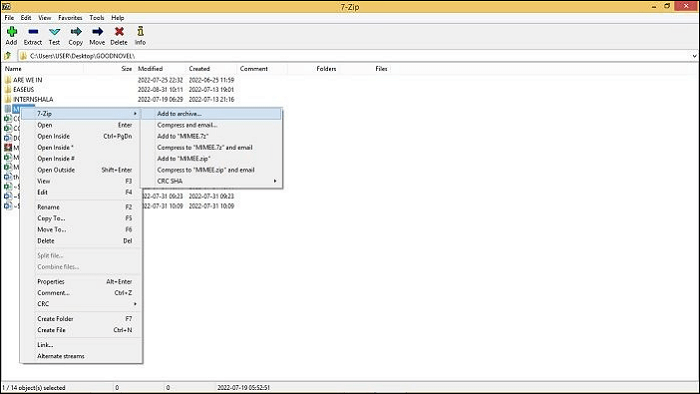
Step 2. Launch the application and navigate to the folder you want to encrypt.
Step 3. Right-click on the file/folder and select "Add to Archive."
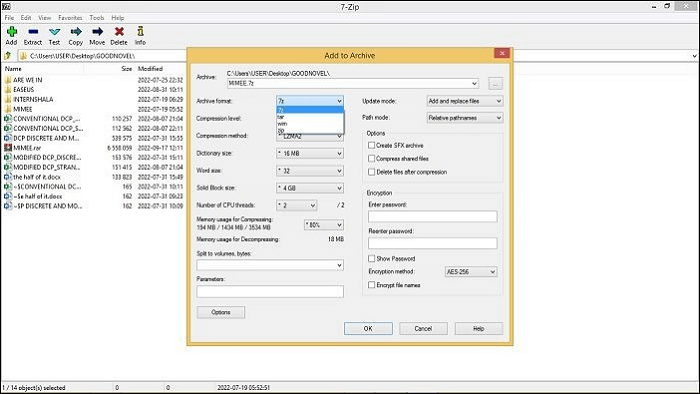
Step 4. In the pop-up box, you can rename your file at the top. The encryption options are on the right side. There you can set the password before confirming.
- Notice:
- In 7zip, only the 7z and zip formats can be encrypted.
Concluding Thoughts
Hopefully, users can now successfully fix the greyed-out encryption option. This article has gone through a few reasons why the encryption option is greyed out and six different methods to fix it when it happens.
FAQs on Encrypt Contents to Secure Data Greyed Out
To answer a few questions that might crop up while reading this article:
1. Why won't my computer let me encrypt files?
The computer not encrypting files might be a result of the system file being missing or getting corrupted. It may also be that your Windows version doesn't support file encryption.
2. How do I enable the encryption key?
This article has dealt with encryption problems and their solutions. Now, how do you encrypt on Windows?
Step 1. Right-click on a file/folder and select "Properties."
Step 2. Go to advanced.
Step 3. Check the encryption box.
Step 4. Apply and click on "OK."
Windows will prompt you to create a backup of the folder. You can choose to do it immediately or later. Windows will create an activation that you use to lock your file. Losing it means losing your file. To confirm, a lock icon will appear at the edge of your folder if the encryption is successful.
3. Does Windows 11 allow file encryption?
Very much so. Windows 11 has a built-in encryption system that lets users encrypt any file or folder, including subfolders.
Was This Page Helpful?
Updated by Tracy King
Tracy became a member of the EaseUS content team in 2013. Being a technical writer for over 10 years, she is enthusiastic about sharing tips to assist readers in resolving complex issues in disk management, file transfer, PC & Mac performance optimization, etc., like an expert.
Related Articles
-
How to Solve Samsung Smart TV USB Not Working [Updated 2025]
![author icon]() Cici/2026-06-29
Cici/2026-06-29 -
Fix 'Windows Can't Find A System Image on This Computer' Error
![author icon]() Tracy King/2025-07-04
Tracy King/2025-07-04 -
How to Fix PC Randomly Turns Off
![author icon]() Daisy/2025-07-04
Daisy/2025-07-04 -
[Fixed] Windows Cannot Run Disk Checking on This Volume Because It Is Write Protected
![author icon]() Tracy King/2025-12-12
Tracy King/2025-12-12
EaseUS Data Recovery Services
EaseUS data recovery experts have uneaqualed expertise to repair disks/systems and salvage data from all devices like RAID, HDD, SSD, USB, etc.