It is common for users to witness issues while using operating systems like Windows, which could impact the stored files. Accordingly, the DISM command can scan and repair these issues with the .wim store in Windows. You can also check for disk errors and fix them using SFC and DISM.
DISM stands for Deployment Image Servicing and Management. Today, we will discuss using this command and the various techniques for repairing Windows images.
What Is DISM Command?
DISM is a command-line tool that comes within Windows. Therefore, it is available through the command line or from Windows PowerShell. The DISM command services and prepares the Windows images, including those used for Windows Setup, Windows PE, and Windows Recovery Environment (Windows RE).
DISM is located in all the Windows 10 and 11 installations in the folder C:\Windows\System32. In addition, it can also run in the Command Prompt terminal from any location.
However, the users cannot use the DISM command with Windows images that are newer than the version of the DISM that has been installed.
How to Run DISM from CMD?
Further, let us see the steps to follow to open a command prompt and run a DISM command in your system. These steps are easy to follow and help the user to know the DISM command's functioning. Here's how you can run DISM from CMD on Windows 10/11 devices:
Step 1. Select "Command Prompt (Admin)" from the "Start" button.

Step 2. A Command Prompt window appears. Type dism /online /cleanup-image /restorehealth, and press enter. You can copy this Command and paste it into the window by right-clicking it.
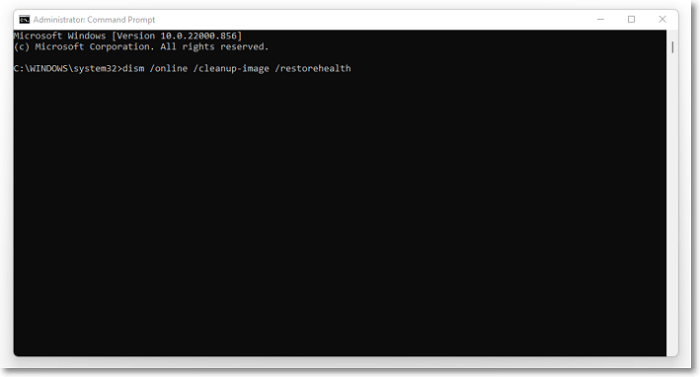
Step 3. A progress indicator will be shown during the scan for integrity violations in the Command Prompt window.
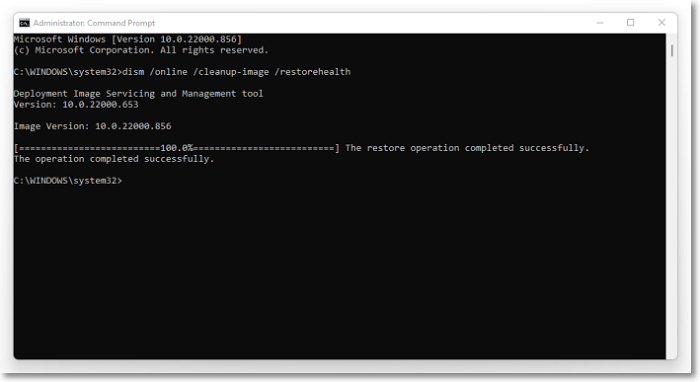
Step 4. After the previous step, wait for the process to complete. It will show you if there are any integrity violations found and are thereby fixed.
Step 5. And finally, a reboot of your system is recommended in case any repairs have been found and performed.
How to Repair Windows Image with DISM?
Lastly, this session will discuss the steps to repair Windows images with DISM and the various commands used for this purpose. On Windows 10, three options can be used when the operating system has a missing or corrupted file that needs to be repaired.
- CheckHealth
- ScanHealth
- RestoreHealth
DISM Command with CheckHealth Option
The CheckHealth option determines the corruptions inside the Windows 10 images but will not repair them.
Step 1. Select Start and search for "Command Prompt"
Step 2. Then right-click the top result. Select the "Run as Administrator" option.
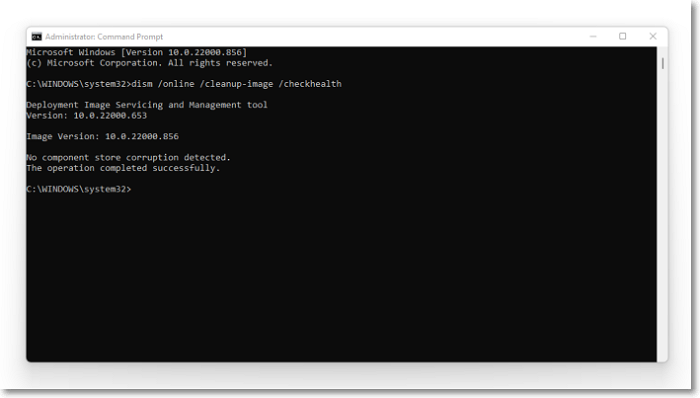
Step 3. Further type dism /online /cleanup-image /checkhealth and enter. This will do a quick check. Moreover, the DISM command runs and displays any corruptions that need to be repaired.
DISM Command with ScanHealth Option
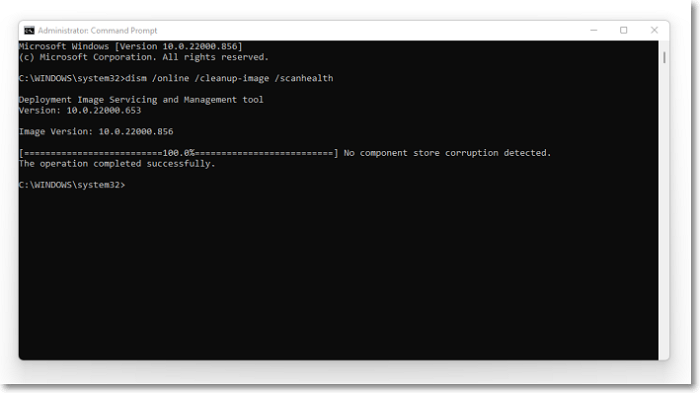
ScanHealth carries a more advanced scanning process to indicate any problems in the image through the following steps.
Step 1. The steps for this are the same as the method used earlier. Click on Start and search for "Command Prompt," and select the "Run as Administrator" option.
Step 2. Type, dism /online /cleanup-image /scanhealth and enter. In this process, the scan may take several minutes to give the result if the Windows 10 image needs any repairing.
DISM Command with RestoreHealth Option
The RestoreHealth option helps not only scan the system image but also rectifies if there is any problem. Use the following steps to get this output.
Step 1. Click on Start and search for "Command Prompt," and select the "Run as Administrator" option.
Step 2. Type dism /online /cleanup-image /restorehealth and enter this command. It takes a few minutes to complete this process. After this, the tool will connect to Windows update and download and replace the damaged files.

The Bottom Line
In conclusion, finding problems within your operating system and the files they store is common, but it is also possible to redeem them. The DISM Command and the three available options can easily repair the Windows images.
Next time you encounter such issues in your system, remember to use the DISM command. Hopefully, your files will recover properly from damage. Consequently, always back up your important files and data on these occasions.
Was This Page Helpful?
Daisy is the Senior editor of the writing team for EaseUS. She has been working at EaseUS for over ten years, starting as a technical writer and moving on to being a team leader of the content group. As a professional author for over ten years, she writes a lot to help people overcome their tech troubles.
Related Articles
-
What Is Wifi Card and How to Use It? [Everything You Need to Know]
 Tracy King/2024-01-11
 -
What Is An Expansion Card? (One-Stop Info Collection)
 Larissa/2024-10-25
 -
What Is Bad Sector? [Bad Sector Explained in 2024]
 Tracy King/2024-11-27
 -
What Is Apple Universal Control, All You Need to Know
 Brithny/2024-10-25
