For many people, space is one of the most significant constraints. Especially with enhancing tech qualities like resolution in videos up to 4K or 8K levels, the size of such files is bigger. Therefore, it is essential to reduce their size without affecting the file or folder quality and fit them in smaller devices with limited storage, like mobile devices. This is what file compression deals with.
Part 1: What Is File Compression
File compression is the main process of compressing or squeezing data files into smaller sizes to save storage space in media players and hard drives. Different software types utilize compression techniques, like backup programs, file management utilities, media apps, and operating systems.
In the context of how does file compression work, the quality of the process depends on the source file type and algorithms used. Yet, typically, a compressed folder with different files will reduce in size by 50% of the original size total. The process is used for media backups, software distribution, and archiving applications.
Part 2: What Are The Types of Compressed Files
While multiple types of compressed files are available, two standard benchmarks are most common for file compressions. They are as follows:
· ZIP file- One of the most common extensions for compressed files is the .zip file, which has been available since its inception in 1989. It is used for archiving multiple files and folders and is compatible with both Windows and Apple operating systems. One can keep one or multiple directories and files within each ZIP file, and exporting the format in different software is simple.
· EXE archive- The EXE file extension is a type of executable file, and installers handle these folders for application functions, like install.exe and setup.exe. However, the .exe file extensions have different file names for the application files. Notably, a few EXE files are self-extractable and instantly transfer to specific folders after users unzip the compressed file.
Part 3: How Does File Compression Work
After understanding what file compression means, let's discuss how does file extensions work. The technology here helps reduce file size without harming the original data.
To note, the main aim of what is file compression and what makes it essential is storage space improvement.
The process works with a specific compression algorithm, a mathematical formula useful for the electronic data compression/decompression process. To properly understand the theory, one should consider the two main techniques related to file compression.
· Lossy file compression:
If you are wondering how does file compression work in the lossy technique, the answer is via the removal of extra information. Here, the file size reduces after deleting unnecessary data in audio, image, and video files. So, the new compressed file does not entirely resemble the original type and is commonly associated with JPEG and MP3 formats.
· Lossless file compression:
This file compression method ensures that the decompressed file will have the same size as the source file. So the software does not lose any data during the compression or decompression steps. Therefore, you can efficiently extract the original files with the same quality as before and in size.
The process efficiently keeps the information within the original file without redundancy. Typically, lossless file format examples are ZIP (file and folder types), PLAC (audio), and PNG (image). Moreover, this compression type works to save video files as well.
Part 4: Benefits of Compression
There are multiple advantages to opting for the file and folder compression method; some of the main ones are mentioned hereafter:
· Users can expect a faster data transmission speed.
· You can remove excess elements from storage space and leave room for adding more app data/files.
· The file integrity and backup storage are at optimal levels.
· Keep the data in files safer.
· Share the files easily via email addresses.
· This is a cost-saving solution since you can avoid investing in multiple extra storage spaces.
Part 5: Disadvantages of Compression
Like the benefits, certain factors file compression as a solution lacks. Here are the main ones:
· The decompression process requires a higher RAM processing power, affecting the PC's speed as it might pause.
· When you decompress the file afterward, the file size can sometimes increase in the new form.
· Compressing and decompressing file types can take longer if the size is large.
· The best anti-virus software can fail to analyze the compression files thoroughly, and malware/viruses within these files can enter systems undetected.
Part 6: How to Compress Files
Different ways to safely and efficiently compress files depend on your system. For Windows users, the simplest method is to go through File Explorer and directly compress the files.
Step 1: Double-click the File Explorer option on your Windows PC to open or press Win + E.
Step 2: Open the folder where the files are saved in the internal or external hard drive.
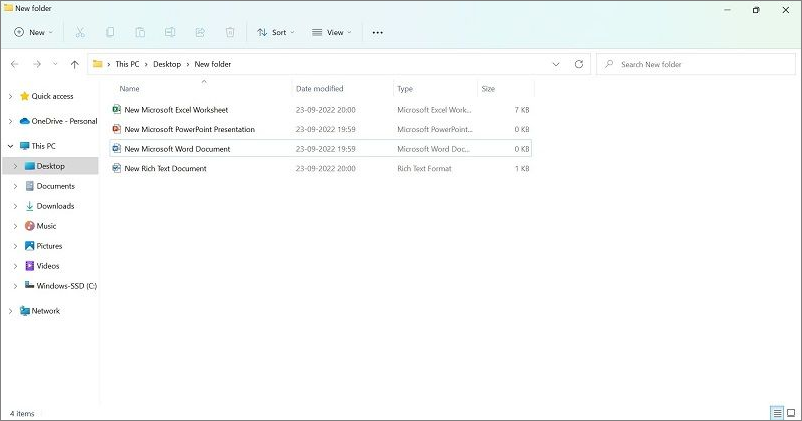
Step 3: Choose the files you will compress by clicking Ctrl + A on the keyboard.
To compress files in different locations, press + hold the left-hand mouse button and drag the cursor over the files you want to choose.
The selected files will get highlighted in blue.

Step 4: After choosing the file, right-click your cursor on one file to get the drop-down menu. Choose the "Send to" option and click on the "Compressed (zipped) folder" choice.
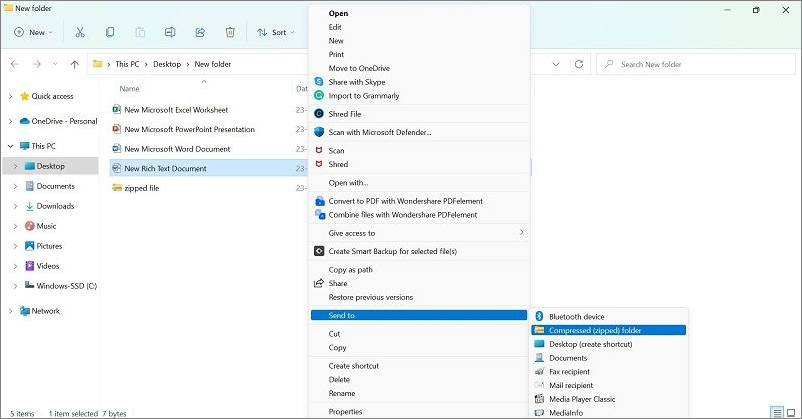
Alternatively, on modern Windows devices, you can directly choose the "Compress to zip file" option from the drop-down menu.
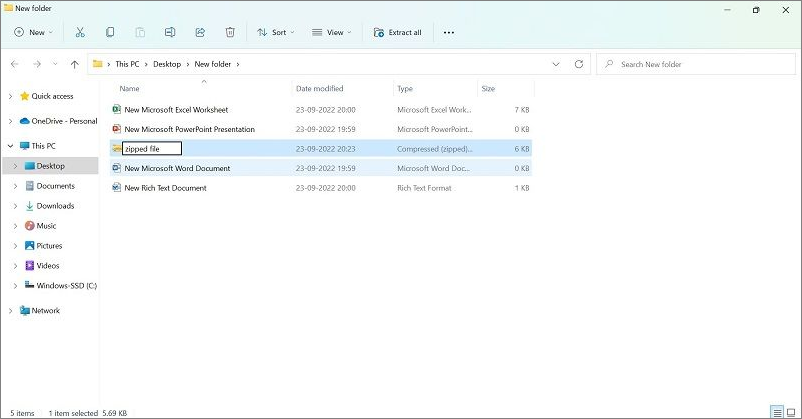
Step 5: After this, the compressed file folder will appear with a big zipper mark. The name is saved as the last file in the folder. Right-click on it to rename the zip file.
Part 7: Unzip A File
After learning what is file compression and its steps, the next point of concern is unzipping the said file. The decompression process works similarly to the previous method through File Explorer.
Step 1: Open the Windows File Explorer by clicking the Win and E keys. Go to the area where your zipped folder resides.
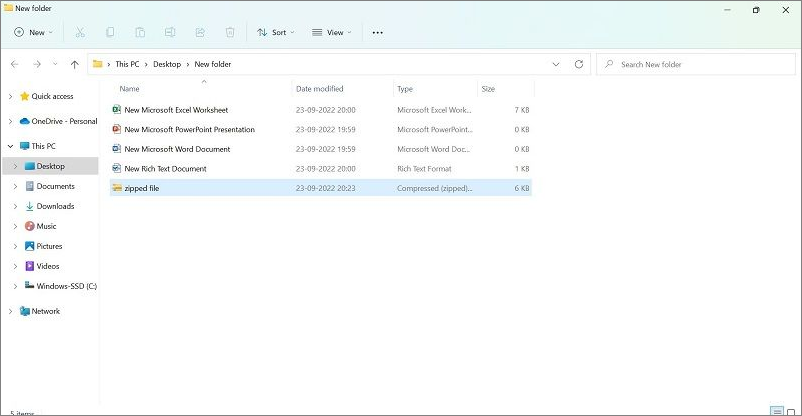
Step 2: Right-click on the top of the zipped file and choose the "Extract All" option.
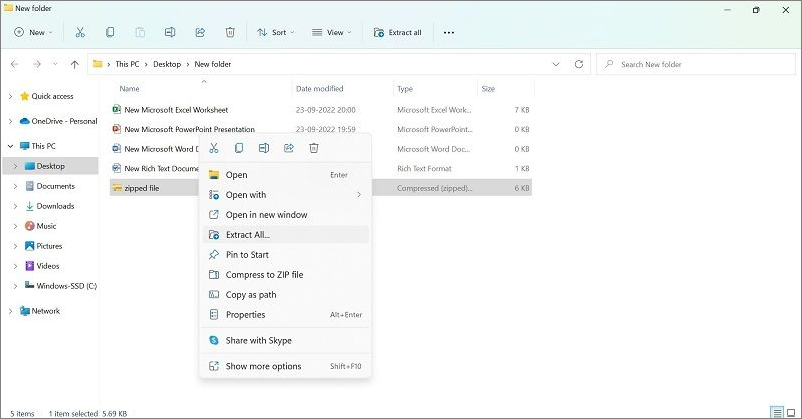
Step 3: Make your choice for the destination folder for the extracted files and click on the Extract button.

Step 4: If you only want to unzip one folder or file, you can double-click on the folder and open it. Then, copy the file/folder or drag it to the preferred location.
Part 8: Create Self Extracting Zip File
It is possible to prepare a self-extracting archive or zip file without an installer. The format here will be a .exe file extension.
Step 1: Click on Win and R keys and open the Run dialog box.
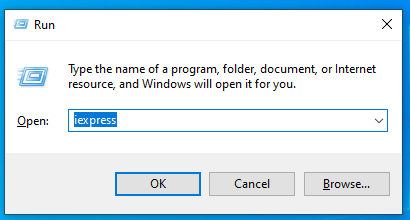
Step 2: Type the term- iexpress. Hit the Enter button on your keyboard or press OK.
Step 3: In the next window, choose the "Create a new self-extraction directive file" option > Next, click on Extract files only.
Step 5: Continue pressing the Next button as the wizard shows the following commands for creating an archive. This will create a .exe file.
Part 9: Create A Multi-Volume Self-Extracting Archive
Like in the case of a single self-extracting archive, users can create the same compressed file type with multiple files. These are the steps for Windows users to follow in the process.
Step 1: On your PC, open the System32 program and click on the "iexpress" folder.
Prepare a shortcut of the file to your desktop home screen.

Step 2: Click on the "iexpress" folder and choose the "Create new Self-Extraction Directive file" option.
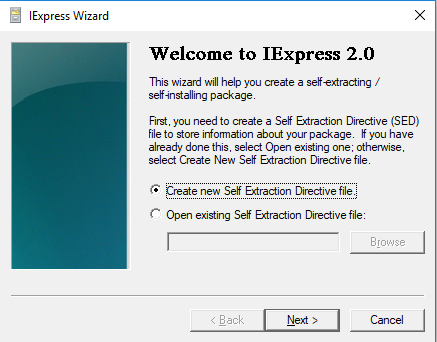
Step 3: On the next window, press the "Extract files only" option and click Next.

Step 4: Choose the package. Following that, click "Prompt use with:" and insert the following command:
Are you sure you want to extract these files?
Step 5: Press Do not display a license > Select files > Default.
Step 6: Select the "Display Message" option and type in "Your files have been successfully extracted."
Step 7: Choose the saving location and press the "Save Self Directive (SED) file" in case you will add more files to it. If not, press the Don't Save button.
Step 8: Press Next > Finish. 9 More Images
Part 10: Convert Compression File format
It is possible to convert the compression file format within Windows with the right steps. You can use the WinZip tool for a quicker conversion or an online converter tool like Convertio. First, you must choose the compressed file folder you want to convert as the source file (ZIP) and select the other as the destination file type.
Step 1: Open Convertio on your preferred browser.
Step 2: Press the Choose Files option and add the file from your device.
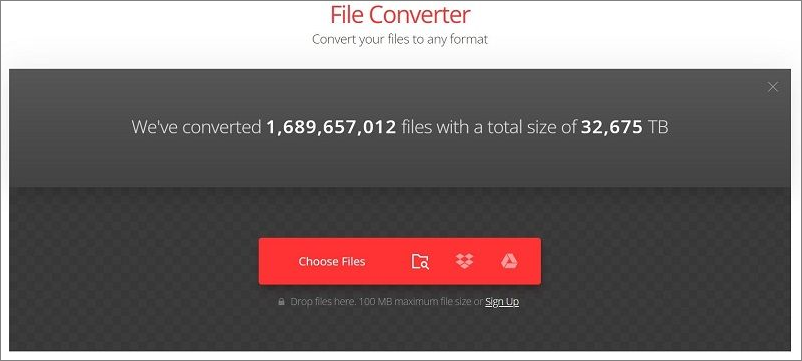
Step 3: Click the three-dot icon after it loads on the converter. Choose the other compression file type.
![]()
Step 4: Then press the Convert button.
Conclusion
To save storage space, it is very useful to compress the files and folders on your desktop and transfer them quickly. You can create a zip file easily via File Explorer and unzip it at any time. Besides that, making a self-extracting archive like an EXE file is possible. For either process, carefully follow the steps mentioned.
Was This Page Helpful?
Updated by Tracy King
Tracy became a member of the EaseUS content team in 2013. Being a technical writer for over 10 years, she is enthusiastic about sharing tips to assist readers in resolving complex issues in disk management, file transfer, PC & Mac performance optimization, etc., like an expert.
Daisy is the Senior editor of the writing team for EaseUS. She has been working at EaseUS for over ten years, starting as a technical writer and moving on to being a team leader of the content group. As a professional author for over ten years, she writes a lot to help people overcome their tech troubles.
Related Articles
-
How Many Megabytes Are There in a Gigabyte
 Daisy/2025-01-24
 -
Command R Mac | Use Command R to Reinstall macOS
 Brithny/2025-01-24
 -
TOP 10 FREE PHOTO EDITORS LIKE PHOTOSHOP
 Daisy/2025-01-24
 -
Windows KB Update: KB3194798 | KB 3192441 | KB 3192440
 Jerry/2025-01-24