A network drive is a location or disk drive that you can save and share files, applications with users in the same network. It could be a Server drive in the network, a NAS drive (stand-along network drive), or a physical drive connected to a router.
Visiting a network drive could be a bit complicated as you need to type in the network drive path every time. To quickly access the network drive, you can map it to your local computer as it won't take much space on the local disk. And this is why we are here. We'll show you the complete procedure of how to map a network drive in Windows 11. Let's get started.
| Workable Solutions | Step-by-step Troubleshooting |
|---|---|
| 1. Set Up a New Volume for Network Drive | Check for free space > Shrink a partition to create unallocated space...Full steps |
| 2. Turn On Network Discovery, File Sharing, Password Protected Sharing | Type Control Panel in the search box and click to open it...Full steps |
| 3. Map a Network Drive in Windows 11 | Double-click "This PC" from Windows 11 > click "Mape network drive"...Full steps |
Why Need to Map a Network Drive to a Local Drive
The reasons why do people need to map a network drive on their computers may vary. Basically, it's based on the advantages of network drives. Here is a list of advantages to use or map a network to a local disk on a Windows PC. Let's check:
- Expand local computer storage, free up the local disk space.
- Fast to transfer or share files onto the network drive.
- Protect personal and essential data from OS crash or failure error.
- Portable to access and use shared files anywhere without the source computer.
How Do I Map a Network Drive in Windows 11
You may currently are asking yourself about this question on your mind and here, we'll present you the complete guide of mapping a network drive in Windows 11. Tips below also work to map a network drive in Windows 10/8.1/8/7/XP/Vista and Windows Server computers.
Let's get started.
1. Set Up a New Volume for Network Drive
- Tool: Disk manager tool - EaseUS Partition Master
- Duration: 1 minute
2. Turn On Network Discovery, File Sharing, Password Protected Sharing
- Tool: Network and Sharing Center Settings
- Duration: 2-3 minutes
To avoid unnecessary errors from happening, it's essential that you turn on the Network Discovery settings in Windows 11. Here are the steps for you to follow:
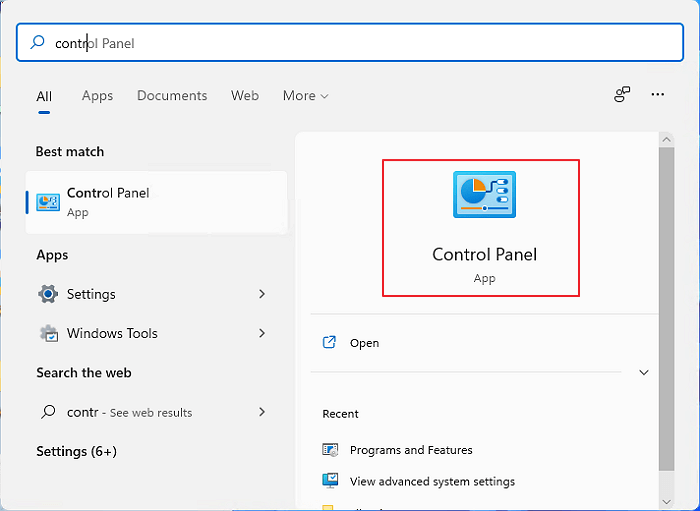
Step 1. Type Control Panel in the search box and click to open it from the result.
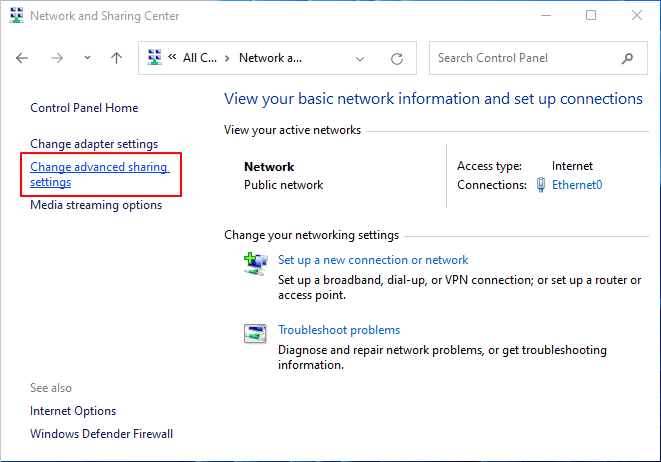
Step 2. Click "Network and Sharing Center", and click "Change advanced sharing settings" on the left pane.
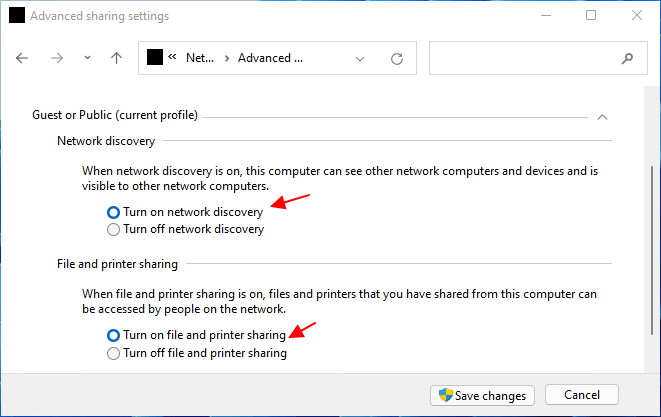
Step 3. At the Private section, check "Turn on network discovery" and "Turn on file and printer sharing".
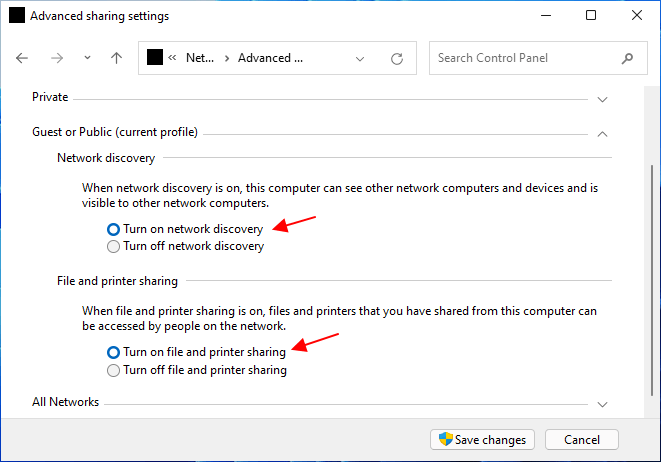
Step 4. At the Guest or Public section, also check "Turn on network discovery" and "Turn on file and printer sharing".
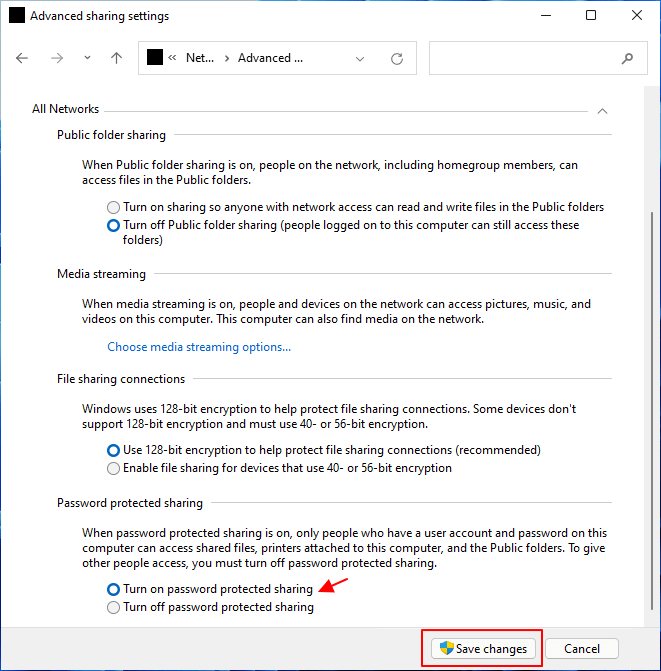
Step 5. At the All networks section, check "Turn on password protected sharing" and click "Save changes" to apply all changes.
3. Map a Network Drive in Windows 11
- Tool: File Explorer Menu Pane
- Duration: 2-3 minutes
Once you complete the setting of network discovery and file-sharing settings on your computer, you can refer to the guide steps here to map a network drive in Windows 11. Let's start.
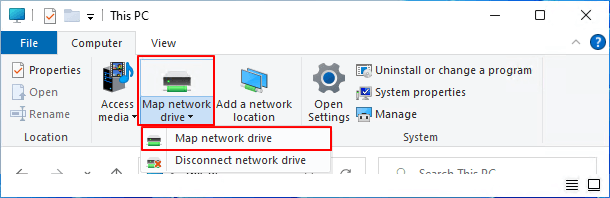
Step 1. Double-click "This PC" from Windows 11 desktop.
Step 2. At the top menu, locate and click "Mape network drive", and select "Map network drive".
Step 3. At the Drive section, select the new volume for connection.
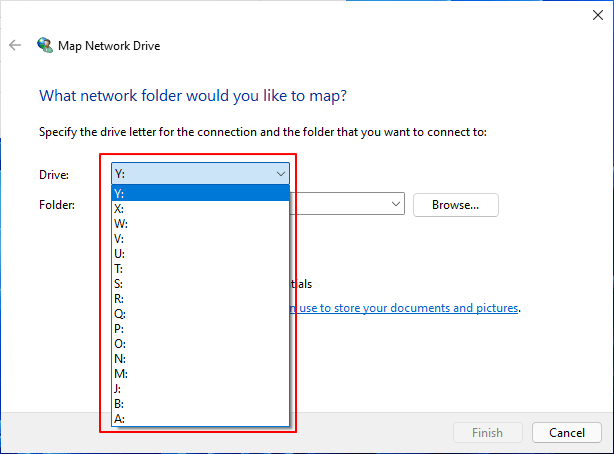
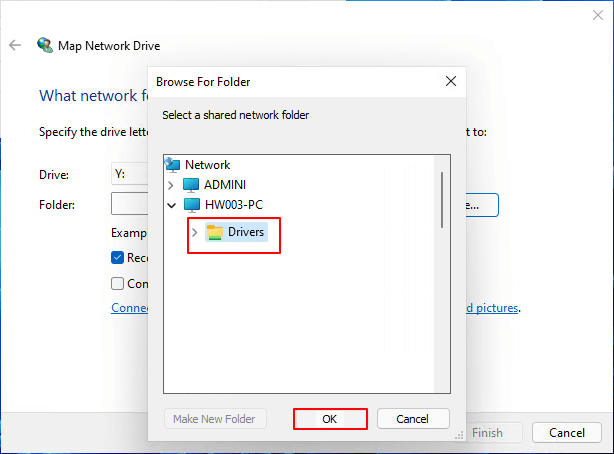
Step 4. Click "Browse" next to the Folder section, then select a network drive folder that you want to connect to.
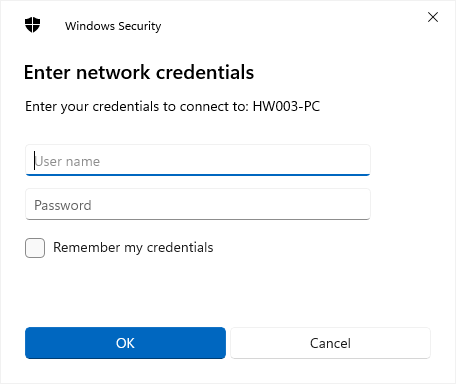
Also, enter your network credentials if necessary and click "OK" to confirm.
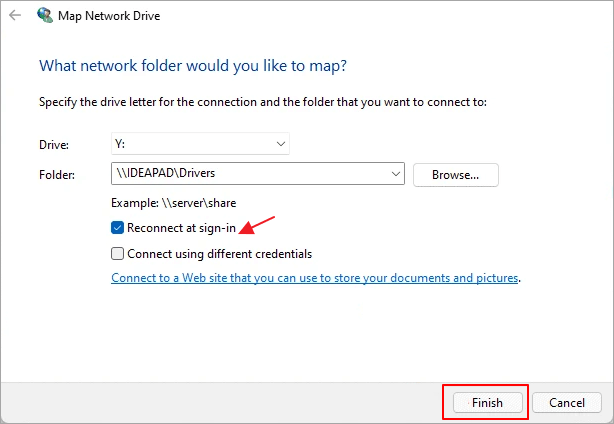
Step 5. Check "Reconnect at sign-in" and click "Finish" to complete.
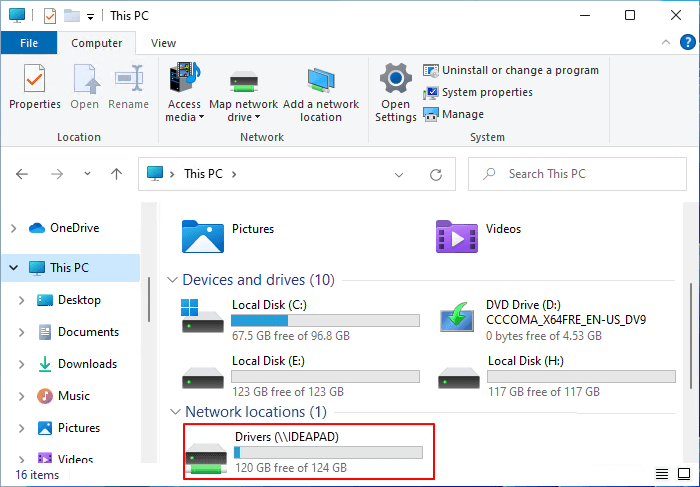
Now, you'll see that your mapped network drive is showing up in File Explorer and you can directly double-click to open and access network drive shared files and transfer data to the disk in Windows 11.
Bonus Tips of Using Network Drive in Windows 11
After mapping a network drive in Windows 11 computer, you can then apply the drive to share and transfer files between your computer and the network. Note that it's also essential that you be aware of using the network drive for sharing and saving computer files.
Here are some tips that can help you make good use of the network drive and protect your files:
- Keep network connection stable in case of losing network drive.
- Copy files to network drive instead of cutting them from local Windows 11 computer.
- Set a password for accessing essential data on the network drive.
- Leave big enough space in the local drive that is connected to the network drive.
Notice that though a network drive won't take much real space on a local disk, it's still necessary that you keep a certain free space for the disk for smooth file transferring and sharing. To manage a local hard drive disk layout, EaseUS Partition Master is meant to help.
Was This Page Helpful?
Daisy is the Senior editor of the writing team for EaseUS. She has been working at EaseUS for over ten years, starting as a technical writer and moving on to being a team leader of the content group. As a professional author for over ten years, she writes a lot to help people overcome their tech troubles.
Written by Tracy King
Tracy became a member of the EaseUS content team in 2013. Being a technical writer for over 10 years, she is enthusiastic about sharing tips to assist readers in resolving complex issues in disk management, file transfer, PC & Mac performance optimization, etc., like an expert.
Related Articles
-
NetBIOS: What It is, How It Works and How to Use It
 Daisy/2024-01-11
 -
What Is Hyper-V Snapshot [Full Explanation]
 Brithny/2024-01-11
 -
Full Guide of Boot Camp on Mac & How to Use It
 Cici/2024-06-27
 -
Ultimate Guide on Network and Sharing Center [Updated 2024]
 Tracy King/2024-01-11
