In Windows 7, Microsoft added a vital component for networking options and dubbed it Network and Sharing center. Since then, it has become an important pillar of network-related settings and has continued its upgrade journey through Windows 8, 7, 10, and now 11.

In today's article, we'll explore why Network and Sharing Center is a critical program for network-related settings. On top of that, we'll also explore whether or not you should tweak around with it. So, let's dive right into it.
Introduction
Internet activity in computers used to depend on wired networks. In the past decade or so, Wireless networking has taken over. However, a lot of people still prefer to use LAN (Local Area Network) cables. Regardless of your choice of connection, you need a Network and Sharing center in windows.
Yet, many people don't understand Network and Sharing Center and tweak it to get the best performance out of their networks. So, what exactly does Network and Sharing Center do? And, should you even mess with it? Let's find out.
What Is Network and Sharing Center?
Network and Sharing Center is a part of the Windows Control Panel. While it has seen a little uplift since its Windows 7 days, this application's main job is to cater to the user with all the critical networking options. This includes LAN, Wi-Fi, VPN, or other connectivity modes.
Do you want to know how to connect your PC to Wi-Fi but are unsure how to do so? You couldn't have found a better destination.
However, you only ever need to access Network and Sharing Center when you need to:
- Change or alter network setting;
- Setup a new connection;
- Change Wi-Fi password or network;
- Create an exception for an app, etc.
These factors allow us to understand how important the Network and Sharing center is in Windows. Besides these settings, it also allows us to tweak other network settings like IPv4 or IPv6. Besides that, it allows us to tweak various settings; here's a peek:
1. Check network type, i.e., Private, Public, Enterprise, etc.
2. Change LAN/Wi-Fi setting.
3. Set up a new connection or network.
4. Troubleshoot problems, such as slow internet or bad connectivity.
5. Change adapter settings (this is where you can access IPv4 and IPv6 settings).
Therefore, it's the primary dashboard for all network-related settings in a Windows system.
Ultimate Guide on Network and Sharing Center
Now that we know what Network and Sharing Center is let's explore how you can access it. So, we'll divide it into five parts. Such as:
- Opening Network & Sharing Center
- Private or Public Network
- Advanced Sharing Settings
- Setup New Network & Troubleshoot Problems
- Change Adapter Settings
Opening Network & Sharing Center
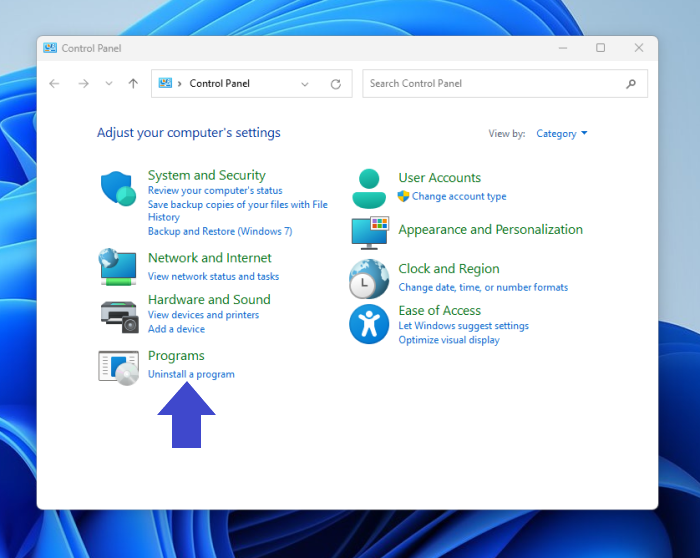
In order to open the Network and Sharing center, there are separate ways in Windows 7, 8, 10, or 11. However, one common way works in all the aforementioned Windows operating systems. Here's how you can open it:
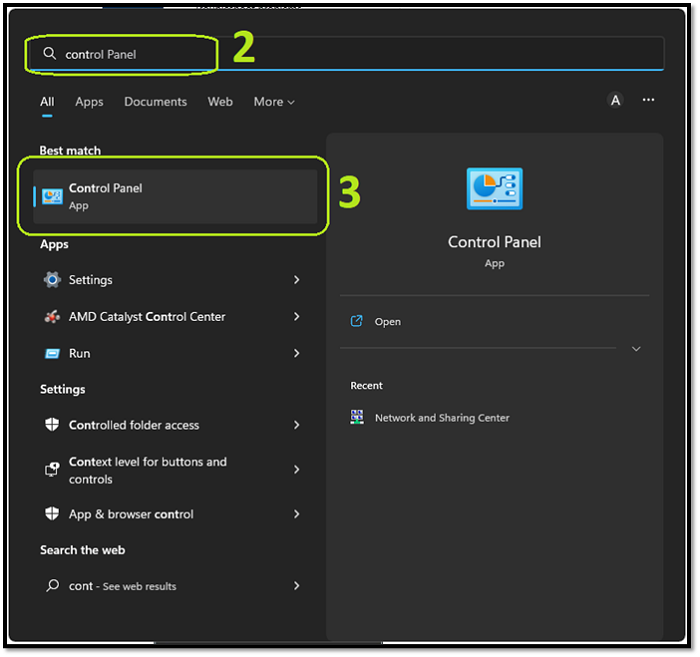
Step 1. Press the Windows button.
Step 2. Type Control Panel.
Step 3. Click on "Control Panel" when it shows up.
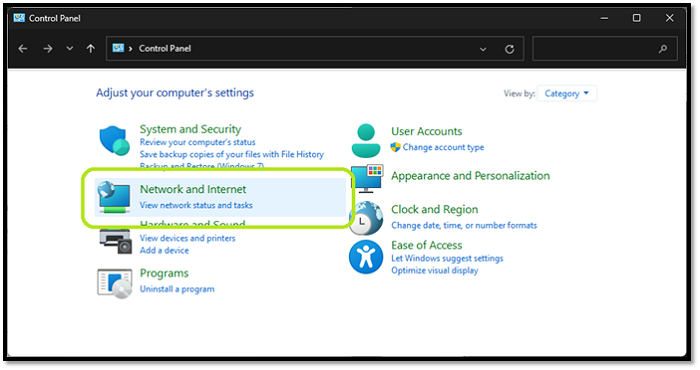
Step 4. Click on "Network and Internet".
Step 5. Find and click "Network and Sharing Center".
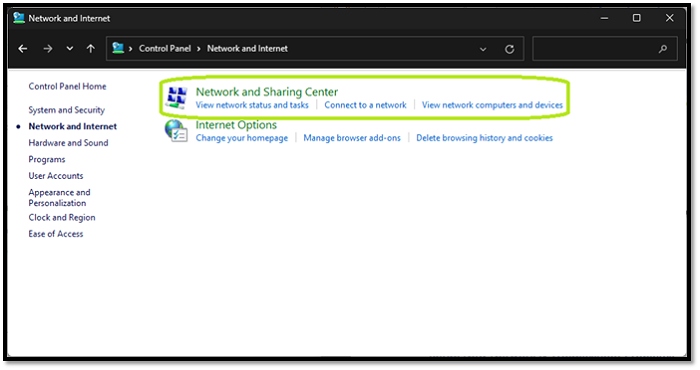
Step 6. Done.
As you can see, it's pretty simple to find and access Network and Sharing Center. However, in Windows 10 and 11, the way of accessing this control panel element is quite different. Therefore, we decided to pick the way that's the same in Windows 7, 8, 10, and 11.
Private or Public Network
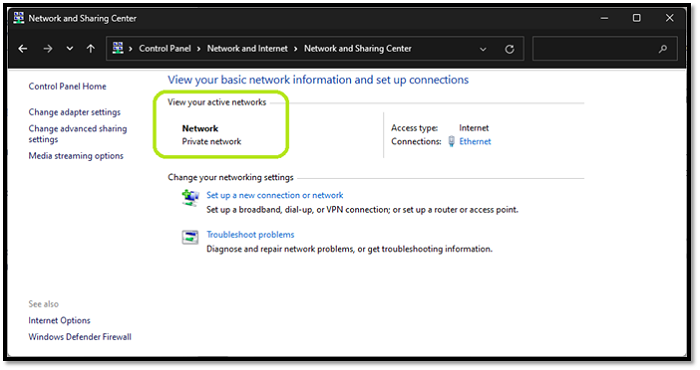
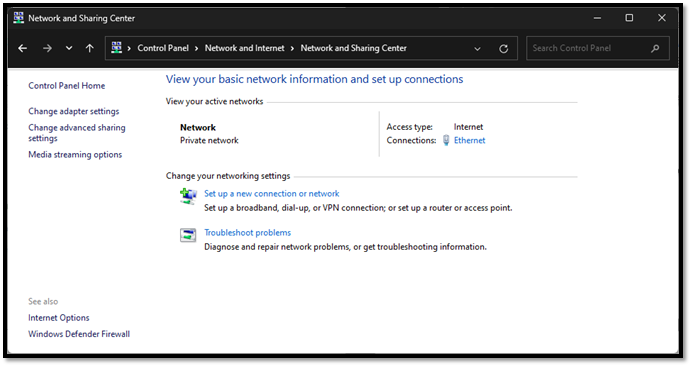
Checking whether your network is private or Public is relatively straightforward. In any Windows, upon opening the Network and Sharing center, you will see this as a prominent feature:
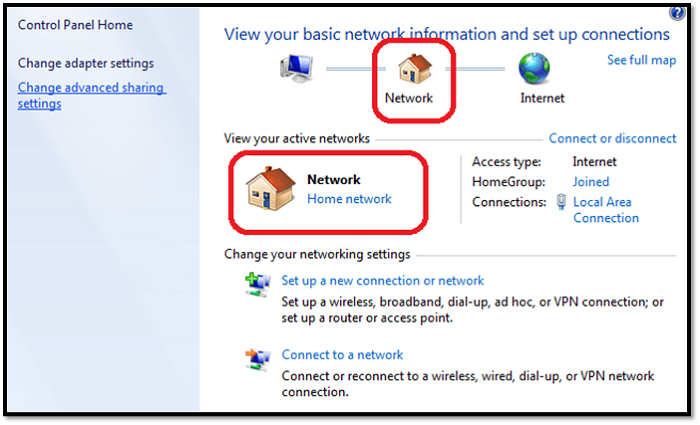
However, in earlier Windows, like 7 or 8, it appeared like this:
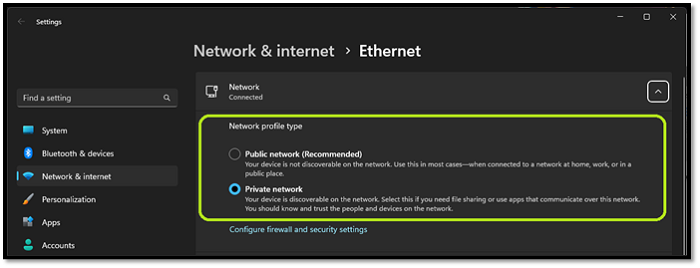
You could click on those icons to change the private or public network settings. However, in Windows 11, here's how you can see which type of network you're leading:
As you can see, Windows recommends for your system be on a Public network. However, most users today have a Wi-Fi router in their homes. So, this should be left to the private network.
Advanced Sharing Settings
Suppose you're on a public network, like shared Wi-Fi, an office computer, or an ISP provider that serves a few clients in your vicinity. In that case, you need to ensure your network is private. In rarely any cases, you'd need to change your network settings to Public. So, here's how to do it:
Step 1. Find and click "Change advanced sharing settings".
Step 2. Turn off Network Discovery and File and Printer Sharing on both Private and Public Networks.
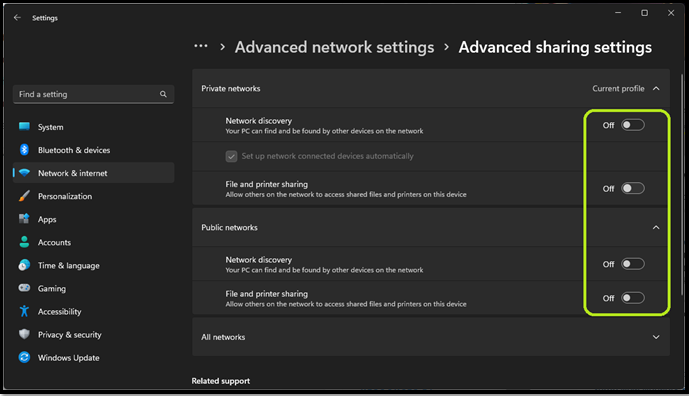
Step 3. Done.
Now it's important to remember that Microsoft has changed many settings and interfaces in Windows 11. However, doing the same steps in Windows 7, 8, or 10 will lead you to this screen:
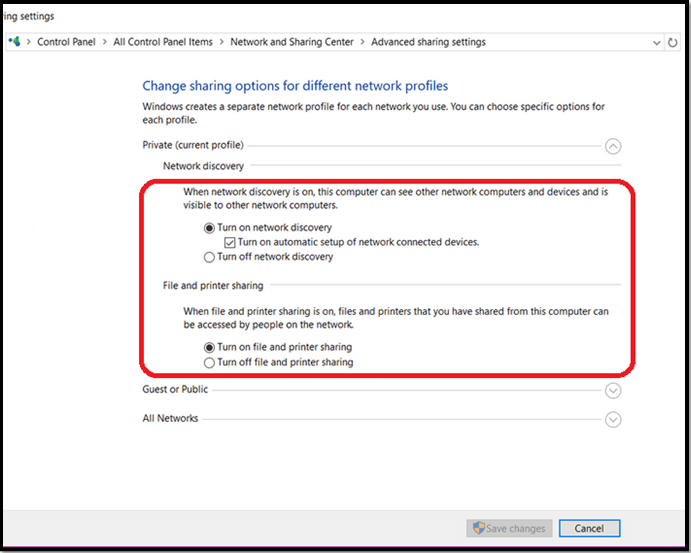
Once again, make sure you turn those settings off to ensure your privacy and safety—especially on Public Networks.
Setup New Network & Troubleshoot Problems
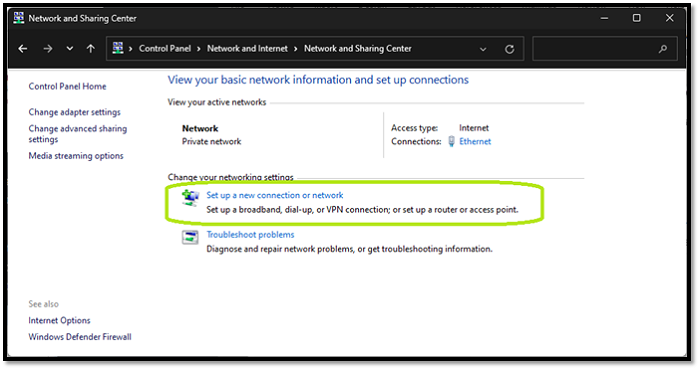
Setting up a new network or troubleshooting problems is straightforward in all Windows. Here's what you have to do in order to set up a new one:
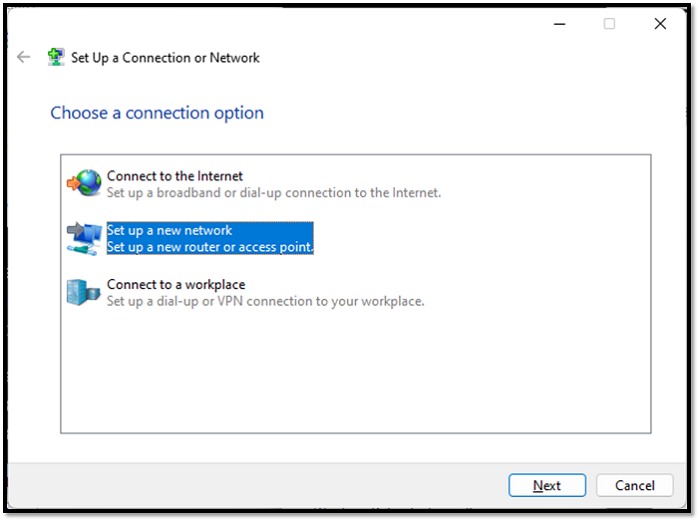
Step 1. Click on "Setup a new connection or network".
Step 2. Click on "Set up a new network".
Step 3. If you're using a Wi-Fi connection, pick it up once it appears here:
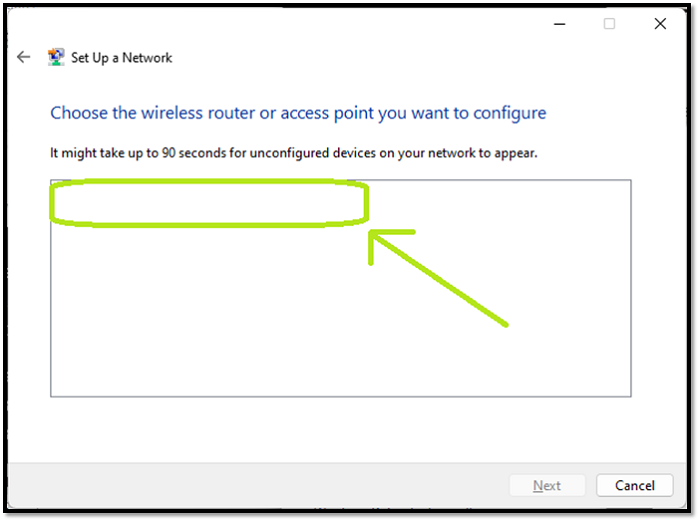
Step 4. Done.
That's how you can manually connect to a Wi-Fi network or set up another connection. As for troubleshooting issues, here's what you need to do:
Step 1. Click on "Troubleshoot problems".
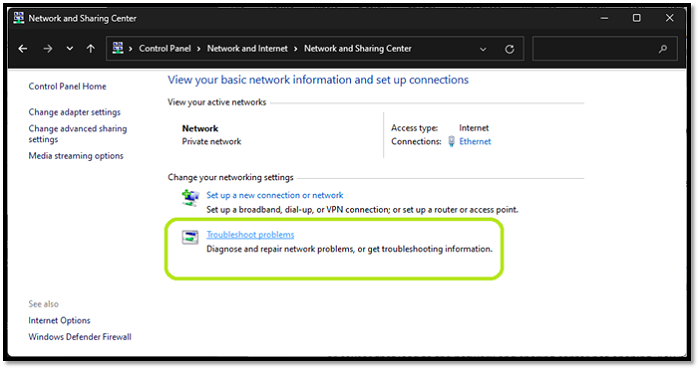
Step 2. On Windows 11, you'll see this:
Step 3. On Windows 10 and the ones before, you'll see this:
Step 4. Done
Therefore, you'll have to pick your subsequent issue to troubleshoot. To fix internet-related issues, you'll pick the first one. Everything else on the list is self-explanatory.
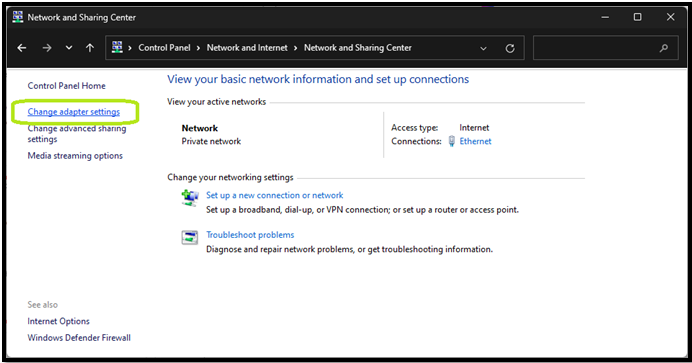
Change Adapter Settings
Changing adapter settings should only be used when you need to manually input an IP or configure between IPv4 or IPv6. So, if you require either of those cases, here's how to access it:
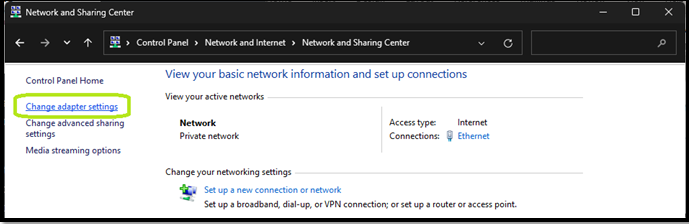
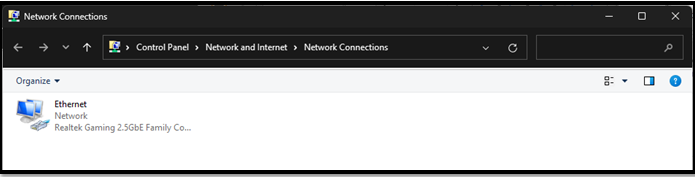
Step 1. Click "Change adapter settings" on the side menu.
Step 2. Pick the adapter you wish to tweak. Since we only have one adapter, we'll pick it:
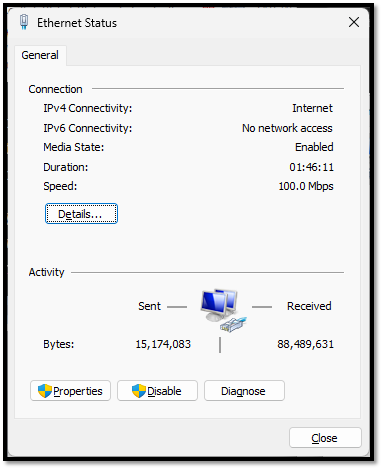
Step 3. Here you'll see the speed information + connectivity time.
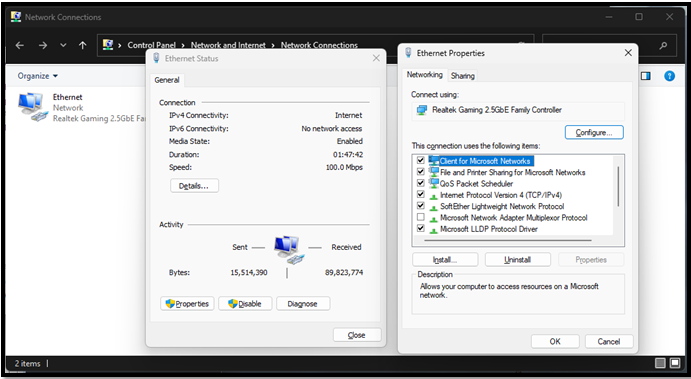
Step 4. Click on "Properties".
Step 5. Head to your subsequent settings.
Step 6. Done.
Once again, it's suggested not to meddle with these settings unless necessary.
Solved: Network and Sharing Center not Opening in Windows 11/10
A lot of people face a huge problem when their Network and Sharing center isn't accessible. In this section, we'll explore possible causes and probable solutions. So, here's how to deal with them, there are four fixes you need to do:
| Four Fixes | Step-by-step Troubleshooting |
|---|---|
| Fix 1. Run System File Checker | The first thing you can do is run System File Checker in Command Prompt...Full steps |
| Fix 2. Reset Network | In order to remove any network-related issues that might prevent you from going into Network and Sharing Center...Full steps |
| Fix 3. Configure Windows Firewall to allow Network Discovery | Windows Firewall might be blocking some aspects of the Network and Sharing center. So, to ensure that's not the case...Full steps |
| Fix 4. Create a New Local Admin Account | If nothing else works, you can add another admin account to your Windows 10 or 11...Full steps |
Fix 1. Run System File Checker
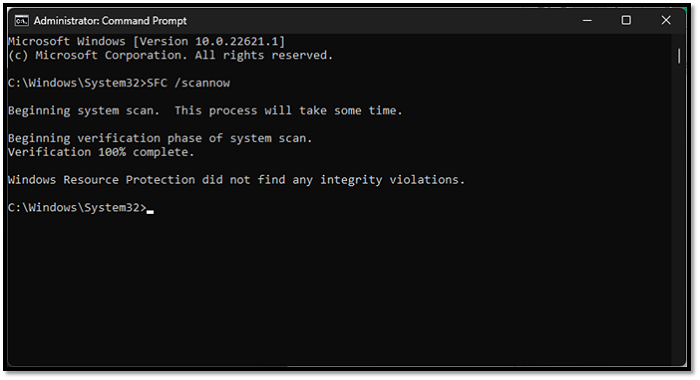
The first thing you can do is run System File Checker in Command Prompt. Here's how:
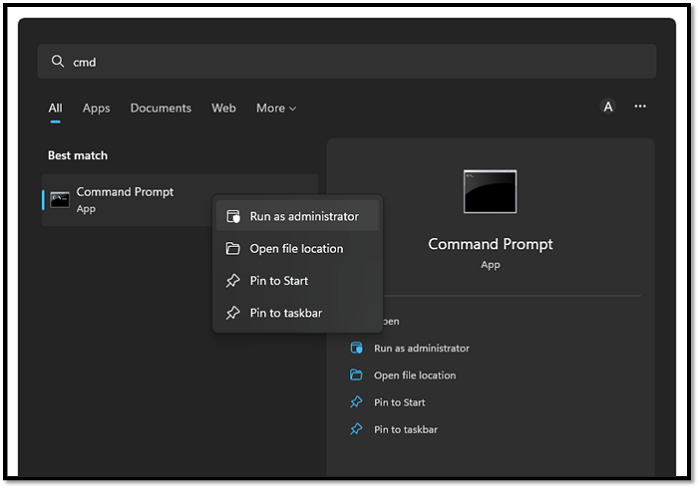
Step 1. Type CMD in Windows search and open as Administrator.
Step 2. Type SFC /scannow in CMD.
Step 3. Let it scan.
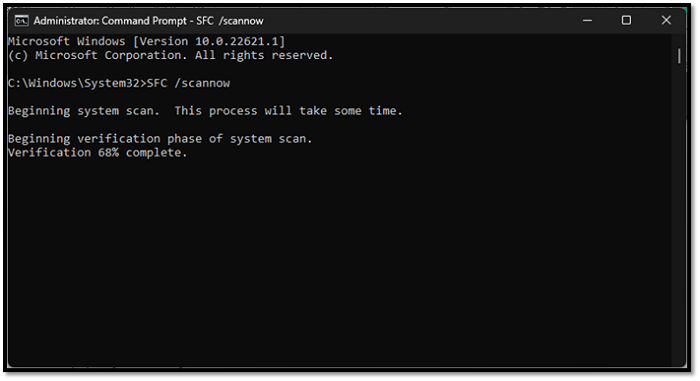
Step 4. Done.
Once it files any corrupt or ruptured files, it'll replace them and reboot your computer. After that, you will most likely access Network and Sharing Center again.
Fix 2. Reset Network
In order to remove any network-related issues that might prevent you from going into Network and Sharing Center, here's what you need to do:
Step 1. Head into Windows Settings by pressing "Windows + I".
Step 2. Tap Network and Internet, then scroll down to find Network Reset.
Step 3. Click on "Reset now".
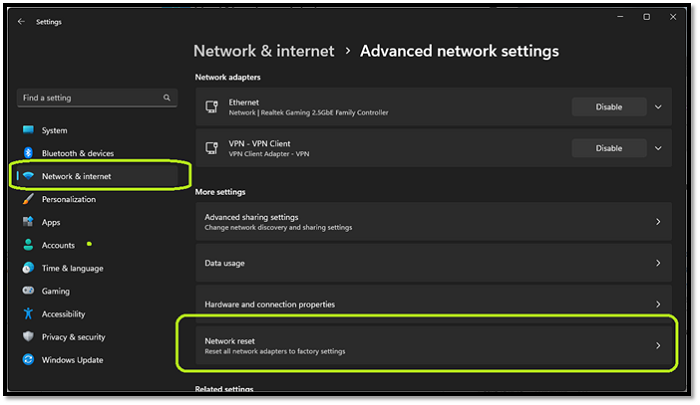
Step 4. Let it finish.
Step 5. Done.
In Windows 10 or 8, the same settings would look like this:
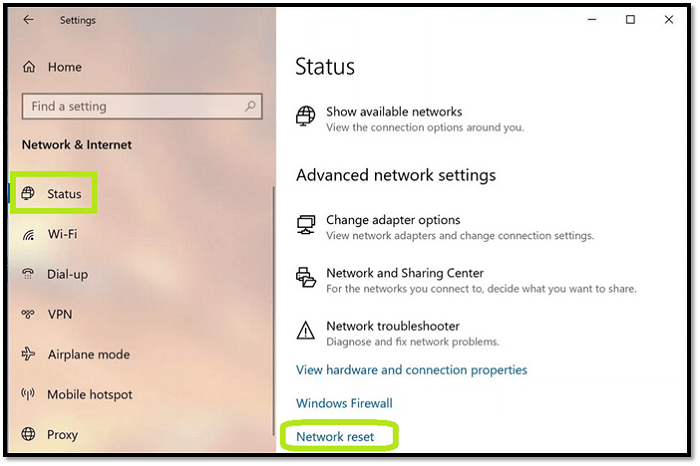
However, you'll be asked for confirmation in all Windows.
Fix 3. Configure Windows Firewall to allow Network Discovery
Windows Firewall might be blocking some aspects of the Network and Sharing center. So, to ensure that's not the case, here's what you need to do:
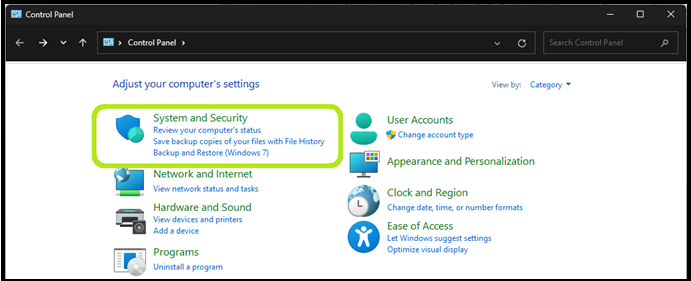
Step 1. Open Control Panel.
Step 2. Head into System and Security.
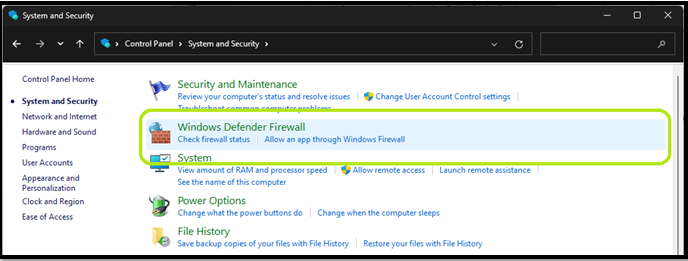
Step 3. Head into Windows Defender Firewall.
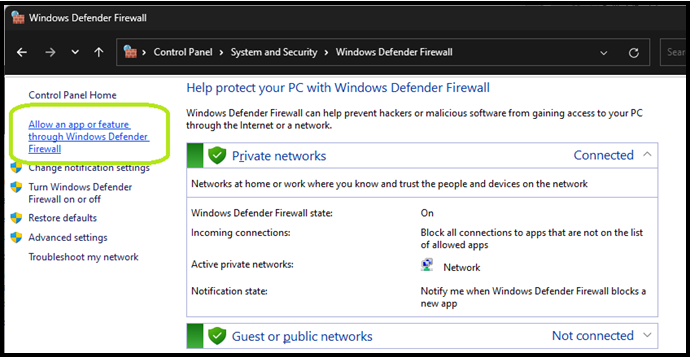
Step 4. Click on "Allow an app or feature through Windows Defender Firewall" on the top-left side.
Step 5. Find Network Discovery and ensure it's checked.
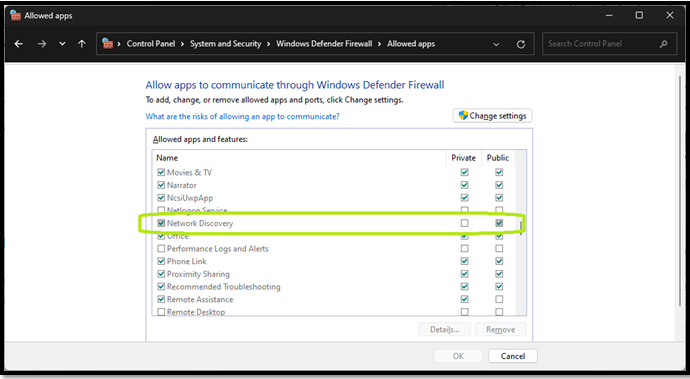
Step 6. Done.
This will require administrative privileges. So, once you're asked, make sure you allow it to make the required changes.
Fix 4. Create a New Local Admin Account
If nothing else works, you can add another admin account to your Windows 10 or 11. In order to do so, here's what you'll have to do:
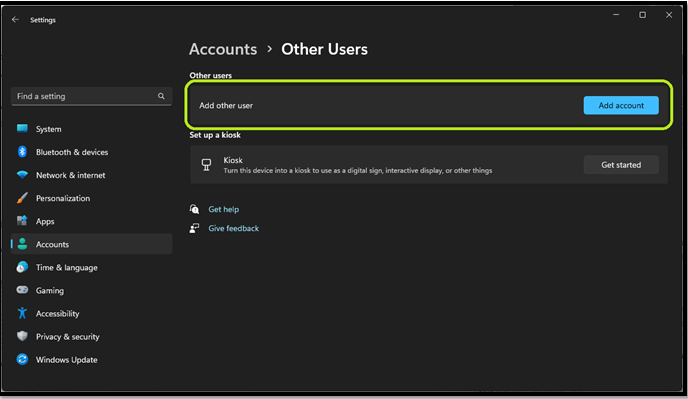
Step 1. Open Settings by pressing Windows + I.
Step 2. Head into Accounts and tap Other Users.
Step 3. Click on "Add accounts".
Step 4. Follow the on-screen instructions.
Step 5. Done.
This will add another admin account; if that one can access Network and Sharing Center, we suggest deleting the former account.
FAQs about Network and Sharing Center
We assume you might have more questions. So, here's the FAQ section to address those queries:
1. What is the network and sharing center?
Earlier on in the article, we described what Network and Sharing Center is. It's the primary element in Control Panel, which allows Windows Users to change, alter, or tweak network-related settings.
2. Why won't my network and sharing center open?
The problem might be caused by a blocking firewall or a corrupt file. In this article, we discussed four different ways you can try to fix the Network and Sharing Center, not opening problem. So, try one of the fixes.
3. How do I open the network and sharing center?
In different Windows, there are different ways of opening it. But, in all Windows, you can click on Start Menu and type Control Panel from there, open the Network and Internet. Then find and click Network and Sharing Center.
4. Where is the network and sharing center on my computer?
You can find the Control Panel's Network and Internet options in Windows.
Conclusion
We hope these factors and guides about the Network and Sharing Center were helpful to you. Not only did we try to explore the key aspects and features of the Network and Sharing Center, but also its importance. So, follow this guide to answer any Network and Sharing Center-related queries.
Was This Page Helpful?
Updated by Tracy King
Tracy became a member of the EaseUS content team in 2013. Being a technical writer for over 10 years, she is enthusiastic about sharing tips to assist readers in resolving complex issues in disk management, file transfer, PC & Mac performance optimization, etc., like an expert.
Related Articles
-
What Is Dell Boot Menu & How to Access?🔥
 Jerry/2025-06-30
 -
What Is An Input Device? Definition, Functions, and Examples [Full Information]
 Daisy/2025-06-30
 -
All About Novo Button [2025 Full Guide]
 Rel/2025-06-30
 -
WD Elements vs. My Passport, Everything You Should Know
 Cici/2025-07-04