One of a computer's most important components is the graphics card, as it determines how well your computer will perform certain tasks. Moreover, computers have several kinds of graphics cards preloaded, which gives them functional differences.
Sometimes you may be in situations where you need to use your computer for a particular purpose like gaming or overclocking and must thus be informed of the graphics card(s) that the PC is loaded with. Understanding this will help you assess your computer's capability in relation to the preloaded graphics card.
The GPU in your computer can be checked using a variety of techniques, so you don't have to take the case off to get that information. We will go through the four best ways to check the graphics card on a computer below, along with instructions on how to use each one.
Method 1. Check The Graphics Card in Task Manager
The Windows Task Manager has a feature that displays the GPU performance of your computer. With that option, you can easily see the name of the graphics card in your computer.
Follow these steps below to check your graphics card in Task Manager:
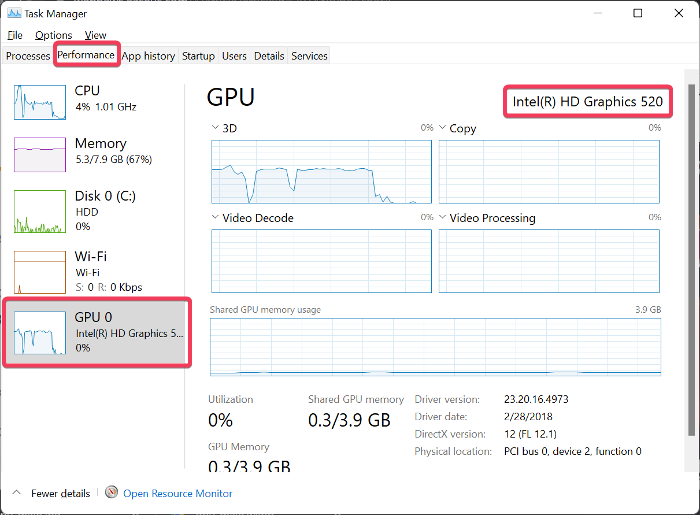
Step 1. Right-click on the Start menu and select Task Manager. You can also press Windows + S, type Task Manager and open the top result.

Step 2. On the Task Manager window, switch to the Performance Tab. If you can't find see the tabs, click on the More details option to show the full Task Manager page
Step 3. Tap on GPU on the left-hand side pane, and you'll see the GPU running on your computer in the top-right corner of the page.
Method 2. Check The Graphics Card in the Device Manager
With the Device Manager, you can see the names of every piece of hardware on your computer, including the GPU. So if you want to check the graphics cards on your computer, the Device can be used.
Here is how to use Device Manager to check graphics card:
Step 1. Press Windows +S, type Device Manager, and tap on the top result to launch it.

Step 2. On the Device Manager window, navigate to the Display adapters option and double-click it.
Step 3. After you've expanded the Display Adapter, you'll see the name of the GPU(s) your computer has.
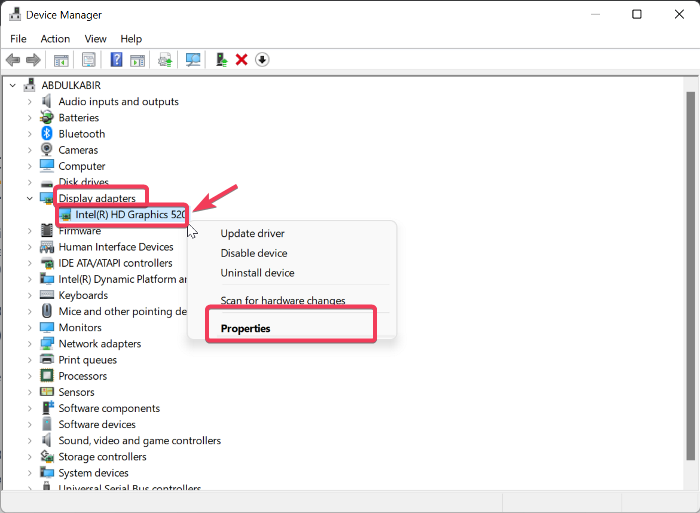
Step 4. You can right-click the GPU and select Properties to see more details about it.
Method 3. Using DxDiag
You can view details about your system, sound card, and graphics card using the Microsoft-created DirectX Diagnostic, also known as DxDiag. The tool comes preinstalled on all Windows computers as a means to troubleshoot issues with your PC's hardware components.
To use DxDiag to check the graphics card on your computer;
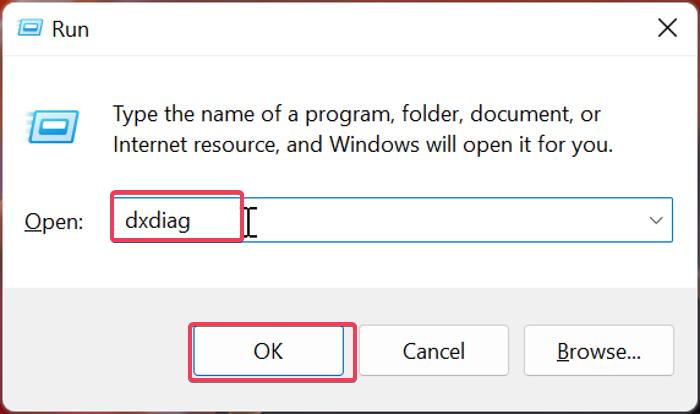
Step 1. Press Windows + R to open the Run Command box.
Step 2. Type dxdiag in the box and hit Enter.
Step 3. After the DirectX Diagnostic Tool opens, switch to the Display tab and navigate to the Device Name part to see the name of the computer's GPU.
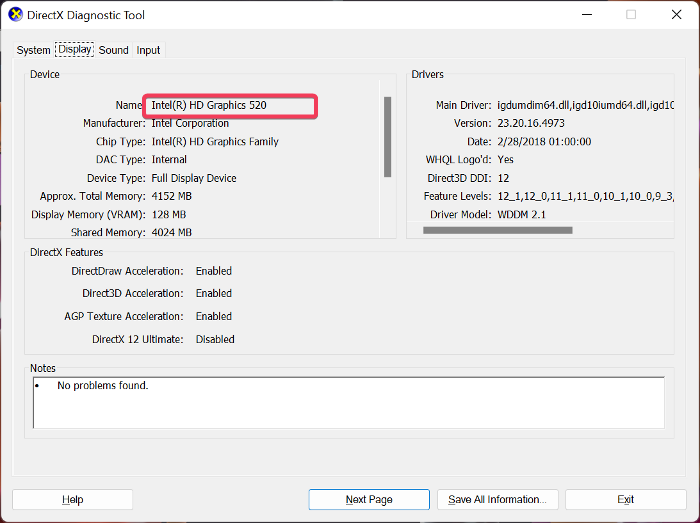
You will also find details about the graphics card and its driver on the page.
Method 4. Using CPU-Z & GPU-Z
If you don't want to use the methods above, you can also get your graphics card details using third-party applications like CPU-Z or GPU-Z.
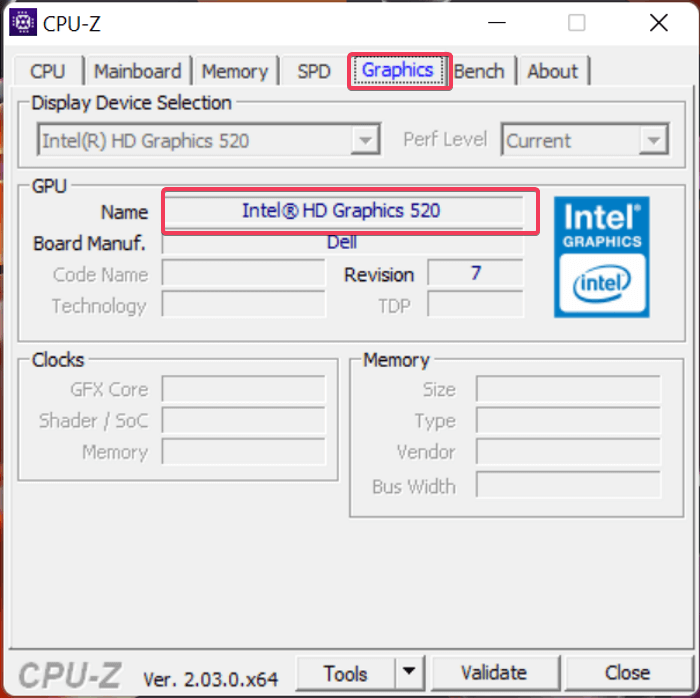
Use CPU-Z
CPU-Z is a piece of free software designed to gather information on some of the most important hardware in your computer. This tool enables you to access details about both your GPU and CPU. The software is very lightweight, which makes it run smoothly on computers. Here's how to use CPU-Z to check for the graphics card on a Windows computer:
Step 1. Go to the CPU-Z download page and download the program on your computer.
Step 2. After downloading the setup file, install the program and launch it.
Step 3. Switch to the Graphics tab at the top of the CPU-Z window, where you will find the graphics card's name on your computer.
Use GPU-Z
GPU-Z is another system utility built to provide important information about your video card and graphics processor. It gives a long list of details about your graphics card as it is built specifically for that purpose. Also, GPU is supported for various Windows versions as well as graphics devices like NVIDIA, AMD, ATI, and Intel
Below are the steps to use GPU-Z to check for details about the graphics card on your computer.
Step 1. Download the GPU-Z program and install it on your computer.
Step 2. After the installation, launch the program, and you will see details about your graphics card under the Graphics Card tab.
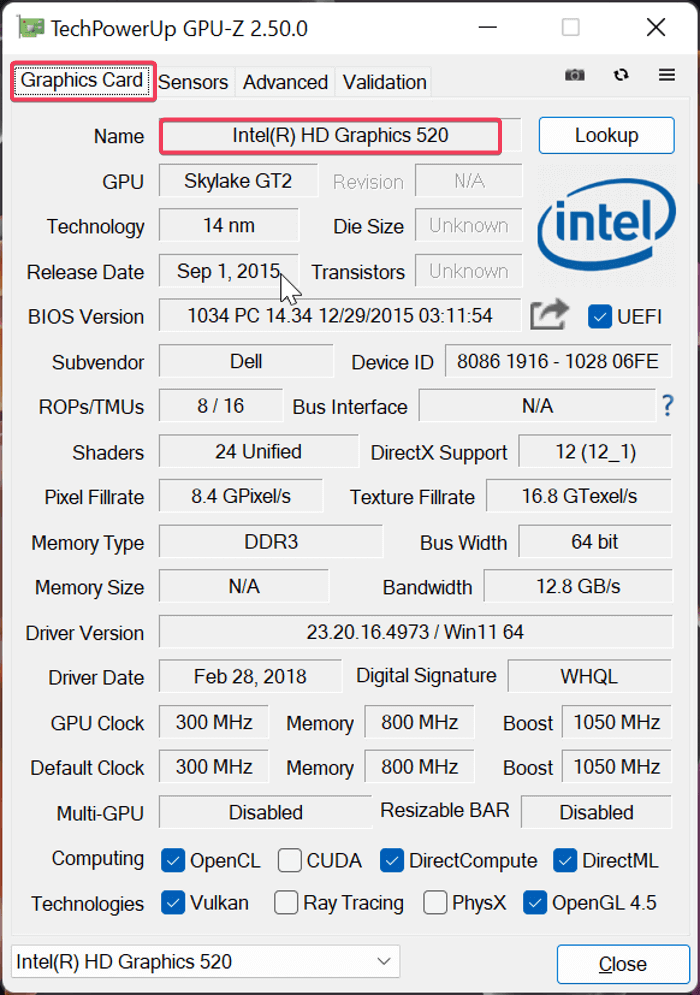
With GPU-Z, you can also click on the Lookup option in front of your graphics card name to find out more information about the GPU
Conclusion
In some situations, you'll be required to check your computer's graphics card. If you happen to be in this situation, there are a number of methods you can use without having to open up your computer casing. One of the best ways to check your computer's graphics card is by using Windows Task Manager, Device Manager, DxDiag, and outside software like CPU-Z and GPU-Z. We have covered the steps for each of these methods so that you can effortlessly find the GPU available on your computer.
Was This Page Helpful?
Daisy is the Senior editor of the writing team for EaseUS. She has been working at EaseUS for over ten years, starting as a technical writer and moving on to being a team leader of the content group. As a professional author for over ten years, she writes a lot to help people overcome their tech troubles.
Related Articles
-
[2024 Guide] macOS High Sierra Download and Install
![author icon]() Brithny/2024-10-25
Brithny/2024-10-25 -
How to Improve SSD Read and Write Speed [100% Working Solutions]
![author icon]() Cici/2024-11-27
Cici/2024-11-27 -
What Is the Best LG TV USB Format & How to Set It? [Step-by-Step Guide]
![author icon]() Cici/2024-07-01
Cici/2024-07-01 -
How To Enable/Disable Reserved Storage Windows 10? [Step By Step]- EaseUS
![author icon]() Tracy King/2024-01-11
Tracy King/2024-01-11

EaseUS Data Recovery Services
EaseUS data recovery experts have uneaqualed expertise to repair disks/systems and salvage data from all devices like RAID, HDD, SSD, USB, etc.