The following methods will help you fix Target Disk Mode not working issue on Mac, and you can click "Full steps" to skip to the target method:
| Workable Solutions | Step-by-step Troubleshooting |
|---|---|
| Fix 1. Update macOS Version to Fix Target Disk Mode Not Working | Access "System Settings" by clicking the Apple menu in the bottom-right corner of your screen...Full steps |
| Fix 2. Reformat Your Mac to Fix Target Disk Mode Not Working | Restart your Mac if it is currently in Target Disk Mode. From the "Utilities" folder, open Disk Utility Mac...Full steps |
| Fix 3. Check Ports and Cables to Fix Target Disk Mode Not Working | Choose the Apple menu and go to "About This Mac". Double-click your serial number, then...Full steps |
| Fix 4. Adjust Finder Preferences to Fix Target Disk Mode Not Working | In the Target Disk Mode, connect your Mac to another Mac. Open "Finder" and go to "Preferences"....Full steps |
| Fix 5. Turn off Firmware Password to Fix Target Disk Mode Not Working | In the Menu Bar, click on "Utilities" and select "Startup Security Utility" or "Firmware Password Utility"...Full steps |
Why Is the Target Disk Mode Not Working on My Mac
macOS base system has always been met with serious revisions by the innovative minds behind it. Target Disk Mode is a boot system that makes the task of transferring files quite easy. You can quickly transfer data using USB, USB-C, or Thunderbolt cables in your Mac's startup or boot mode. This mode mimics the functionality of an external hard drive. Hold the "T" key while your Mac boots up to activate Target Disk Mode.
Sometimes Target Disk Mode not working issue will happen on your Mac. Before getting to its solutions, let us discuss possible reasons for your Target Disk Mode not working on macOS Ventura, or Monterey.
Target Disk Mode may occasionally not appear on the host computer, the connected Mac may not recognize the connected Mac as an external hard drive, or maybe Target Disk Mode USB-C is not working. And there could be several reasons it is not working on your M1 Mac.
The common reason is using the wrong port or cable for your Mac computer. Moreover, these are some other possible causes:
- Wrong format of the Hard Drive. Check whether your hard drive is in the correct format or not.
- You have set external files to be hidden on Finder. Always check to see if your files and folders are accessible normally.
- Hardware issue. Your computers should be connected with a thunderbolt cable rather than a USB or USB-C.
Regardless of the cause, you should be able to boot Mac into Target Disk Mode on Apple Silicon Mac or Boot Mac into Target Disk Mode on Intel Mac using the outstanding troubleshooting techniques listed below.
Fix 1. Update macOS Version on Mac to Fix Target Disk Mode Issues
Your Mac may occasionally be formatted as APFS when you want to boot it in Target Disk mode. If that's your case, the computer you connect to must run macOS High Sierra or later. Older software cannot recognize APFS format, which prevents it from recognizing your Mac.
To fix this, you can update to the latest version of macOS on your Mac to which you want to transfer files. We also suggest you check if you have enough free storage space before you start updating.
You can update Mac to High Sierra or later (Ventura/Monterey) by following the steps below:
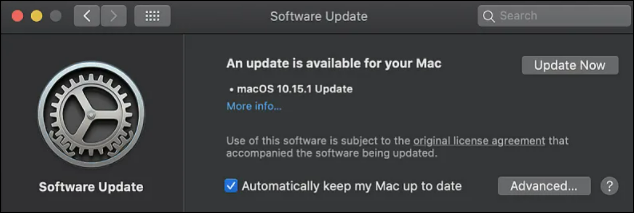
Step 1. Access "System Settings" by clicking the Apple menu in the bottom-right corner of your screen.
Step 2. In the sidebar, click "General".
Step 3. Finally, click "Software Update" on the right and update your Mac.
In most cases, updating your Mac can be the solution to fix "Target Disk Mode" issues. However, if this is not working for you or you cannot update the Mac to High Sierra or later, you need to check the format that your Mac in Target Disk mode is using.
So, continue reading this article and check below how you can Reformat your Mac to fix Target Disk Mode issues.
Fix 2. Fix Target Disk Mode Not Working by Reformat Your Mac
You need to check the format your Mac is using because when the Mac is in APFS format, Target Disk mode will only work if connected to another High Sierra or later running Mac. So, here are the steps to check the format of your Mac:
Step 1. Restart your Mac if it is currently in Target Disk Mode.
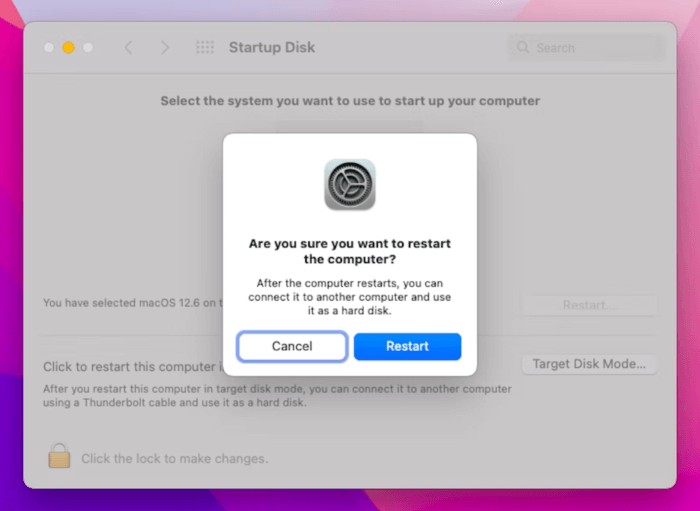
Step 2. From the "Utilities" folder, open Disk Utility Mac.
Step 3. From the sidebar, select "Macintosh HD". You can see the hard drive format beneath its name at the top of the window.
If your Mac is in APFS format, you must erase the drive and reformat your Mac storage. But before that, make sure you back up your Mac, or else you will lose all your data.
Now follow the steps to erase the drive:
Step 1. Go to "View" and then "Show All Devices" in "Disk Utility".
Step 2. Select your Mac's hard drive parent folder and click "Erase".
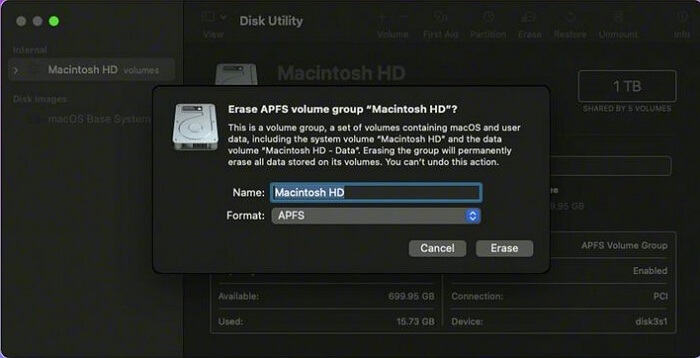
Step 3. Choose the "Format", "Scheme", and "Name" you want to use.
Note: We advise choosing GUID Partition Map and Mac OS Extended (Journaled).
Step 4. Now click on "Erase" to reformat the Mac.
Step 5. Finally, recover your data backup and check if the Target Disk Mode works now.
Fix 3. Check if the Ports and Cables on Mac Are Available
If Target Disk mode is working, but you can't get it to connect to another Mac, something might be wrong with the cable or port you're using. So, you need to check the cables and ports used for the file transfer.
Use a cable that is Target Disk mode compatible. You can use this guide to determine which cables work with data transfer in Target Disk mode.
1. What Cables Are Needed for Target Disk Mode
Here's a list of cables and ports that you can use in Target Disk mode:
- Thunderbolt 3
- Thunderbolt 2
- FireWire
Check your Mac ports at Apple's website and try to use high-quality, official cables to connect your devices. You can use a USB-C cable in the Thunderbolt 3 port, as both ports work the same on the Mac.
2. How to Check Ports and Cables Are Working Properly
Here's how you can check if Ports and Cables Are Working Properly or not:
Start by switching the ports on your devices, and if it begins to function in another port, your port is faulty. If this approach doesn't work, try a different cable and see if the new one works fine.
Sometimes you are sure that the used cables/ports are in proper order, then try this technical trick to overcome the hassle that you are facing:
Step 1. Choose the Apple menu and go to "About This Mac".
Step 2. Double-click your serial number, then press Command-C to copy it.
Step 3. Switch to the "Tech Specs" page, click on the search specs bar, press Command-V to enter your Mac's serial number, and start searching.

This will let you see all the ports on your Mac and give you an idea about the ports and cables that can be used.
Fix 4. Adjust Finder Preferences to Fix Target Disk Mode Not Working
Target Disk mode may be active on your Mac, but you may need help to see it because of a Finder issue. Making changes to your Finder preferences can be the solution. If that doesn't work, however, Disk Utility may help you locate your Target Disk.
Let's see the steps to solve this issue by adjusting Finder preferences:
Step 1. In the Target Disk Mode, connect your Mac to another Mac.
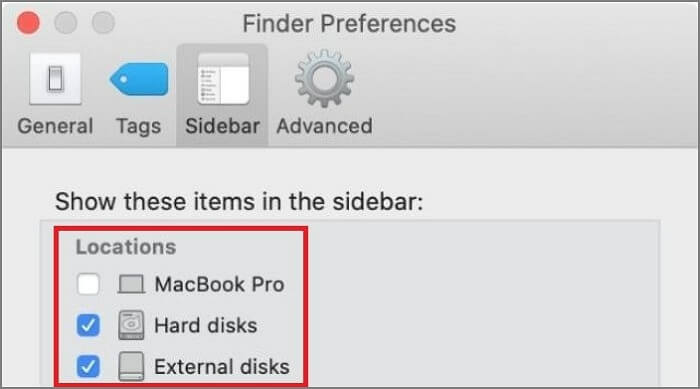
Step 2. Open "Finder" and go to "Preferences".
Step 3. Now, open the "Sidebar" tab.
Step 4. To view the Hard disks and External disks, check the box. Your Target Disk will appear in the Finder sidebar.
If this doesn't work, use the Disk Utility and follow the steps below.
Step 1. Open "Disk Utility".
Step 2. In the sidebar, check for the Target Disk.
Step 3. If the disk is grayed out, click the "Mount" button after selecting it.
Now go back to the Finder and look for the Target disk again.
Fix 5. Turn off Firmware Password to Fix Target Disk Mode Issue
When the Mac firmware password is set to "ON", you cannot enter Target Disk Mode from a cold boot. So, it would be best if you disabled it.
Boot your Mac into macOS Recovery Mode and follow the steps below (check this link if your Mac won't boot into Recovery Mode):
Step 1. In the Menu Bar, click on "Utilities" and select "Startup Security Utility" or "Firmware Password Utility".
Step 2. Click on "Turn off Firmware Password".
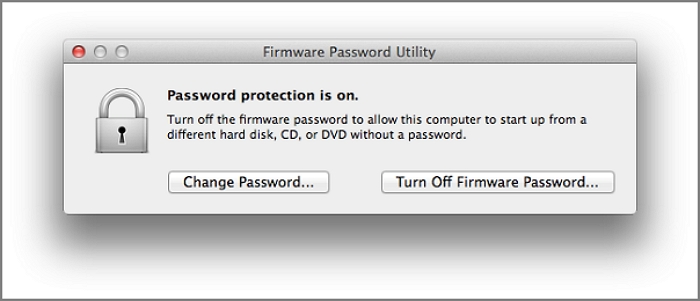
Step 3. Enter the firmware password and exit the utility.
Step 4. Now "Restart" your Mac. Now that we have successfully disabled the Firmware Password, you can easily access the Target Disk mode.
We hope that the solutions provided in this article successfully solve your Target Disk issues. However, if you lost your Mac Data or forgot to keep a backup anywhere during this process, Don't Panic! We have a solution.
Recover Lost Files While Fixing Target Disk Mode Not Working
We hope that the solutions provided in this article successfully solve your Target Disk issues. However, if you lost your Mac Data or forgot to keep a backup anywhere during this process, Don't Panic! We have a solution. While updating and reformatting your Mac, your data is at a high risk of getting lost permanently.
If you have lost your data when a macOS upgrade failed, reformatting, system crash, or any other possible reasons, you can get it back with the help of the EaseUS Data Recovery Wizard for Mac.
EaseUS Data Recovery Wizard for Mac helps you in every data loss recovery situation, regardless of the size or format of the file. You can use this powerful tool to recover images, video files, audio files, documents, and more from Macs, SD cards, external hard drives, memory cards, and cameras without running into issues. Mac Trash Recovery is possible even after emptying the Trash Bin on your Mac.
To get your lost data back, all you need to do is follow the steps given below:
Step 1. Select the location to scan
Launch EaseUS Data Recovery Wizard for Mac and choose the hard drive, SSD, SD card, USB flash drive, or TF card where you lost data. Click "Search for lost files" to start scanning.

Step 2. Filter lost Mac data
The software will automatically scan for lost data on MacBook/iMac. When the scan completes, filter wanted data through the "Type" and "Path" buttons.

Step 3. Recover lost data or files
Double-click a file to preview it. Then, click the "Recover" button to restore the lost data to another place.

Summary
Target Disk Mode is an excellent way to transfer data, but it can also be a headache if it stops working correctly. Luckily, we have covered the best solutions in this article to help you quickly fix the Target Disk Mode problems.
Regarding keeping your data safe in concern, we have discussed a professional and functional data recovery tool, "EaseUS Data Recovery Wizard for Mac", to help you recover your data. So, what are you waiting for? Check out the fantastic solutions and fix your Mac Target Disk Mode problems without losing your Mac data.
Target Disk Mode Not Working FAQs
We hope this article could address all of your questions regarding Target Disk Mode issues. However, we have prepared some FAQs for you if you still have any doubts or questions. To clear up any confusion, check out the FAQ below.
1. What can my Mac do in Target Disk Mode?
While in the Target Disk Mode, your Mac's drive acts as an external storage device. So you can easily access, partition, mount, and even format the Mac drive that has been booted into the Target disk Mode. In Intel-based Macs, you can transfer the data through Thunderbolt Bridge if the Migration Assistant fails to work.
Moreover, here's a compiled list of all the possible tasks that Target Disk Mode can easily carry out:
- For file transfer between 2 Macs.
- To boot a Mac using another Mac.
- To Migrate your files to a new Mac from an older one.
- If your Mac is unbootable, you can use Target Disk Mode to run Mac First Aid and repair its disk.
- You can get your files off if your MacBook is not turning on.
2. How to recover data from Mac with a broken screen in Target Disk Mode?
To recover data from a Mac with a broken screen, you need two Macs and a cable to connect both. Now follow the steps given below:
- Connect the Mac with the broken screen to the other Mac.
- Shut Down your Mac with the broken screen.
- Turn on the other Mac and enter Target Disk Mode by pressing the "T" key.
- Click the disk icon on the new Mac to recover data from the broken Mac to the new one.
We hope you have successfully recovered the data to your new Mac from the one with the broken screen.
3. How do I fix Target Disk Mode on Mac?
You can fix Target Disk Mode on your Mac in the following easy ways:
- Try updating or reformatting your macOS
- Try changing the Finder preferences
- Make sure the cables and ports that you are using are working fine.
- You can also disable FileVault encryption to fix Target Disk Mode.
- Make sure your Mac's Firewall password is turned off.
4. Does Mac Target Disk Mode work with USB?
You can find the Thunderbolt 3 port in your Mac using the same form factor as the USB-C. Moreover, every Thunderbolt 3 port in your Mac resembles the functioning of a USB-C/ USB port. This makes it safe to say that a USB-3/ USB can be used on your Mac while working in Target Disk Mode.
Was This Page Helpful?
Dany is an editor of EaseUS who lives and works in Chengdu, China. She focuses on writing articles about data recovery on Mac devices and PCs. She is devoted to improving her writing skills and enriching her professional knowledge. Dany also enjoys reading detective novels in her spare time.
Related Articles
-
Laptop Turns On Then Off Immediately (Quick Fixes)
![author icon]() Larissa/2025-07-04
Larissa/2025-07-04 -
SSD Not Detected in BIOS | Top 8 Ways to Fix🔥
![author icon]() Jerry/2025-07-04
Jerry/2025-07-04 -
How to Fix Mac Flashes Folder with Question Mark on Startup? [macOS 13/12/11 Applicable]
![author icon]() Jaden/2025-09-17
Jaden/2025-09-17 -
[Fixed] The File Is Corrupted and Cannot Be Opened in Excel/Word
![author icon]() Tracy King/2025-07-04
Tracy King/2025-07-04
EaseUS Data Recovery Services
EaseUS data recovery experts have uneaqualed expertise to repair disks/systems and salvage data from all devices like RAID, HDD, SSD, USB, etc.