If you preinstalled a game, you might experience a Steam unpacking slow issue when installing it. Of course, this problem can arise in other situations as well. In this article, you can learn how to solve this problem:
Let's learn more details about Steam unpacking slowly and learn why this issue appears on PC.
Overview of Steam Unpacking Slow Issue
Many Steam users have complained that they are experiencing slow Steam unpacking. This problem mainly occurs in the following two situations:
Case 1. You preinstalled a game
When you preinstall a game and get the decrypted file, but if your computer's hard drive is slow and the network speed is fast, Steam will also be stuck in the unpacking process for a while after the download is complete.
Case 2. You update the game
This update is essentially small but unpacks a huge file. As a result, unpacking is slow, and sometimes you need to have 30GB free to apply a 200MB update.
Next, we will learn how to remove this issue, and here, I list some other issues you may be concerned about. Click them to get more details:
How to Fix Steam Unpacking Slow Issue - 7 Efficient Ways
The unpacking process is normal, but why is Steam unpacking so slow? We found that the slow decompression problem of Steam is mainly related to the hard disk. We'll focus on how to solve this problem in this part.
- Fix 1. Pause Extraction or Restart Steam
- Fix 2. Set Steam's Priority to High
- Fix 3. Make Sure There Is Enough Free Space
- Fix 4. Defrag HDD or Optimize SSD
- Fix 5. Delete the Files in the Depotcache Folder
- Fix 6. Check the Drive for Errors
- Fix 7. Upgrade to SSD
Now, let's start to learn the first fix to remove this issue.
Fix 1. Pause Extraction or Restart Steam
Steam unpacking slowly can also be caused if you have too many apps open, so logging out of Steam and back in or restarting the Steam client may help resolve the issue. This is the most basic troubleshooting method.
How to Fix Steam Not Enough Disk Space Error [Updated]
What should we do when the Steam not enough disk space error occurs? How to remove this error? Don't worry; below, you'll learn how to free up disk space on Steam and extend your partition directly using third-party free software.
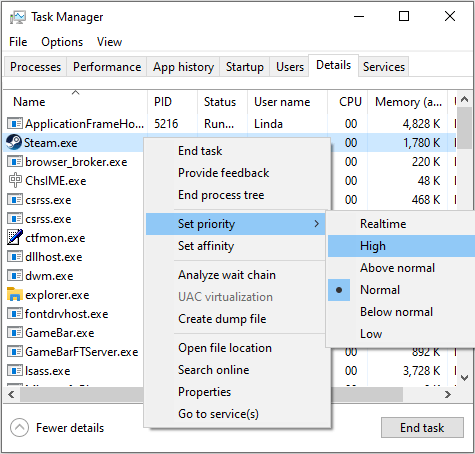
Fix 2. Set Steam's Priority to High
If you set Steam's priority high, the system will allocate more resources to Steam to increase its speed. Here is the guide:
Step 1. Right-click an empty area of the Windows taskbar and click open Task Manager from the context menu.
Step 2. Skip to details. Find the Steam.exe program, right-click on it, and navigate to Set priority > High.
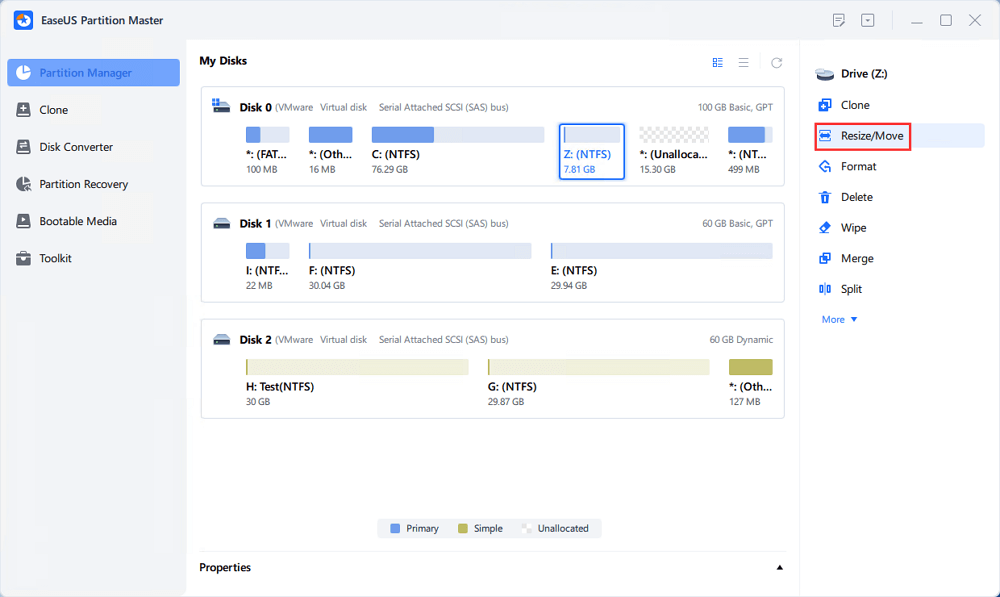
Fix 3. Make Sure There Is Enough Free Space
In order for the unpacking process to go smoothly, you should ensure that the drive where Steam is installed has enough free space. To do this, you can delete some unnecessary files. But if you don't want to delete the files and you have enough free space on the other drive, you can solve the problem by extending the drive where Steam is installed. Then, EaseUS Partition Master can help you expand the drive easily. Also, this feature is free. Here is the guide:
Step 1. Locate the Target Partition.
Go to Partition Manager, locate the target partition and select "Resize/Move".
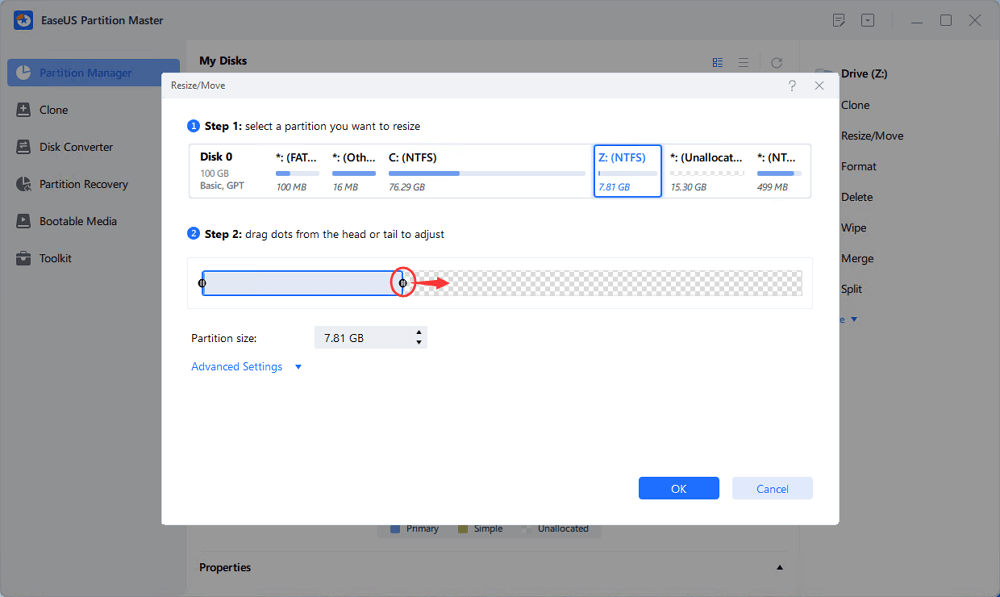
Step 2. Extend the Target Partition.
Drag the partition panel rightward or leftward to add the unallocated space into your current partition, or you can click click "fill in all unallocated" to allocate all space to the target partition. Then, click "OK" to confirm.
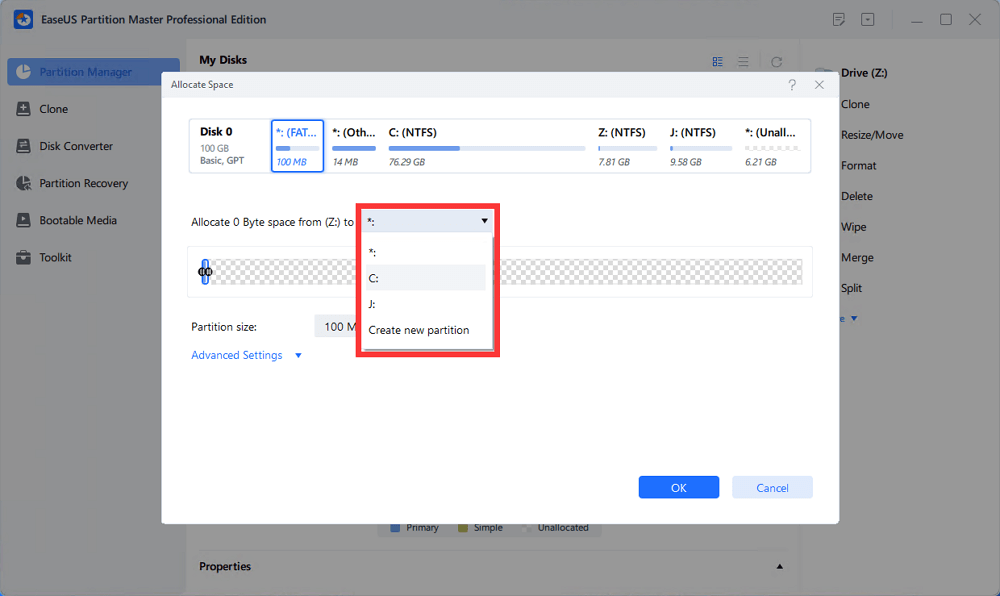
Extra Option: Get Space from Another Drive
If there is not enough unallocated space on your disk, right-click on a big partition with enough free space, select "Allocate space".
Then select the target partition that you want to extend at the allocate space to column.
Step 3. Execute Operations to Extend Partition.
Drag the dots of the target partition into the unallocated space and click "OK".
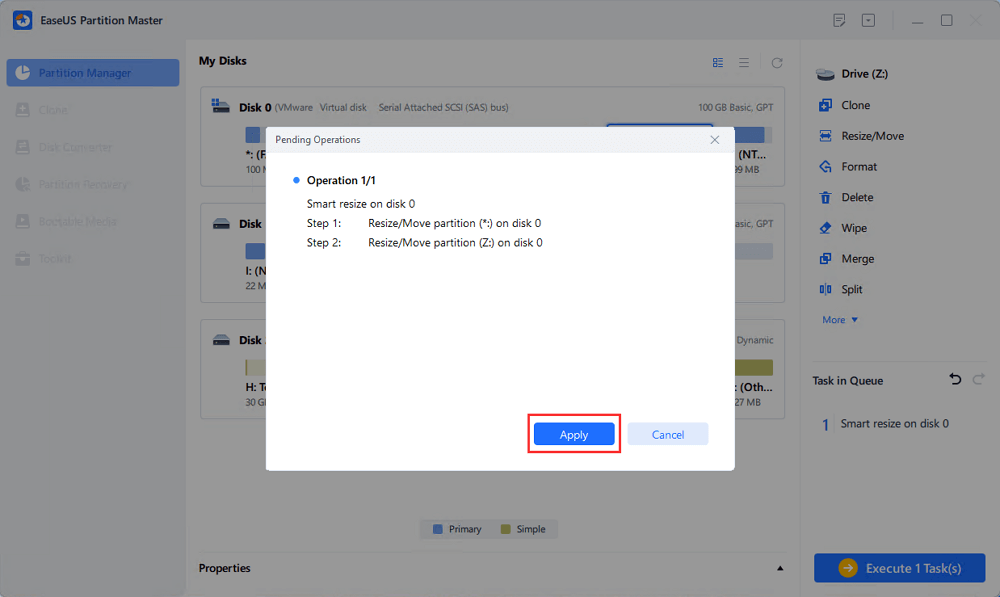
Then Click the "Execute Task" button and click "Apply" to keep all the changes.
Besides what we've talked about above, EaseUS Partition Master still can do a lot to help free up hard drive space, such as:
- Free up space on C drive
- Move unallocated space to C drive
- Format (new) SSD to get usable space
Download EaseUS Partition Master to manage your hard drives or SSDs now.
Fix 4. Defrag HDD or Optimize SSD
Things become different when you use an HDD or an SSD, so we divide this fix into two parts.
Guide 1: Defrag HDD
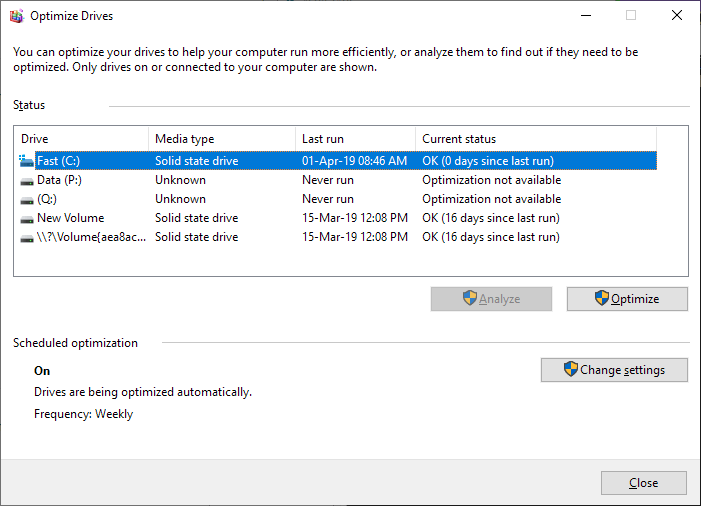
Here are the steps of how to defrag HDD:
Step 1. Type "optimization" into the Windows search box.
Step 2. Click the Defragment and Optimize Drives icon to run it.
Step 3. Select a disk and click "Optimize" to get a better performance.
Guide 2: Optimize SSD
If you use an SSD, defragmentation is not for you. Instead, you should enable the TRIM feature to trigger the GC (garbage collection) process. Here are the steps:
Step 1. Click open Windows search and type cmd on the box. Choose the command prompt and select "Run as administrator."
Step 2. Type the following command line and press Enter: fsutil behavior query disabledeletenotify
Step 3. Then check the command line and check if the TRIM is enabled on SSD.
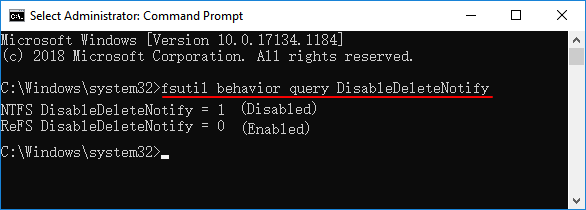
NTFS DisableDeleteNotify = 0 - This means "TRIM is enabled."
NTFS DisableDeleteNotify = 1 - This means "TRIM is disabled."
You can continue to type the following command line to enable it if the TRIM technology is not enabling: fsutil behavior set disabledeletenotify 0
Fix 5. Delete the Files in the Depotcache Folder
The Steam "Depotcache" folder may store unwanted temporary data on your computer that takes up valuable space. Slow Steam unpacking issues may also be resolved by deleting files in the Steam "Depotcache" folder. Here is the guide:
Step 1. Close Steam on your PC.
Step 2. Go to the following path: C:\Program Files (x86)\Steam\depotcache. The path varies depending on where your steam is installed.
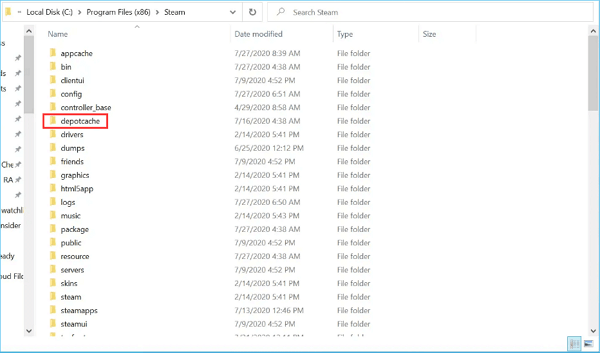
Step 3. Delete the files in the "Depotcache" folder.
Fix 6. Check the Drive for Errors
Windows' built-in error-checking tools can repair file system corruption and bad logical sectors that can prevent your PC from functioning properly. However, it can be difficult. Hence, we recommend you use EaseUS Partition Master to help. Its "disk surface test" can help check drive errors efficiently. Here is the error-checking guide:
Step 1. Open EaseUS Partition Master. Go to Toolkit and select "Bad Sector Scan."
Step 2. Tick "Scan Disk" and choose the target disk from the drop-down menu.
Step 3. Click "Scan" to apply the bad sector scaning process.
Fix 7. Upgrade to SSD
If you are using an HDD, upgrading to an SSD may resolve the Steam unpacking slow issue. However, when you replace HDDs with SSDs, you may want to clone all the data on the original disk to the new SSD. In this circumstance, turn to EaseUS Partition Master. Here are the steps:
Step 1. Select the source disk.
- Click the "Clone" from the left menu. Select the "Clone OS Disk" or "Clone Data Disk" and click "Next".
- Choose the source disk and click "Next".
Step 2. Select the target disk.
- Choose the wanted HDD/SSD as your destination and click "Next" to continue.
- Read Warning message and confirm "Yes" button.
Step 3. View the disk layout and edit the target disk partition size.
Then click "Continue" when the program warns it will wipe out all data on the target disk. (If you have valuable data on the target disk, back up it in advance.)
You can select "Autofit the disk", "Clone as the source" or "Edit disk layout" to customize your disk layout. (Select the last one if you want to leave more space for C drive.)
Step 4. Click "Start" to start the disk cloning process.
You may also like the following:
Conclusion
Did this article help you? Did any of these methods work for you? If you have solved your problem through these methods, don't hesitate to share this article with more people in need. Also, in the next section, I will list a few questions related to the topic we discussed today. Please continue reading.
Steam Unpacking Slow FAQs
Do you remove the Steam unpacking slow issue? This part gives some other questions you may be concerned about. Check the answers below to help:
1. What does Steam unpacking mean?
On Steam, unpacking is a common process. The unpacking process can be visible or invisible when you preload, update or install a game. However, if something goes wrong or the hard drive's pace is slow, a slow Steam unpacking issue will develop.
2. How to speed up the Steam unpacking process?
There are many ways to speed up the Steam unpacking process; the ways are as follows:
- Pause extraction or restart Steam
- Set Steam's priority to high
- Make sure there Is enough free space
- Defrag HDD or optimize SSD
- Delete the files in the Depotcache folder
- Check the drive for errors
- Upgrade to SSD
3. Why does unpacking the game take so long?
The machine may take longer because it has to decompress a large amount of data without data loss or data corruption and then install the decompressed (full-size) file. The main causes are as follows:
- SSD/HDD slow read/write speed.
- Some glitches in the Steam client.
- The update or installation package is too big.
Was This Page Helpful?
Sherly joined EaseUS in 2022 and she has always loved writing articles and enjoys the fun they bring. She receives professional training here, focusing on product performance and other relative knowledge. She has written over 200 articles to help people overcome computing issues.
Related Articles
-
Half Sword Save File Location: How to Locate & Backup It
![author icon]() Larissa/2025-01-24
Larissa/2025-01-24 -
My Computer Turns on but the Screen Is Black Windows 10, How to Fix
![author icon]() Jaden/2025-01-24
Jaden/2025-01-24 -
Steam Quit Unexpectedly Mac? 6 Methods to Fix it [macOS Ventura/Monterey/Big Sur]
![author icon]() Jaden/2025-02-25
Jaden/2025-02-25 -
How to Fix Active Partition Not Found in Windows [Full Guide]
![author icon]() Cici/2025-01-24
Cici/2025-01-24
EaseUS Data Recovery Services
EaseUS data recovery experts have uneaqualed expertise to repair disks/systems and salvage data from all devices like RAID, HDD, SSD, USB, etc.