Depend on your own case and pick up a solution within the following sections:
If you see a process called Service Host: Local System is using up all of your computer or laptop resources in Task Manager in Windows 10, 8 or 7, it's time to read this post from the beginning to the end and pick up a solution to stop Service Host: Local System from taking high disk usage, CPU usage, memory usage or too much network bandwidth.
What is Service Host: Local System?
By pressing Ctrl + Alt + Del, you can easily get the quick access to Task Manager. Stay on the first Process tab, by scrolling down you should find many Service Host related processes, such as Service Host: Local System (Network Restricted), Service Host: Local Service, Service Host: Network Service, etc.
From what we learned, Service Host: Local System is the major cause of Windows 10 100% disk usage in Task Manager. So, what is exactly the term and why is it consuming resources out of control? Let me tell you.
Service Host: Local System is a bundle of system processes, or call it a generic service hosting container. It includes processes including Windows Auto Update and many required system services would be running in it. That's why it's very likely to take up huge disk, memory, RAM and even network bandwidth, draining computer resources, especially after getting a Windows 10 update.

How to solve Service Host: Local System high disk usage, CPU usage or memory usage?
Solution 1. Restore hard drive health and optimize system
First. Download EaseUS partition manager on your computer or laptop and launch it after install.
Next. Go to complete the whole procedure of hard drive repair and system optimization with software.
# To restore hard disk health back to normal state:
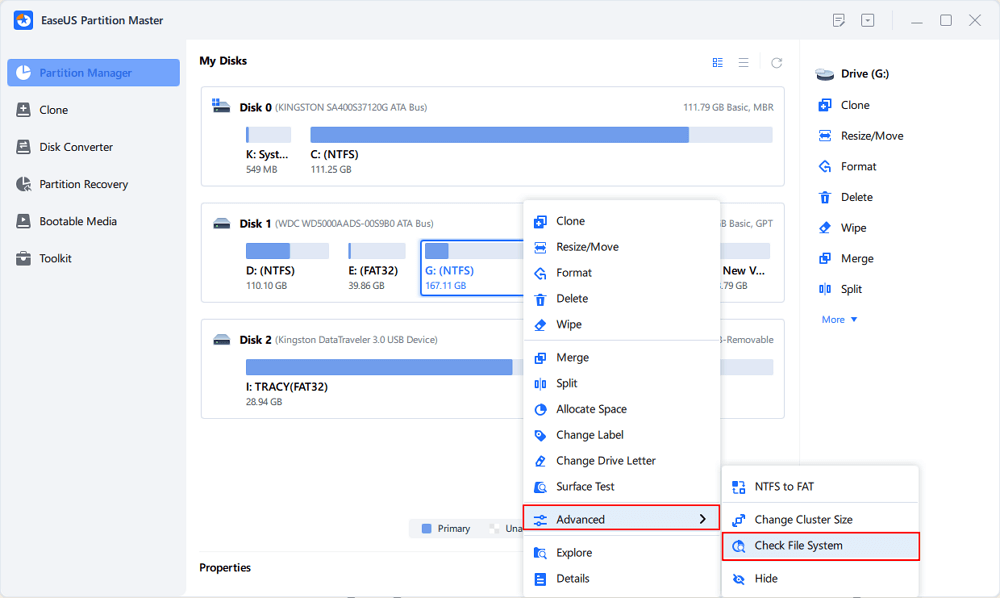
Step 1. Open EaseUS Partition Master on your computer. Then, locate the disk, right-click the partition you want to check, and choose "Advanced" > "Check File System".
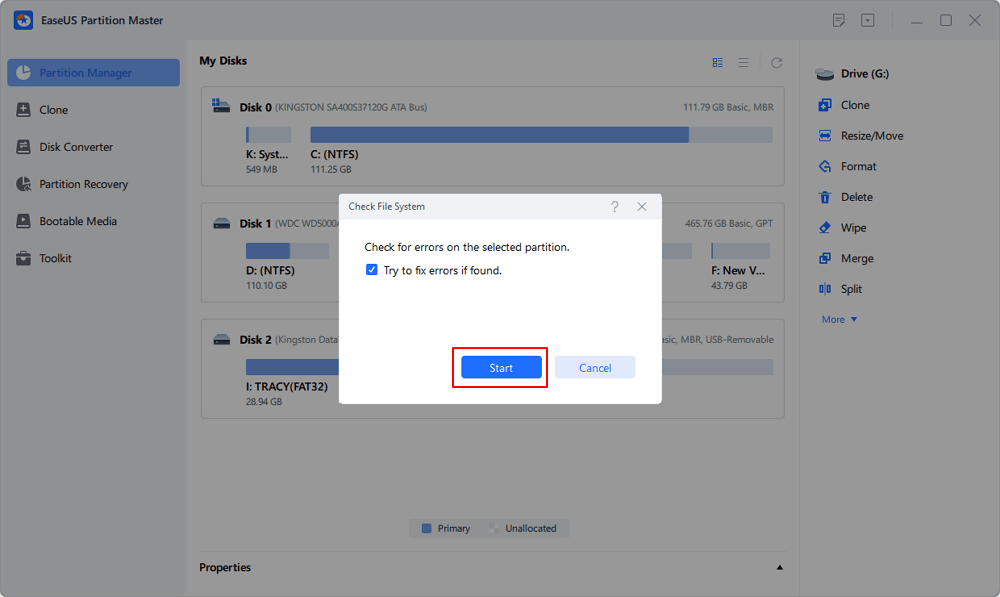
Step 2. In the Check File System window, keep the "Try to fix errors if found" option selected and click "Start".
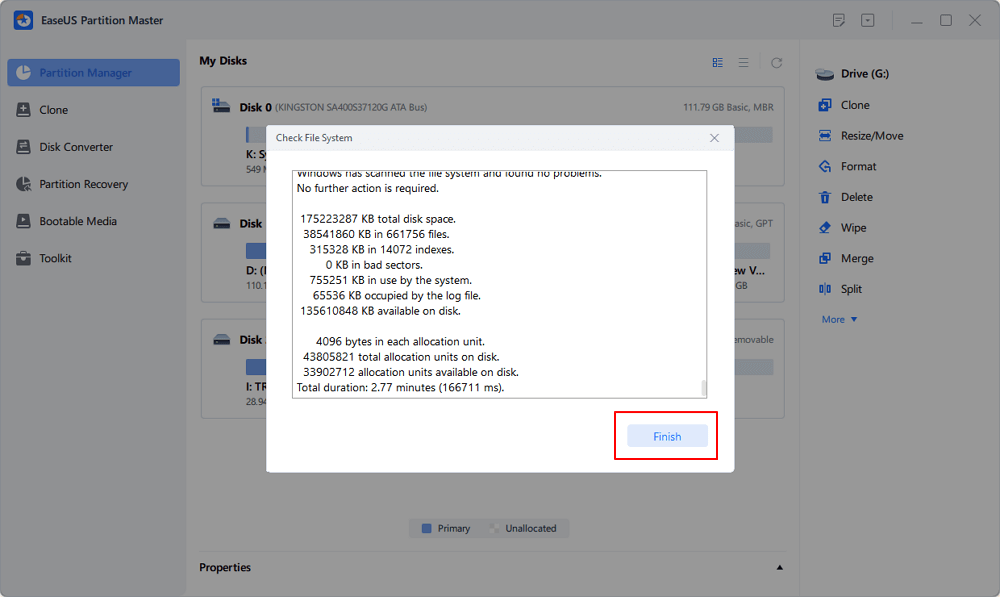
Step 3. The software will begin checking your partition file system on your disk. When it completes, click "Finish".
Let the software automatically check and repair hard drive errors and system file errors that happen to eat away all your available resources.
# Continue to optimize your computer by removing redundant network data, files and system logs
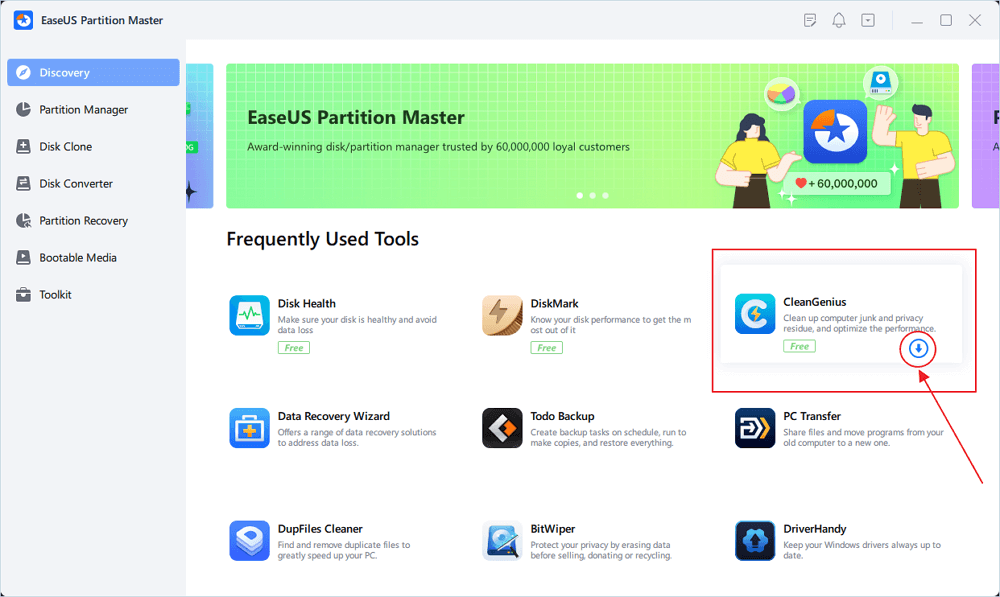
Disk Cleangenius in EaseUS Partition Master discovery section offers you a free option in cleaning up system junk files. Junk File Cleanup, Large File Cleanup and Disk Optimization, all are working solutions to get rid of 99% or 100% usage of disk, CPU, and memory. Here are the detailed steps:
Step 1. Download and install EaseUS Partition Master Suite on your PC. Click to download PC Cleaner on panel.
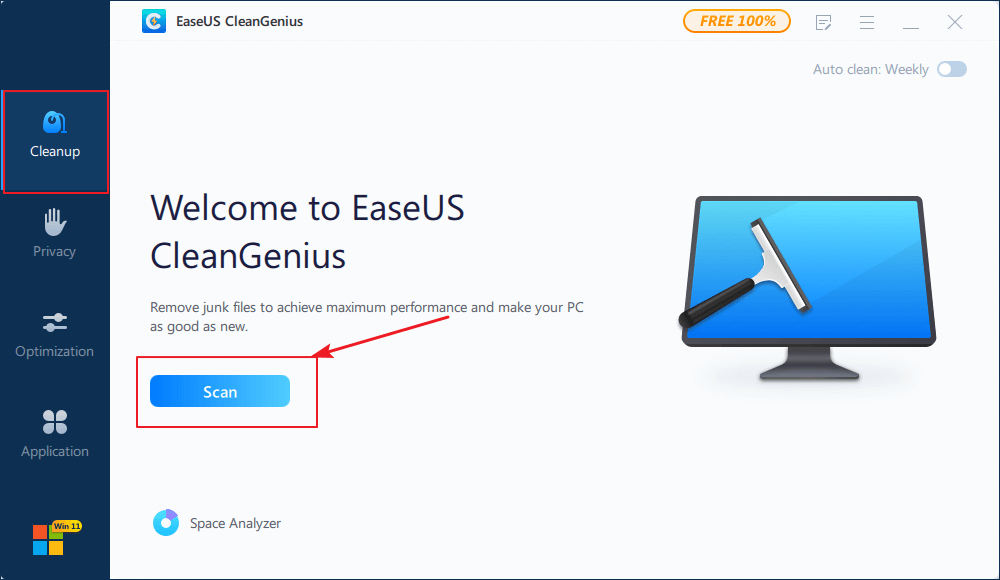
Step 2. Install EaseUS CleanGenius on your PC. To begin with, navigate to "Cleanup" and click "Scan."
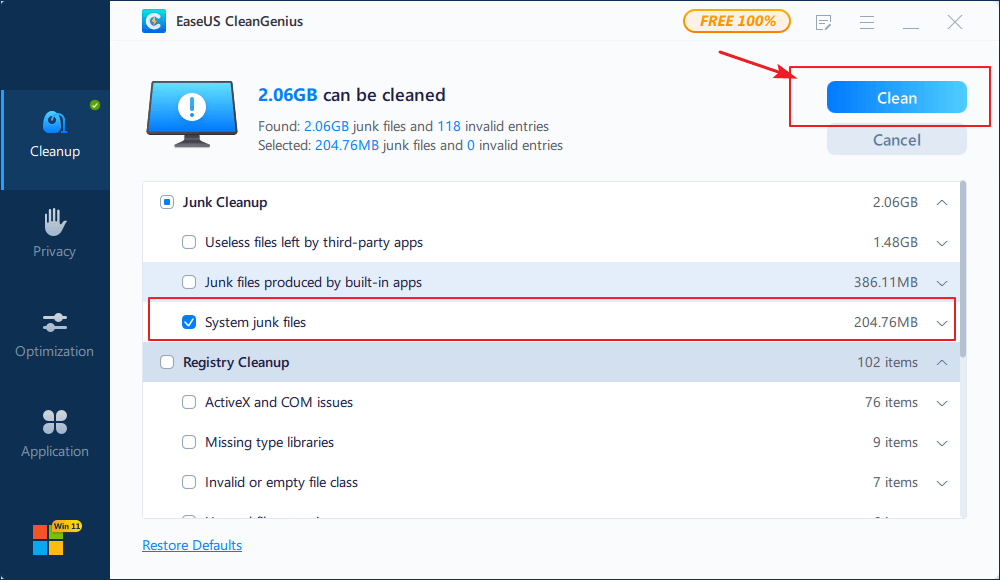
Step 3. EaseUS CleanGenius will start immediately to scan all the useless files, select system junk files and invalid entries, and click "Clean" over all your PC.
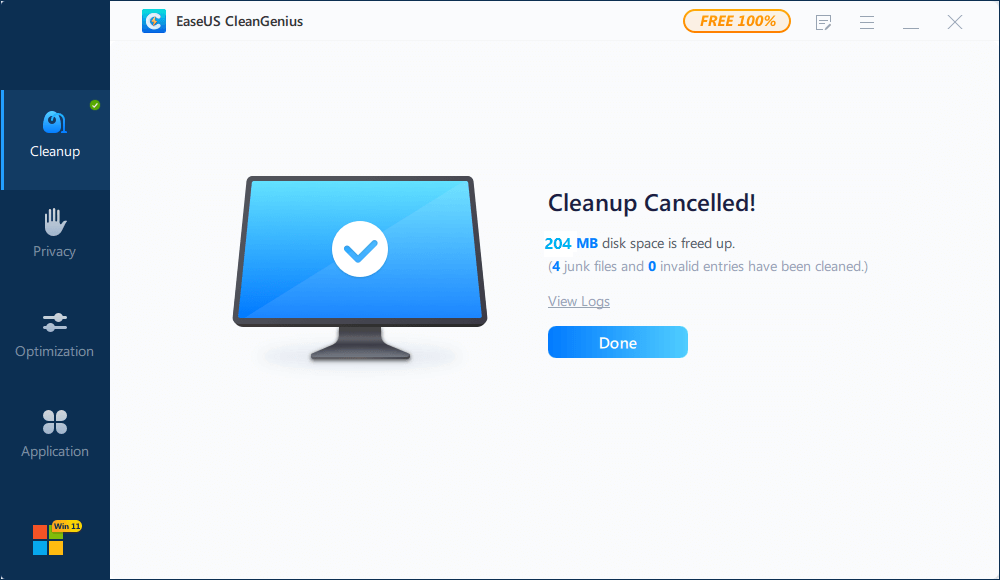
Step 4. Once completed, you can see clearly how many MBs or GBs of data are cleaned. Click "Done" to finish the process.
Solution 2. Directly disable Service Host Local System tasks
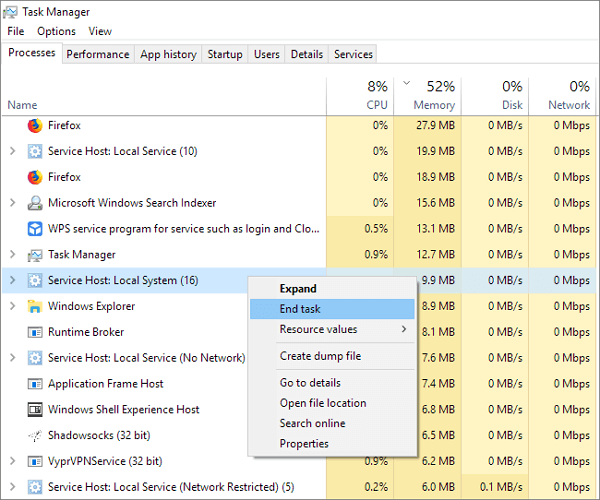
Step 1. Assuming that you're in the Task Manager. Expand the Service Host: Local System to see what items are using more disk, CPU or memory clearly.
Step 2. Once identified the items that are hogging your computer resources, right-click on it and select End Task.
Step 3. Repeat many times until all suspicious tasks were suspended. Meanwhile, keep an eye on the CPU, disk or memory tabs, see if the percent number is decreasing.
Step 4. Once you have identified the item that is causing the problem, right click on it and select the Open Services option.
Step 5. Go through the services on Task Manager until you find the service with the same name and right click on it. Then click Stop.
Step 6. Once you have found the service that is causing the problem, then double click on it, expand the Startup type menu and click on Disabled. Then, click on the Apply button and the OK button.
Solution 3. Disable Backup Intelligent Transfer Service
Step 1. At Windows Task Manager, click Services tab.
Step 2. On the Services window, at the bottom, you will find Open Services button. Just click on it.
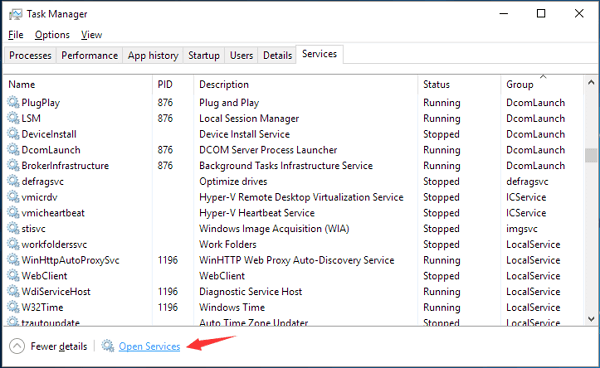
Step 3. A new window will open up with a huge list of all the Services. Find the service called Background Intelligent Transfer Service there. Right-click on it and click Stop.
Solution 4. Disable Superfetch Service
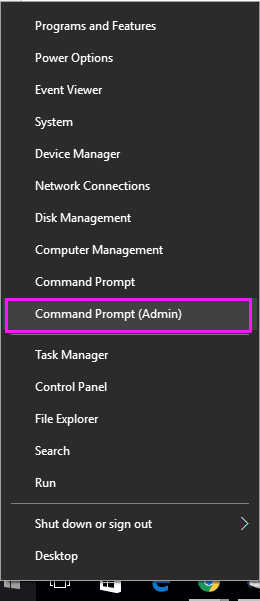
Step 1. Press Windows + X keys at the same time. This will bring up a menu, on which to click Command Prompt (Admin).
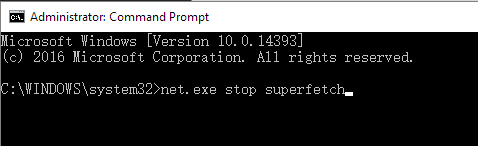
Step 2. Now you open the Command Prompt. Type the command: net.exe stop superfetch and press Enter.
Solution 5. Disable Automatic Updates
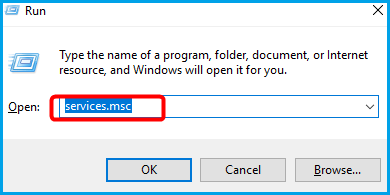
Step 1. Press "Windows + R" keys to openthe "Run" dialog, type: services.msc in the box and press enter.
Step 2. A window then pops up with a list of Services. Find Windows Update Service. Double click on Windows Update service and Windows Update Service Properties Screen will pop up.
Step 3. Locate the Startup type under General tab and select Disabled from the drop-down list. Click OK to apply the change.
Step 4. After disabling Windows Update permanently, follow the solution 2 to end task of Service Host: Local System.
Was This Page Helpful?
Updated by Tracy King
Tracy became a member of the EaseUS content team in 2013. Being a technical writer for over 10 years, she is enthusiastic about sharing tips to assist readers in resolving complex issues in disk management, file transfer, PC & Mac performance optimization, etc., like an expert.
Jean is recognized as one of the most professional writers in EaseUS. She has kept improving her writing skills over the past 10 years and helped millions of her readers solve their tech problems on PC, Mac, and iOS devices.
Related Articles
-
How to Erase All Content and Settings on Mac [macOS Ventura/Monterey]
![author icon]() Dany/2026-06-17
Dany/2026-06-17 -
⚠️Update Apple ID Settings Stuck on Your Mac? 6 Solutions to Fix It
![author icon]() Brithny/2026-06-12
Brithny/2026-06-12 -
Disk Utility First Aid Process Has Failed [with 5 Proven Ways to Fix It]
![author icon]() Brithny/2026-06-17
Brithny/2026-06-17 -
How to Fix Mac Flashes Folder with Question Mark on Startup? [macOS 13/12/11 Applicable]
![author icon]() Jaden/2025-09-17
Jaden/2025-09-17
EaseUS Data Recovery Services
EaseUS data recovery experts have uneaqualed expertise to repair disks/systems and salvage data from all devices like RAID, HDD, SSD, USB, etc.