Have you been caught up in the Windows 10 Start menu critical error that crashes your Start menu, blocks your access to the installed apps and Settings, or freezes your computer? Take it easy! Read this page to stop such a critical error and fix the access problem.
The received error message should be like this:
"Critical Error – Start menu and Cortana aren't working. We'll try to fix it the next time you sign in."

"Critical Error – Your Start menu isn't working. We'll try to fix it the next time you sign in."

How to Fix Windows 10 Start Menu Critical Issue
When you first came across the Windows 10 Start button not working problem due to the critical error message, do not hesitate to refresh your computer once or twice, or directly turn it off and restart. That's the safest and quickest way to determine how serious a problem you're getting.
But many people are not lucky to tackle the critical error happening to the Start menu and Cortana so easily. Next, we have some general troubleshooting for you to move on.
Fix 1. Install the Recent Windows 10 Update
Since the critical error prevents you from accessing the Settings option in the Start, let's pass round the Start and get to the place where the update is available.
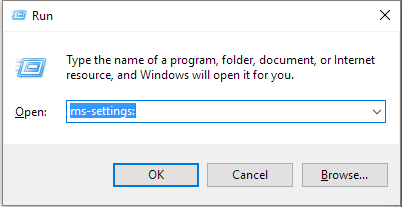
Step 1. On your keyboard, press the Windows + R keys together to bring up the Run box, type ms-settings: in the empty box and press enter.

Step 2. On the Settings panel, click Update & security and then Check for updates. If you're running Windows 10 version 1511, you should navigate to System > About > Version. Follow the wizard to install the most recent update that is currently available on your PC.
Fix 2. Download the Start Menu Troubleshooter
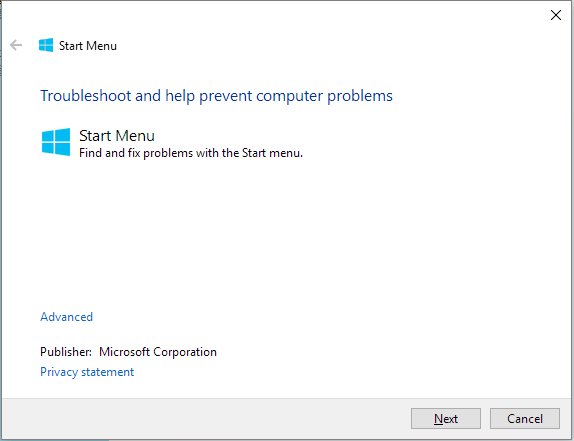
You should know that the Start menu issue is always there, accompanying each Windows 10 update, so you're alone. And Microsoft has developed a troubleshooter to help at least temporarily find and fix problems with the Start menu. Click the download link for Start menu troubleshooter and run it as the wizard instructs.
Start Menu Troubleshooter Download

Fix 3. Boot Into Safe Mode and Then Return to Normal Mode
It seems that booting into safe mode works the most because quite a lot of users found that booting into safe mode and then returning into normal mode removes the critical error, though still a few of them said that it's just a temporary fix, after some time the critical error came back again! Whatever, it's worth a try.
Step 1. When Windows 10 starts, press Windows Key + L to log out.
Step 2. Click the "Power" button in the bottom right corner, hold "Shift" on your keyboard and click "Restart".
Step 3. Your computer should now restart to boot options. Go to "Troubleshoot" > "Advanced options" > "Startup Settings". Click the "Restart" button.
Step 4. Once your computer restarts again, press F5 to access "Safe Mode" with Networking.
Step 5. Just by entering the Safe Mode your problem should be resolved. All you have to do now is to restart your computer.
In addition to the three general ways of Start menu troubleshooting, be aware of your antivirus software, it's said that third-party antivirus software is generating the critical error of the Start menu unnoticeably. Try to uninstall it and then reinstall.
Furthermore, there are some other suggestions from experienced users who solved their problem. The upcoming parts are somewhat higher-leveled, so you must show some patience and follow the detailed guide in earnest.
Fix 4. Restore System to an Earlier State Point
The last unexpected resolution has to be implemented if none of the solutions aforementioned solved the Start menu critical error in Windows 10. Comparing with the temporary fixes, restoring your computer to a previous version seems to be the most workable, especially you're so fed up with the repeatedly crashing Start menu with the critical error prompt.
- Tip
- since revert your current operating system to an earlier state would erase data on the system drive, it's highly advised for you to create a backup of C drive data, especially lots of installed applications. To quickly do a software backup without reinstalling, you can try EaseUS Todo PCTrans, the best PC transfer software to transfer applications on the C drive to a second drive. It's the safest way to do a system restore with a backup at hand.
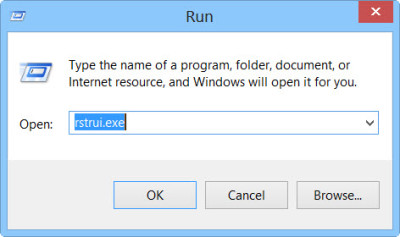
Step 1. Press Windows key + R to bring up the Run box and type rstrui.exe and hit Enter to open System Restore.

Step 2. The System Restore window will open. Click on Next.
Step 3. Select a Restore Point which you want to restore your computer to, and click Next.
Step 4. Follow the wizard to confirm all your selections to take effect.
Was This Page Helpful?
Daisy is the Senior editor of the writing team for EaseUS. She has been working at EaseUS for over ten years, starting as a technical writer and moving on to being a team leader of the content group. As a professional author for over ten years, she writes a lot to help people overcome their tech troubles.
Jean is recognized as one of the most professional writers in EaseUS. She has kept improving her writing skills over the past 10 years and helped millions of her readers solve their tech problems on PC, Mac, and iOS devices.
Related Articles
-
Top 8 Ways to Fix Kernel Mode Heap Corruption BSOD Error
![author icon]() Brithny/2025-07-07
Brithny/2025-07-07 -
BitLocker Recovery Screen: How to Fix It After Windows Booting
![author icon]() Jaden/2025-07-04
Jaden/2025-07-04 -
How to Fix 'Switch User' Option Missing in Windows 10/11
![author icon]() Daisy/2025-07-04
Daisy/2025-07-04 -
How to Get Windows 10 for Free [Full Guide in 2025]
![author icon]() Jean/2025-07-04
Jean/2025-07-04
EaseUS Data Recovery Services
EaseUS data recovery experts have uneaqualed expertise to repair disks/systems and salvage data from all devices like RAID, HDD, SSD, USB, etc.