Imagine doing something working on your computer, like writing an important document, and you are minutes away from your deadline. But suddenly, your computer crashes, and all you see is a blue screen with an APC Index Mismatch error or APC_INDEX_MISMATCH code appearing.
Typically, the BSOD or Blue Screen of Death occurs due to faulty hardware, incorrect configurations, or incompatible drivers. Sadly, you will lose some work in this situation, but it is fixable as long as you know the main problem area. So, you must identify and then disable/remove it or try other solutions depending on the cause.
Here are some top fixes you can carry out when this error prompt appears on Windows 10.
Fix 1. Uninstall Update
The APC Index Mismatch windows 10 issue can occur if you use an outdated system. However, it is also possible that the problem occurs after you have updated your Windows version due to unforeseen errors or incompatibility issues.
In this situation, which is relatively rare, you have to uninstall the new update. To do so, you must first check if the error occurred after upgrading your device. Then, downgrade to the previous version and wait until the new updates come up.
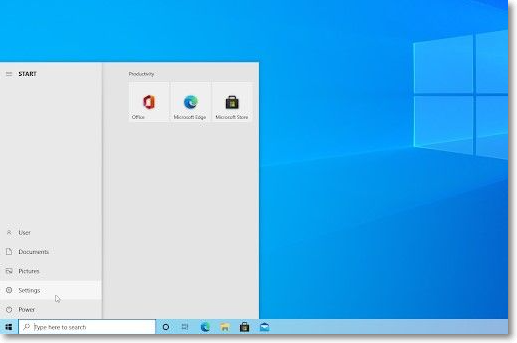
Step 1. Tap on the Windows icon on your screen at the bottom left to open the Start menu. Select Settings.
Or, you can click on Win + I keys on the keyboard. Another alternative way is typing Settings in the text field and clicking on the first choice.
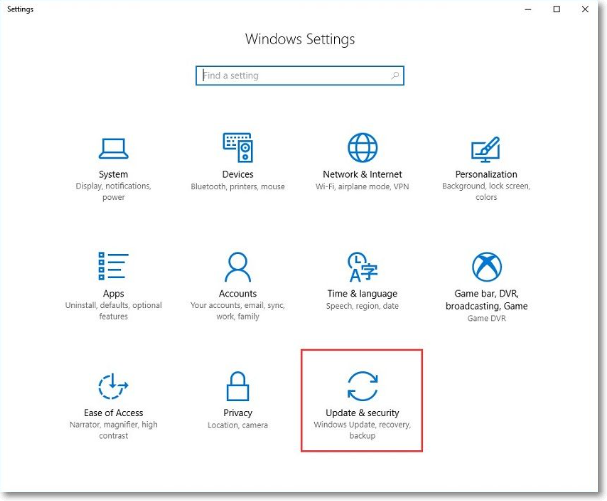
Step 2. Among the tiles that appear, choose Update & Security.
Step 3. Next, click on the Windows Update option on the left-hand-side navigational bar.
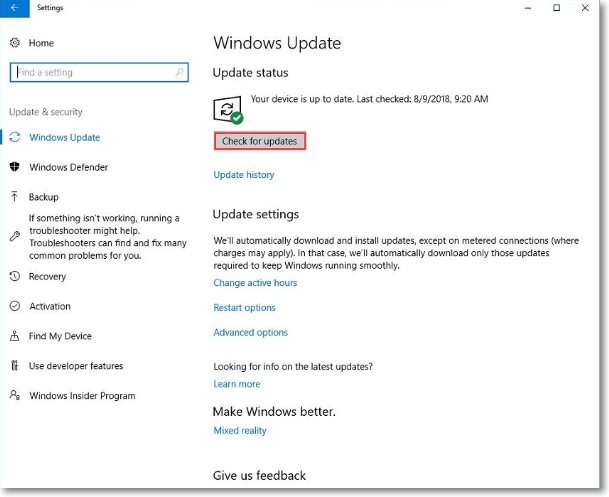
Step 4. Press the "View update history" in the next window.
Step 5. Tap on the Uninstall Updates option and wait for the PC to remove all recently installed updates.
Fix 2. Try to Roll Back to A Previous Version of Windows 10
After users upgrade their computer from an older version, e.g., Windows 8.1 to Windows 10, the older version stays in the hard drive memory. After around 28 days, the retained version information is deleted. So, if the APC Index Mismatch occurs during this phase, you can back your device to the previous version to eradicate the issue.
Step 1. In the computer device is not plugged into the power socket, you should do that first. Then, tap the Next button.
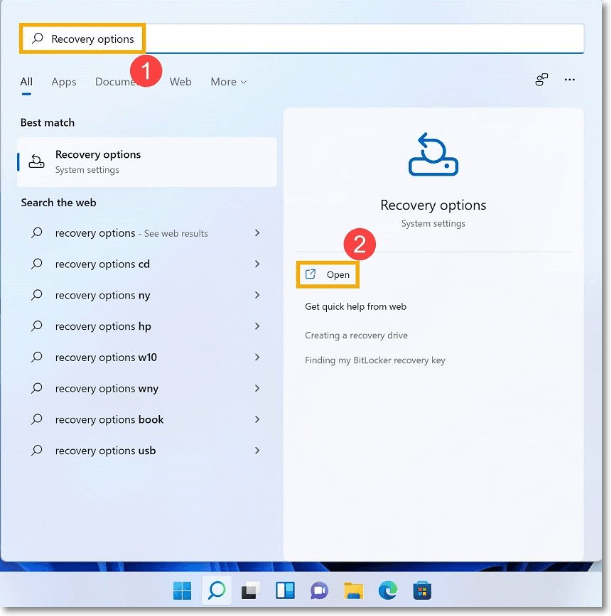
Step 2. Press the Start icon on your homepage taskbar and type in the term "recovery" in the text field.
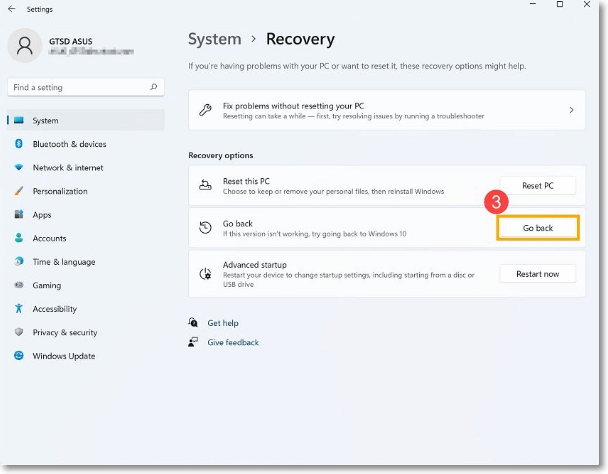
Step 3. Choose "Recovery options (System settings)" next.
Step 4. In the next Recovery screen, tap on Go back to Windows [X]. The [X] here represents whichever previous Windows version your system had.
Step 5. Choose why you will roll back and press the Next button.

Step 6. Tap the Go Back to Windows [X] button. After that, follow all the rollback-based instructions on the screen. When the process completes successfully, your system will automatically boot up to the previous Windows version.
An easier way to roll back to a previous version of Windows is to use EaseUS free system rollback software - EaseUS Todo Backup. Just a few simple actions will get you back to the version you want to roll back.
Fix 3. Check The Drivers in Your Computer
One of the potential causes of the APC Index Mismatch Windows 10 prompt is incompatible connecting devices with the system, e.g., external webcam. This might happen if the installed device pairs poorly with the existing drivers. Therefore, to fix the problem, you should check all the drivers to find the incompatible one and upgrade it.
Step 1. Press the Win + X keys on your keyboard. From the choices, choose Device Manager.

Step 2. Find the recently installed device from the list of drivers. When you see one with a yellow triangle or marked as Unknown Device, right-click on it > Update Driver.
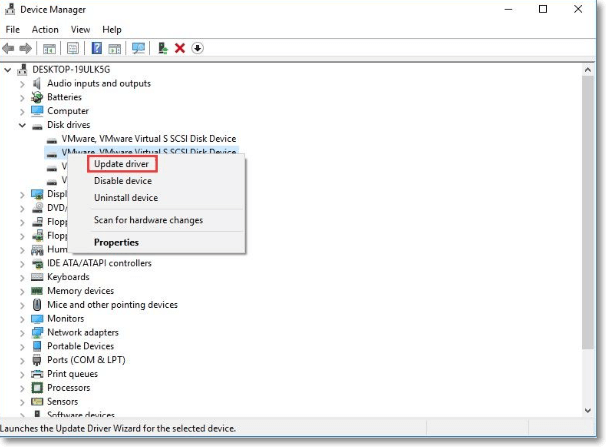
Step 3. Wait until the operating process is complete.
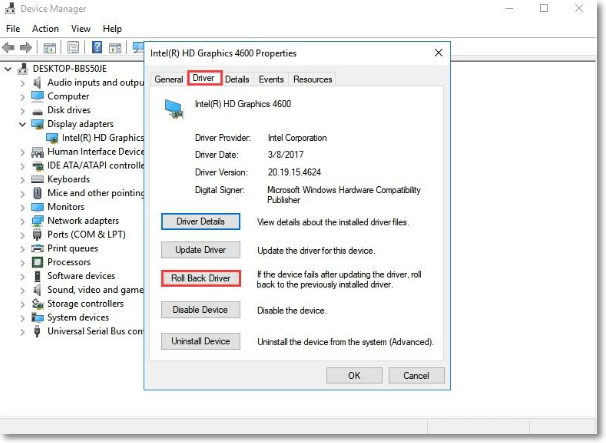
Alternatively, you can roll back the incompatible driver by double-clicking on it and tapping on the Driver tab > Rollback Driver > OK.
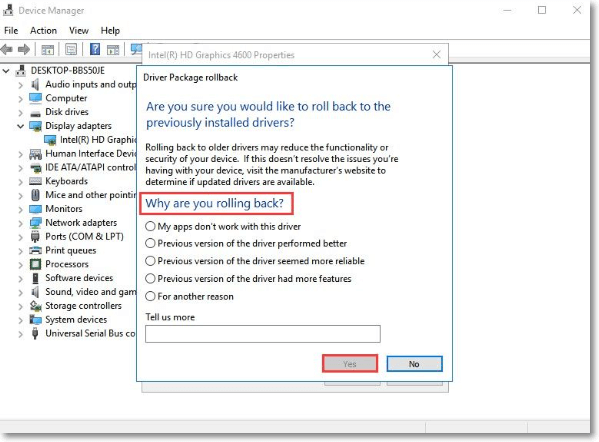
Choose the reason and tap on YES. Then, restart the device.
Fix 4. Check RAM frequency in Task Manager
One of the advanced methods of fixing the APC Index Mismatch issue is to check your RAM frequency through Task Manager. However, remember that this can create system instability if you do not follow the steps correctly. So, choose this solution only if others do not work or if you have the technical skills.
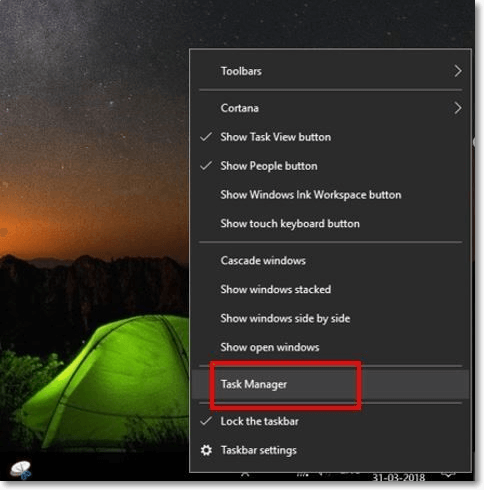
Step 1. Open Windows 10 Taskbar and right-click on it. From the drop-down menu, choose Task Manager.
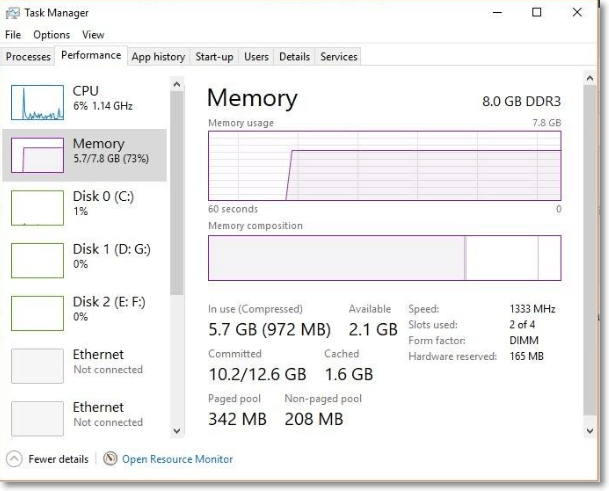
Step 2. In the next window, tap the Performance tab and choose Memory to see RAM-related details like slot used, RAM speed/frequency, total memory used/available, etc.
Sometimes, the APC Index Mismatch occurs due to active Trend Micro tools. This happens due to Virtualization feature issues in the system that disturb the regular functioning of other system tools. You should deactivate this setting from your BIOS.
Fix 5. Disable Virtualization Technology
Sometimes, the APC Index Mismatch occurs due to active Trend Micro tools. This happens due to Virtualization feature issues in the system that disturb the regular functioning of other system tools. You should deactivate this setting from your BIOS.
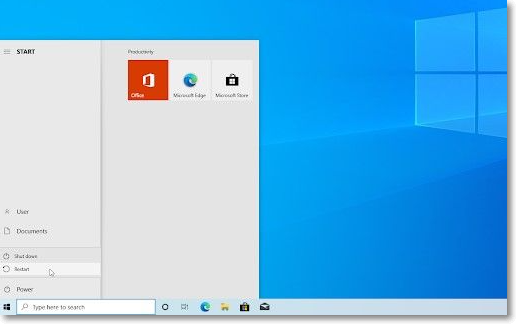
Step 1. Tap on the Windows icon to open Start.
Step 2. Press the Power button > Restart. It will shut down all running functions in the device.
Step 3. While the device is booting, hit F2 on the keyboard. This can differ in some laptop/computer models. Other possible keys include F10, F8, F12, or Del keys.

Step 4. When the BIOS screen opens, tap on Advanced > disable the Virtualization feature. Then, restart your device again.
Fix 6. Reset or Reinstall Windows 10
The last solution to fix the APC Index Mismatch is reinstalling or resetting your Windows 10 PC. Do this step if none of the other keys work. Remember that many system configurations, personal files, and apps can get deleted if you reset your device, so consider this the last resort.
Step 1. Open Start from the Windows icon in the taskbar and choose Settings.
Step 2. Select Update & Security > Recovery.
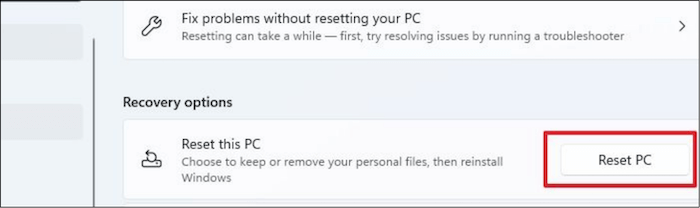
Step 3. When you see the Reset this PC option, tap on Get Started > Remove Everything.
Conclusion
Indeed, there are different tactics you can use to fix the APC Index Mismatch issue on Windows 10. First, it can occur due to incompatible drivers or updates, so you must uninstall them. Check if the cause is more intricate, like a BIOS issue like the Virtualization feature, or reset the whole system if none of the steps fix the problem. Finally, take professional technical support if the hardware issue is more intricate.
Was This Page Helpful?
Daisy is the Senior editor of the writing team for EaseUS. She has been working at EaseUS for over ten years, starting as a technical writer and moving on to being a team leader of the content group. As a professional author for over ten years, she writes a lot to help people overcome their tech troubles.
Related Articles
-
2025 Tips| Could Not Complete Your Request Because of a Program Error Photoshop
![author icon]() Brithny/2026-02-12
Brithny/2026-02-12 -
How to Get Live Wallpapers on Windows 10 [Full Guide]
![author icon]() Daisy/2025-07-04
Daisy/2025-07-04 -
Windows 10 Keeps Restarting or Continuously Reboots? Fix It Now!
![author icon]() Tracy King/2025-07-04
Tracy King/2025-07-04 -
Fix GRUB Loading Error 15, 17, 21, 22 and Recover Data
![author icon]() Jean/2025-12-12
Jean/2025-12-12
EaseUS Data Recovery Services
EaseUS data recovery experts have uneaqualed expertise to repair disks/systems and salvage data from all devices like RAID, HDD, SSD, USB, etc.