MS SQL Server is an enterprise-ready database from Microsoft used by many companies around the world. With this application, you can easily relationally manage the database. Sometimes, in the process of using the database, you need to extract the SQL server database in a text-file format for importing into other data analysis tools. And the most popular is the CSV format. On this page, we will show you the step-by-step guide on how to export MS SQL server database to CSV file using SQL Server Management Studio straightly.
How to Export SQL Server Data to CSV by using SQL Server Management Studio
1. Open SQL Server Management Studio and connect to the database.
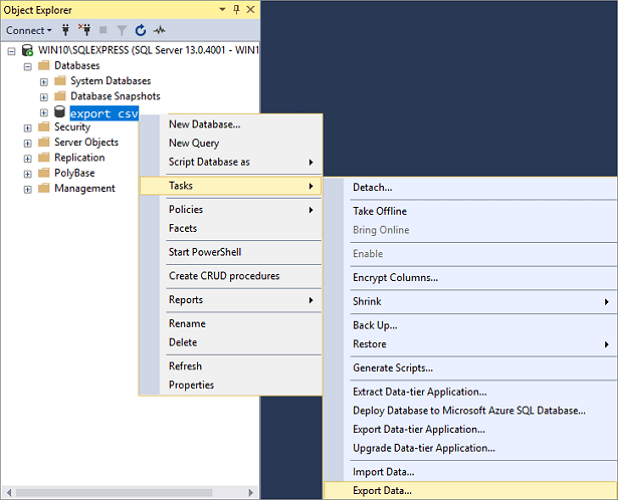
2. Go to "Object Explorer", find the server database you want to export in CSV. Right-click on it and choose "Tasks" > "Export Data" to export table data in CSV. Then, the SQL Server Import and Export Wizard welcome window pop up.
3. Now, you need to click on the Data source drop-down button to choose the data source you want to copy. Here, select "SQL Server Native Client 11.0". In the Server name drop-down box, select a SQL Server instance. In the Authentication section, choose authentication for the data source connection and from the Database drop-down box, select a database from which data will be copied. After everything is set, press the "Next" button.

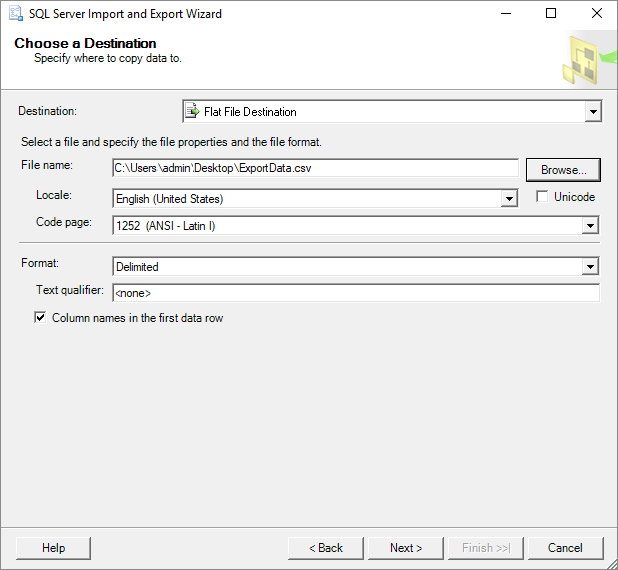
4. On the "Choose a Destination" window, in the Destination box, choose "Flat File Destination" for copying data from SQL Server to CSV. In the File name box, specify a CSV file where the data from a SQL Server database will be exported and click the "Next" button.
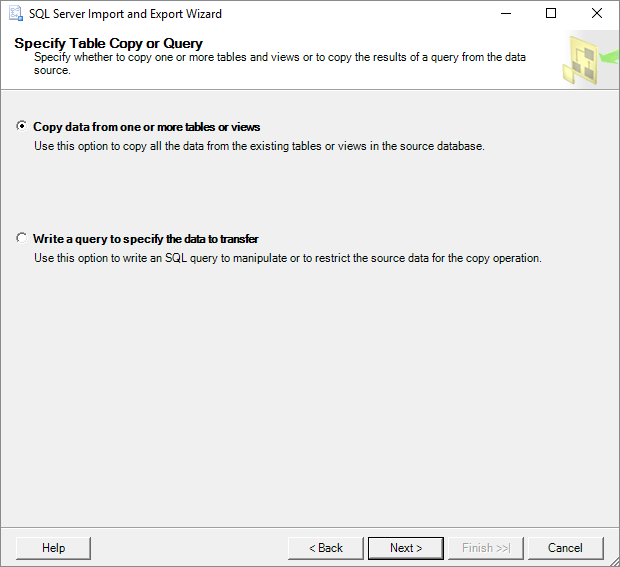
5. On the Specify Table Copy or Query screen, you can choose export the SQL database into CSV format either by "Copy data from one or more tables or views" or "Write a query to specify the data to transfer". Then, click Next to go on.
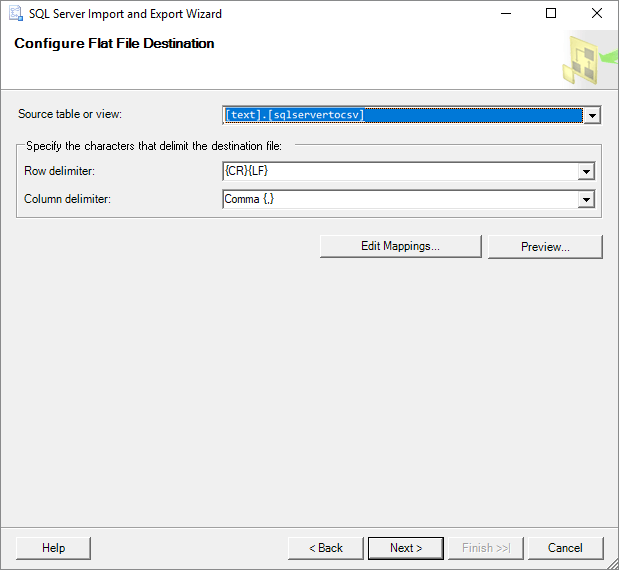
6. Now, in "Configure Flat File Destination" screen, you can select the table for exporting from "Source table or view" option. And you can also change the default settings of Row & Column delimiter. You can click the "Preview" button to view which data will be exported to the CSV file. Click Next to go on.
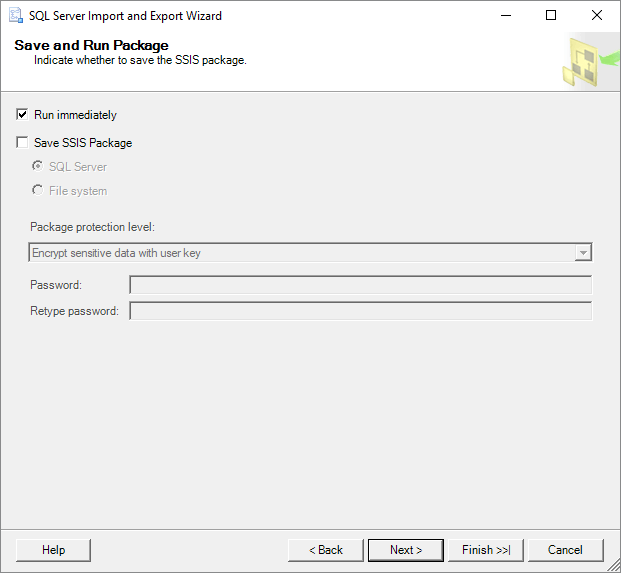
7. Here, on the 'Save and Run Package" window, you don't need to change any settings. Click the "Next" button to move on.
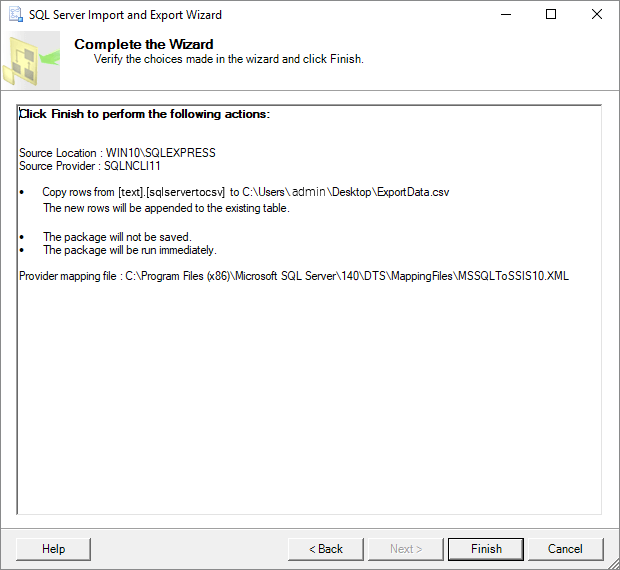
8. On the "Complete" Wizard window, you can check all the settings set during of exporting process. If everything is right, click "Finish" to start exporting SQL database to CSV.
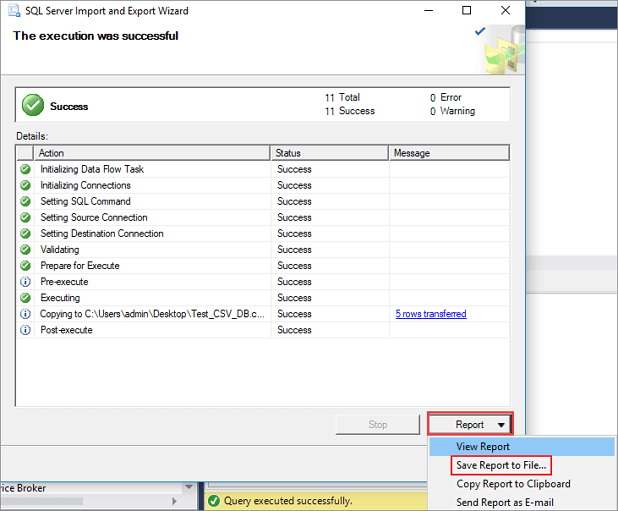
9. You can view the exporting process in this step. When it completes, click on "Report" drop-down button.
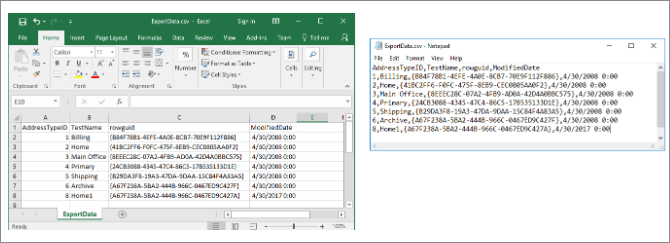
10. You can choose "Save Report to File..." (including Excel, Notepad) to save the report as you need. This report consists of details of the complete SQL database to CSV conversion.
The conversion of SQL Server data to CSV can be done by using the Import and Export Wizard of the SQL Server Management Studio (SSMS). However, when the primary database MDF file is corrupted, you have to use a professional MS SQL repair tool to fix the problem at first, then you can continue exporting the database.
Was This Page Helpful?
Related Articles
-
MS SQL Recovery Software to Recover MDF/NDF File
![author icon]() Cedric/2025-07-21
Cedric/2025-07-21 -
SQL Recovery Program Download: Repair SQL Server Database
![author icon]() Tracy King/2025-07-21
Tracy King/2025-07-21 -
[Solved] MS SQL Server Database Corruption Repair
![author icon]() Brithny/2025-07-21
Brithny/2025-07-21 -
3 Ways to Open MS SQL Sever Backup .BAK File in Excel
![author icon]() Tracy King/2025-07-21
Tracy King/2025-07-21
EaseUS MS SQL Recovery
- Restore (.mdf and.ndf) Files
- Recover Corrupted Objects
- Fix Database Log Files