
Content
Page Table of Contents
About the Author
Hot Topics

Updated on Sep 05, 2026
If your PC feels slower than it used to, your storage drive could be part of the problem. You might also be running out of room for new games, photos, videos, or work files. In other cases, you may start seeing disk errors or other warning signs. Moving to a new SSD or HDD can give you more space and a better storage setup without buying a new computer.
After you get the new drive, you'll have a few things to sort out. If you want to keep your current system, you'll need to move Windows. You may also want to move your files, change the partition layout, or free up C drive. Your old drive does not have to go to waste either. You can keep it as extra storage or use it for backups after the upgrade.
This guide covers what you need to know before and after a disk upgrade. You can use it to pick a suitable SSD or HDD, move Windows and files, set up partitions, free up disk space, and check your drive. You can also find out what you can do with your old drive when the upgrade is finished.
Why Upgrade to a New SSD or HDD
You do not always need a new computer when your storage starts causing problems. In many cases, replacing the current drive is enough. You can get more storage, improve load times, or replace a drive that has started to show signs of trouble.
Common Reasons to Upgrade to a New Disk
There are several common reasons to replace drive or upgrade a storage drive:
- The disk is too slow: An old HDD slows Windows and apps; an SSD makes the PC faster.
- The disk is almost full: A full drive limits space for apps, files, and updates.
- The disk has problems: Errors, bad sectors, or health warnings can mean the drive needs replacement.
- You need more storage: A larger drive adds space for games, media, projects, and backups.
- You want faster speeds: An NVMe SSD is much faster than an older SATA drive.
- You want to upgrade an old PC: A new SSD can refresh an older machine without replacing it.
What to Consider Before a Disk Upgrade
| Factor | What to Check |
| Capacity | Choose enough space for Windows, apps, files, and future use. |
| Drive type | SSDs are generally faster than HDDs. |
| Interface | Check SATA, PCIe, or NVMe compatibility. |
| Form factor | Common options include 2.5-inch SATA and M.2. |
| Partition style | GPT is the standard choice for most modern Windows PCs. |
| PC compatibility | Check your motherboard, laptop slot, and BIOS/UEFI support. |
| Migration plan | Decide whether to clone the disk or migrate selected data. |
Choosing a new disk is not just about capacity. Check whether the drive fits your computer and whether it provides the performance you need.
Pro tip: A larger drive is not always a better upgrade if your computer cannot support its interface or form factor. Check the PC specifications before purchasing the new storage device.
How to Upgrade to a New Disk
After selecting a compatible drive, prepare the computer before installing it. Desktop PCs often allow you to connect the new disk alongside the old one, which makes cloning and data transfer easier. Laptops with only one storage slot may require an external enclosure or adapter.
How to Choose the Right SSD or HDD
Choose the drive type based on how you plan to use it:
- Choose an SSD for Windows, applications, games, and other tasks that require fast access.
- Choose an HDD for large media libraries, archives, backups, and other data where capacity and cost matter more than speed.
- Choose a SATA SSD when your computer supports SATA but does not have an NVMe slot.
- Choose an NVMe SSD when your motherboard or laptop supports the required PCIe interface.
Before buying an SSD, follow these checks:
Step 1. Check whether your PC supports SATA, NVMe, or both.
Step 2. Confirm the physical form factor, such as 2.5-inch or M.2.
Step 3. Check the maximum supported capacity and PCIe generation, if applicable.
Step 4. Estimate how much space Windows, applications, games, and personal files will need.
Step 5. Choose additional capacity for future updates and new files.
Pro tip: A 1TB SSD is often a practical starting point for Windows, applications, and personal files. Users with large game libraries, video projects, or extensive media collections may need 2TB or more.
How to Install or Replace a Disk
Install the new disk carefully and confirm that Windows recognizes it before starting migration.
Step 1. Back up important files from the existing drive.
Step 2. Shut down Windows completely and disconnect the computer from power.
Step 3. Open the computer according to the manufacturer's instructions.
Step 4. Install the new SSD or HDD in a compatible bay or M.2 slot.
Step 5. Connect the required power and data cables if you are installing a SATA drive.
Step 6. Close the computer, reconnect the power, and start Windows.
Step 7. Open Disk Management and check whether the new disk appears.
Step 8. Initialize, partition, and format the disk if Windows identifies it as new or unallocated.
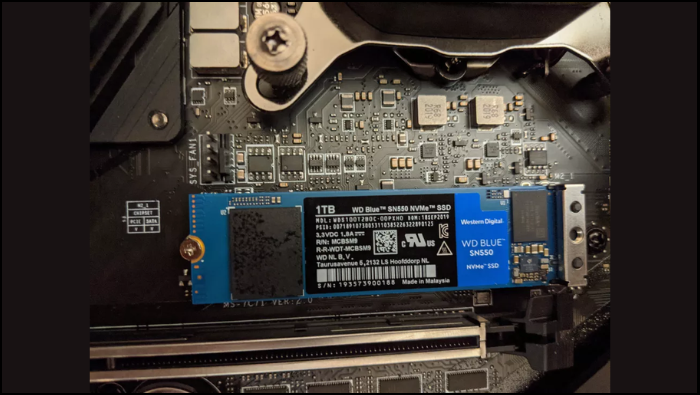
For a laptop with only one storage slot, connect the new SSD through a USB-to-SATA adapter or an external NVMe enclosure before replacing the internal drive.
How to Migrate Windows and Data
The correct migration method depends on what you want to move. Cloning copies the entire disk, OS migration moves Windows, and data transfer moves selected files or folders.
How to Upgrade to a Larger Disk Without Reinstalling Windows
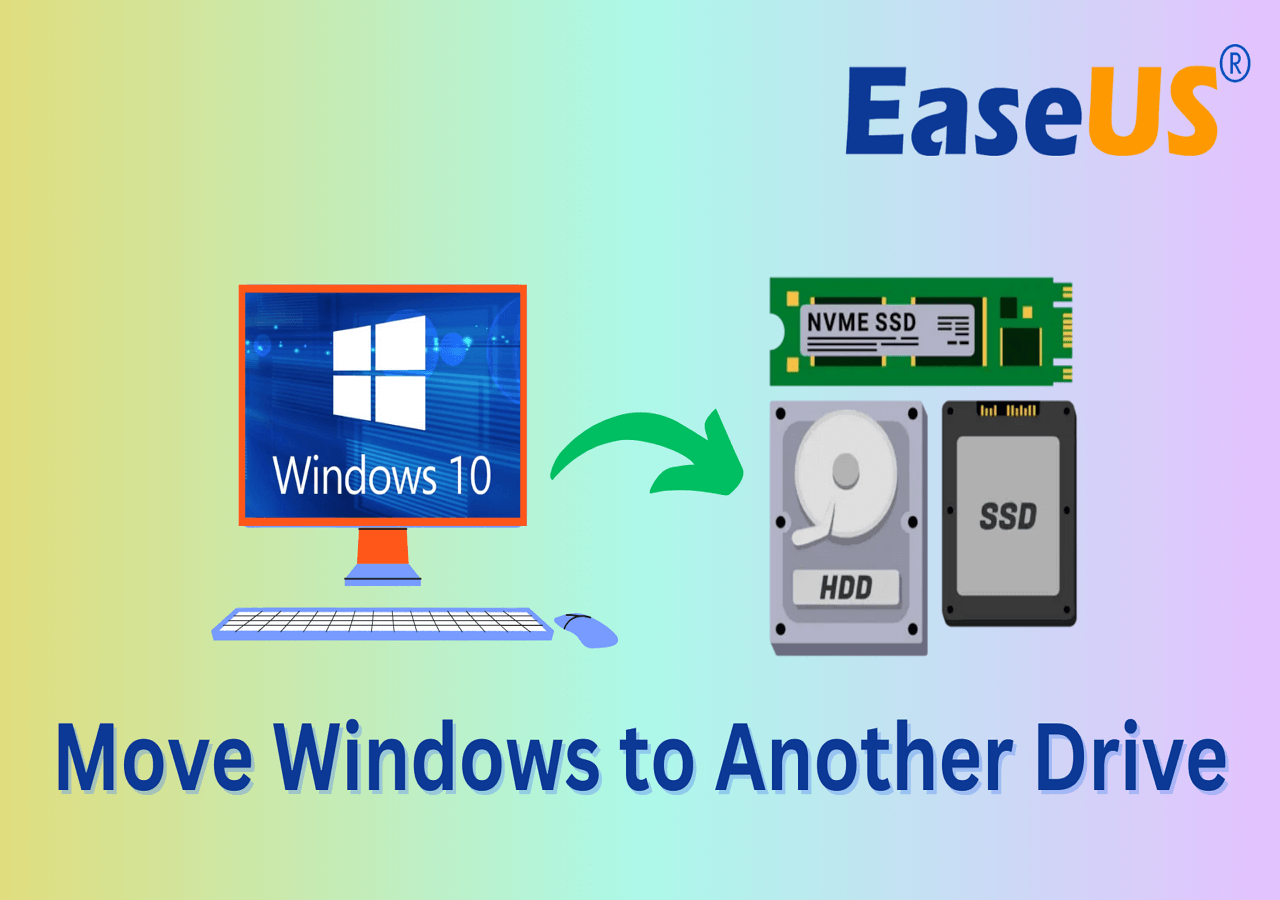
You can move Windows to a larger disk without reinstalling it by using disk cloning or OS migration.
Step 1. Connect the new disk to the computer.
Step 2. Check the old disk for errors and back up important data.
Step 3. Confirm that the target disk has enough capacity for the Windows installation and selected data.
Step 4. Choose a disk cloning or OS migration tool, like EaseUS Partition Master.
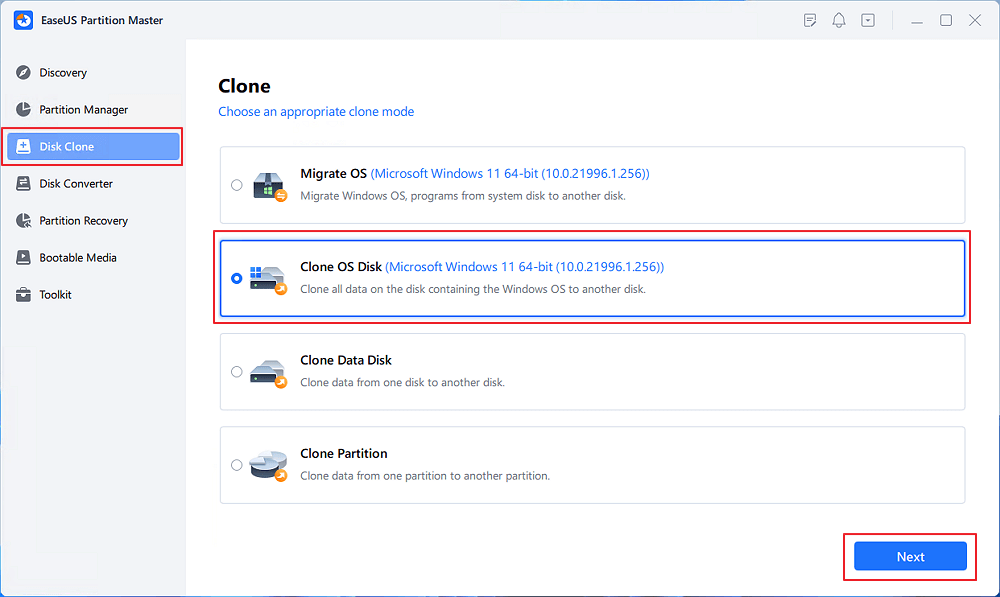
Step 5. Select the old disk as the source and the new disk as the destination.
Step 6. Start the migration and wait until it finishes without interrupting the process.
Step 7. Shut down the computer after the migration is complete.
Step 8. Boot from the new disk by changing the BIOS/UEFI boot order if necessary.
Step 9. Confirm that Windows, applications, and important files work correctly.
Step 10. Extend the system partition if the larger disk contains unused or unallocated space.
How to Clone an Old Disk to a New Disk
Disk cloning creates a copy of the source disk, including Windows, applications, partitions, and data. It is useful when you want the new disk to replace the old one with minimal changes to the existing system.
Common cloning scenarios include:
- Clone HDD to SSD
- Smaller SSD to larger SSD
- Old system disk to a replacement disk
- SATA SSD to NVMe SSD
- Existing disk to a new disk with the same or greater capacity
Follow these steps to clone a disk:
Step 1. Connect the target disk to the computer.
Step 2. Check the source disk for errors and back up important files.
Step 3. Confirm that the target disk has enough usable capacity.
Step 4. Select the source disk and target disk in the cloning tool.
Step 5. Review the partition layout before starting.
Step 6. Start the cloning process and do not disconnect either disk.
Step 7. Shut down the computer after cloning finishes.
Step 8. Boot from the new disk and verify that Windows loads correctly.
Step 9. Check whether the new disk uses all available capacity.
Step 10. Keep the old disk until the new installation and data have been confirmed.
If both disks remain connected, verify which disk Windows is using before formatting or repurposing the old one.
How to Transfer Data to a New Disk
You do not need to clone the entire disk when you only want to move personal files. Manual data transfer is useful when Windows will remain on the existing disk or when you want to organize files separately.
You can move documents, photos, videos, downloads, games, project files, and other folders to the new disk.
Step 1. Connect and initialize the new disk.
Step 2. Create a suitable folder structure on the new disk.
Step 3. Check the size of the folders you want to move.
Step 4. Copy the files to the new disk instead of deleting the originals immediately.
Step 5. Open several copied files to confirm that the transfer worked.
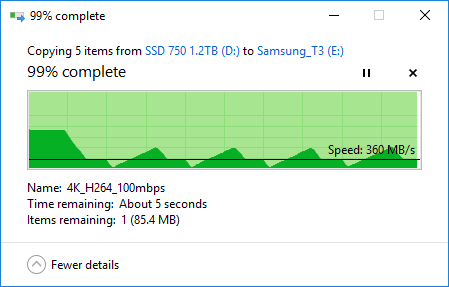
Step 6. Update application libraries, game locations, or Windows folder locations if necessary.
Step 7. Delete the original files only after verifying the copies.
Disk Clone vs. OS Migration vs. Data Transfer:
| Method | Best For | What Is Moved |
| Disk Clone | Replacing the entire disk | The system, partitions, applications, and data |
| OS Migration | Moving Windows | Windows system and boot-related data |
| Data Transfer | Moving selected content | Files, folders, games, or personal data |
How to Partition and Set Up a New Disk
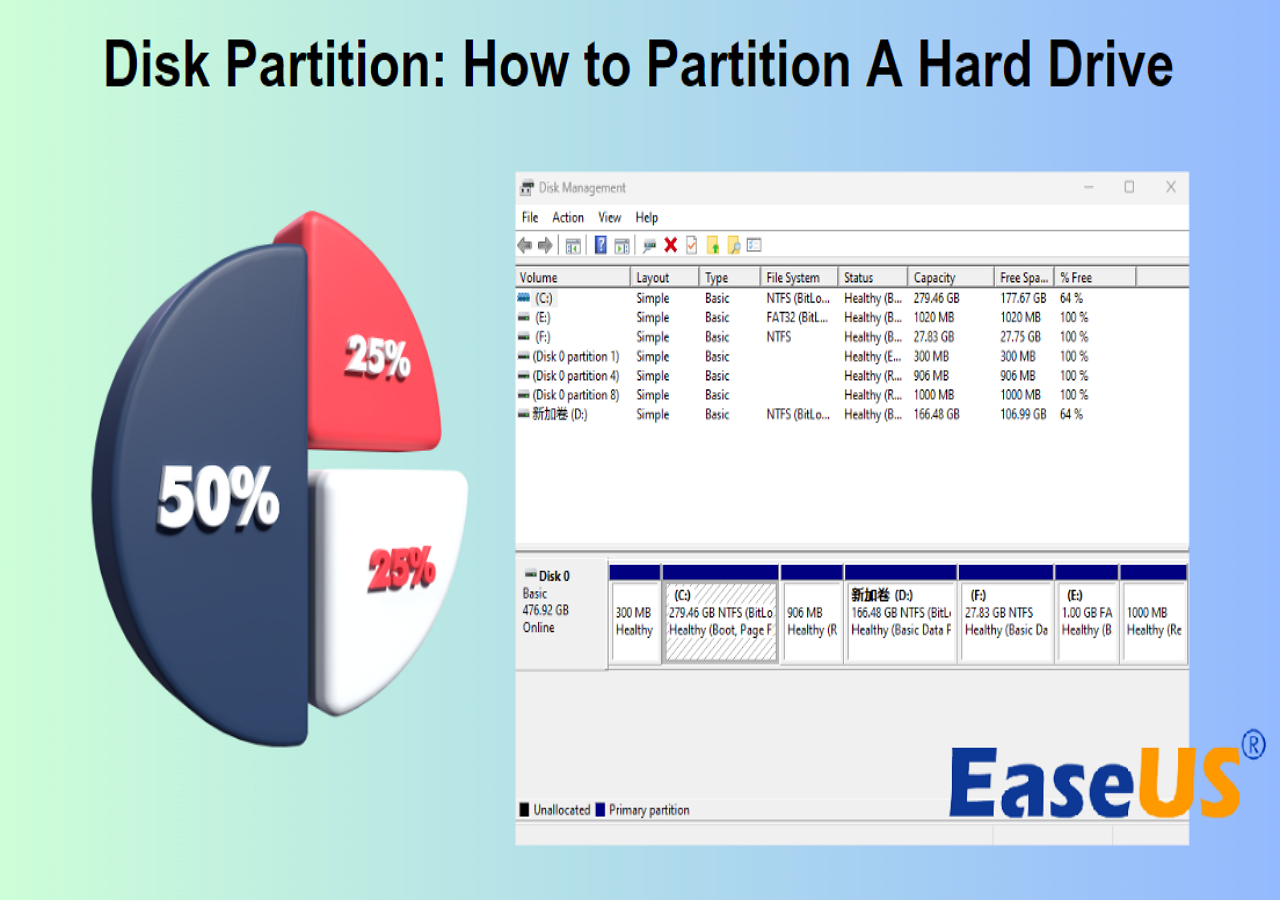
A new disk may appear as unallocated space, while a cloned disk may contain partitions that do not use its full capacity. Setting up the disk correctly ensures that Windows can use the available storage and that the partition layout matches your needs.
How to Initialize a New SSD or HDD
Initialization prepares a new disk for partitioning. Windows usually asks you to choose between GPT and MBR.
Step 1. Open Disk Management.
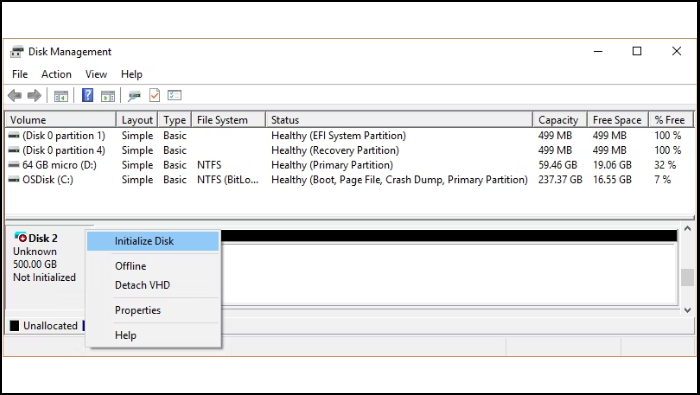
Step 2. Locate the new disk marked as unknown or not initialized.
Step 3. Right-click the disk and choose the option to initialize the disk.
Step 4. Select GPT for most modern Windows 10 and Windows 11 computers.
Step 5. Select MBR only when required by an older system or a specific compatibility need.
Step 6. Confirm the selection and continue with partition creation.
How to Partition a New Disk
Partitioning divides a disk into separate storage areas. Each partition can have its own drive letter and can be used for a different type of data.
Step 1. Open Disk Management and locate the unallocated space.
Step 2. Right-click the unallocated space and choose to create a new simple volume.
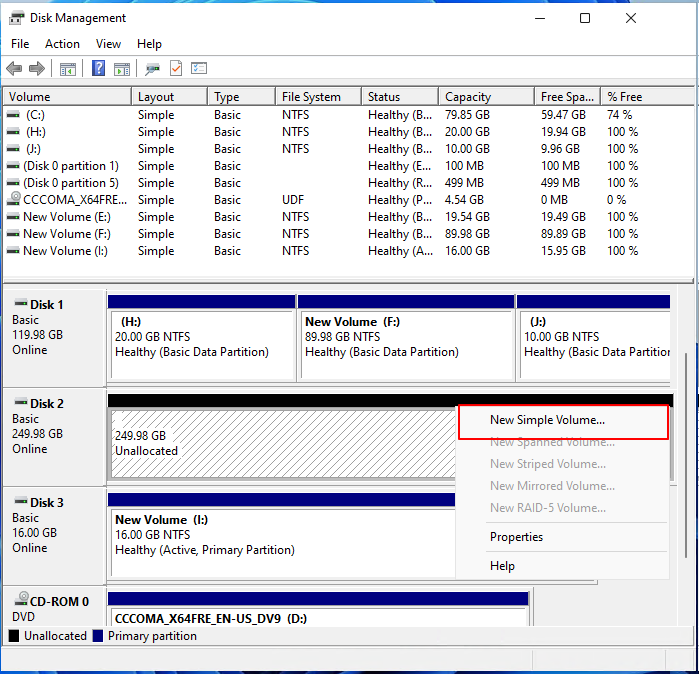
Step 3. Enter the desired partition size.
Step 4. Assign a drive letter.
Step 5. Format the partition with the appropriate file system.
Step 6. Give the partition a clear label.
Step 7. Repeat the process if you need additional partitions.
C Drive Space Management
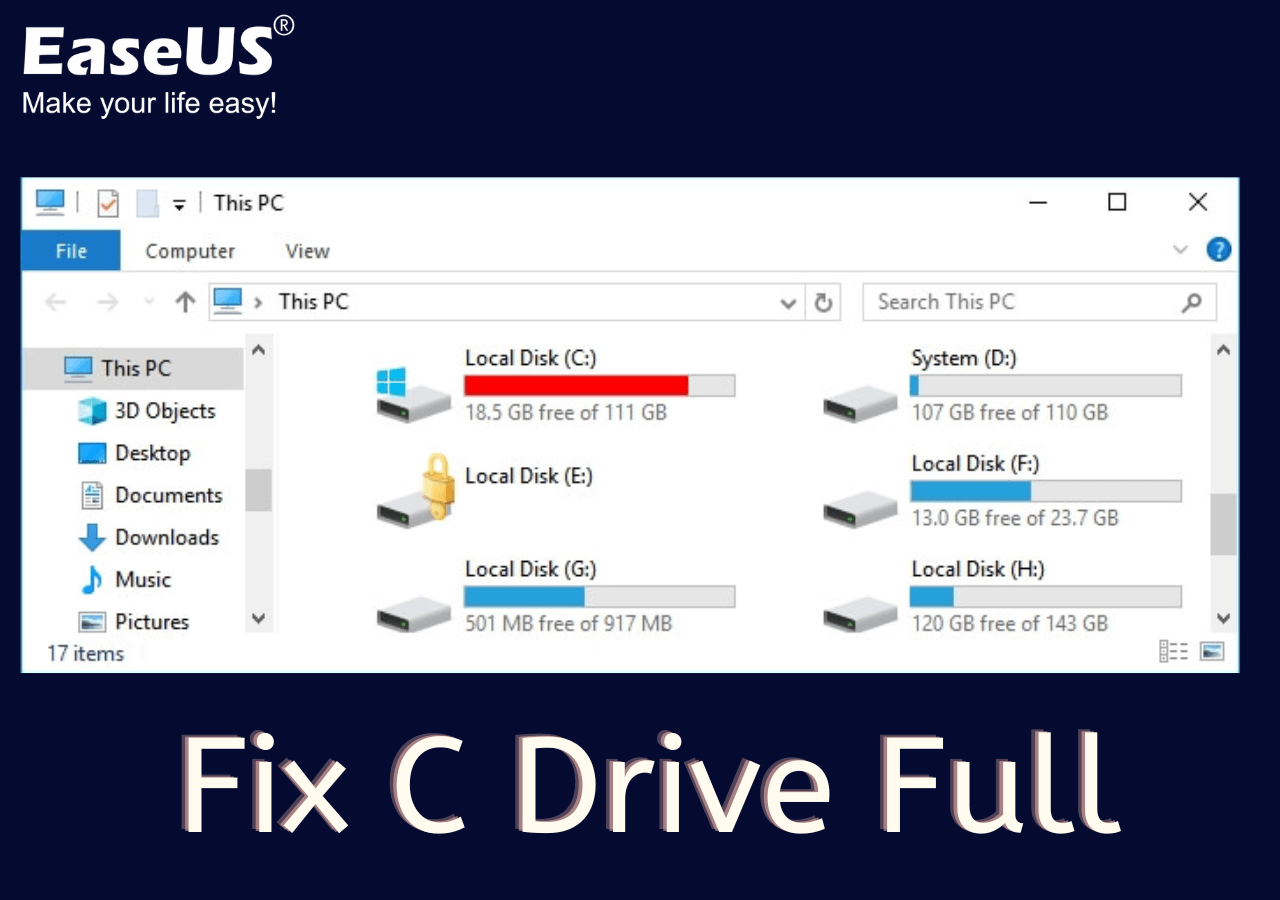
The C drive stores Windows, updates, applications, temporary files, and often personal folders. When it becomes full, Windows may slow down or fail to install updates.
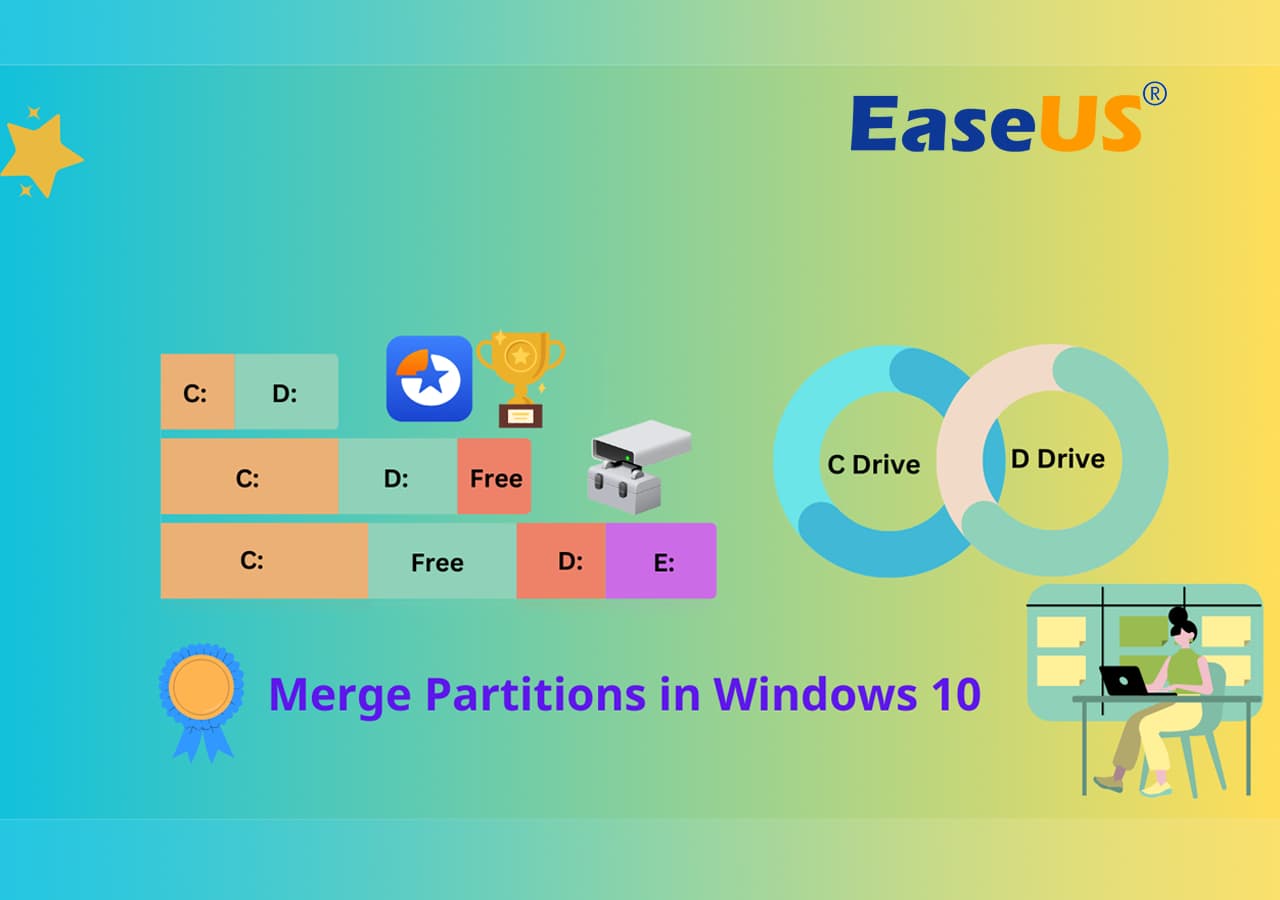
Before replacing the entire disk, check whether you can free up space, move large files, or extend the C drive using available unallocated space.
Check What Is Using Space
Open Settings > System > Storage to view how space is being used. Windows groups data into categories such as installed apps, temporary files, documents, and system files. This makes it easier to identify what is taking up the most space before deleting anything.
How to Increase C Drive Space
You can expand the C drive when unallocated space is available and can be assigned to the system partition.
Step 1. Open Disk Management and inspect the partition layout.
Step 2. Check whether unallocated space is directly next to the C drive.
If unallocated space is not adjacent to the C drive, you can refer to this guide: Extend C Drive with Nonadjacent Unallocated Space.
Step 3. Back up important files before resizing partitions.
Step 4. Right-click the C drive and choose Extend Volume if Windows allows it.
Step 5. Select the amount of unallocated space to add.
Step 6. Confirm the operation and wait for it to finish.
Step 7. Check the C drive capacity in File Explorer.
Free Up C Drive Space
You can turn on Storage Sense to automatically remove temporary files and items in the Recycle Bin. You can also open Cleanup recommendations to review files that Windows considers safe to remove.
Other ways to free up C drive space include:
- Uninstall applications and games you no longer use.
- Move large videos, photos, and project files to another drive.
- Empty the Recycle Bin after checking its contents.
- Remove temporary files through Settings > System > Storage > Temporary files.
- Use Disk Cleanup to remove system files, such as old Windows installation files.
C Drive Space Management Tool
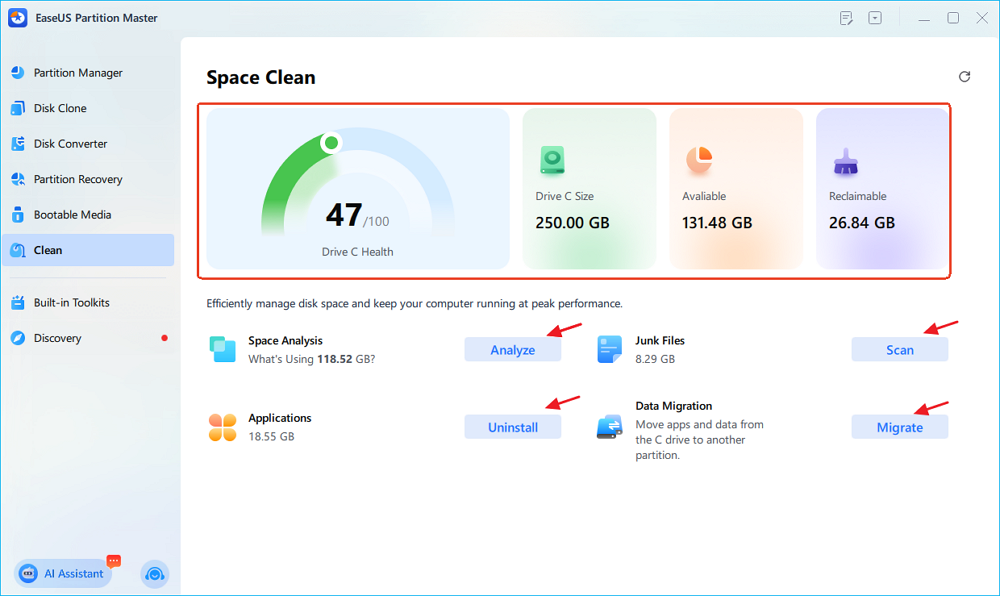
You can use EaseUS Partition Master to find and free up C drive space without manually checking multiple locations. This feature lets you analyze disk usage and free up space through cleanup, app removal, and data migration from a single interface.
- Open EaseUS Partition Master and select Clean.
- Use Space Analysis to identify what is taking up the most space.
- Scan for and remove unnecessary junk files.
- Find and uninstall large or unwanted applications.
- Use Data Migration to move supported large apps or files from C drive to another drive, such as D drive.
- Check the available C drive space again after cleanup.
SSD, HDD & Disk Optimization
A new disk still requires maintenance. SSDs and HDDs use different technologies, so optimization should match the type of drive.
SSD maintenance focuses on TRIM, free space, health monitoring, and firmware or driver support. HDD maintenance focuses more on fragmentation, bad sectors, physical condition, and file system errors.
How to Optimize an SSD
Windows performs many SSD maintenance tasks automatically, but you can still check whether the drive is operating correctly.
Step 1. Confirm that Windows recognizes the drive as an SSD.
Step 2. Check whether TRIM is enabled and functioning.
Step 3. Keep sufficient free space on the SSD.
Step 4. Check the SSD health and remaining life.
Step 5. Test the SSD speed if performance seems abnormal.
Step 6. Verify 4K alignment when troubleshooting performance.
Step 7. Scan the file system for errors.
Step 8. Keep Windows, storage drivers, and SSD firmware updated when appropriate.
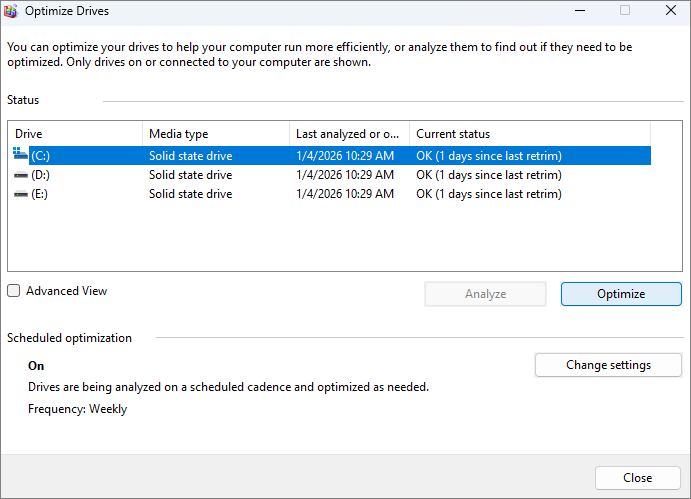
You can also use the "Optimize Drives" to optimize your SSD.
How to Optimize an HDD
HDDs use spinning magnetic platters, so files can become fragmented as data is created, modified, and deleted.
Step 1. Check the HDD health and listen for unusual mechanical sounds.
Step 2. Scan the file system for errors.
Step 3. Check for bad sectors if you suspect physical problems.
Step 4. Remove unnecessary files to maintain free space.
Step 5. Use Windows drive optimization to defragment the HDD when necessary.
Step 6. Back up important files if the drive shows repeated errors or unusual behavior.
Pro tip: Clicking, grinding, repeated read errors, or sudden performance changes may indicate a failing HDD. Back up the data before attempting extensive repairs.
How to Check Disk Health and Performance
Checking both health and performance can help you identify storage problems before they cause data loss. Regular checks are especially useful for aging drives and storage devices that contain important files.
- Check the drive's SMART health information.
- Scan the file system for logical errors.
- Test for bad sectors when using an HDD or troubleshooting read errors.
- Measure read and write speeds.
- Compare the results with the drive's expected performance.
- Back up important data if the drive reports warnings or repeated errors.
- Replace the drive if its health continues to decline.
Storage Planning & Best Practices
A well-planned storage layout makes future upgrades, backups, and space management easier. Instead of storing everything on the C drive, assign Windows, applications, personal files, and backups to suitable storage locations.
How to Plan Your Storage Space
Plan storage based on current usage and expected growth rather than choosing capacity based only on today's free space.
Step 1. Check how much space Windows and system files currently use.
Step 2. Measure the size of applications, games, and personal files.
Step 3. Identify which data is growing fastest.
Step 4. Decide whether Windows, applications, and personal files should share one drive.
Step 5. Reserve additional capacity for updates, temporary files, and future data.
Step 6. Choose a drive size that leaves room for long-term use.
Step 7. Create a backup plan before filling the new drive.
A basic storage layout might include:
| Partition or Storage Type | Main Contents |
| System partition | Windows and system files |
| Application partition | Applications and games |
| Data partition | Photos, videos, documents, and projects |
| Backup storage | Copies of important files |
How to Use Your Old Disk After an Upgrade
You can reuse the old disk after confirming that the new disk boots and all important data is available.
Step 1. Boot the computer from the new disk.
Step 2. Confirm that Windows, applications, and personal files work correctly.
Step 3. Back up any remaining data from the old disk.
Step 4. Check the old disk's health before reusing it.
Step 5. Delete old system partitions only after verification is complete.
Step 6. Format or repartition the old disk for its new purpose.
Step 7. Use it as secondary storage, archive storage, game storage, or backup storage.
Common Disk Upgrade & Migration Problems
Disk upgrades and migrations can sometimes cause problems with drive detection, Windows booting, or available storage. The table below covers some of the most common issues and the quickest ways to address them.
| Problem | Common Cause | What to Do |
| New SSD or HDD is not detected | Connection, initialization, or compatibility issues. | Check Disk Management, initialize the disk, check the cables or M.2 slot, and verify detection in BIOS/UEFI. |
| Windows will not boot after cloning | Wrong boot disk or boot configuration. | Check the BIOS/UEFI boot order and select the new disk or Windows Boot Manager. |
| The SSD shows less space after cloning | Unallocated space remains on the larger disk. | Extend the existing partition or create a new partition from the unallocated space. |
| The C drive cannot be extended | Another partition separates it from the unallocated space. | Move or resize the intervening partition, then extend the C drive. |
| Disk migration or cloning fails | Source errors, insufficient space, or connection problems. | Check the source disk, make sure the target has enough space, and reconnect both drives. |
| The old disk still appears as the boot drive | The old disk has higher boot priority. | Set the new disk as the primary boot device and verify that Windows starts from it. |
| Files or partitions are missing after migration | Some partitions or data were not included. | Check the source and target partition layouts, and verify whether the missing data remains on the old disk. |
Conclusion
Upgrading to a new SSD or HDD can improve performance, add storage space, and replace an aging drive. A smooth upgrade also requires proper Windows and data migration, disk partitioning, and space management. By planning your storage layout and checking disk health regularly, you can make better use of your new drive and keep your Windows PC running reliably.
FAQs About New Disk Upgrade and Migration
1. Should I clone or migrate Windows to a new SSD?
Use disk cloning when you want to copy the entire disk, including Windows, applications, partitions, and data. Use OS migration when your main goal is to move Windows to the new SSD while handling personal data separately.
2. Can I upgrade to a larger SSD without reinstalling Windows?
Yes. Disk cloning or OS migration can move the existing Windows installation to a larger SSD. After migration, extend the system partition to use any remaining unallocated space.
3. Should I use SSD or HDD for Windows?
An SSD is generally better for Windows because it provides faster access and better system responsiveness. An HDD is more suitable for large amounts of lower-cost storage.
4. How much free space should I leave on an SSD?
Avoid filling an SSD completely. Leave enough space for Windows updates, applications, temporary files, and normal storage operations. The exact amount depends on the drive capacity and workload.
5. What should I do with my old disk after upgrading?
Keep the old disk unchanged until the new disk boots and you've verified your important files. If the old disk is healthy, you can format and reuse it for secondary storage, archives, games, or backups.
How Can We Help You
About the Author
Updated by Joey Albert
Joey is an enthusiast of science and technology. With a passion for uncovering the latest tech innovations, she creates clear, engaging how-to guides that make technology accessible and enjoyable for all.
Product Reviews
-
I love that the changes you make with EaseUS Partition Master Free aren't immediately applied to the disks. It makes it way easier to play out what will happen after you've made all the changes. I also think the overall look and feel of EaseUS Partition Master Free makes whatever you're doing with your computer's partitions easy.
Read More -
Partition Master Free can Resize, Move, Merge, Migrate, and Copy disks or partitions; convert to local, change label, defragment, check and explore partition; and much more. A premium upgrade adds free tech support and the ability to resize dynamic volumes.
Read More -
It won't hot image your drives or align them, but since it's coupled with a partition manager, it allows you do perform many tasks at once, instead of just cloning drives. You can move partitions around, resize them, defragment, and more, along with the other tools you'd expect from a cloning tool.
Read More
Related Articles
-
[Solved] Can't Resize exFAT Partition with Unallocated Space
![author icon]() Cici/2026/08/13
Cici/2026/08/13 -
How to Format SDXC to FAT32 on Windows 11/10/8/7
![author icon]() Sherly/2026/07/09
Sherly/2026/07/09 -
How to Format Bootable Pendrive [4 Safe Solutions]
![author icon]() Brithny/2026/06/17
Brithny/2026/06/17 -
ScanDisk Windows 10: How to Scan and Repair Drive Windows 10/8/7
![author icon]() Jean/2026/06/30
Jean/2026/06/30
 Cici/2026/08/13
  Sherly/2026/07/09
  Brithny/2026/06/17
  Jean/2026/06/30