
Content
Page Table of Contents
About the Author
Hot Topics
Can't launch Modern Warfare 4 because Secure Boot isn't enabled? If you've checked your BIOS and found that Secure Boot can't be turned on, your Windows system may still be using Legacy BIOS with an MBR system disk.
Modern Warfare 4 requires TPM 2.0 and Secure Boot on PC, and Secure Boot requires a UEFI boot configuration with a GPT system disk. If your disk is still MBR, you may need to convert it to GPT before switching from Legacy BIOS to UEFI and enabling Secure Boot.
The good news is that you may not need to reinstall Windows. In this guide, we'll show you how to check your current boot configuration, convert MBR to GPT with EaseUS Partition Master if needed, and enable Secure Boot so you can get back to Modern Warfare 4.
3 Prerequisites for Enabling Secure Boot
For Modern Warfare 4, Secure Boot is part of the PC security requirements. But enabling it isn't simply a matter of finding the right switch in BIOS. Your PC needs to meet several conditions first.
Before changing any BIOS settings, check these three prerequisites:
1. UEFI Boot Mode Must Be Enabled
Secure Boot works with UEFI firmware, not Legacy BIOS or Legacy/CSM boot mode.
If your PC is still configured to boot Windows in Legacy mode, you may not see a usable Secure Boot option at all. Check your current boot mode in Windows by pressing Windows + R, entering msinfo32, and checking BIOS Mode.
You should see:
- BIOS Mode: UEFI
If it shows Legacy, you'll need to switch your Windows installation to UEFI-compatible booting first.
2. TPM 2.0 Must Be Enabled
Modern Warfare 4 also requires TPM 2.0 on PC. TPM (Trusted Platform Module) provides hardware-based security functions used by Windows and modern security features.
You can quickly check your TPM status in Windows:
- Press Windows + R.
- Type tpm.msc and press Enter.
- Check the Status and Specification Version.
Your TPM should be ready for use, with the specification version showing 2.0.
Tip: If TPM 2.0 isn't available or is disabled, look for Intel PTT, AMD fTPM, or a similar TPM setting in your UEFI/BIOS. The exact name depends on your motherboard or PC manufacturer.
3. Your System Disk Must Use GPT
This is the requirement that can prevent players with older Windows installations from enabling Secure Boot.
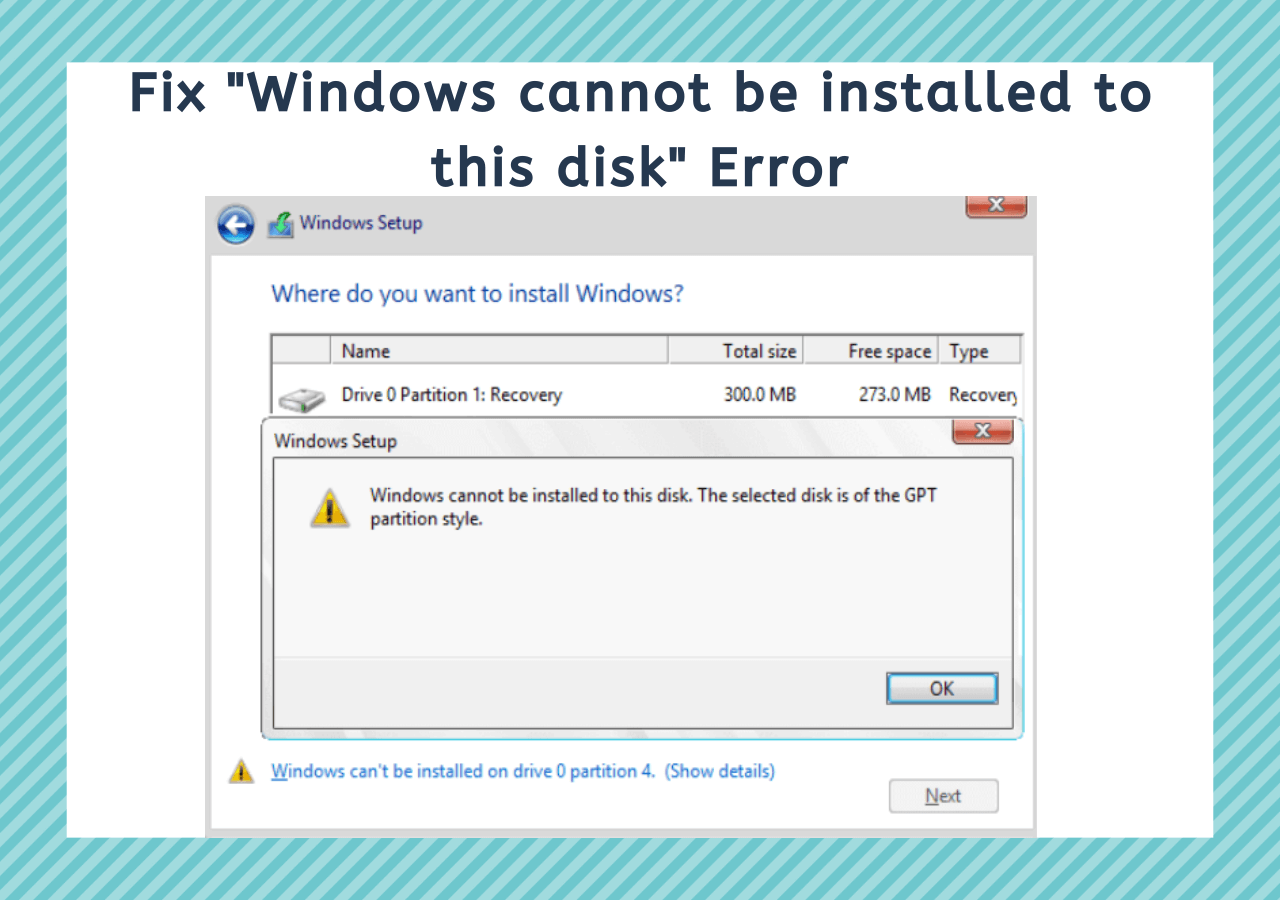
Your Windows system disk must use the GPT partition style rather than MBR. If Windows is installed on an MBR disk and the PC is configured for Legacy BIOS, switching directly to UEFI and Secure Boot can cause Windows to stop booting.
Here's how to check your disk:
- Search for and open Disk Management in Windows.
- Find the disk containing your Windows installation.
- Right-click the disk label, such as Disk 0, and select Properties.
- Open the Volumes tab.
- Check the partition style.
You'll see either:
- GUID Partition Table (GPT)
- Master Boot Record (MBR)
If your system disk is already GPT, you can move on to checking your UEFI and Secure Boot settings. If it is MBR, convert the system disk from MBR to GPT first. Windows Disk Management only supports converting data disks and requires you to delete all partitions during the MBR to GPT conversion. Alternatively, EaseUS Partition Master can convert both data and system disks from MBR to GPT without deleting partitions or losing any data.
- Open EaseUS Partition Master and go to the "Disk Converter" section.
- Click "MBR to GPT," select the target system disk, and click "Convert" to start.
- This might take some time, depending on the size of the disk. Wait for it to complete.
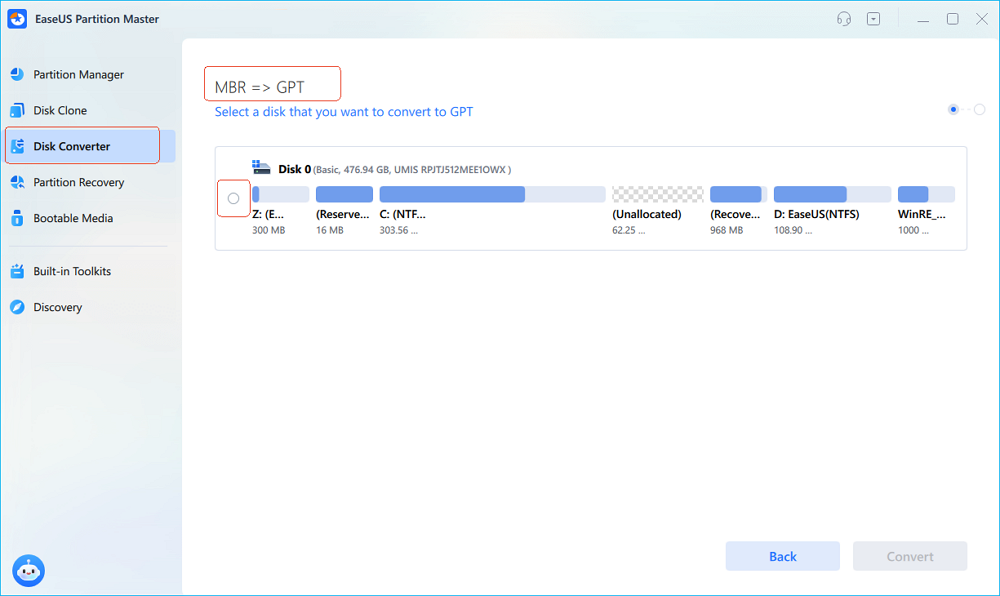
This is how to convert MBR to GPT with EaseUS Partition Master. Ensure the boot mode is set to UEFI, the disk partition style is GPT, and TPM2.0 is enabled. Then, you can go to the BIOS to enable Secure Boot to run Modern Warfare 4.
Check our full guide on 3A Games and Secure Boot.
How to Enable Secure Boot to Play Modern Warfare 4
Once your PC is using UEFI boot mode, the system disk is GPT, and TPM 2.0 is enabled, you can turn on Secure Boot in the UEFI/BIOS settings. Activision confirms that Modern Warfare 4 requires both TPM 2.0 and Secure Boot on PC.
The exact BIOS interface varies by motherboard and PC manufacturer, but the overall process is similar.
Step 1. Enter UEFI/BIOS Settings
You can enter your firmware settings directly from Windows:
- Press Windows + I to open Settings.
- Go to System > Recovery.
- Next to Advanced startup, click Restart now.
- Select Troubleshoot > Advanced options > UEFI Firmware Settings.
- Click Restart to enter the BIOS/UEFI setup screen.
You can also restart your PC and press the BIOS key during startup, such as Del, F2, or F10, depending on your device.
Step 2. Make Sure UEFI Boot Mode Is Enabled
In the BIOS/UEFI interface, open the Boot or Startup section and look for a setting such as:
- Boot Mode
- UEFI/Legacy Boot
- CSM
- Boot Option
Make sure the system is configured for UEFI rather than Legacy BIOS. If you see Legacy, Legacy Only, or CSM, switch to UEFI or disable CSM.
Important: If Windows is installed on an MBR system disk, don't switch from Legacy to UEFI yet. Make sure the system disk has been converted to GPT first. Otherwise, Windows may fail to boot.
Step 3. Enable Secure Boot
Once UEFI mode is enabled, find Secure Boot in the Boot, Security, or Advanced section.
- Set: Secure Boot → Enabled
On some motherboards, you may need to save the UEFI changes and enter the BIOS again before the Secure Boot option becomes available. If Secure Boot is greyed out, double-check that UEFI mode is enabled and CSM is disabled.
The exact menu names can differ between ASUS, MSI, Gigabyte, ASRock, Dell, HP, Lenovo, and other manufacturers, so refer to your PC or motherboard manufacturer's documentation if you cannot find the setting. Activision also warns that incorrect UEFI/BIOS changes can cause boot problems.
Step 4. Save Changes and Restart
After enabling Secure Boot:
- Open Save & Exit.
- Save your BIOS changes, usually with F10.
- Confirm the changes and restart your PC. Let Windows boot normally.
Step 5. Verify Secure Boot Is Enabled
After Windows starts, verify that the setting actually took effect:
- Press Windows + R.
- Type msinfo32 and press Enter.
- Find BIOS Mode and Secure Boot State.
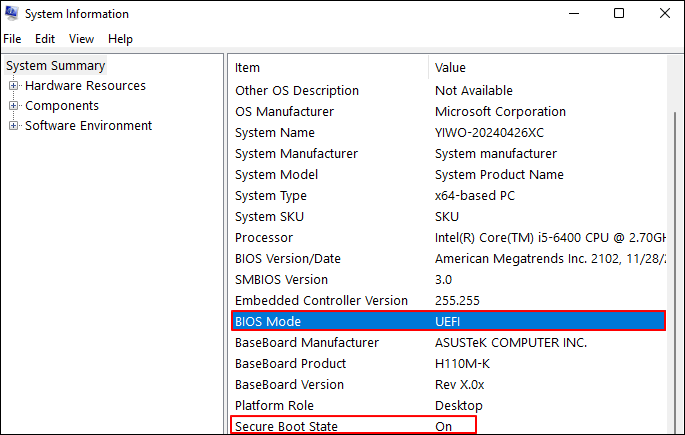
You should see:
- BIOS Mode: UEFI
- Secure Boot State: On
Activision recommends checking these two values to confirm that Secure Boot is correctly configured. Once both settings show the correct status, launch Modern Warfare 4 and check whether the Secure Boot error has been resolved.
Still seeing a Secure Boot error? If msinfo32 already shows UEFI and Secure Boot State: On, but Modern Warfare 4 still reports a security requirement problem, your PC may need a BIOS/firmware update or another security setting may still be incomplete. Activision recommends using its Call of Duty Secure Attestation Wizard to check whether your system meets the game's security requirements.
Conclusion
If Modern Warfare 4 says Secure Boot is not enabled, start by checking your Windows boot configuration instead of changing random BIOS settings. Your PC needs UEFI boot mode, a GPT system disk, TPM 2.0, and Secure Boot enabled to meet the game's security requirements.
If your system disk is still MBR, convert it to GPT before switching from Legacy BIOS to UEFI. Once the disk is GPT and Windows is configured for UEFI, you can enable Secure Boot in BIOS and verify the result through msinfo32.
Still getting the error after Secure Boot shows On? Check for available BIOS/firmware updates and run the Call of Duty Secure Attestation Wizard to identify any remaining security or firmware issues.
FAQs About Modern Warfare 4 Secure Boot
1. Does Modern Warfare 4 require Secure Boot?
Yes. Activision's current PC system requirements state that TPM 2.0 and Secure Boot are required to play Modern Warfare 4 on PC.
2. Why can't I enable Secure Boot?
If Secure Boot is unavailable or greyed out in BIOS, check whether your PC is using UEFI boot mode and whether CSM/Legacy boot is disabled. Your Windows system disk should also use the GPT partition style.
If your system disk is MBR, convert it to GPT before switching from Legacy BIOS to UEFI.
3. Can I enable Secure Boot if my disk is MBR?
You should not switch an existing Legacy/MBR Windows installation directly to UEFI and Secure Boot. First convert the system disk to GPT, then switch the firmware to UEFI and enable Secure Boot.
4. How do I check if Secure Boot is enabled?
Press Windows + R, enter msinfo32, and press Enter. Check:
- BIOS Mode: UEFI
- Secure Boot State: On
If both values are correct, Windows is running with UEFI and Secure Boot enabled.
5. Why does Modern Warfare 4 still say Secure Boot is not enabled?
If Windows shows BIOS Mode: UEFI and Secure Boot State: On, but Modern Warfare 4 still reports a security requirement error, the issue may be related to your BIOS firmware or another system security configuration.
First, check for a BIOS/firmware update from your motherboard or PC manufacturer. You can also run Activision's Call of Duty Secure Attestation Wizard, which checks your PC's security configuration and identifies settings that may need attention.
6. Will enabling Secure Boot delete my files?
Enabling Secure Boot itself does not delete your personal files. However, changing UEFI/BIOS settings incorrectly can cause Windows boot problems. Before making firmware changes, make sure you have important files backed up and keep your BitLocker recovery key available if BitLocker is enabled.
7. Do I need to reinstall Windows to enable Secure Boot?
Not necessarily. If your Windows installation is currently on an MBR system disk, you can convert the disk to GPT without reinstalling Windows when using a suitable conversion method. After the conversion, switch the system to UEFI mode and enable Secure Boot.
8. What should I do if Secure Boot is enabled but Modern Warfare 4 still won't launch?
Verify that TPM 2.0 is also enabled, then check msinfo32 for UEFI and Secure Boot status. If everything appears correct, update your BIOS/UEFI firmware if an update is available and run the Call of Duty Secure Attestation Wizard to check for remaining compatibility or attestation issues.
How Can We Help You
About the Author

Sherly joined EaseUS in 2022 and she has always loved writing articles and enjoys the fun they bring. She receives professional training here, focusing on product performance and other relative knowledge. She has written over 200 articles to help people overcome computing issues.
Product Reviews
-
I love that the changes you make with EaseUS Partition Master Free aren't immediately applied to the disks. It makes it way easier to play out what will happen after you've made all the changes. I also think the overall look and feel of EaseUS Partition Master Free makes whatever you're doing with your computer's partitions easy.
Read More -
Partition Master Free can Resize, Move, Merge, Migrate, and Copy disks or partitions; convert to local, change label, defragment, check and explore partition; and much more. A premium upgrade adds free tech support and the ability to resize dynamic volumes.
Read More -
It won't hot image your drives or align them, but since it's coupled with a partition manager, it allows you do perform many tasks at once, instead of just cloning drives. You can move partitions around, resize them, defragment, and more, along with the other tools you'd expect from a cloning tool.
Read More
Related Articles
-
How Do I Use DiskPart to Delete All Partitions in Windows? Your 2026 Guide Is Here
![author icon]() Tracy King/2026/09/22
Tracy King/2026/09/22 -
How to Hide System Reserved Partition in Windows 11/10/8/7 [Step-by-Step Guide]
![author icon]() Sherly/2026/09/23
Sherly/2026/09/23 -
Fix: Windows 10 Login Screen Loop (7 Ways)
![author icon]() Oliver/2026/09/28
Oliver/2026/09/28 -
How to Partition SD Card for Android
![author icon]() Daisy/2026/09/22
Daisy/2026/09/22
 Tracy King/2026/09/22
  Oliver/2026/09/28
  Daisy/2026/09/22