Mac users enjoy an exclusive set of advantages and advanced features. The high-end components and the uniform designs credited by Apple aim to improve the user experience. However, out of all the functionalities available to the users, what core sync is one of the crucial questions? It is one of the necessary features to improve the seamless integration of Mac with Adobe Creative Cloud.

Let us know all the details about the core sync. First, we'll cover the quick definition followed by the detailed steps to use it on your Mac device. We'll also cover the key issues of core sync using high CPU and quick fixes for this problem. Finally, the quick FAQs to handle core sync independently and quickly are not to miss.
What Is Core Sync Mac?
Before jumping to the detailed steps or understanding the other related issues, it is essential to know the core sync in Mac. It starts with a quick definition, followed by its key functions and purposes.

Core sync in Mac is the background program or process used by different Adobe services. It helps share data between devices and Creative Cloud. Hence, all users aiming for seamless Adobe Creative Cloud use must use core sync on their devices.
The key function of the core sync is the uninterrupted data synchronization between devices and Adobe servers. In addition, it can further sync different cloud documents in Adobe Photoshop and Adobe XD. Hence, core sync is necessary to use Adobe Creative Cloud and other applications on the device.
The key purpose of core sync is to ensure that different Adobe applications run smoothly on the device. It ensures that all Creative Cloud files remain synced on the different devices and the cloud. In addition, it ensures that different functionalities, like Adobe fonts, are available for the users.
Sync Photos From iPhone to Mac Wirelessly
Syncing photos from iPhone to Mac can be easily done either with the built-in Apps/features on the iOS devices or with a third-party program like EaseUS MobiMover.

How To Use Core Sync On Mac?
Core sync is an internal part of Mac's smooth operability with Creative Cloud. So, after going through its quick definition, functions, and purposes, it comes down to how to use it. First, let us understand the quick steps to turn core sync on/off or remove it.
How to Turn On/off Core Sync Mac?
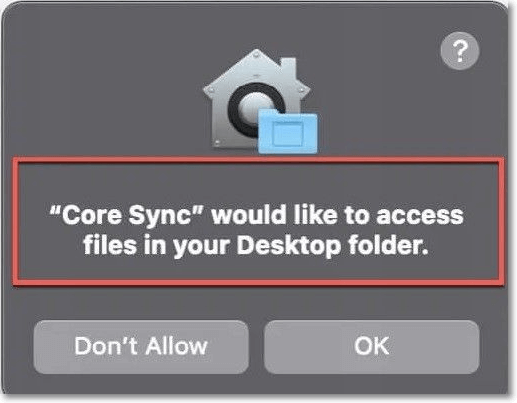
Users notice the core sync option on their Mac devices as a pop-out requesting access to system files or folders. Thus, core sync is automatically turned on on all Mac devices. However, once you've turned it off, you may need to turn it on to enable seamless synchronization between Adobe applications and Mac devices. The steps to turn on core sync mac are:
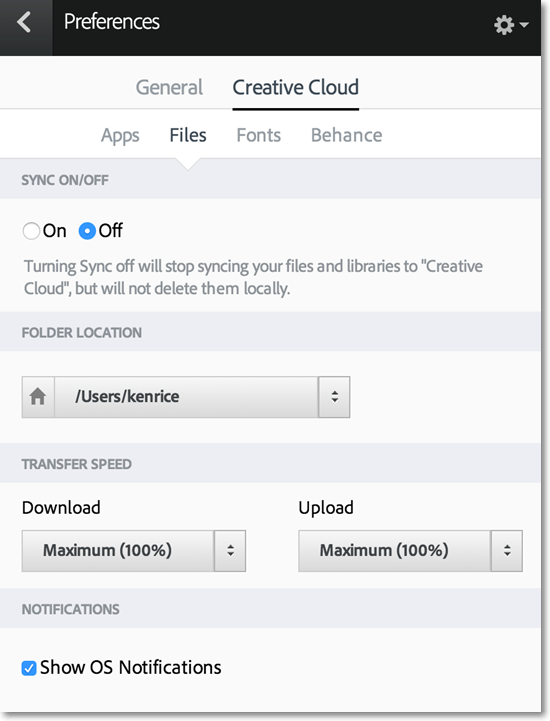
Step 1. Go to the "System Preferences" application and click on the "Creative Cloud" option.
Step 2. Go to the "Files" section and turn on the "SYNC ON/ OFF" option, which is set to "Off."

The steps to turn off core sync mac are:
Step 1. Go to the "Activities Monitor" in the utility folder. Select "All Processes" from the drop-down menu.
Step 2. Look for the "Core sync" process in the list and click on the "i" icon next to it. Select the "Prevent unloading" option. It will turn the core sync off and prevent it from running automatically on the device.

How to Remove Core Sync Mac?
While core sync has different uses in Mac devices, sudden situations like virus threats may compromise the device's security. To overcome the fears of malicious background programs, it becomes necessary to disable core sync. The steps to disable core sync mac are:
Step 1. Go to the "System Preferences" application and click on the "iCloud" preference pane.

Step 2. Go to the "Documents and Desktop" menu and uncheck the box next to it.
Step 3. Click on the "Done" option to save the changes and disable core sync on the device.
Why Does Core Sync Mac Enjoy High CPU and How To Fix It?
Mac users can turn on or off the core sync option based on the system needs using the steps mentioned above. However, if ask Adobe, core sync is not supposed to use high CPU usage at any time. Hence, if you observe that it is using a high CPU on your Mac device, there is something not right. The ingenuine installation of the core sync or the malware threats is the main reason for the core sync functioning improperly.
The quick steps to confirm if the core sync on your Mac is genuine are:
Step 1. Go to the "Task Manager" and go to "Details."

Step 2. Go to the details tab and open core sync.

Step 3. Check the core sync file location.

So do you need to worry?
The answer is a big yes as the high CPU used by core sync on Mac is not good due to the following reasons:
- It starts applications to crash.
- It overheats the Mac system.
- It leads to decreased system performance.
This clearly calls for the top troubleshooting solutions to prevent core sync from malfunctioning and causing further issues to Mac. Some of the top fixes to remove core sync Mac includes:
- Update the Software and Restart Your Mac
- Identify the source of high CPU usage with activity monitor
Update the software and restart your mac
The quick steps for updating the software to get rid of high CPU usage errors.
Step 1. Go to "System Preferences" and go to "Software Update."
Step 2. Go to the "Advanced" settings for specific update settings. Further, it is easy to check the application's update in the relevant apps.

More Information About Core Sync Mac
It is always great to know more about the top functionalities like core sync Mac. Hence, after going through the quick fixes for the core sync mac high CPU errors, it comes down to some of the popular questions. Users may be interested in the following top searched questions:
1. What is Windows core sync?
Core sync is part of the Creative Cloud installation and app. The Windows core sync is responsible for data sharing between devices and Creative Cloud. It can synchronize different documents created in top applications like Adobe Photoshop and Adobe XD. Further, core sync synchronizes all "Creative Cloud Files" folders on Windows devices to the Adobe servers.
2. How do I turn off Adobe background processes on Mac?
Multiple Adobe background processes may run on Mac devices. The quick steps to turn these processes off include:
- Start by turning off all the Adobe Creative Cloud applications on the device.
- Disable core sync by going to the system preferences of the device.
- Disable all the LaunchAgents and LaunchDaemons.
- Finally, turn off the running Adobe processes by quitting the Adobe option.
3. What happens if I uninstall the Core Sync on my Mac?
You will no longer be able to use Adobe Creative Cloud if you delete core sync on mac devices. It is because core sync is responsible for the smooth synchronization between the Mac devices and the Creative Cloud.
Summary
Hence, learning about the core sync app option on Mac devices is easy. No more confusion when it asks for different access or permissions when you know it is necessary to synchronize the device's data with Creative Cloud. The detailed functions and purpose of core sync ensure that users get the best out of it.
After going through what is core sync mac, the quick steps to use it ensure that users can easily turn on and turn it off according to their needs. It is easy to learn about the high CPU core sync error and fix it quickly using the detailed steps. Further, users can go through the top questions to gain more information about core sync Mac.
Was This Page Helpful?
Updated by Tracy King
Tracy became a member of the EaseUS content team in 2013. Being a technical writer for over 10 years, she is enthusiastic about sharing tips to assist readers in resolving complex issues in disk management, file transfer, PC & Mac performance optimization, etc., like an expert.
Related Articles
-
What Is MacOS Extended Journaled? [Updated 2025]
 Tracy King/2025-01-24
 -
Hot Corners Mac: How to Enable on macOS Sonoma/Ventura
 Brithny/2025-01-24
 -
All About Novo Button [2025 Full Guide]
 Rel/2025-01-24
 -
M2 Pro vs M2 Max | Price, Battery Life, CPU, and GPU
 Brithny/2025-01-24