Have you upgraded from Windows 10 to Windows 11? Windows 11 do give us some surprise but some of you may encounter the high memory usage issue. So how to fix it and make your computer keep healthy? In this article, we provide 8 methods to fix high memory usage in Windows 11.
Quick Navigation:
1. End Unnecessary Apps or Programs
2. Disable Startup Apps
3. Defragment Hard Drive
4. Disable SysMain Service
5. Adjust for Best Performance
6. Increase Virtual Memory
7. Set Your Registry
8. Scan Virus
Reasons for High Memory Usage In Windows 11
Memory is used to temporarily store data and instructions, like RAM. All programs in a computer are run in Memory.
- Unnecessary Apps or Programs
- Enabled a lot of programs running at the Startup.
- Virtual memory is not enough.
- Virus infection.
- More......
The memory usage issue corresponds to a number of approaches, and you may need to try each one of them. Read on and check 8 fixes in Windows 11.
1. End Unnecessary Apps or Programs
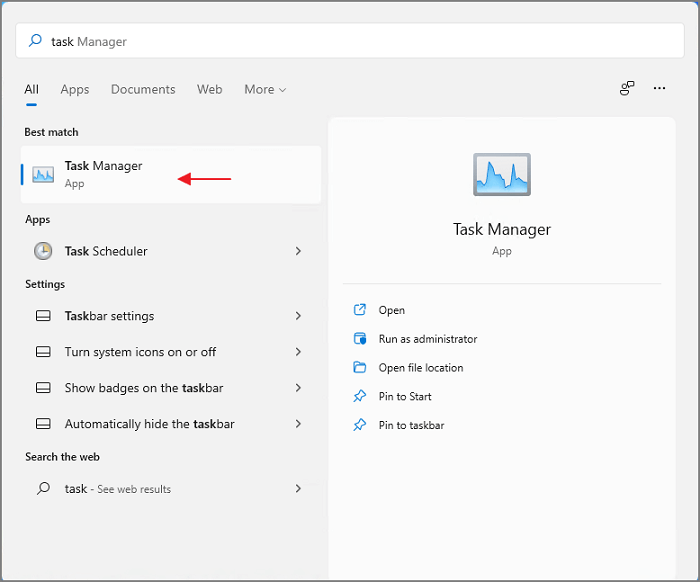
Step 1. Press the Search icon in the middle of the taskbar. And input Task Manager, then click the best match to start.
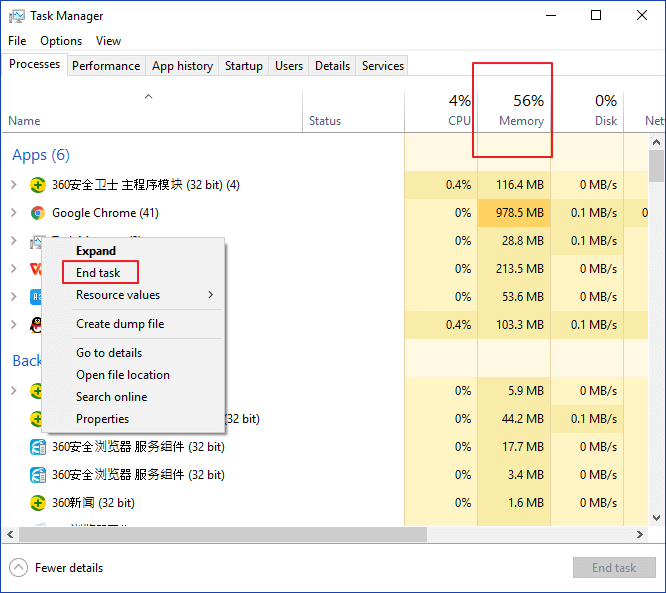
Step 2. In the Task Manager, click the Processes tab.
You can see the apps and programs that are running below. Move to the Memory column, you can see the memory consumption.
Step 3. Right-click the program and select End Task on the pop-up menu.
Choose the app that you don't need at that moment. Or you can select the one that occupies too much memory.
2. Disable Startup Apps
Some programs will automatically start up when you running the computer. It does convenient for reducing the clicking steps but some apps consuming a lot of memory. The startup is too high. If you want to manage programs running at the Startup, you can go to the Startup tab to disable apps.
Step 1. Click the Search icon to input Task Manager. Click it to launch.
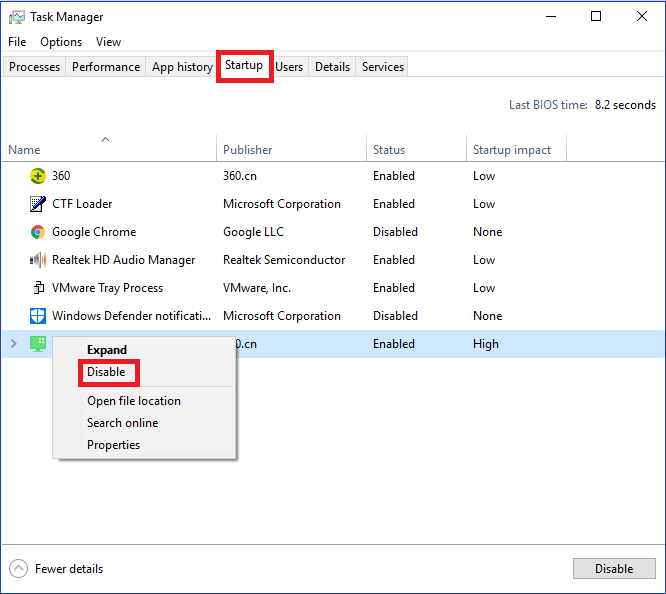
Step 2. Go to the Startup tab.
You can see a bunch of apps that running at the startup.
Step 3. Right-click the app and click Disable.
3. Defragment Hard Drive
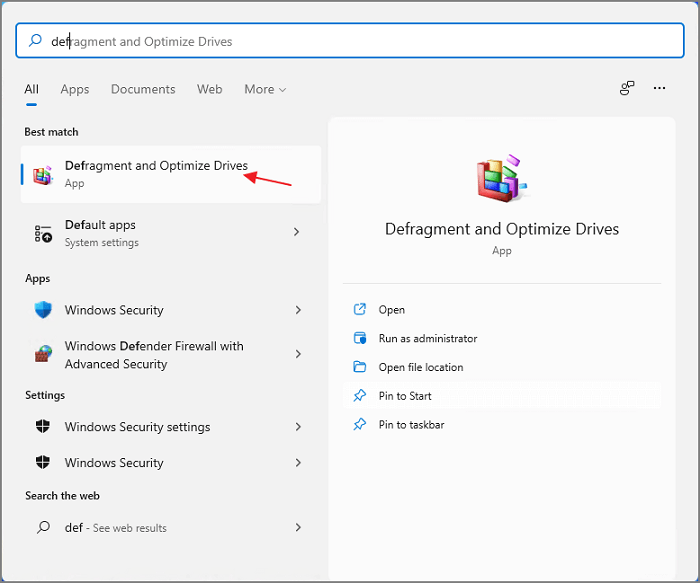
Step 1. Click the search icon to open the Start menu, and search for Defragment and Optimize Drives. Click the best match result to start.
Step 2. You can see the drive here. Click the one you want to defragment and click Optimize option.
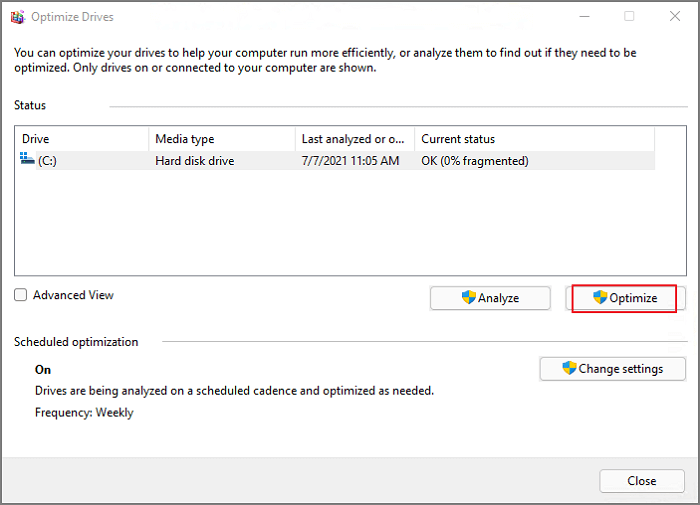
Step 3. Wait for the defragment is finish.
Step 4. While finish, restart your computer and see if your memory usage is a relief.
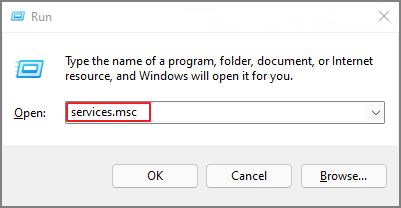
4. Disable SysMain Service
If you are experiencing performance issues, it is OK to disable the SysMain service. Known as SuperFetch in Windows 10, SysMain used to identify the frequently used apps and help you start faster.
Step 1. Press Windows + R to open the Run window. Input services.msc in the box and then click the OK button.
Step 2. Scroll down to find the SysMain service.
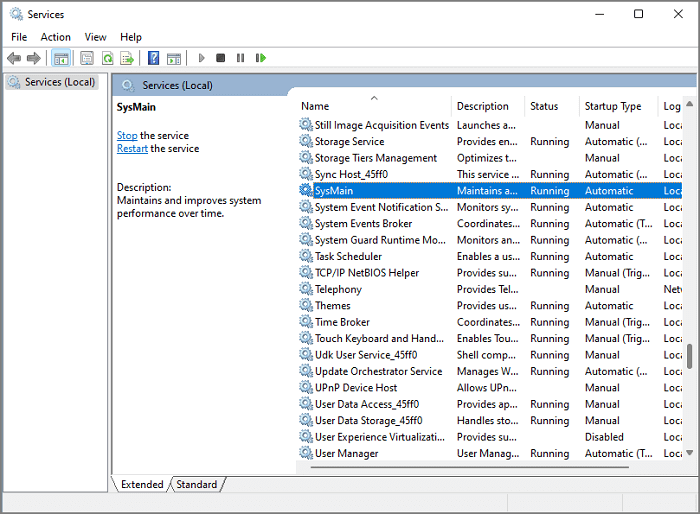
Step 3. Right-click SysMain Service and select Properties from the context menu.
Step 4. On the SysMain Properties page, navigate to Startup Type. Click the drop-down menu and choose Disabled.
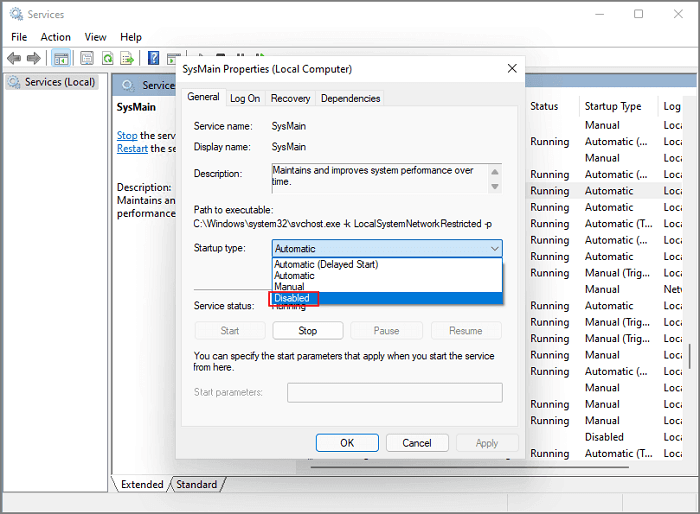
Step 5. Move to Service status and click the Stop button.
Wait for the disable process to complete and click OK.
5. Adjust for Best Performance
Change the system performance setting also can fix the high memory usage.
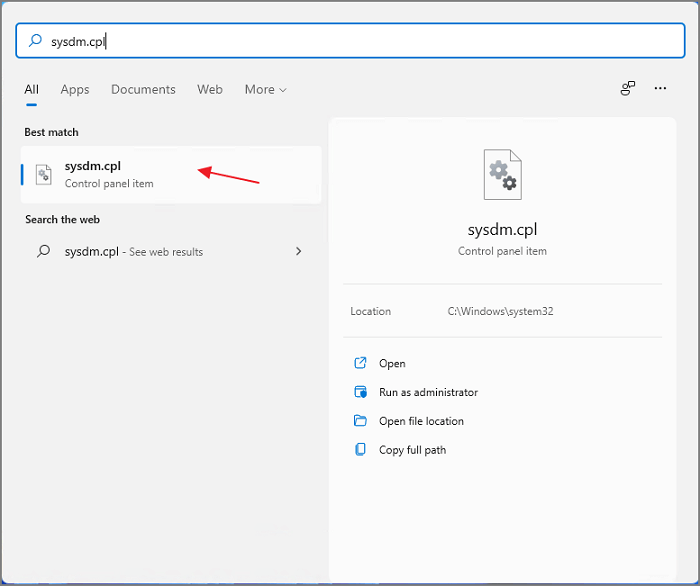
Step 1. Open Start menu and search for sysdm.cpl. Click the best match results.
Step 2. You can see the System Properties window here.
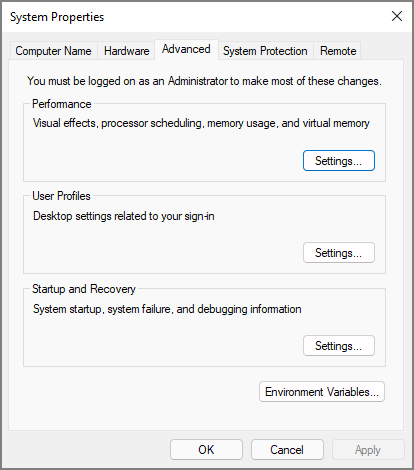
Step 3. Click on the Advanced tab and click the Settings button under the Performance.
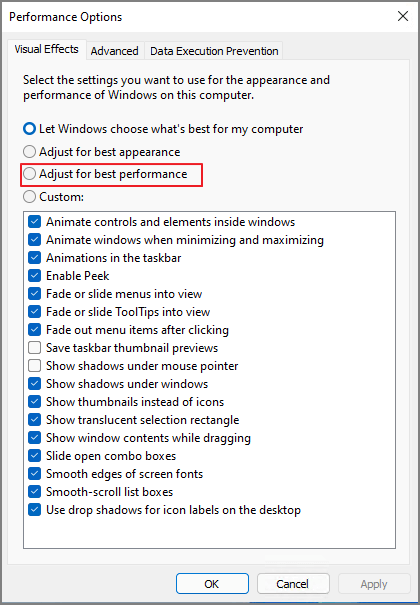
Step 4. Then the Performance Options windows pop up, select the Adjust for best performance.
6. Increase Virtual Memory
Step 1. Launch Start Menu and type sysdm.cpl. Click the results to move on.
Step 2. When System Properties appear, go to the Advanced tab and click Settings under Performance.
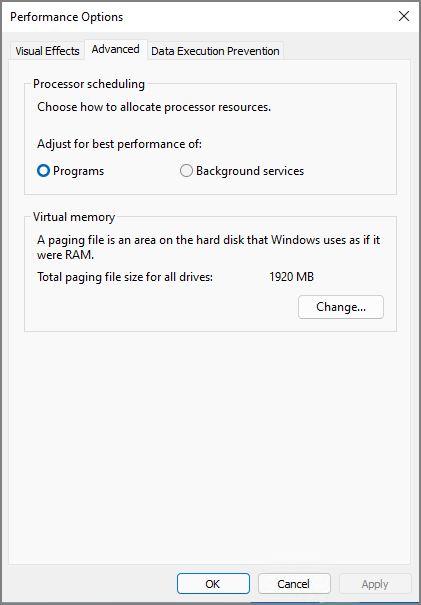
Step 3. In the Performance Options window, click the Advanced tab. And navigate to Virtual memory and click the Change button.
Step 4. Check the Automatically manage paging file size for all drives > select C drive (system partition) > Check No paging file > Click on the Set button.
Step 5. Click Yes to confirm.
Step 6. Select another volume from the drive list > Tick the Custom size and enter a value on Initial size and Maximum size > Click on Set and then click on OK.
Step 7. Restart your computer.
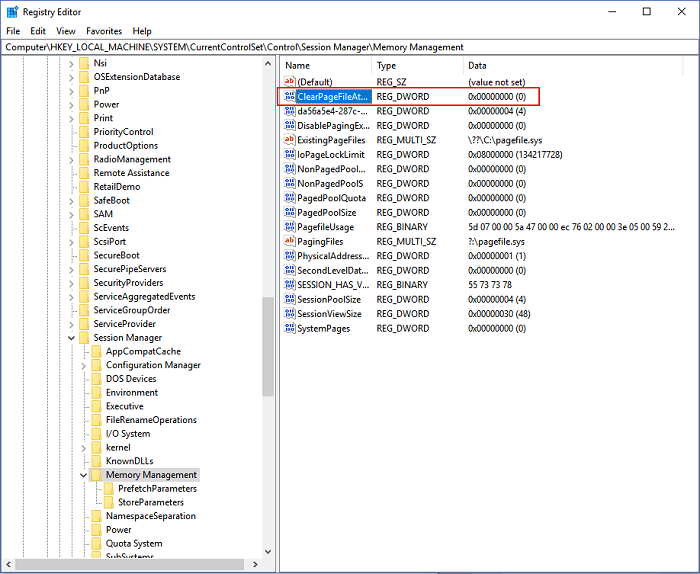
7. Set Your Registry
Step 1. Press Windows + R to open the Run window, type Regedit to open the Registry Editor.
Step 2. Navigate to: Computer\HKEY_LOCAL_MACHINE\SYSTEM\CurrentControlSet\Control\Session Manager\Memory Management
Step 3. Locate and double-click the ClearPageFileAtShutDown.
Step 4. Enter 1 on the Value data and click OK.
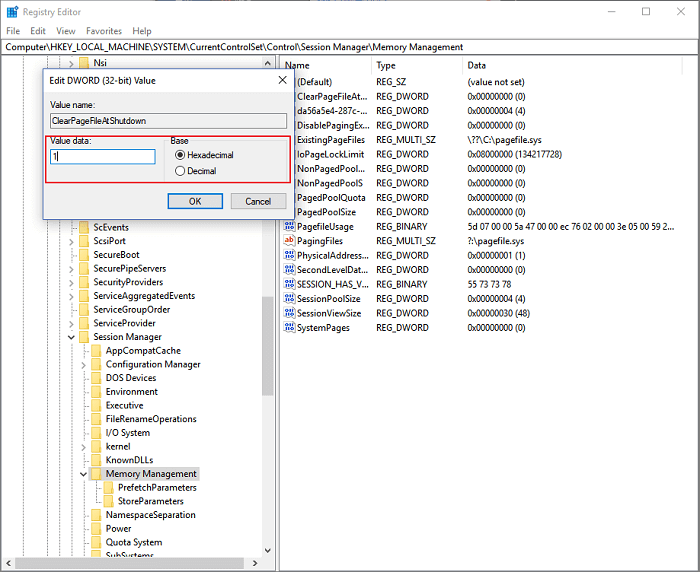
Step 5. Restart your computer.
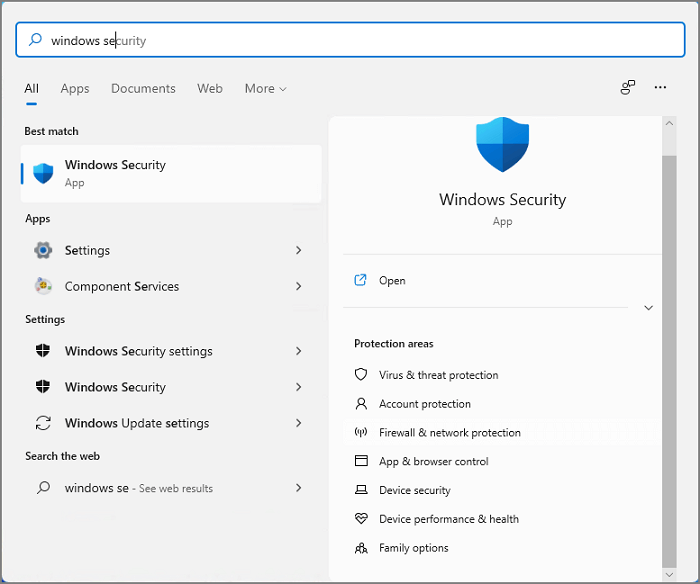
8. Scan Virus
The high memory usage may be caused by a virus issue.
Step 1. Type Windows Security on the Start Menu. Click the best match to open the program.
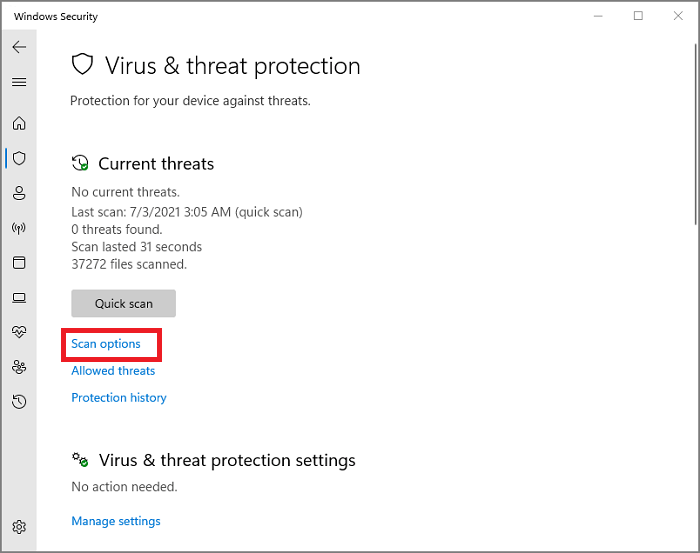
Step 2. Click Virus & threat protection.
You can click the Quick Scan here.
If it doesn't work, we suggest you make a full scan for looking at the virus.
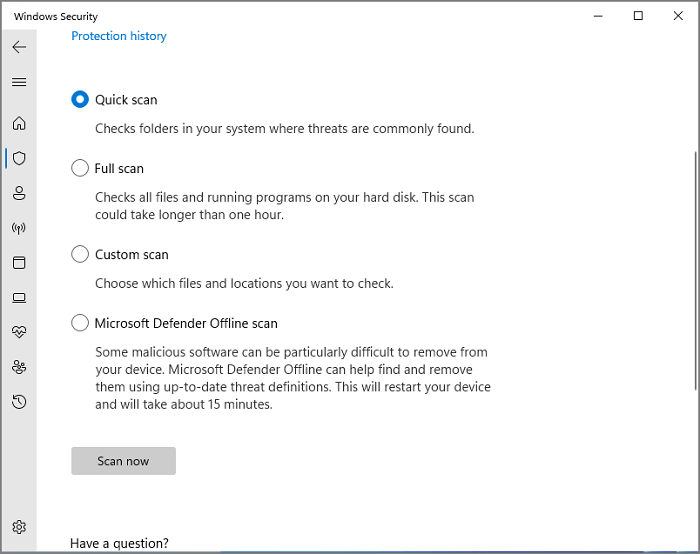
Step 1. Click Scan options.
Step 2. Tick the Full scan and click Scan now button.
Was This Page Helpful?
Daisy is the Senior editor of the writing team for EaseUS. She has been working at EaseUS for over ten years, starting as a technical writer and moving on to being a team leader of the content group. As a professional author for over ten years, she writes a lot to help people overcome their tech troubles.
Written by Tracy King
Tracy became a member of the EaseUS content team in 2013. Being a technical writer for over 10 years, she is enthusiastic about sharing tips to assist readers in resolving complex issues in disk management, file transfer, PC & Mac performance optimization, etc., like an expert.
Related Articles
-
How to Stop Windows 11 Update (Block It Forever)
 Brithny/2025-12-01
 -
How to Access Startup Security Utility Mac? [Latest Tips]
 Tracy King/2025-06-30
 -
What is AMD CPU fTPM? Everything You Need to Know
 Daisy/2025-07-04
 -
How Long Do SSDs Really Last? [New Study 2025]
 Cici/2025-06-30