Sharing printer is quite common for both working and home environments. However, there are many issue reports on shared printers from the year 2021, and the error goes Operation Failed with Error 0x0000011b. By this article posts, Microsoft hasn't released an overall fix for this issue. This article introduces some proven effective fixes.
What the 0x0000011b error code means?
This issue is about a printer connecting error. And it happens when a PC connects to a shared printer on another PC, which stops the printing needs. However, the shared printer shows up on the remote PC and seems OK to be connected. It may also appear when trying to download the printer driver. And both Windows 10 and 11 have such an issue.
Causes of the 0x0000011b error code
The security patches Microsoft released to protect Windows 10 and 11 from Windows Print Spooler Spoofing caused vulnerability in remote code. And the involved patches are KB5005565 and KB5005568. These patches affected the remote connection to a printer via a shared network and asked for an admin right.
How to fix the 0x0000011b error code?
For the spotted root reason, there are several temporary fixes approved effective to settle this problem. A quick solution is to allow administrative users to install the printer driver. Or you can reverse the Windows Print Spooler Spoofing patch default setting by disabling them. Below are the detailed steps for these two methods.
Method 1: Install the printer driver again without admin
As mentioned above, when the 0x0000011b error occurred, printing is only allowed with admin rights connection to the target printer. To change this registry key needs to be edited. Follow the steps below for this:
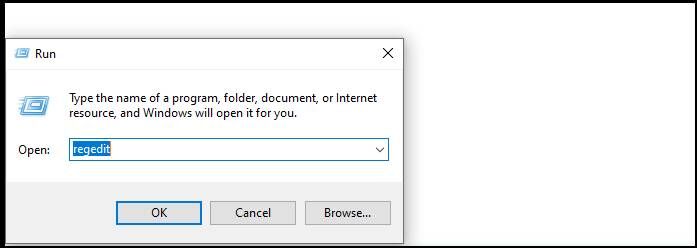
- Open the Registry Editor by pressing the Windows key + R;
- Search “HKEY_LOCAL_MACHINE\Software\Policies\Microsoft\Windows NT\Printers\PointAndPrint”at the top
- Edit the default value to 0.
- Click OK
Method 2: Reverse the settings brought by the update patches
Check below for a step-by-step guide.
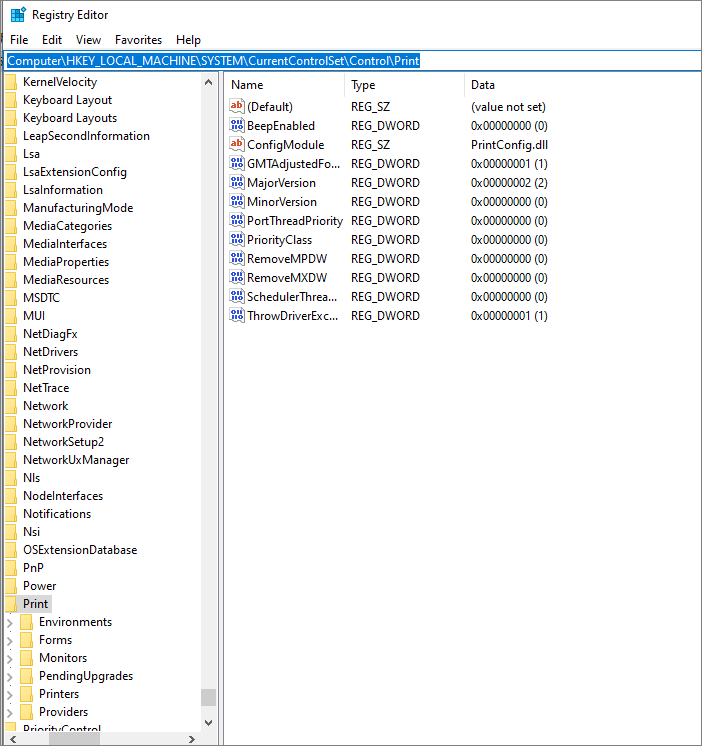
- Open Registry editor
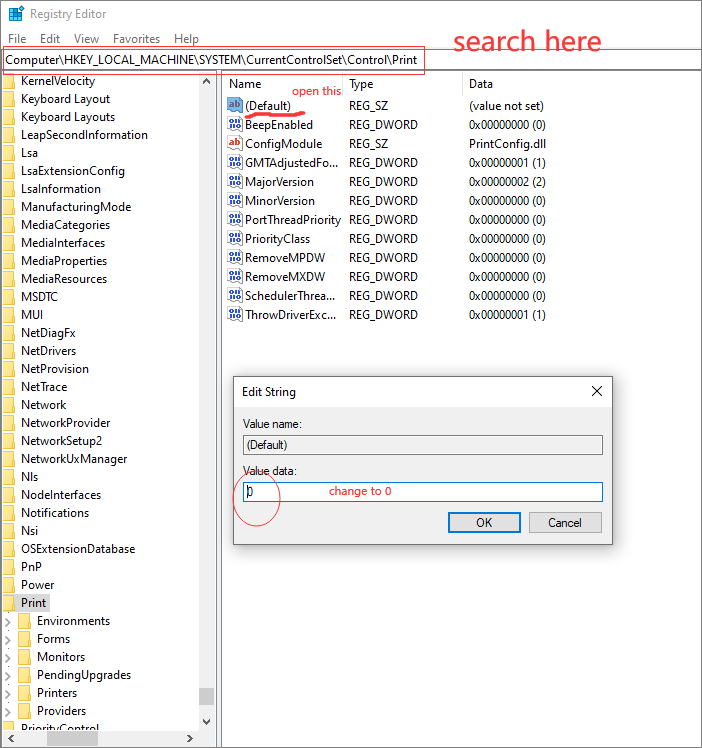
- Enter the Print section by this route - HKEY_LOCAL_MACHINE\SYSTEM\CurrentControlSet\Control\Print, or you can search directly in the top
- Open the Default file and make the Value 0
Method 3: Uninstall updates
Another method is to remove the newly updated patches and eliminate the change but leave with the vulnerability these patches mean to cover. However, this can be the worry-free fix for this issue until Microsoft release an official solution.
And it's pretty simple to follow this method. Just go to the Settings KB updates section and uninstall KB5005565.
- Open Settings from the Windows Start button
- Enter into Windows Updates
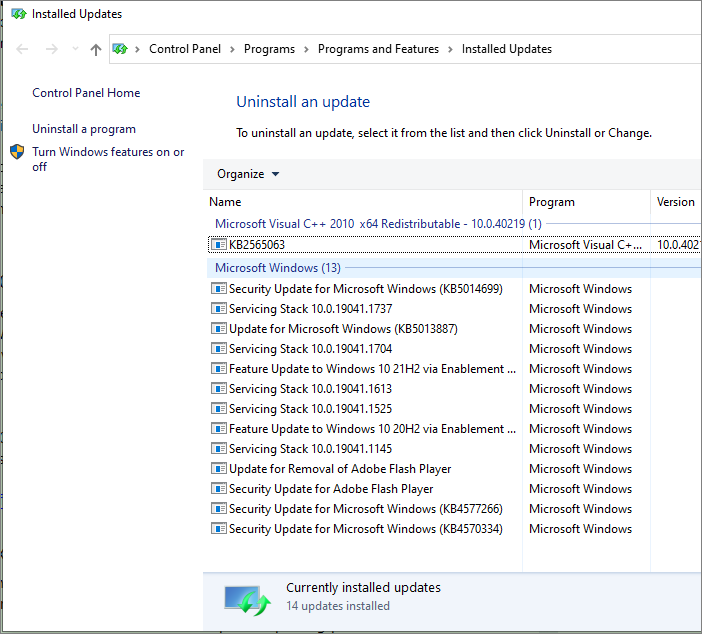
- Check View Update History>Uninstall updates
- Search BKB5005565 here
Both Windows 10 and 11 can apply the above methods. And with knowledge about how this happened, it’s effortless to follow any solutions. The first two are temporary fixes, and the problem may appear again. The KB removal way brings risk and is not the most suggested, but it will solve this issue from the root.
Was This Page Helpful?
Daisy is the Senior editor of the writing team for EaseUS. She has been working at EaseUS for over ten years, starting as a technical writer and moving on to being a team leader of the content group. As a professional author for over ten years, she writes a lot to help people overcome their tech troubles.
Related Articles
-
Reset This PC Not Working on Windows 11 (4 Fixes)
 Brithny/2026-02-12
 -
What Is DCIM? What Does DCIM Stand for? [Beginner Guide]
 Daisy/2026-06-17
 -
What Is Werfault.exe and How to Fix Werfault.exe Error in Windows
Daisy/2025-06-30 -
What is AMD CPU fTPM? Everything You Need to Know
Daisy/2025-07-04