-
![]()
-
![]()
-
![]() xD-Picture Card Recovery: How to Recover Lost Files (Photos/Videos)
xD-Picture Card Recovery: How to Recover Lost Files (Photos/Videos) July 23,2026
 6 min read
 -
![]()
-
![]()
-
![]() DJI Action 5 Pro Video Recovery: Restore Deleted Footage EasilyJuly 23,20266 min read
DJI Action 5 Pro Video Recovery: Restore Deleted Footage EasilyJuly 23,20266 min read -
![]()
-
![]()
-
![]()
-
![]() How to Recover Image DB on Sony Camera [Sony Alpha 7 III, Alpha 7 IV...]July 23,20266 min read
How to Recover Image DB on Sony Camera [Sony Alpha 7 III, Alpha 7 IV...]July 23,20266 min read
Page Table of Contents
| Workable Solutions | Step-by-step Troubleshooting |
|---|---|
| Fix 1. Allow Camera Permission | Go to Windows Settings and allow camera permission. Click Windows Start > Settings. Type webcam...Full steps |
| Fix 2. Update Driver of Laptop Camera | Press Windows + X and click Device Manager. Move to Imaging Devices and click it. Right-click driver...Full steps |
| Fix 3. Apply Troubleshooting | Type Control Panel in the search box and click to start. Scroll down the page and select Troubleshooting...Full steps |
| Fix 4. Rollback Camera Driver | Type Device Manager in the search box, and click to open it. Click the Imaging device. Your webcam will show...Full steps |
| More Useful Solutions | Uninstall and reinstall the camera driver in Device Manager; turn Off camera protection...Full steps |
"My camera has stopped working, I cannot uninstall it and reinstall it......I cannot find it listed anywhere in my device manager settings. I would appreciate it if somebody could solve this problem for me without me having to buy a new laptop......please help."
Due to some reasons, your camera is not working when you need it to do tasks. Terrible! It is time to troubleshoot your computer. Join us to learn how to fix the camera not working/detected on a laptop.
Camera Photo Recovery: Restore Lost Photos from Any Camera or SD Card
In this page, you will learn about digital camera photo recovery and how to recover lost digital photos, pictures, images, and videos from a memory card.

Solution 1 - Allow Camera Permission (Windows Settings)
One of the common reasons in “Why is my camera not working on my laptop” is your camera permission is limited by yourself. Go to Windows Settings and allow camera permission.
Step 1. Click Windows Start > Settings.
Step 2. Type webcam in the search box.
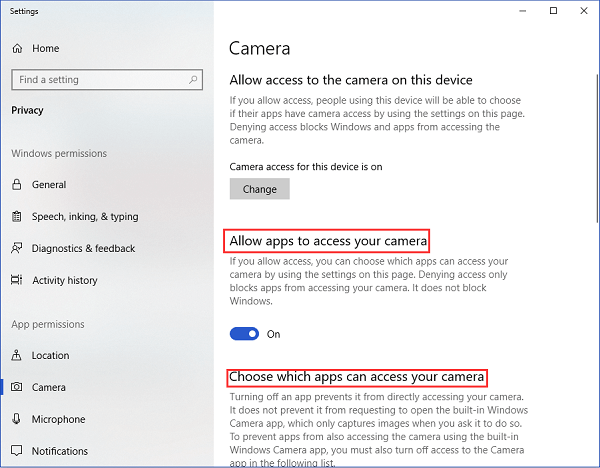
Step 3. Choose Camera privacy settings.
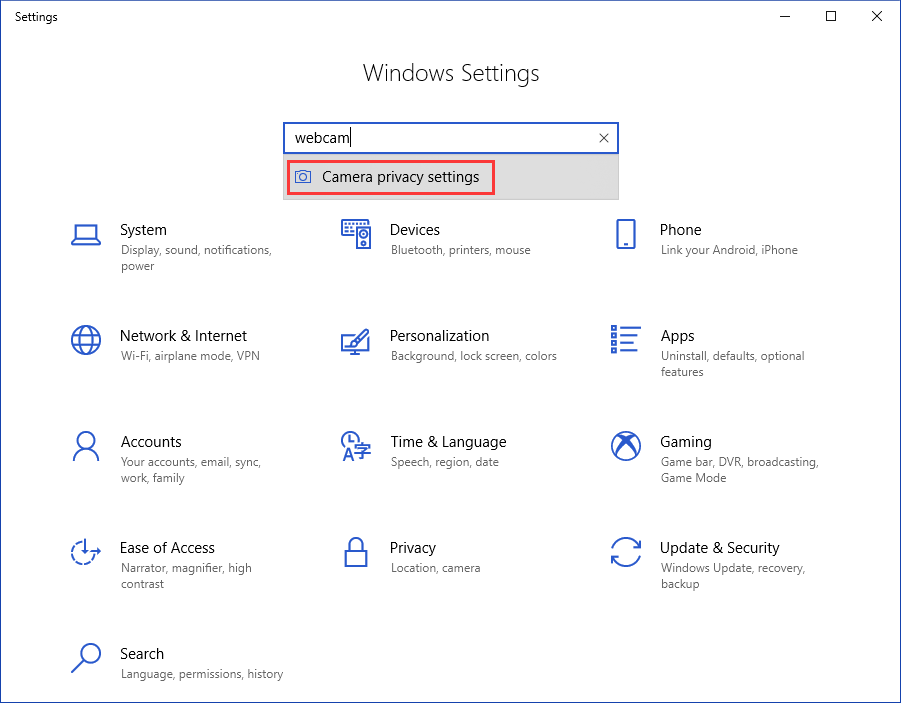
Step 4. Make sure "Allow apps to access your camera" is on or choose apps to access your camera.
Solution 2 - Update Driver of Laptop Camera (Device Manager)
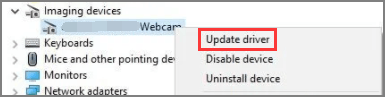
Step 1. Press Windows + X and click Device Manager.
Step 2. Move to Imaging Devices and click it.
Step 3. Right-click the laptop camera driver.
Step 4. Choose Update Driver.
Step 5. Choose Search automatically for updated driver software > Select "Let me pick from a list of device drivers on my computer".
Step 6. Choose USB Video Device.
Step 7. Restart your PC.
Solution 3 - Apply Troubleshooting (Control Panel)
Step 1. Type Control Panel in the search box and click to start.
Step 2. Scroll down the page and select Troubleshooting.
Step 3. Click View all on the left pane.
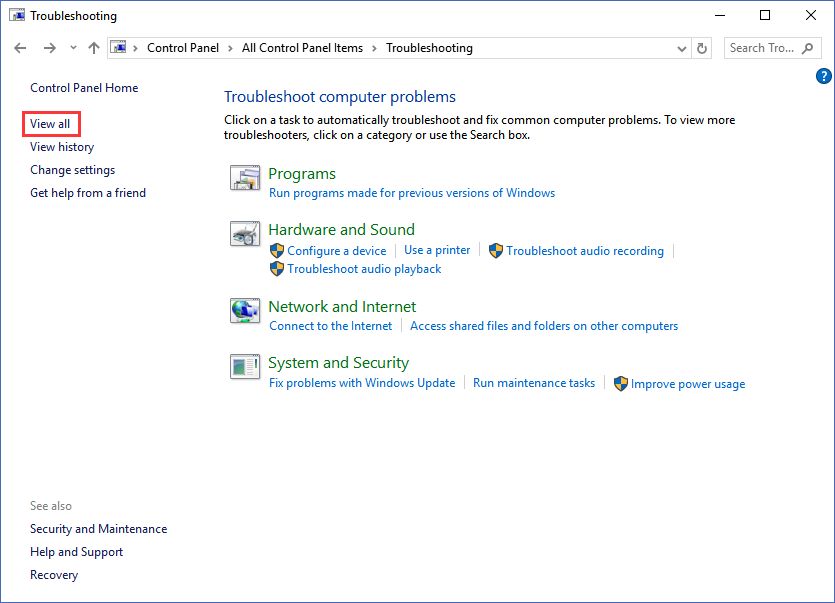
Step 4. Select Hardware and Devices.
Step 5. Click Next.

The troubleshooting will detect any common or serious problem with the hardware.
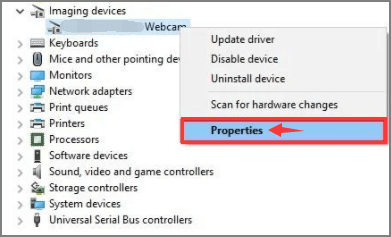
Solution 4 - Rollback Camera Driver (Device Manager)
Step 1. Type Device Manager in the search box, and click to open it.
Step 2. Click the Imaging device. Your webcam will show up under the Imaging device.
Step 3. Right-click it and choose Properties.
Step 4. Go to the Driver tab, click Roll Back Driver, and click OK. ( If Roll Back Driver does not work, you can try another way in the next part. If it is available, go on.)
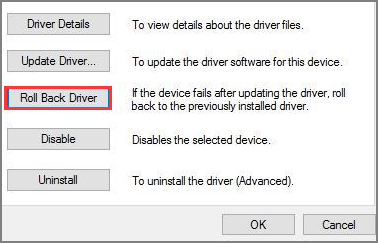
Step 5. Then the Driver Package rollback pops up, it will list some reasons about "why are you rolling back". Choose the answer that matches your situation.
Step 6. Click Yes and restart your computer.
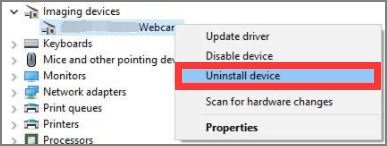
Solution 5 - Uninstall and Reinstall the Camera Driver (Device Manager)
Step 1. Press Windows + X, select Device Manager.
Step 2. Scroll down to expand Imaging devices, right-click the webcam driver and choose Uninstall device.
Step 3. Then you can see the "Uninstall Device" window, check to Delete the driver software for this device. Click Uninstall button.
Step 4. Click the Action tab and choose Scan for hardware changes.
Step 5. The computer will reinstall your camera driver. You can check whether the camera is working properly.
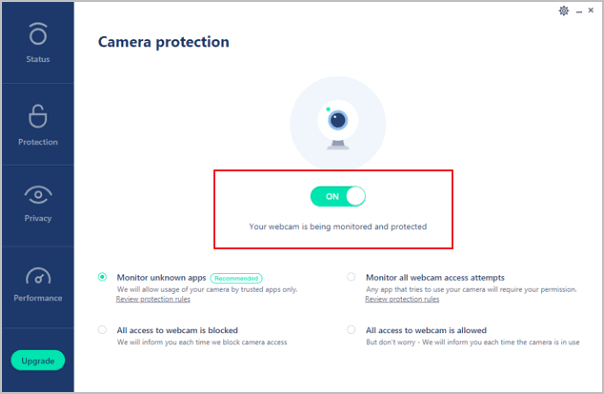
Solution 6 - Turn Off Camera Protection (Antivirus Software)
Generally, most antivirus software has privacy settings to limit some application access to the camera. You can change the camera protection setting to troubleshoot the Camera not working.
Step 1. Open your antivirus software.
Step 2. Find your "Privacy Protection".
Step 3. Turn off the camera protection. As pictures shows:
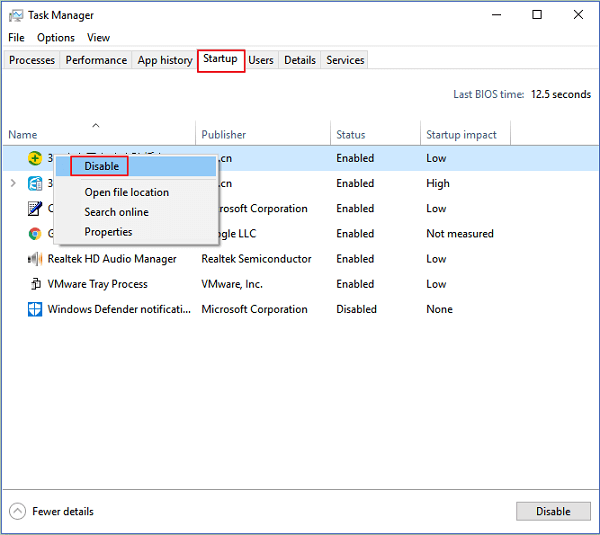
Solution 7 - Disable the App that is Using the Camera
Your camera is not working may be caused by the webcam is being used by another program.
Step 1. Type Task Manager in the search box, and click to open.
Step 2. Choose the Start-up tab, and select the process that is using the webcam.
Step 3. Right-click process and choose disable.
Solution 8 - Reset Your Camera Programs (Windows Settings)
If the above seven methods can not fix the "Camera not working" problem, you can reset the camera app. Your computer will reinstall it and revert to the default settings.
Step 1. Click Settings > Apps > Apps & Features > Camera
Step 2. Scroll down to find the Camera app or search Camera in the search box.
Step 3. Click Camera and select Advanced options.
Step 4. Choose Reset.

Why Is My Camera Not Working on Laptop
- Your camera permission is not allowed to your running programs.
- Outdated webcam driver.
- Your antivirus software blocks the camera function for privacy protection.
- Your camera app is used by another unknown program.
- ......
Get Your Answer Here! Available on Top-rated Laptop Models!
No matter what laptop you are using now, such as Lenovo, HP, ASUS, Dell, you can use the eight ways we mentioned in the body to solve Camera not working problem.
If you encounter any technical issue with our product, please send an email to [email protected] or contact our technical support team via online chat.
Was this page helpful?
-
![]()
Written by
Tracy became a member of the EaseUS content team in 2013. Being a technical writer for over 10 years, she is enthusiastic about sharing tips to assist readers in resolving complex issues in disk management, file transfer, PC & Mac performance optimization, etc., like an expert.…


20+
Years of experience

160+
Countries and regions

72 Million+
Downloads

4.9 +
Trustpilot Score


