Table of Contents
![]() About the Author
About the Author
![]() Related Posts
Related Posts
What Does "Invalid Image Buffer Size" Mean
An image buffer refers to a block of memory allocated to store image data during processing. When software attempts to load an image, it reads the file header and determines how much memory to allocate.
The error "Invalid Image Buffer Size" appears when:
- The file header indicates incorrect image dimensions
- The buffer allocation doesn't match the actual data size
- The file is truncated or partially overwritten
- The image decoding process fails
In simpler terms, the software expects a certain amount of image data, but the file structure doesn't match that expectation.
This commonly happens with:
- Corrupted JPEG/PNG files
- RAW photo repair scenarios
- Images recovered from faulty storage devices
- Incomplete downloads or transfers
How to Fix Invalid Image Buffer Size Error (Step-by-Step)
If you see the Invalid Image Buffer Size error while opening or importing an image, follow the detailed fixes below in order. These solutions address the most common causes, including oversized images, memory limitations, incomplete transfers, and file corruption. If you are sure the file is corrupted, go to the photo repair software solution directly.
Fix 1. Reduce Image Resolution Before Opening or Importing
Extremely large images may exceed the memory allocation limits of editing software, especially in motion graphics workflows. To avoid this issue, reduce the image resolution.
You can open your image in another photo viewer or editor, navigate to image size or resize settings. Reduce resolution and export the image as a new JPG or PNG file.
After reduce resolution of your image, try to open it again in Photoshop.
Fix 2. Disable or Adjust Canvas-Expanding Effects
Certain effects silently enlarge the rendering canvas, creating buffer sizes far larger than the original image.
First, locate any effects that have been added to the picture layer and temporarily turn off any distortion-based tweaks that might increase the rendering canvas, such as Motion Tile, Glow, Repetile, or others. To avoid excessive buffer allocation, lower the output width and height settings. Then, examine the composition once again to see whether the problem still occurs. To reduce real-time memory use and stabilize the rendering process, think about pre-rendering the layer before adding heavy effects if the problem persists.
Fix 3. Clear Cache and Optimize Memory or GPU Usage
Cache buildup or insufficient RAM/VRAM can prevent applications from allocating the required image buffer.
You can clear the cache and reopen After Effects to fix this image issue.
While increasing RAM allocation enables the program to analyze huge pictures more effectively, clearing the memory and disk cache might release transient data that impedes rendering. Switching from GPU acceleration to software-only mode can help identify whether VRAM constraints or driver conflicts are causing the problem if it occurs during preview or rendering.
After making these changes, restarting the program ensures the cache is correctly rebuilt and frequently resolves unforeseen buffer allocation issues.
Fix 4. Re-transfer or Re-download the Image File
Incomplete file transfers frequently cause decoding mismatches and buffer errors.
Delete the corrupted or incomplete copy of the image, find the source, and re-download the file. If you cannot redownload images, try photo repair software, and do not delete the corrupted files.
If copied from a device, reconnect using a stable USB cable or card reader to avoid the transformation being interrupted again. Safely eject storage devices before disconnecting.
Fix 5. Repair Corrupted Image Files with Photo Repair Tool
If the image fails to open in any viewer, the internal file structure is likely damaged. In such cases, standard editing tools cannot fix the issue.
A specialized repair tool like EaseUS Fixo Photo Repair can rebuild image headers and restore proper decoding with advanced AI technology.
This professional photo repair tool can repair corrupted photos, such as JPEG or PNG files that cannot be previewed, display as blank/gray thumbnails, or return decoding and rendering errors when opened in editing software like Photoshop or Lightroom.
Images that were partially transferred, interrupted during download, or copied from unstable storage devices, resulting in truncated file data and invalid buffer allocation, can also be fixed with sample images.
Check the following steps and recover corrupted images:
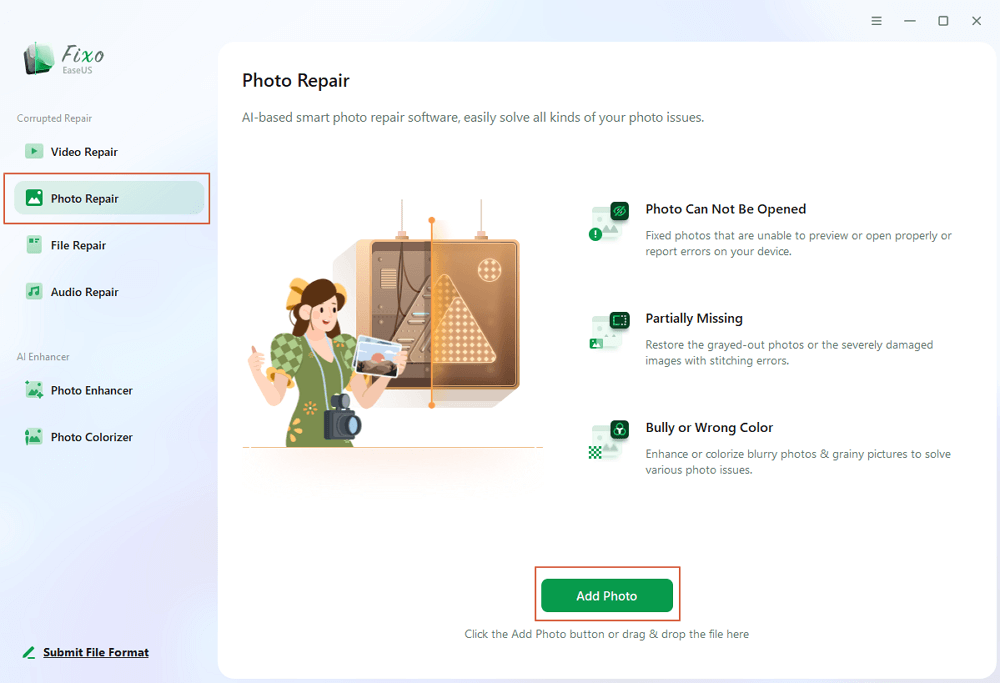
Step 1. Launch Fixo on your computer. You can choose "Photo Repair" to repair photos that cannot be opened, partially missing, etc. Click "Add Photos" to select corrupted photos.
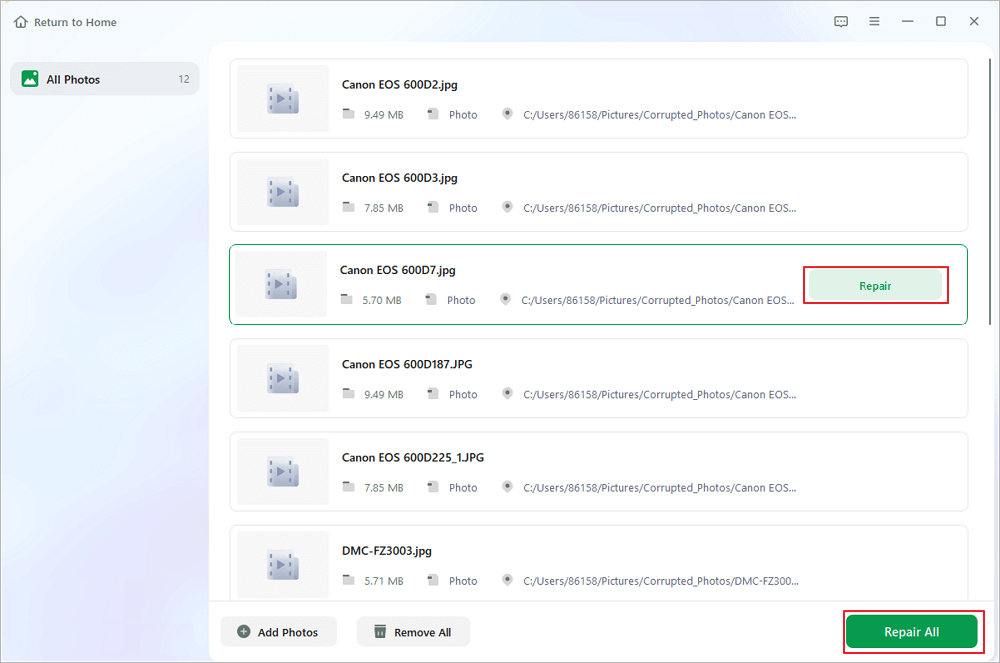
Step 2. You can repair multiple photos at once by clicking the "Repair All" button. If you want to repair one photo, move your pointer to the target photo and choose "Repair".
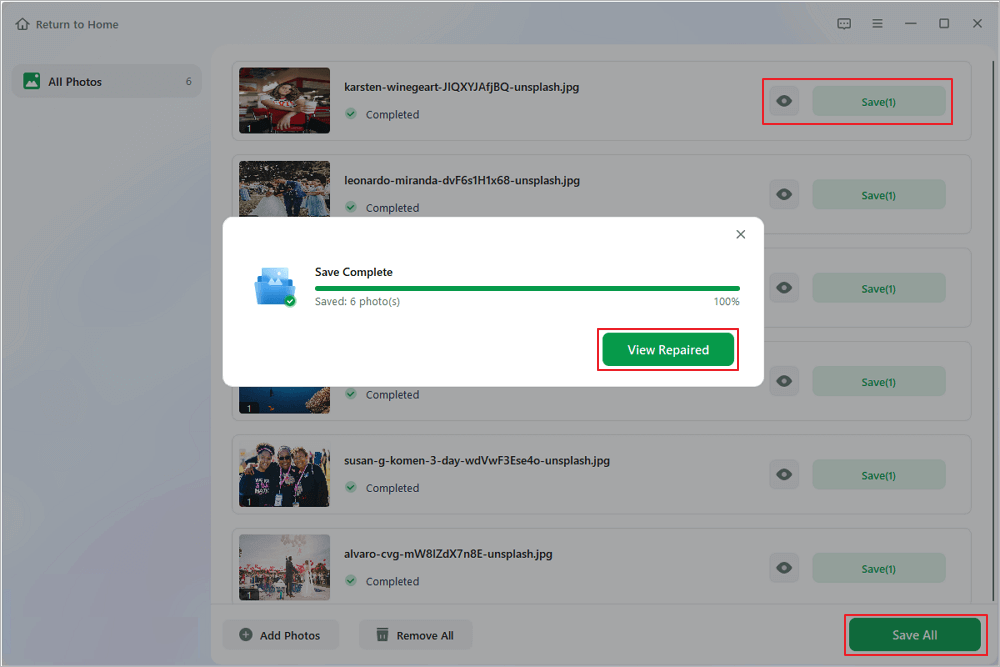
Step 3. You can click on the eye icon to preview the photos and click "Save" to save a selected photo. Choose "Save All" to save all the repaired images. Click "View Repaired" to locate the repaired folder.
Don't forget to share this professional photo repair software on social media to help more friends!

Invalid Image Buffer Size FAQs
1. How to fix unable to create image buffer in Premiere Pro?
Reduce the size of the picture resolution, then restart Premiere Pro after clearing the media cache. To test VRAM limitations, disable GPU acceleration, update graphics drivers, and then import the file again. Before editing, fix or re-export the picture if it is corrupted.
2. What causes image buffers of size exceed internal limits?
This error typically happens when buffers bigger than the software's memory constraints are created by picture dimensions, scaling, or effects.
3. How to fix error 516 in After Effects?
Memory allocation and excessive layer rendering are frequently associated with error 516. Disable effects that increase the size of the canvas, clear the cache, and lower the composition resolution.
Conclusion
The Invalid Image Buffer Size error can stem from both technical rendering limits and damaged image files. While reducing resolution and optimizing effects often solves AE-related cases, corrupted images require structural repair.
If the issue persists across applications or affects recovered photos, repairing the image file itself is typically the most reliable solution.
Was This Page Helpful?
About the Author
Dany is an editor of EaseUS who lives and works in Chengdu, China. She focuses on writing articles about data recovery on Mac devices and PCs. She is devoted to improving her writing skills and enriching her professional knowledge. Dany also enjoys reading detective novels in her spare time.