Differences Between RECOVERY and NORECOVERY Options
Actually, Recovery and Norecovery are two command parts during the database restoration. Both of these options need a SQL database backup.
The Recovery option will help if you have a single backup and you want to recover directly. This recovery process by default involves both undo and redo parts while no excess backup restoration is not allowed. That is to say, the RECOVERY option puts the database in the operational state.
NORECOVERY rolls the process forward so that the next action is executed. If you have different types of backups (differential, transactional, etc,) the NORECOVERY option should be the proper choice.
How to Restore MS SQL Database with Recovery and Norecovery Options
Recovery and Norecovery options are two manual SQL recovery methods. They are suitable for minor SQL corruption issues. Before you start these commands, you must keep in mind that a database backup is necessary. You must have a backup before you start the command.
To back up MS SQL
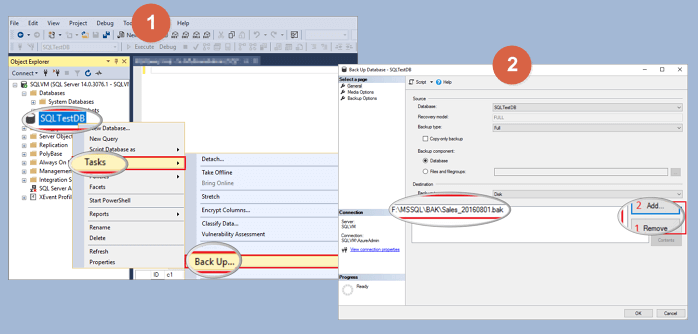
Step 1: Open the SQL Server Management Studio and right-click the database and select "Task > Back Up".
Step 2: Then you can back up your database according to your needs. While taking a backup, you can specify where you want to store the backup of your database.
Now that we know the differences and the way to create a backup, let’s go through the detail of MS SQL database restore.
Restore With Recovery Option
You can recover in SQL Server Management Studio by right-clicking "Databases" and selecting the "Restore Database" option
You can also use T-SQL. This is useful if you want to automate the tasks:
RESTORE DATABASE F FROM DISK = ’c:\sql\F.bak’ WITH FILE = 1, NOUNLOAD, STATS = 5,
RECOVERY
GO
Replace "F" with the name of your database. It is not necessary to use "RECOVERY" because it is a default one.
Restore With NORECOVERY
If there are multiple backup restorations, the NORECOVERY option is useful. Additional backups can be performed because Norecovery command enables "restoring state" in a database.
You can use SQL Server Management Studio to restore with Norecovery command:
Click on "Options". Choose "Restore With Norecovery" and click "OK".
Also, you use the command:
RESTORE DATABASE F FROM DISK = N’c:\sql\F.bak’
WITH NORECOVERY
Go
RESTORE LOG F FROM DISK = N’C:\Program Files\Microsoft SQL Server\MSSQL14.MSSQLSERVER\MSSQL\Backup\F_LogBackup_2019-8-4_12-24-25.bak’
WITH RECOVERY
Go
Here, Norecovery command will be used to perform additional backups later. This command will restore the database but that database will be in the restoring state.
EaseUS for MS SQL Database Recovery (Easier)
If your SQL server database is damaged, you have other options to restore your data rather than using the backup. And if you didn't back up the database, you can still restore lost data without backup.
EaseUS SQL Recovery software allows you to repair a damaged database and resolve all types of SQL database repair problems. What's more, it can recover database components (tables, triggers, indexes, keys, rules&stored procedures) as well as deleted records from the SQL database. It supports MS SQL Server 2017, 2016, 2014, 2012, 2008 and older versions.
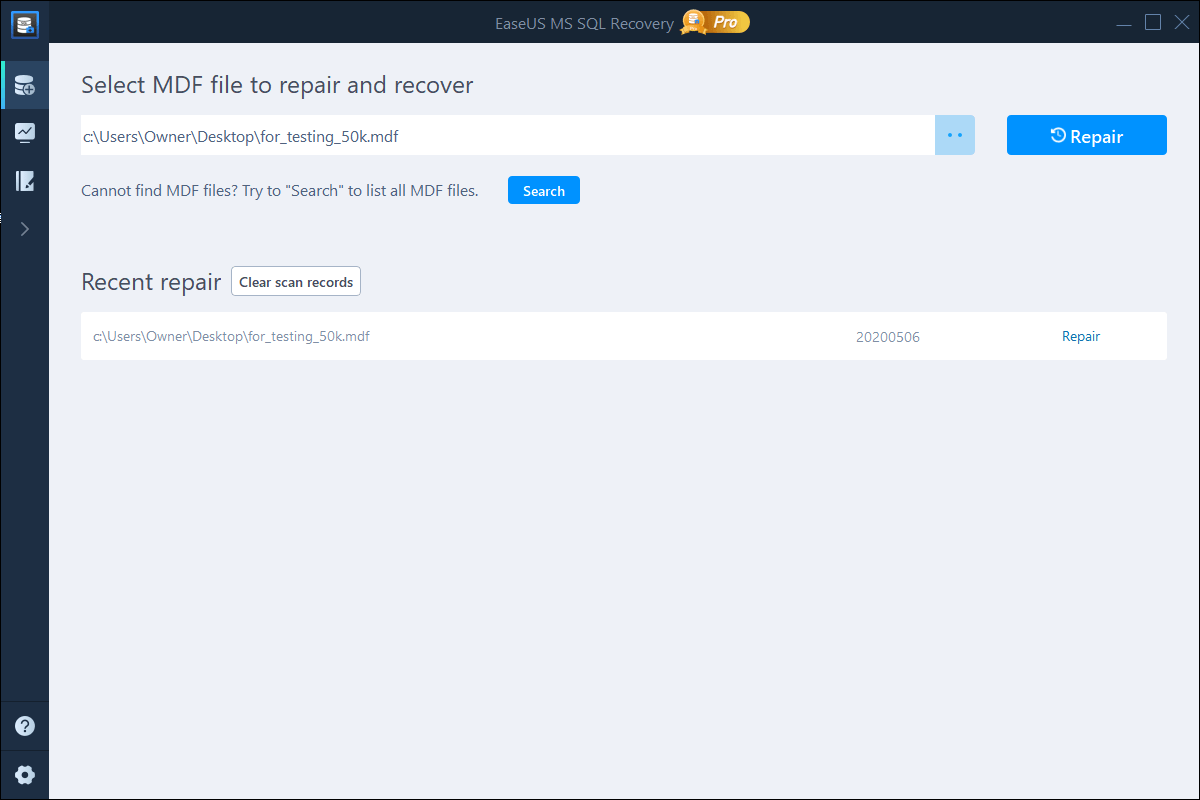
Step 1. Download and run EaseUS MS SQL Recovery.
Step 2. Click the two dots (Browse button) to choose the target MDF file or click "Search" and select the desired file to repair from the list found below. Then, click "Repair" to start the repairing process.
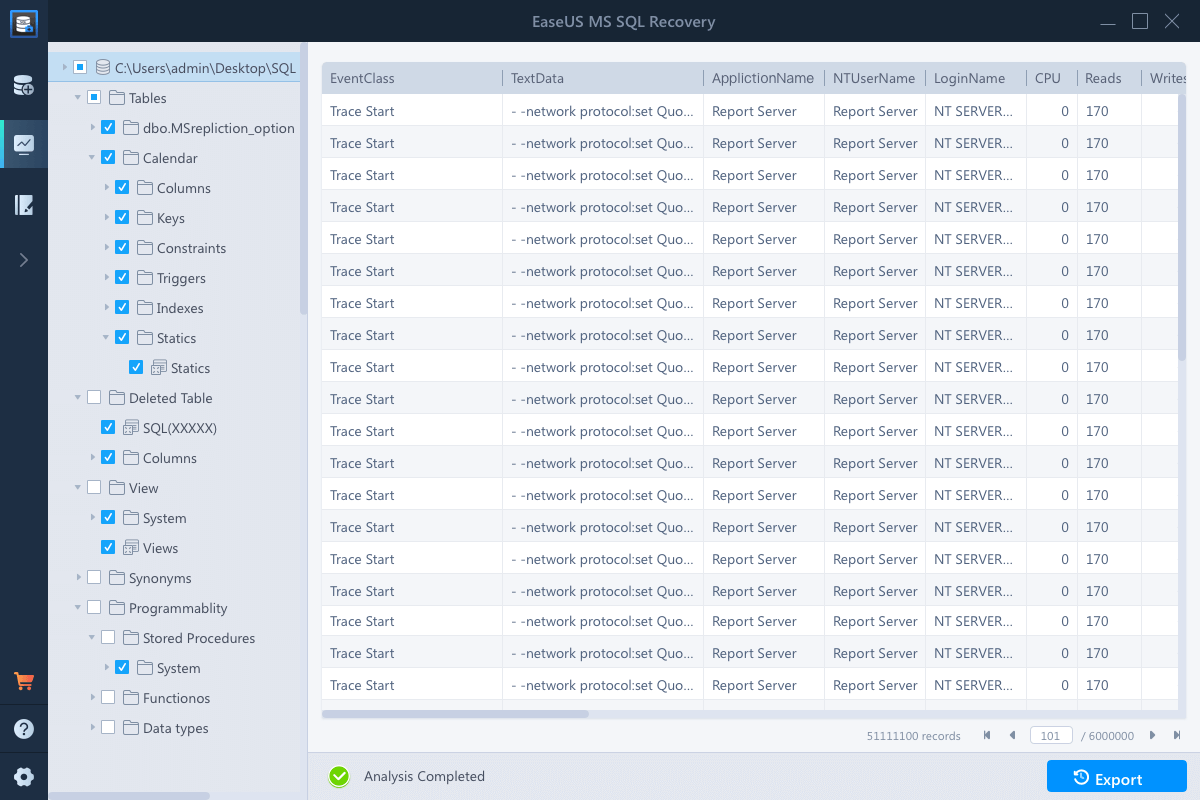
Step 3. When the process completes, a Window will appear to confirm the successful analysis. All the deleted tables & records recovered items will be listed on the left pane in the name of the original tables.
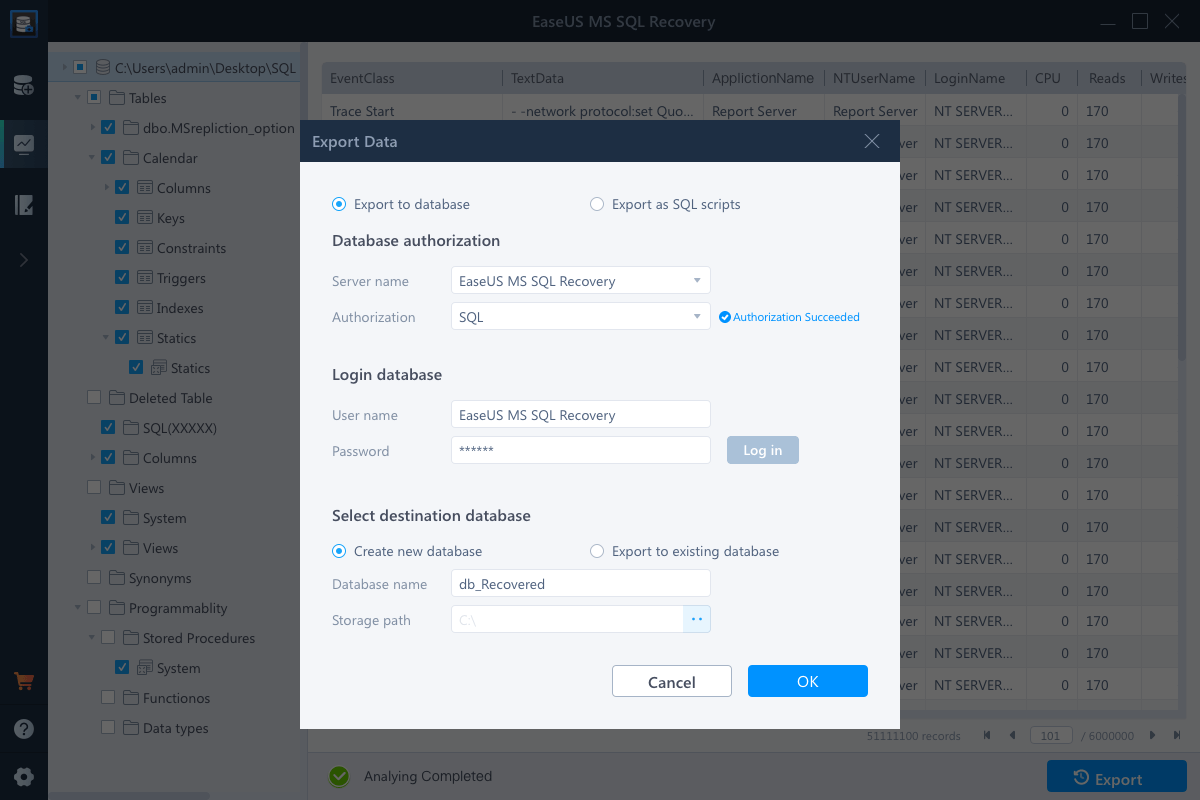
Step 4. Click the "Export" button in the bottom right corner of the screen. You can save the recovered database to database & SQL scripts based on your need. Then, you need to enter Server/Instance Name and connect to the server. If you choose to "Export to database", you can create a new database or export to an existing database.
Was This Page Helpful?
Related Articles
-
How to Export MS SQL Server Database to CSV File
![author icon]() Cedric/2026-06-16
Cedric/2026-06-16 -
MS SQL Recovery Software to Recover MDF/NDF File
![author icon]() Cedric/2026-06-16
Cedric/2026-06-16 -
How to Fix Microsoft SQL Server Error 5123
![author icon]() Tracy King/2026-06-16
Tracy King/2026-06-16 -
SQL Database Restore Failed Database Is in Use
![author icon]() Jean/2026-06-16
Jean/2026-06-16