Ever since computers have become a vital aspect of the education system, workforce, and our personal lives, it is vital to remind ourselves how important it is to adapt our computers according to ourselves. From the brightness and ergonomics to the font size of the computer screen, everything needs to be correctly set up for healthy computer usage behavior.
Font size determines how large or small the texts appear on your computer screen. If you have weak eyesight, you will find it hard to read from a screen with a small font size. The same goes for very large font sizes; it will start to hurt your eyes.
So, if you are having a problem while reading from your computer screen lately, it is time to change the font size on your Windows 11/10/8/7, any version you use.
How to Change Font Size on Windows 11/10/8/7?
Changing font size on Windows depends on which version is being used. Since each version of Windows settings has a difference in navigation, you may find it hard to locate the exact setting that can increase or decrease the font size on your Windows 11/10/8/7.
1. Change Font Size on Windows 10
Windows 10 is one of the most widely used Windows versions. So, if you are a Windows 10 user, here are the steps you can use to change the font size on Windows 10.
Step 1. Open Windows settings by clicking the Windows button, scrolling down to Settings, and clicking on it.
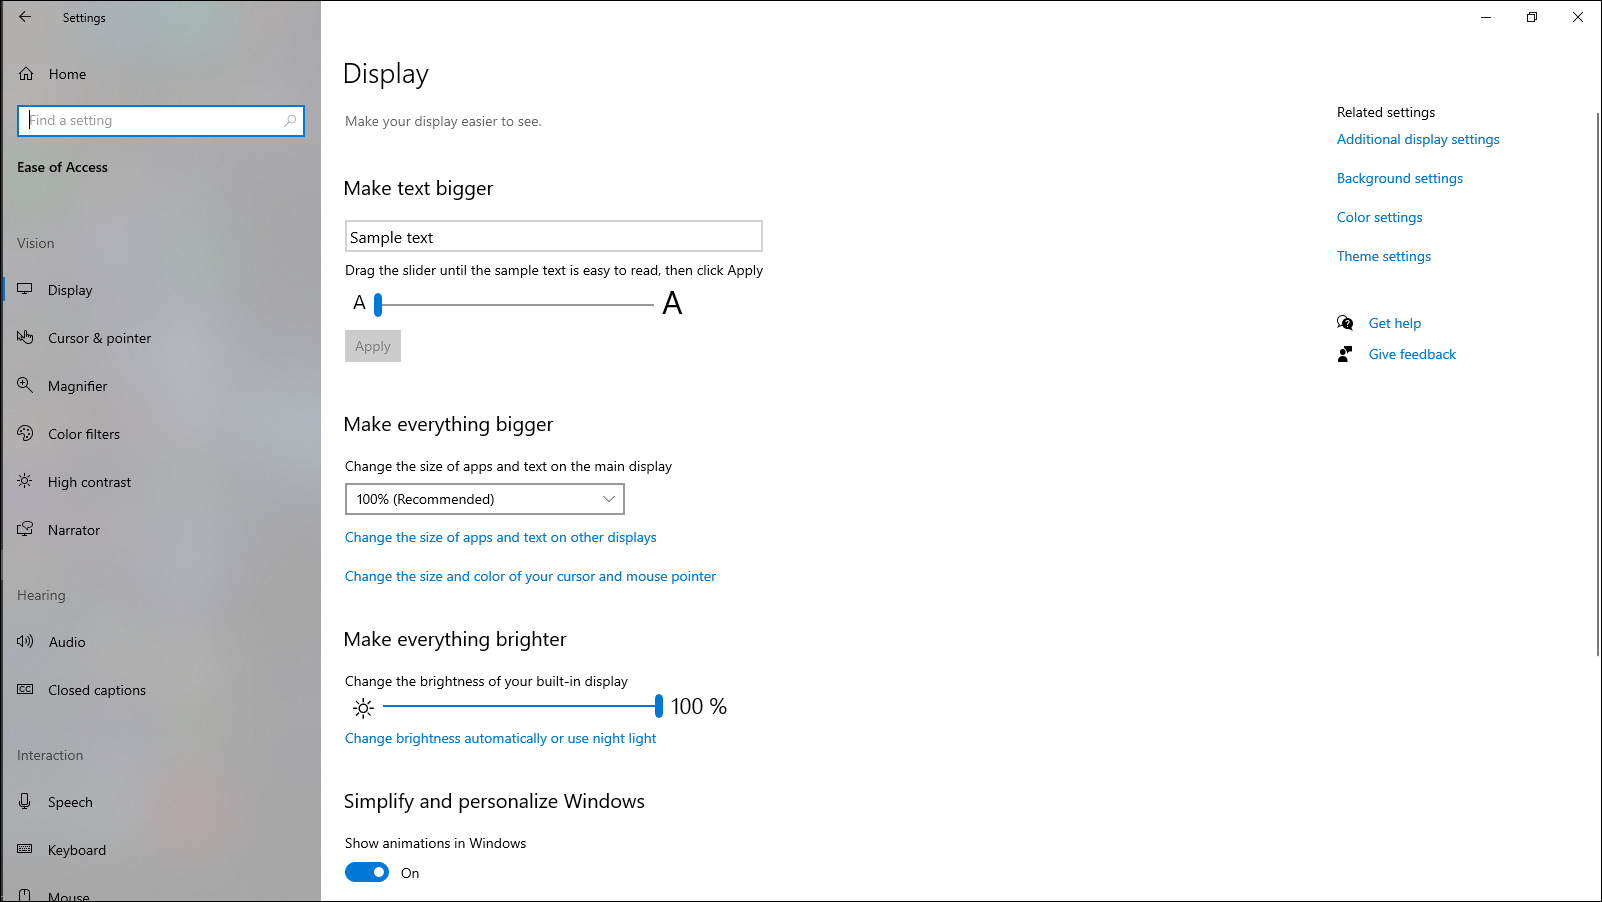
Step 2. Once you are on the Settings screen, you will find the Ease of Access option. Click on the option to open the Ease of Access settings.
Step 3. On the next screen, you will find the Make Text Bigger option right on the top. This option will have a slider to slide, increasing and decreasing the fonts. Again, the sample text is right on the top. Adjust the font size and click the Apply button to apply the changes.
If you can't find the font size setting with the above steps, you can also search for the term Make Text Bigger on the search bar of the Settings screen.
2. Change Font Size on Windows 11
Although Windows 11 is launched recently, many people have upgraded their OS to this version. If you are a Windows 11 user, follow the below steps to find and change the font size.
Step 1. Open the Windows Settings by clicking the Start button and selecting the Settings option. You may also find the Settings option in the recent apps section. Alternatively, you can search Settings on the search bar to find the Settings of your Windows 11.
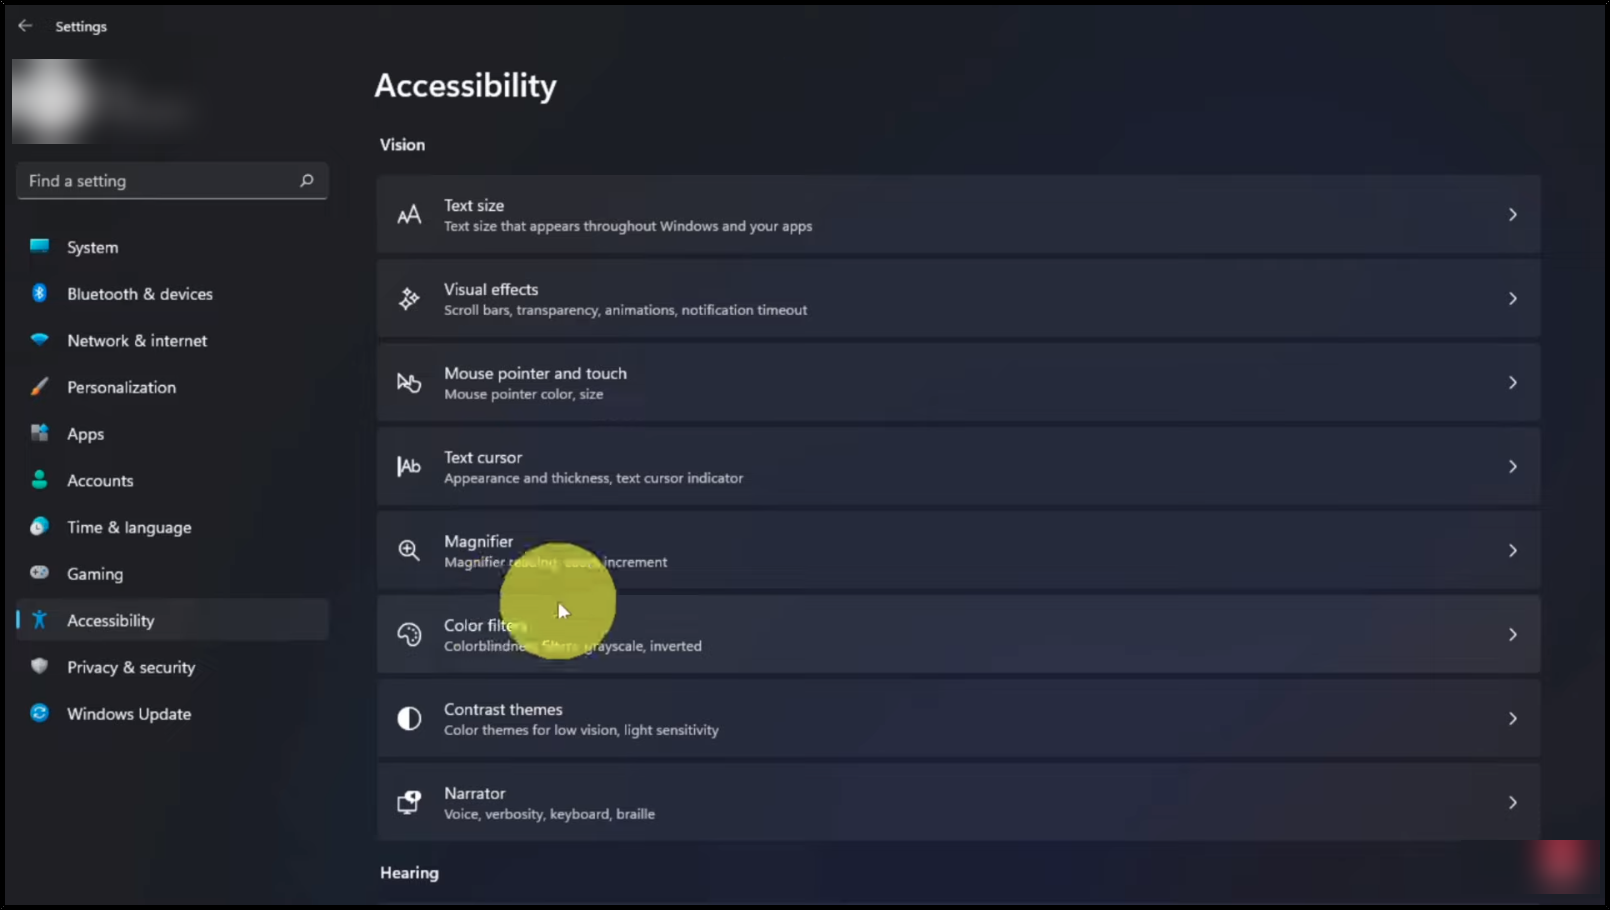
Step 2. On the Settings screen, look for the Accessibility option on the left and click on it.
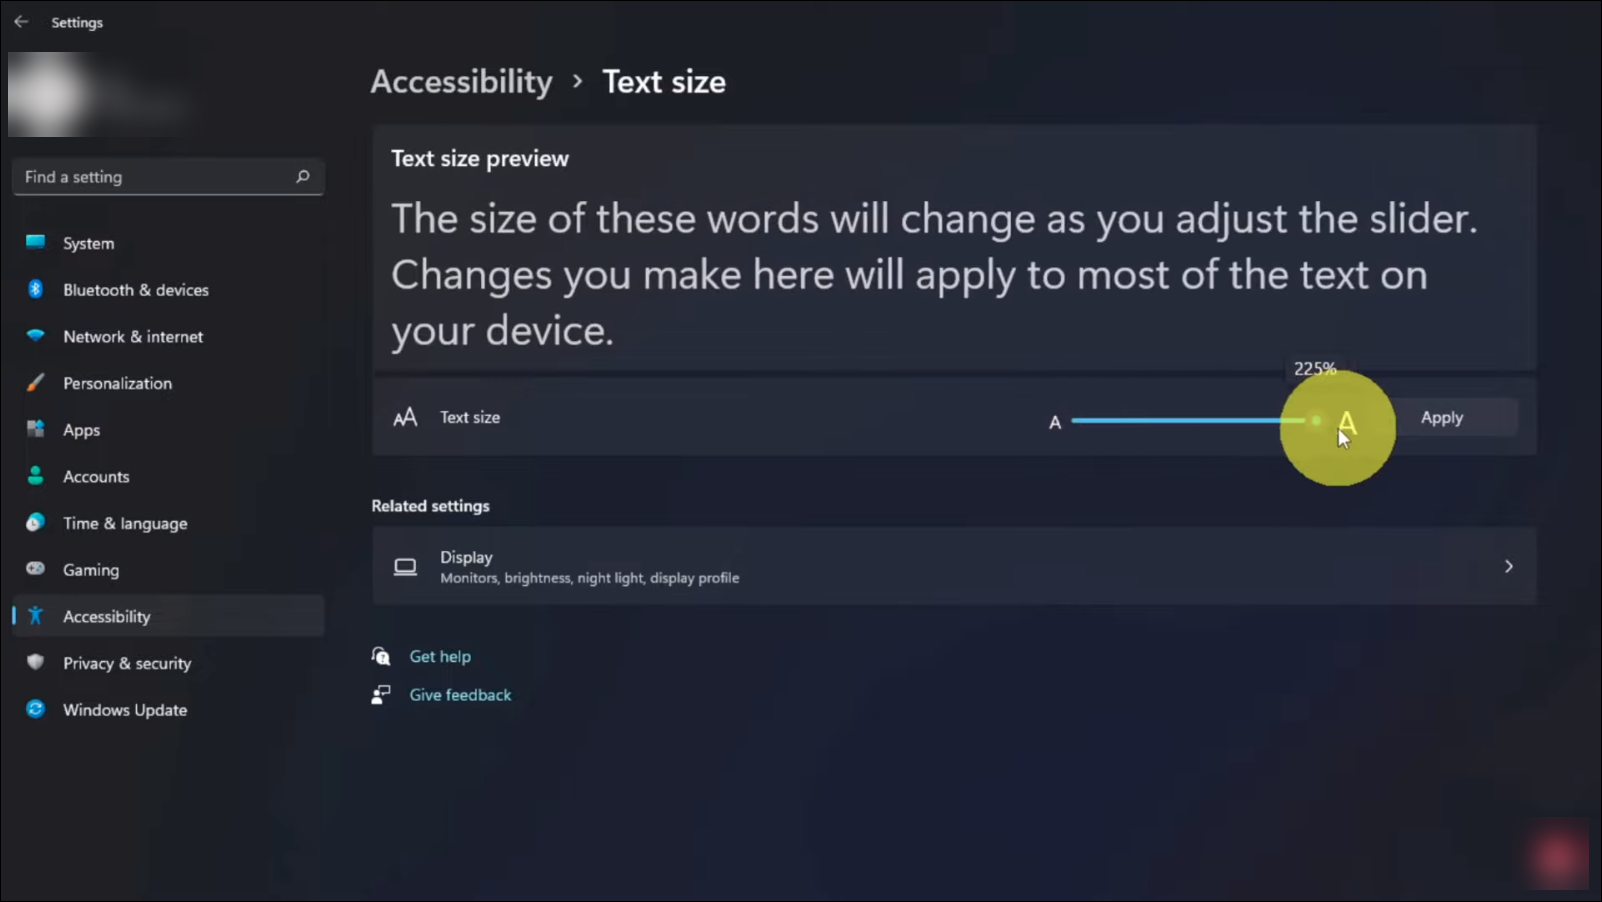
Step 3. The Accessibility settings will have the Text Size option on the top. Click on the option.
Step 4. You will find a slider to increase and decrease the font size with Sample Text on the top. Adjust accordingly and tap on Apply to apply the changes.
3. Change Font Size on Windows 8/7
Windows 8 and 7 are the old Windows version that many people may still use. If you have Windows 8 or Windows 7 on your computer, follow the below steps to change the font size.
Step 1. Right-click on a blank space on your desktop screen.
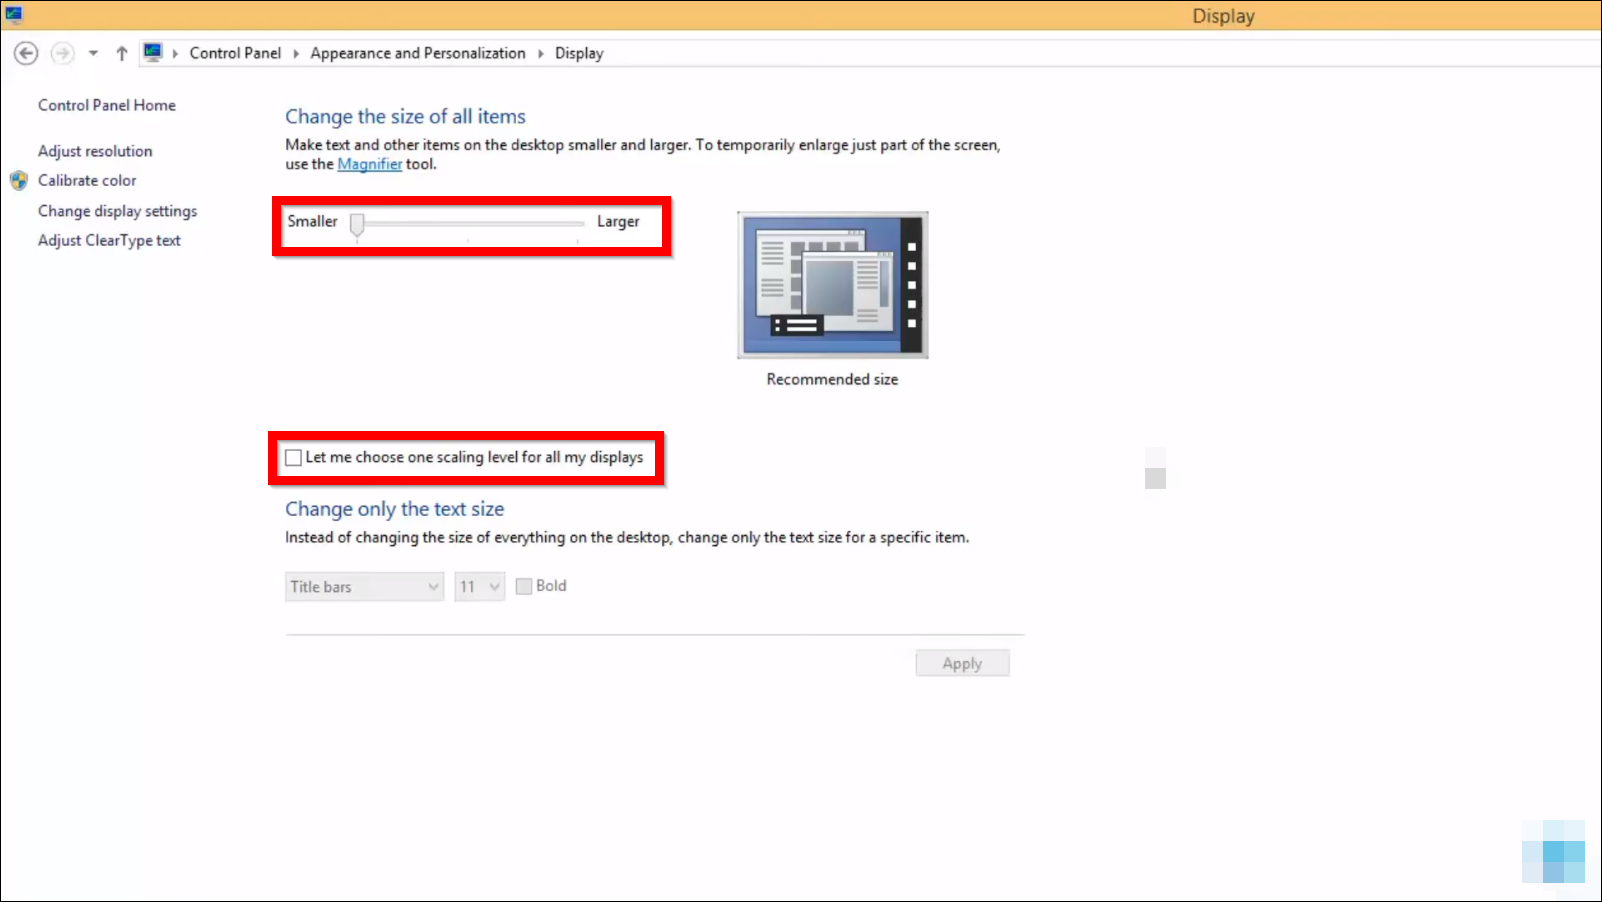
Step 2. Select "Screen Resolution" by clicking on it.
Step 3. Now, click on the "Make text and other items larger or smaller" option on the next screen.

Step 4. You will now find a slider to increase or decrease your font size. You can also tick the "Let me choose one scaling level for all my displays" option to get preset font sizes.
Step 5. Choose the font size and click Apply to apply the changes.
This is all about how to change the font size on Windows. Apart from changing font size on Windows, sometimes you need to change the font size in PDF, you can get this done with EaseUS PDF Editor.
How to Make Part of Screen Text Bigger?
Alternatively, you can use the Magnifier feature on your Windows to enlarge a specific part of the screen whenever your cursor is. This feature first needs to be turned on before using it.
Follow the steps below to turn on the Magnifier feature.
Step 1. Open Windows Settings from the start menu or by any Settings shortcut if you have one.
Step 2. Click on "Ease of Access" and go to the next screen.
Step 3. Click on the "Magnifier" option from the left bar.
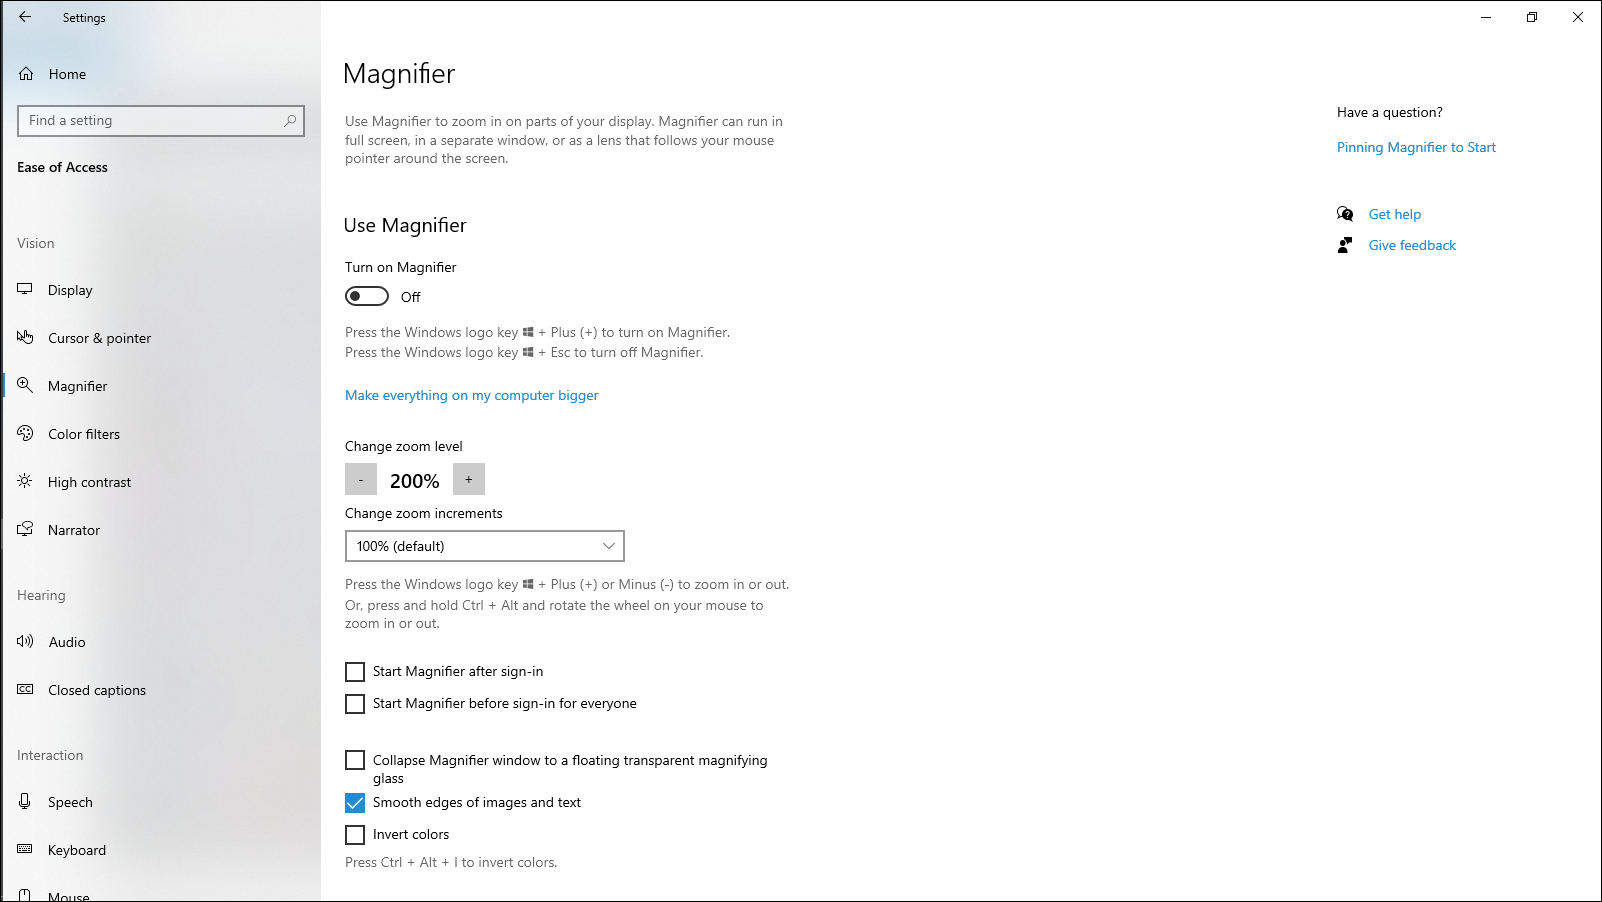
Step 4. Now, you will see the option to turn On the Magnifier feature. Toggle the button to turn On Magnifier. It will instantly start magnifying the screen where your cursor is.
However, this feature can be impractical most of the time, so there exists a shortcut that you can use. The shortcut is helpful to turn on this feature when you want and turn it off after use without navigating to Settings each time.
To turn On the Magnifier feature - Windows + Plus(+)
To turn Off the Magnifier feature - Windows + Esc
You can also customize the Magnifier feature on what Zoom level you prefer, what view you want, and more. You can find all these settings on the same Magnifier Settings screen.
Was This Page Helpful?
Daisy is the Senior editor of the writing team for EaseUS. She has been working at EaseUS for over ten years, starting as a technical writer and moving on to being a team leader of the content group. As a professional author for over ten years, she writes a lot to help people overcome their tech troubles.
Related Articles
-
Ultimate Guide to Choosing the Right SD Card for Nintendo Switch
 Roxanne/2024-01-11
 -
EaseUS Disk Drives Stats 2 (Disk Number/Disk Types/C Drive Size) for 2024
 Cici/2024-05-10
 -
What Is MSI Boot Menu [Detailed Info]🔥🔥
 Jerry/2024-01-11
 -
What Is Mac Finder & How to Use It
 Daisy/2024-06-05
