About Windows 10 PC Green Screen
Everyone’s known about the blue screen of death (BSOD) that appears when your Windows PC crashes. But do you know Windows 10 has a green screen of death? The green screen of death only appears when you’re running an Insider Preview version of Windows 10. It’s the same as the blue screen of death, and it will show this error message:
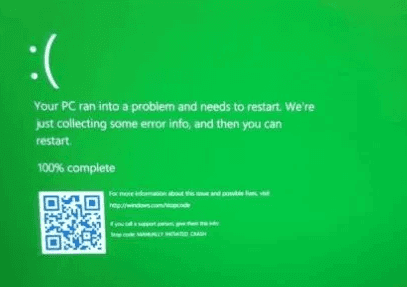
The error message is similar to the blue screen's error. That means anything that triggers a blue screen of death on a normal version of Windows 10 will trigger a green screen of death on an Insider Preview version of Windows 10. The only difference is this screen says you’re using a "Windows Insider Build" and it has a green background instead of a blue one. Before you fix the Windows 10 green screen error, access your data and save them to another place first.
| Workable Solutions | Step-by-step Troubleshooting |
|---|---|
| Fix 1. Recover Data with Software |
1. Download EaseUS Data Recovery Wizard WinPE Edition 2. Launch the software. 3. Reboot and set to run your computer...Full steps |
| Fix 2. Fix Green Screen Error |
1. Check if there is a peripheral connected 2. Try to restart your PC for three more times 3. Go to Microsoft Update page...Full steps |
| Fix 3. Use EaseUS Parition Master | This feature automatically fixes many startup-related errors, including Windows 10 green screen errors...Full steps |
How to Protect Data from Windows 10 Green Screen of Death
Before troubleshooting the GSOD issue, use EaseUS bootable data recovery software to save your computer data. It's an ideal tool to recover data in the case that Windows broken, crash, and non-bootable.
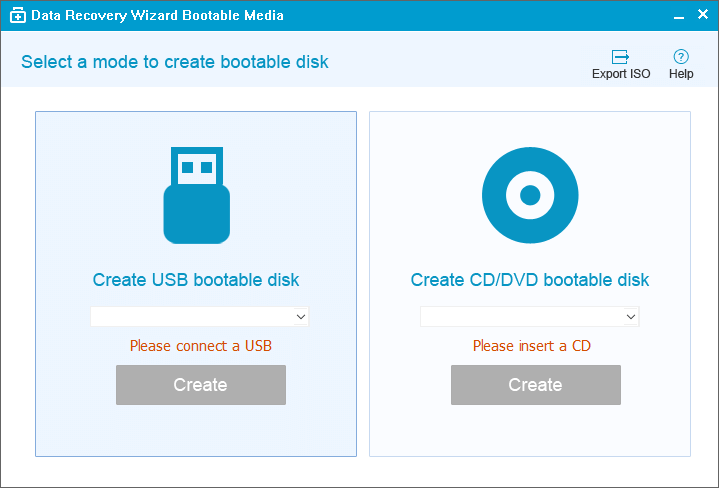
Step 1. Download EaseUS Data Recovery Wizard WinPE Edition on a healthy computer. Prepare a CD/DVD disc or USB drive to create EaseUS WinPE bootable disk.
Step 2. Launch the software. Select CD/DVD or USB drive and click "Proceed".
Step 3. Reboot and set to run your computer from the created bootable disk.
Step 4. Select the disk where you want to rescue data and click "Scan".
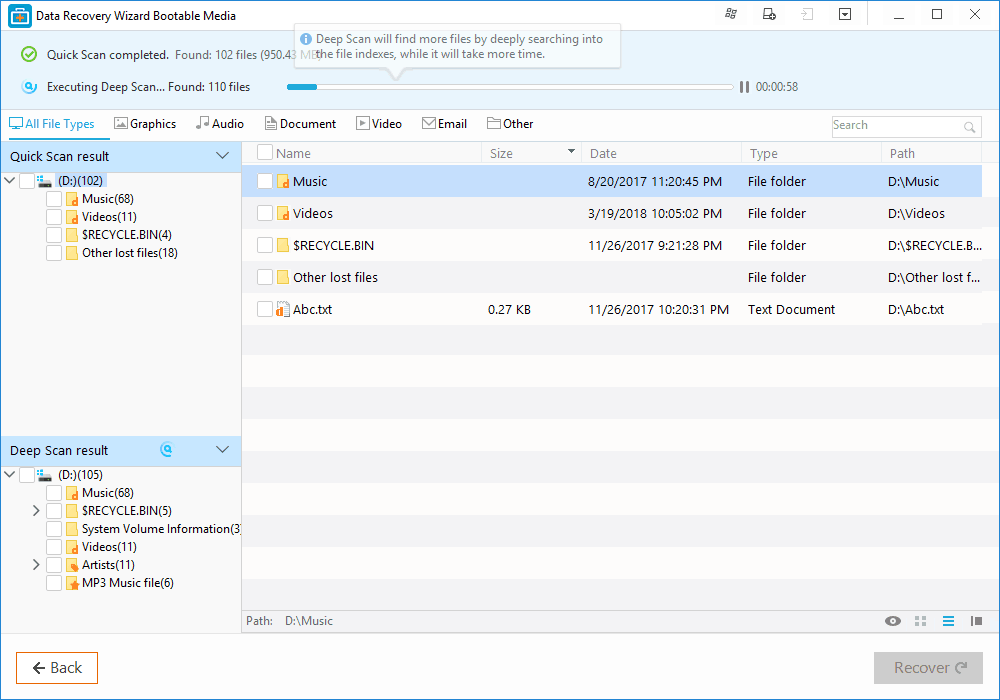
Step 5. Let the software scan the disk to find all data on the selected drive.
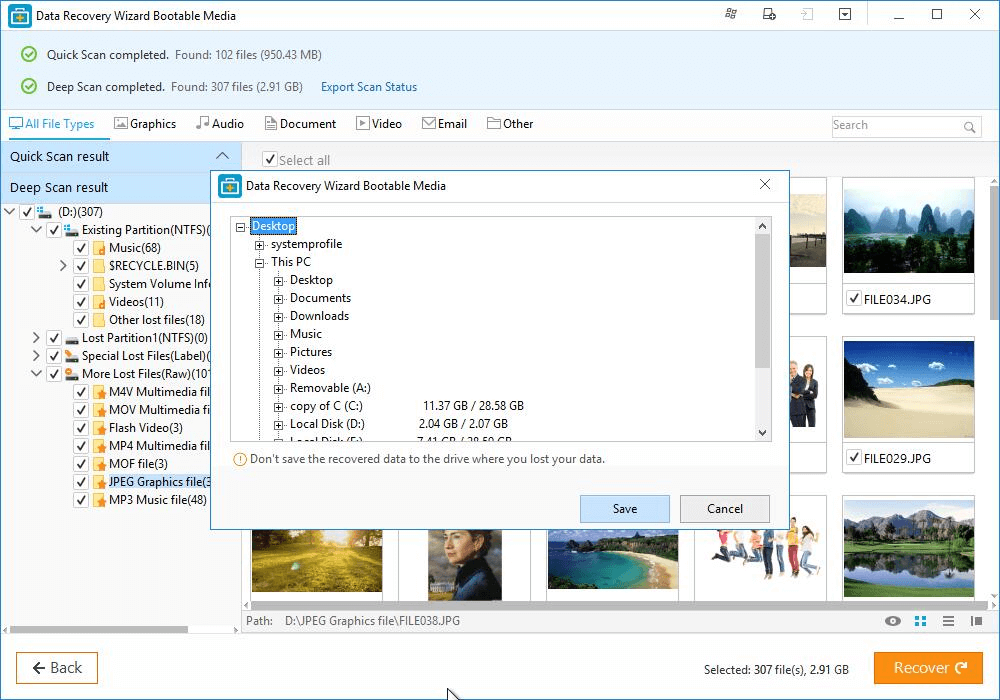
Step 6. Select all desired files and click "Recover".
How to Fix Windows 10 Green Screen of Death
The troubleshooting steps of Windows 10 green screen of death resemble those of blue screen of death and black screen of death. Let's begin.
Step 1. Check if there is a peripheral connected to the computer.
Sometimes, an external power cord, mouse, USB drive or perhaps a digital camera would cause trouble and threw your PC into a dead green screen. If yes, remove all the peripherals from the PC.
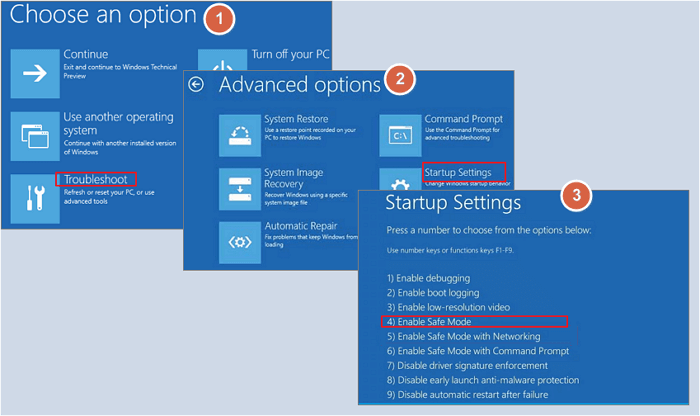
Step 2. Try to restart your PC for three more times, during the boot start Automatic Repair, go ahead with Troubleshoot > Advanced options > System Startup and click the Restart button. When your computer restarts again, select the Safe Mode with Networking option.
Press Windows + X keys simultaneously, go to Device Manager - Display Adapter - Driver - Update Driver - Browse my computer for driver software and install latest updates. Restart your PC to check if the green screen appears.
Step 3. Go to Microsoft Update page, download Windows 10 Creators Update ISO files. Put it in a bootable CD/DVD disc or bootable USB drive. Boot your PC from the bootable drive and find Troubleshoot option. Click Repair your computer, go to Advanced options and then Startup Repair. Now you can easily follow the wizard to repair the startup issue that causes a green screen of death on PC.
You can also turn to third-party software to fix this error.
Use EaseUS Partition Master to Fix the Windows 10 Green Screen of Death
EaseUS Partition Master comes with a boot repair function. This feature automatically fixes many startup-related errors, including Windows 10 green screen errors. You can download this tool to your computer and follow the steps below to remove this error. Don't worry, it's very suitable for beginners. Even if you have no experience, you can follow the instructions below to complete the operation.
Step 1. Start EaseUS Partition Master after connecting the external drive/USB to your computer, go to "Bootable Media," and click "Create bootable media."

Step 2. Select an available USB Drive or CD/DVD and click "Create." You can also burn the Windows ISO file to the storage media.

Step 3. Connect the created bootable drive to the new computer and reboot the computer by pressing and holding F2/Del to enter the BIOS. Then, set the WinPE bootable drive as the boot disk and press F10 to exit.
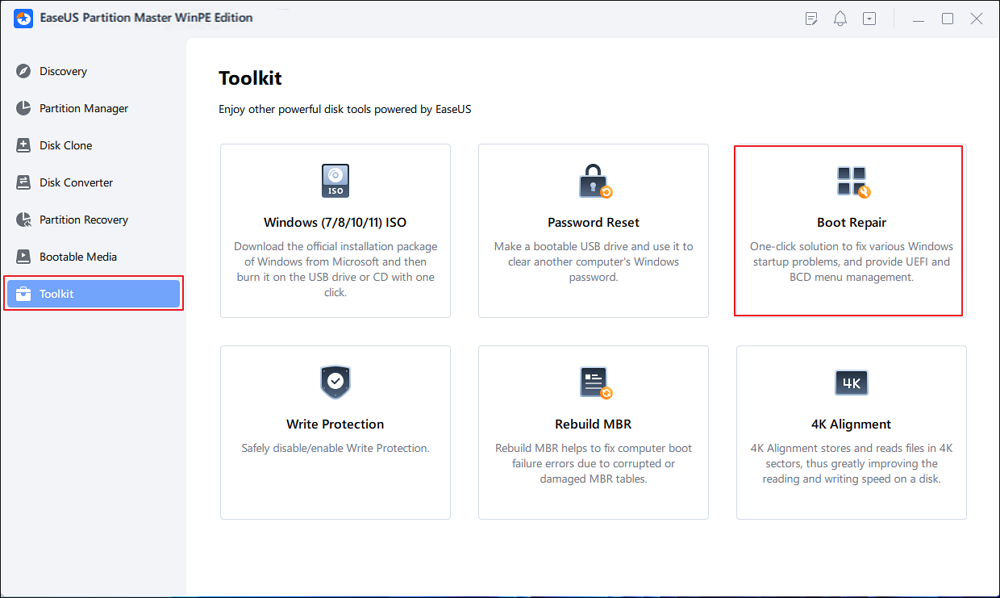
Step 4. Boot the computer again and enter the WinPE interface. Then, open EaseUS Partition Master and click "Boot Repair" under the "Toolkit" option.
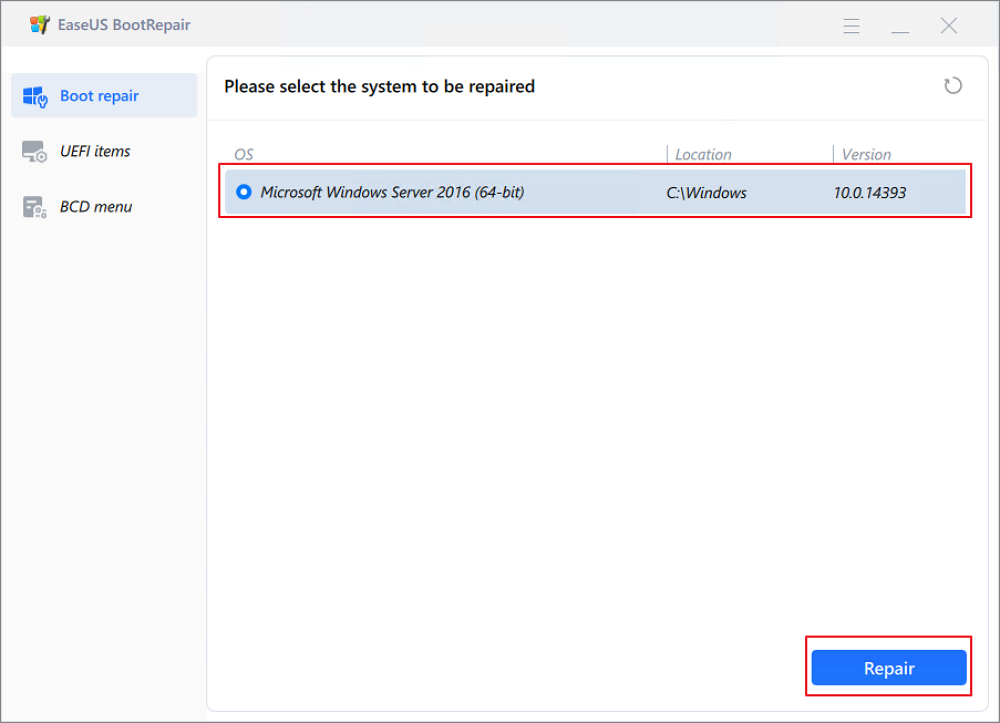
Step 5: Select the system you want to repair and click "Repair."
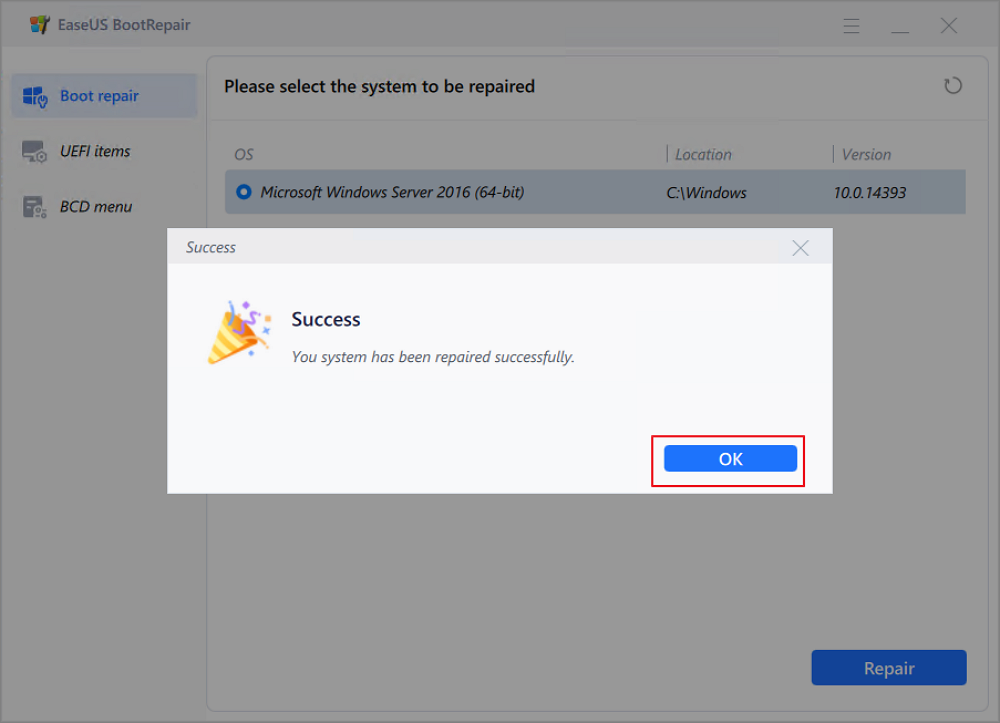
Step 6. Wait a moment, and you will receive an alert that the system has been successfully repaired. Click "OK" to complete the boot repair process.
Was This Page Helpful?
Sherly joined EaseUS in 2022 and she has always loved writing articles and enjoys the fun they bring. She receives professional training here, focusing on product performance and other relative knowledge. She has written over 200 articles to help people overcome computing issues.
Jean is recognized as one of the most professional writers in EaseUS. She has kept improving her writing skills over the past 10 years and helped millions of her readers solve their tech problems on PC, Mac, and iOS devices.
Related Articles
-
What Does Format Disk Mean? [Most Detailed Answer 2024]
![author icon]() Cici/2024-01-11
Cici/2024-01-11 -
Recover Saved Game Data on Xbox Series X [ 3 Proven Ways]
![author icon]() Jaden/2024-01-16
Jaden/2024-01-16 -
[3 Solutions] Fix Word Not Opening on Mac
![author icon]() Jean/2024-01-11
Jean/2024-01-11 -
SSD Not Detected in BIOS | Top 8 Ways to Fix🔥
![author icon]() Jerry/2024-01-23
Jerry/2024-01-23

EaseUS Data Recovery Services
EaseUS data recovery experts have uneaqualed expertise to repair disks/systems and salvage data from all devices like RAID, HDD, SSD, USB, etc.