| Workable Solutions | Step-by-step Troubleshooting |
|---|---|
| Erase the Disk via Terminal | To begin, visit the Finder and select Applications > Utility to open the Terminal...Full steps |
| Update to the Latest macOS | Hit the Apple menu, and opt for "About this Mac". Opt for a software update...Full steps |
| Erase Selected Volumes | Navigate to your Mac's Finder > Apps > Utility and start the Disk Utility...Full steps |
| Adjust the Security Levels | Launch Disk Utility on your Computer and attach your external device...Full steps |
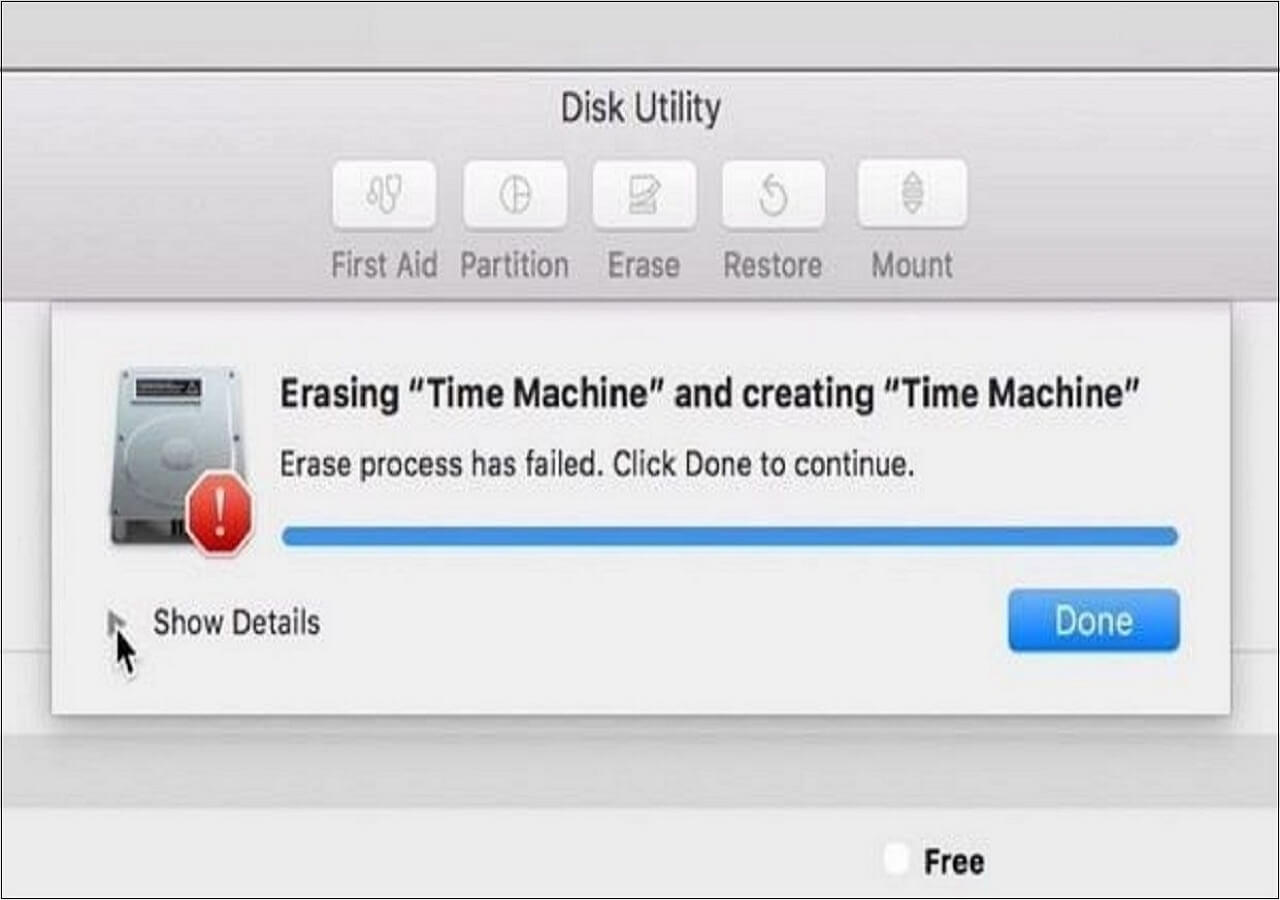
Erase Process Has Failed on Mac, Click Done to Continue
Apple's macOS laptop lineup is more effective than ever, thanks to the M1 processor, which advances the business's shift into Apple Silicon. Is your Macbook displaying the message erase process has failed Mac M1? If so, this article can assist. The "erase process has failed Mac" problem occurs when you try to restart macOS or OS X after erasing the information from your hard drive. Luckily, you can try a few solutions to this problem. This "Erase process has failed" error on the Mac is inconvenient because it prevents you from accessing your files and apps.
Why does this issue happen? These are the leading reasons shown below, which caused Mac erase process has failed problem:
- Malware or viral infection on your Mac
- Damaged or corrupted hard drive on Mac
- An out-of-date variant of macOS
- Disk Utility's important Mac elements may not be correctly launched
If you're in a comparable situation and looking for the best option, this article can help.
4 Ways to Fix Erase Process Has Failed Mac
As several reasons may generate this error on your Mac, a few fixes are there too! But before getting started with the solutions, here is the main timeline of a video given below to eliminate this Mac erase process failed error.
- 0:00 Introduction
- 0:19 Erase
- 0:58 First Aid
Now, let's start with the solutions!
Method 1. Erase the Disk via the Terminal on Your MacBook
Do you need help with your Mac's Disk Utility program? If so, you can attempt the very same thing via Terminal. It's one of the clearest methods of erasing a drive and will assist you in quickly meeting your requirements.
Step 1. To begin, visit the Finder and select Applications > Utility to open the Terminal program as an admin.

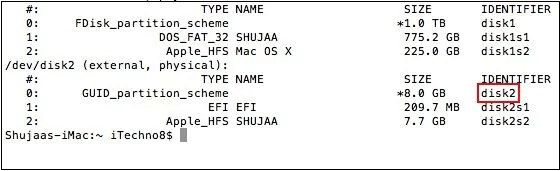
Step 2. When the Terminal program opens, enter "diskutil list" and hit return. It will show comprehensive details about your Mac's drives and partitions. Remember to take notice of the identifier of the disk you desire to convert from here.
Step 3. Excellent! Once you've identified the number, use the "erase drive" instruction to delete the data.
Step 4. The diskutil instruction, in its essence, is diskutil delete disk. For example, to prepare disk2 in HFS+ format, type diskutil eraseDisk HFS+ DISK disk2 and hit the back symbol.
Step 5. Afterward, simply wait for the instructions to execute while your chosen drive is converted into compatible system files.
Method 2. Update to the Latest macOS to Fix Disk Utility Error
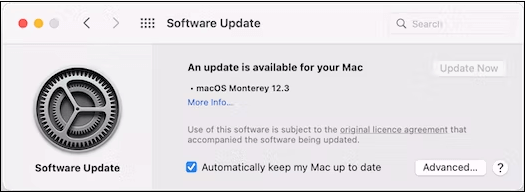
If your Mac is operating an outdated version, it may encounter the "erase procedure has failed click completed to proceed" error. Luckily, it is easily remedied by updating your Mac's software to the most current version. You can look for the most current macOS upgrade in the App Store, or you may follow the steps below to upgrade to macOS Ventura:
Step 1. Hit the Apple menu, and opt for "About this Mac".
Step 2. Opt for a software update.
Step 3. Keep waiting until checking is over. In case any update is available, hit the update option.
Method 3. Erase Selected Volumes Instead to Fix the Error
When formatting a disk on Mac, users may encounter an error stating that the erase procedure has failed. As a result, rather than formatting the entire drive, try configuring specific volumes. This allows you to determine if the problem is with a specific amount or otherwise.
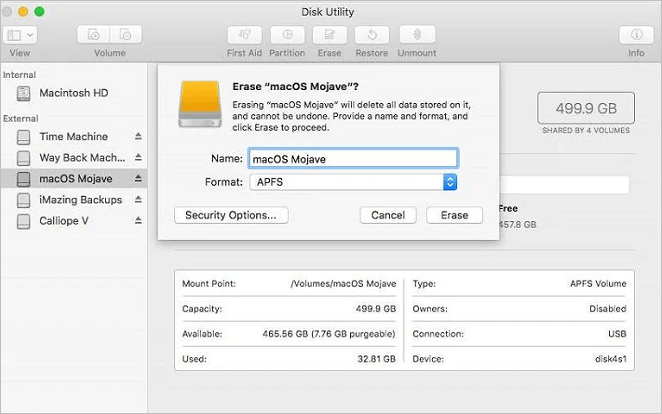
Step 1. Navigate to your Mac's Finder > Apps > Utility and start the Disk Utility program.
Step 2. After launching the Disk Utility implementation, navigate to the top-left edge of the interface. You may select all files or external media from the dropdown option.
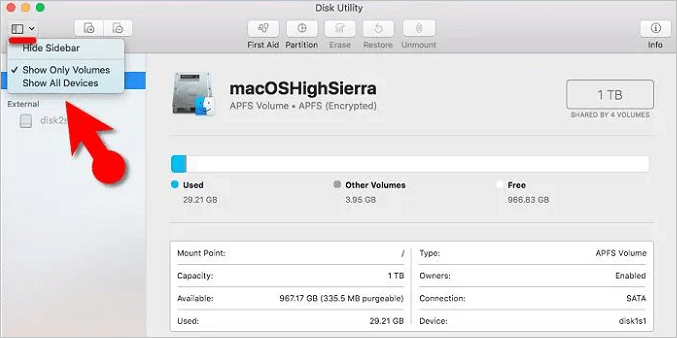
Step 3. In order to format a volume, pick it from the sidebar (rather than the complete drive) and hit the "Erase" icon on the taskbar.
Correspondingly, you can attempt to delete the complete drive to investigate the issue further. In this manner, you can determine whether the issue is with the complete drive or specific directories.
Method 4. Adjust the Security Levels for Formatting an External Device
Is the disk tool telling you that the erase procedure on your Mac has failed while formatting an external device? If yes, you must follow this strategy! It can be used only when the security level on the external hard drive or USB drive is extremely high. After that, the disk utility may not be capable of formatting it. In order to modify its level of security and resolve this error, the steps are the following:
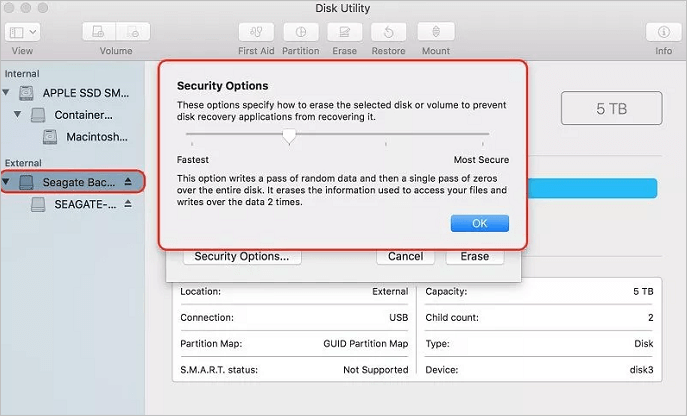
Step 1. Launch Disk Utility on your Computer and attach your external device to it.
Step 2. Now, choose the device from the toolbar and click the "Delete" option. Navigate to the Encryption Settings tab in the new browser.
Step 3. Adjust the protection settings for configuring the device from here. Set a moderate level of security to avoid receiving the "can't delete Mac hard disk" notification.
How to Erase Hard Drive on Mac [Detailed Guide]
If you're using macOS Monterey, there are two ways to wipe your hard disk. The sort of processor determines the best approach for you:
- If you have a Mac with Apple hardware or an Intel-based Mac with the Apple M2 Chip.
- If you have an Intel-based Computer.
Press the option key while navigating to the Apple menu > About This Mac to determine the type of processor on your Mac. On the left, navigate to the Devices area. The sort of chip will be displayed in the right corner of the screen.
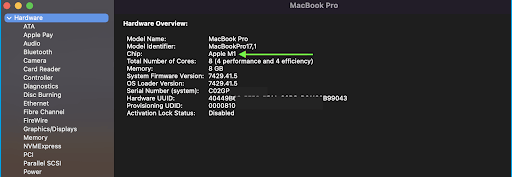
If your mac has an Intel CPU, go to the right-hand column and select Controller to determine if it currently has a T2 protection chip inserted. If so, it will be presented in the right-hand side window.
Bonus Tip: How to Erase a Disk Without Losing Data on Mac
When you format or delete your Macbook, all your info is erased. To safeguard your files, you must create a backup. A data rehabilitation program would be an excellent option if you've not previously backed up your data and have reformatted your drive.
EaseUS Data Recovery Wizard for Mac is an all-in-one data retrieval program that brings success in recovering unintentionally erased information. Because of the inclusion of a wide range of capabilities, it is a powerful data recovery application used by millions of people worldwide.
It can retrieve any material, that includes photos, files, papers, or movies. The program guarantees individuals file, unprocessed, and formatted retrieval, and functions on both external and internal storage media. The best highlights of this tool are the following:
- It can recover deleted photos, videos, music files, documents, and other files on Mac with simple clicks.
- This software supports file recovery from a hard drive, SSD, USB flash drive, and pen drive.
- It upholds data retrieval for mac for accidental deletion, virus attack, formatting, and system crash.
Download this professional tool now, and have the best experience of erasing a disk without losing data on your Mac.
Step 1. Select the location to scan
Launch EaseUS Data Recovery Wizard for Mac and choose the hard drive, SSD, SD card, USB flash drive, or TF card where you lost data. Click "Search for lost files" to start scanning.

Step 2. Filter lost Mac data
The software will automatically scan for lost data on MacBook/iMac. When the scan completes, filter wanted data through the "Type" and "Path" buttons.

Step 3. Recover lost data or files
Double-click a file to preview it. Then, click the "Recover" button to restore the lost data to another place.

Conclusion
After reviewing this tutorial, you should be capable of fixing the Mac erase process failed problem. In this section, we have provided a variety of tried-and-true remedies for this problem on Mac that you can use. Furthermore, a method for effectively erasing a hard drive (or an external device) has already been given. However, if you've accidentally erased your data, use EaseUS Mac data recovery software. It will allow you to easily recover all types of info from multiple sources on your Mac.
Erase Process Has Failed FAQs
The detailed FAQs are given below for a seamless understanding of this topic:
1. How do I fix the delete process that failed on Mac?
Follow any of the aforementioned fixes, including updating your macOS, adjusting the security levels for formatting an external device, etc., to fix the failed delete process on Mac.
2. How do I force my Mac to erase a hard drive?
You must select Restart from the Apple menu, then instantly hit and press Command + R. After that, pick Disk Utility in the Recovery program box, then press Proceed. Find the disk you want to delete in Disk Utility's pane, then hit Delete in the taskbar.
3. Does a hard reset on Mac erase everything?
Yes, Mac hard reset deletes everything. Switch on your Computer and instantly hit and hold the Option, Command, P, and R buttons next to each other. After around 20 seconds, disengage the buttons. This helps clear user preferences from memory and returns any security mechanisms that may have been modified.
4. What happens when Mac recovery mode doesn't work?
You need to hold down the 'Option+Command+R' buttons to restart your Computer. As soon you notice the Apple emblem, disengage these buttons.
If you find this post helpful, share it on your Twitter and Facebook to let more people know.
Was This Page Helpful?
Daisy is the Senior editor of the writing team for EaseUS. She has been working at EaseUS for over ten years, starting as a technical writer and moving on to being a team leader of the content group. As a professional author for over ten years, she writes a lot to help people overcome their tech troubles.
Brithny is a technology enthusiast, aiming to make readers' tech lives easy and enjoyable. She loves exploring new technologies and writing technical how-to tips. In her spare time, she loves sharing things about her game experience on Facebook or Twitter.
Related Articles
-
Learn How to Install on ReFS Partition Today | Windows 11 Installation Made Simple
![author icon]() Roxanne/2024-01-11
Roxanne/2024-01-11 -
User Profile Service Failed the Logon (Causes & Solutions)
![author icon]() Jerry/2024-10-25
Jerry/2024-10-25 -
How to Factory Reset HP Laptop Without Password
![author icon]() Brithny/2024-10-28
Brithny/2024-10-28 -
How to Fix Windows 11 24H2 Update Stuck error ✔️
![author icon]() Sherly/2024-10-31
Sherly/2024-10-31

EaseUS Data Recovery Services
EaseUS data recovery experts have uneaqualed expertise to repair disks/systems and salvage data from all devices like RAID, HDD, SSD, USB, etc.