There are four ways in all to Fix 'Can't Find the Specified File' error when rename/move folder in Windows 10/8/7. The table below is an overview of the solution, read detailed content for full steps.
| Workable Solutions | Step-by-step Troubleshooting |
|---|---|
| Fix 1. Locate missing files | The quickest way is to find, locate and place the missing files back to the original location if you...Full steps |
| Fix 2. Change user profile | When the computer cannot locate exact files or folders, you can try to change a user profile...Full steps |
| Fix 3. Run Powershell | Press Windows key and type Powershell in search, right-click on it and Open as administrator...Full steps |
| Fix 4. Change registry | Press Windows + R and enter regedit, hit Enter or click OK. Navigate to: HKEY_LOCAL_...Full steps |
Folder renaming/moving error: can't find the specified file! Help!
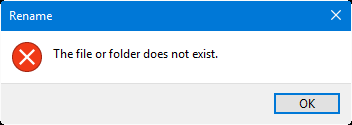
"I get a problem of renaming a file folder on the D: drive. When I clicked Rename the system warned me that 'The file or folder does not exist'. Is there a way to find the missing files on my computer?"
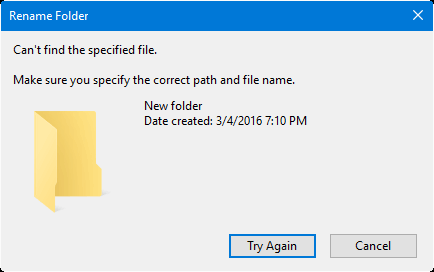
“If the Windows PC tells that it can't find the specified files when you try to rename or move a folder on your PC or storage devices, what else can you do to fix this issue? Any recommended methods?”
If you have encountered a similar case as the above two problems while trying to rename or move a file or folder on your storage devices or PC, don’t worry. Effective solutions are ready to help right now.
Let's see how to remove 'can't find the specified file’ error on your PC or storage devices now:
Method 1. Locate and place the missing files back to the original location
If the system warns you that 'The file or folder does not exist’ or ‘can’t find the specified file' on your PC or storage devices when you are trying to rename or move a file or folder, the exact files or folder may have been moved to other location or deleted from your device.
So the quickest way is to find, locate and place the missing files back to the original location if you can't find the specified files while trying to rename or move a file folder. How? Follow below tips for help:
Tip 1. Search and locate the exact missing files
- 1. Right-click on the Windows icon or Start icon, click Search.
- 2. Type the missing file name or folder name that you need to find in the search box and hit Enter.
- 3. Double-click to locate and find the missing files or folder on your PC, copy them back to the original folder which you need to rename on your PC or storage device.
- 4. Finally, you should be able to rename or move file/folder again.
Tip 2. Restore lost/missing files/folder
If you didn’t find any tracks of missing files or folder by using Search on your computer, you may need to run a useful EaseUS Data Recovery Wizard to find and restore missing files/folder on your PC or storage device. And EaseUS Data Recovery Wizard can help you simply resolve this issue.
Step 1. Run EaseUS Data Recovery Wizard. Choose the drive where you lost files and start scanning by clicking "Search for Lost Data". This software allows you to recover lost data from all devices, including HDD, SSD, USB drive, SD card, pen drive, camera, etc.

Step 2. Browse the full scan results. You can choose the file type you need by clicking on the file type filter. EaseUS data recovery software supports 1000+ file types like photos, videos, documents, emails, audio files, and many more.

Step 3. Select the files you want to preview. Click "Recover" and set a storage location or Cloud drive to save the recovered data.

Now you can place the missing folder or file back to the original location to rename the folder again.
Method 2. Change User Profile to Fix 'Can't find the specified file' error
Sometimes, when the computer cannot locate exact files or folders, you can try to change a user profile or create a new user profile to see if you can locate and find the missing files/folder on your device or computer:
If you have another user profile, log out and sign in with the other user profile to your computer to see if you can locate the missing files or folder.
If you can't, follow below tips to create a new user account and log in to find the specified files which can't be found by your PC:
Step 1. Enable Administrator Account and create a new Account
1. Right-click Start and select Command Prompt (Admin);
2. Type: net user administrator /active: yes and hit Enter;
3. Switch yes for no when you reverse this in the feature by the same command.
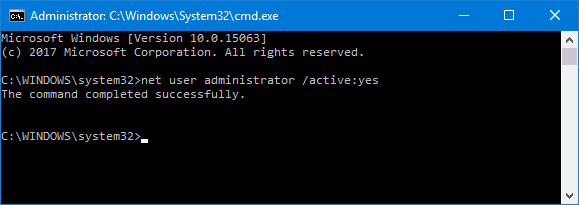
4. This will enable the hidden administrator account on your computer and restart the computer, sign into this new account.
Step 2. Create a new Account - new user profile account
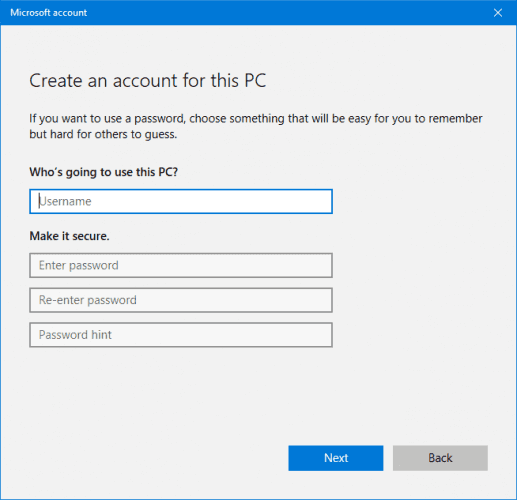
1. Go to Settings > Accounts > Family & other users;
2. Click Add someone else to this PC and follow the onscreen guidelines to complete the process;
3. If you want to create a local account instead of a Microsoft one, click I don’t have this person’s sign-in information > Add a user without a Microsoft account.
Step 3. Sign in with your new account and find missing files.
Method 3. Run Powershell to remove 'Can't find the specified file' error to rename file folder
- 1. Press Windows key and type Powershell in search, right click on it and Open as administrator.
- 2. Type the following command in Powershell and hit enter:
- Get-AppXPackage -AllUsers |Where-Object {$_.InstallLocation -like "*SystemApps*"} | Foreach {Add-AppxPackage -DisableDevelopmentMode -Register "$($_.InstallLocation)\AppXManifest.xml"}
Method 4. Change Registry to remove 'Can't find specified file' error
Note: Place export and backup Registry files before you make changes to the Registry in case of unexpected file missing or program function error.
- 1. Press Windows + R and enter: regedit, hit Enter or click OK.
- 2. Navigate to: HKEY_LOCAL_MACHINE\SOFTWARE\Microsoft\Windows\CurrentVersion and expand to find RunOnce, if it's not available, create a new one: right-click on the CurrentVersion > New > Key.
- 3. Rename the key as RunOnce and navigate to HKEY_CURRENT_USER\Software\Microsoft\Windows\CurrentVersion\ and expand the key to see if RunOnce is available. If not, repeat to create a new one.
- 4. Close Registry and restart your PC.
Was This Page Helpful?
Daisy is the Senior editor of the writing team for EaseUS. She has been working at EaseUS for over ten years, starting as a technical writer and moving on to being a team leader of the content group. As a professional author for over ten years, she writes a lot to help people overcome their tech troubles.
Written by Tracy King
Tracy became a member of the EaseUS content team in 2013. Being a technical writer for over 10 years, she is enthusiastic about sharing tips to assist readers in resolving complex issues in disk management, file transfer, PC & Mac performance optimization, etc., like an expert.
Related Articles
-
How to Install macOS Monterey | macOS 12 Clean Install
![author icon]() Jaden/2024-10-10
Jaden/2024-10-10 -
[Fix] A required device isn't connected or can't be accessed with error
![author icon]() Jean/2024-03-15
Jean/2024-03-15 -
How to Reset Windows 7 Password Using CMD - 2024 Tutorial
![author icon]() Cici/2024-10-24
Cici/2024-10-24 -
A File Error Has Occurred While Saving Word Document
![author icon]() Jean/2024-11-28
Jean/2024-11-28

EaseUS Data Recovery Services
EaseUS data recovery experts have uneaqualed expertise to repair disks/systems and salvage data from all devices like RAID, HDD, SSD, USB, etc.