How to Make USB Auto Copy Files When Plugged In
A lot of people say that they are looking for a solution for copying or backing up all the files from a hard disk to a specific directory on a USB memory device once the USB is connected. It seems difficult to realize this automatic copying, but we still have a solution.
Recommended: Turn to Windows Backup and Recovery Software for Help
To solve this issue, we'd like to recommend a professional and easy-to-use backup tool - EaseUS's backup software to you. It supports different types of backup, clone, restoration and so on and its File Backup feature enables you to automatically back up and copy files when the USB drive is connected.
Why Do You Choose EaseUS Todo Backup:
- Backup complete partitions or hard drives
- Backup specific single files or folders
- Space-saving backup due to archive compression and leaving out free space
- Easy to handle
- Fully supports Windows 10/8/7/Vista/XP
How Does It Work:
You'll need to take two moves:
1. This tool will create an image of your file to the USB first.
Note: You can preview the image, but if you want to edit it, you must copy it to another place or recover it by using the tool. The image is a little bit different, for it takes less space but the content keeping the same.
2. Then you'll need to set a schedule for the automatic backup.
This tool can not only automatically copy files when the USB drive is connected but also automatically copy files from one folder to another easily.
Step-by-step Direction on How to Automatically Copy Files When USB Drive Connected
To make USB drive back up and copy files automatically once it's connected to PC, follow the steps below:
Step 1. To initiate a backup, click the Select backup contents option.

Step 2. There are four data backup categories, File, Disk, OS, and Mail, click File.

Step 3. On the left, both local and network files will be shown. You may extend the directory to pick the backup files.

Step 4. Follow the on-screen instructions and choose a location to store the backup.
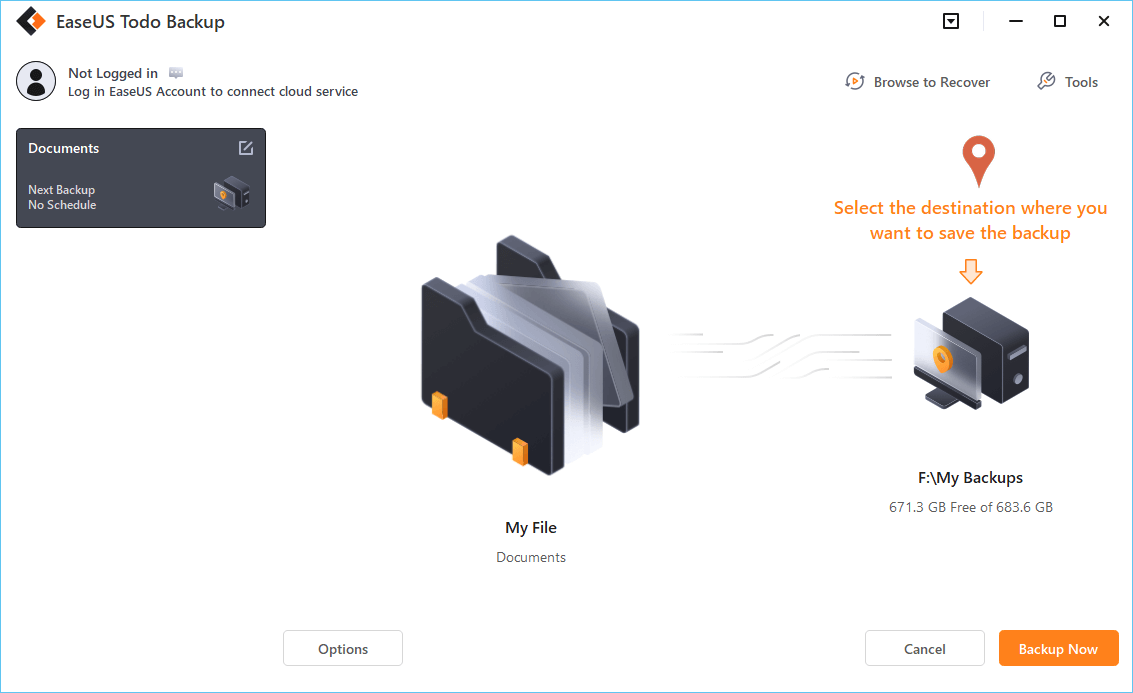
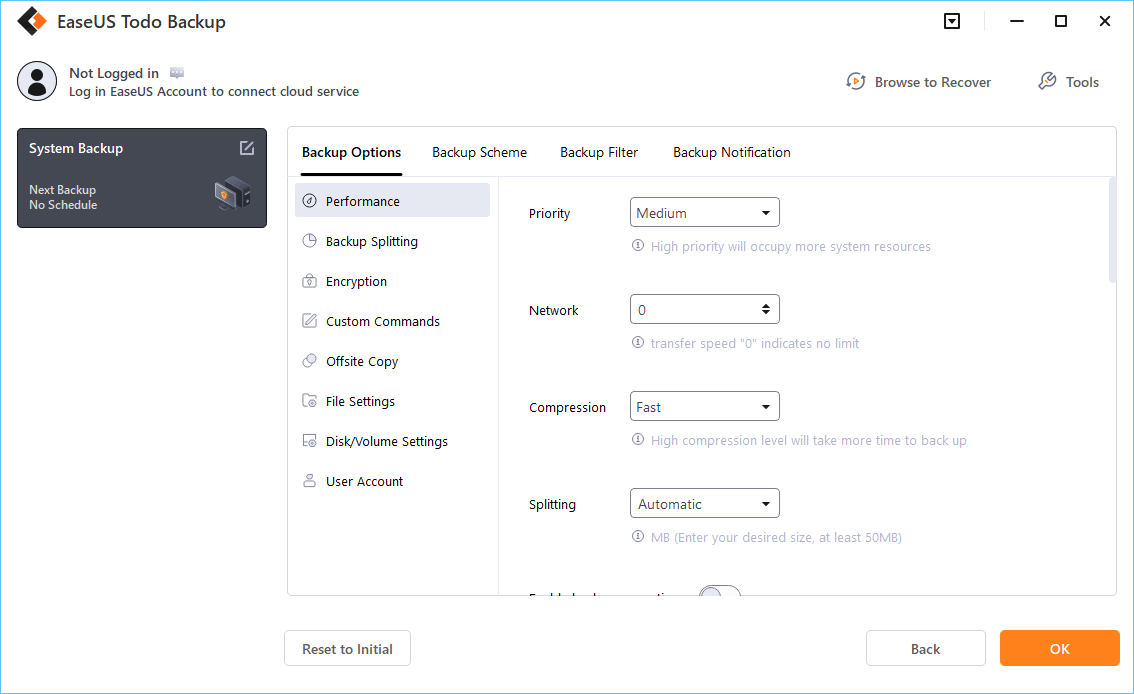
Click Options to encrypt the backup with a password in Backup Options, then click Backup Scheme to specify the backup schedule and start the backup at a certain event. There are also other additional choices you may choose to tailor the backup process to your requirements.
Step 5. The backup may be stored on a local disk, EaseUS' online service, or NAS.

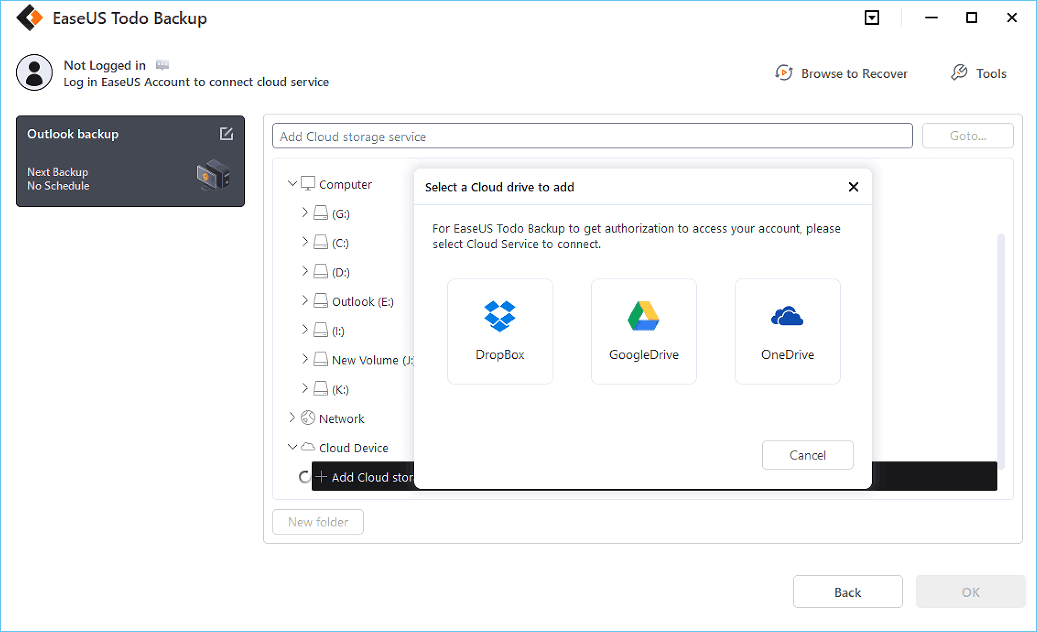
Step 6. EaseUS Todo Backup enables customers to back up data to a third-party cloud drive as well as its own cloud drive.
If you want to back up data to a cloud drive provided by a third party, choose Local Drive, scroll down to add Cloud Device, and then add and log in to your account.
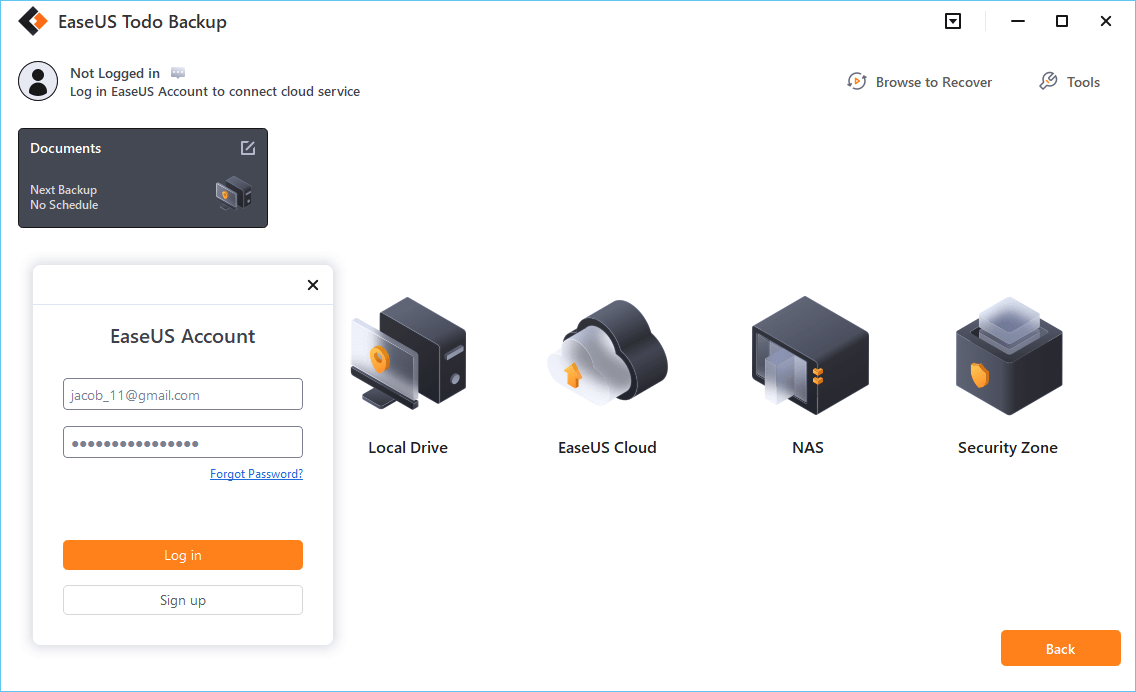
You can also choose the EaseUS cloud drive. Sign up for an EaseUS Account, then click EaseUS Cloud and log in.
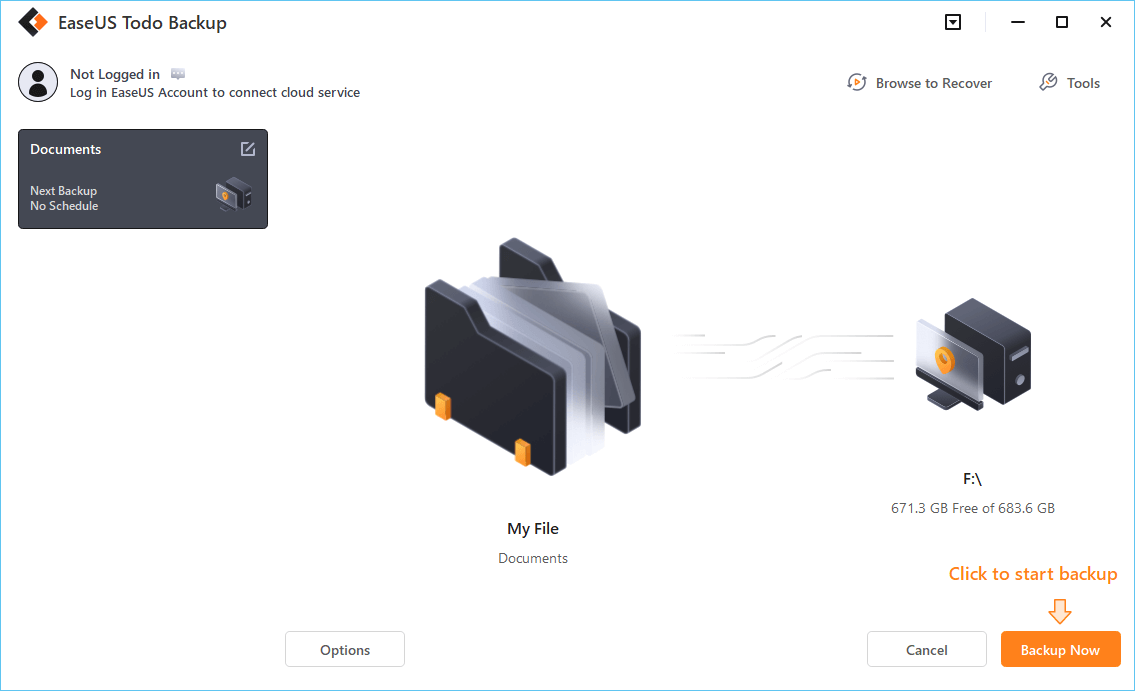
Step 7. Click Backup Now to begin the backup process. The backup job will be presented as a card on the left side of the panel after it has been finished. Right-click the backup job to handle it further.
Secure Download
In The End
Once the schedule backup task is complete, and when EaseUS Todo Backup finishes backing up files to your USB flash drive for the first time, you can then close this program and unplug USB.
Next time, EaseUS Todo Backup will automatically copy and backup files to your USB once it's plugged in/connected to your PC.
Was This Page Helpful?
Daisy is the Senior editor of the writing team for EaseUS. She has been working at EaseUS for over ten years, starting as a technical writer and moving on to being a team leader of the content group. As a professional author for over ten years, she writes a lot to help people overcome their tech troubles.
Brithny is a technology enthusiast, aiming to make readers' tech lives easy and enjoyable. She loves exploring new technologies and writing technical how-to tips. In her spare time, she loves sharing things about her game experience on Facebook or Twitter.
Related Articles
-
How to Fix DXGI_ERROR_DEVICE_REMOVED on Windows 10/11 [Fixed]
![author icon]() Tracy King/2025-07-04
Tracy King/2025-07-04 -
The PC Must Support TPM 2.0 Error While Upgrading to Windows 11
![author icon]() Daisy/2025-07-04
Daisy/2025-07-04 -
How to Get Windows 10 for Free [Full Guide in 2025]
![author icon]() Jean/2025-07-04
Jean/2025-07-04 -
Fix Windows 10 Computer Keeps Freezing Randomly
![author icon]() Tracy King/2025-07-04
Tracy King/2025-07-04
EaseUS Data Recovery Services
EaseUS data recovery experts have uneaqualed expertise to repair disks/systems and salvage data from all devices like RAID, HDD, SSD, USB, etc.