
If your Mac's available disk space dwindles faster than expected, it's time to clean the storage. When checking the storage usage in the "About This Mac" section, you can see something called "System Data" is taking up a huge amount. What is "System Data" on Mac, and how can it be cleared without critical data loss?
As a leading tech blog writer, I have written extensively on Mac series maintenance and optimization, receiving positive feedback from beginners and advanced users. This article will explain the reasons, applications, and steps for cleaning "System Data" storage.
If you can implement all the suggestions and fixes, it’s easy for you to regain many GBs of free disk space for your Mac – that means more room for new photos, videos, or apps.
Let's get started!
What Is "System Data" Storage on Mac?
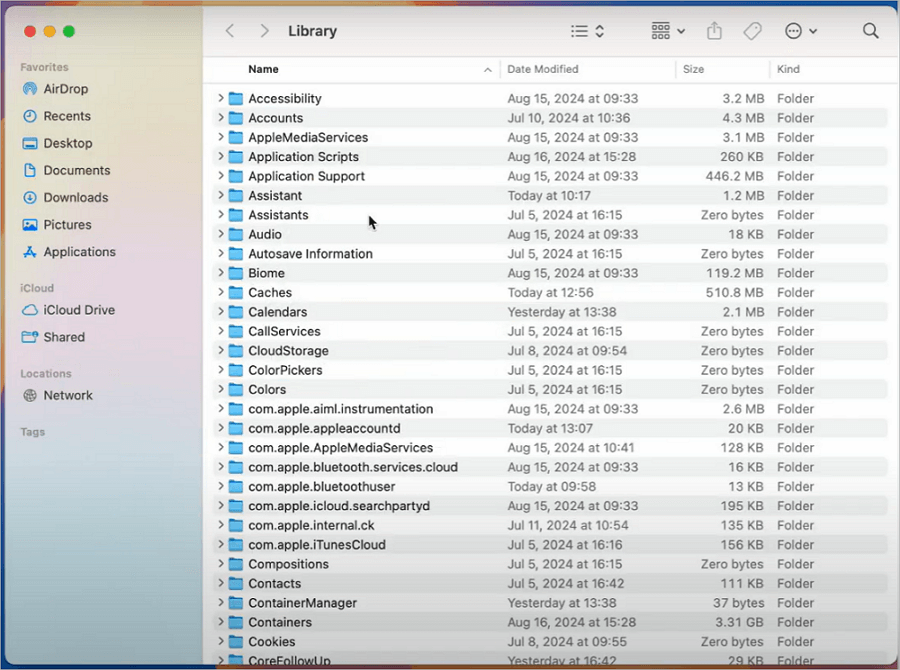
Mac's "System Data" includes system caches, Time Machine snapshots, logs, iOS files, and some temporary files. It takes up a fair bit of space, mainly if your Mac performs massive background tasks or has too many apps installed.
In earlier macOS versions (before Ventura), some of this data was categorized as "Other." Now, the "System and Library" folders contain the majority of macOS System Data.
Here's how to check the amount of space System Data is consuming on your Mac:
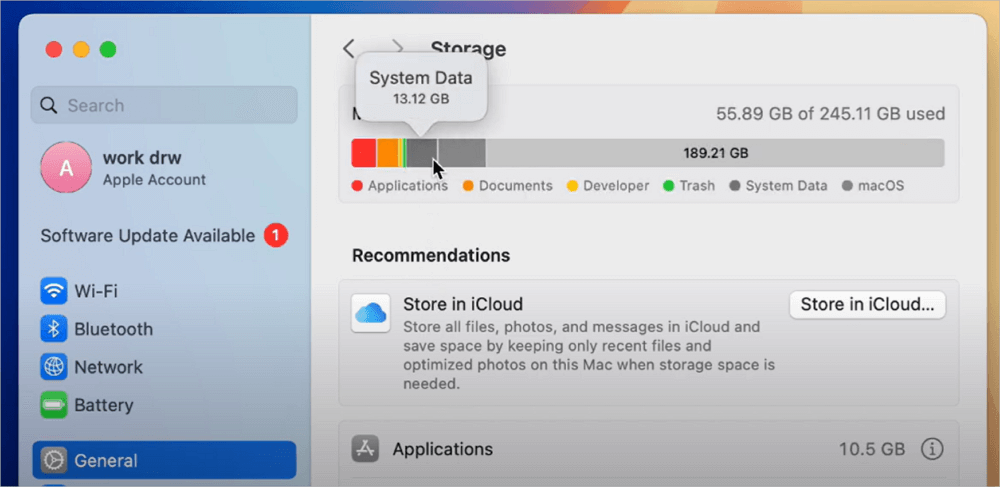
In Ventura and later macOS (including macOS 15 Sequoia):
- In the upper left corner of the screen, click the Mac Apple menu.
- Select "System Settings" > "General" > "Storage".
- Hover your cursor over the System Data category to see how much space it consumes when your computer calculates your storage.
In macOS versions before Ventura:
Navigate "Apple" > "About This Mac", then click "Storage" to check the system data.
Why Does "System Data" Take Up So Much Disk Space?
macOS can create large temporary files, especially during updates or when indexing Spotlight search data. If you're using iCloud, it might store local copies of your documents and photos.
"System Data" storage is a convenient monitor of space usage on macOS, and it identifies the documents that consume the most space to improve storage management.
When macOS automatically deletes files, a significant portion of the storage space utilized by the OS for system-related tasks is cleared; however, this does not always occur, which is why the System Data category can take up so much disk space.
Is It Safe to Clear or Delete "System Data" on Mac?
It is generally safe to clear or delete "System Data" on your Mac. But we recommend doing so only if you know what data you're deleting and avoid removing essential files.
Most of the files in this category are temporary or redundant, and cleaning temp files will not affect your system's stability or functionality.
4 Manual Methods to Clear "System Data" on Mac
Before you clear "System Data" on Mac, watch this video first. It provides you with more details on the manual deletion.

Method 1. Remove Time Machine Backups
Time Machine is Apple's built-in tool for backing up your Mac. If it continues saving files in the storage, you could encounter large system data problems.
Deleting by Terminal is the most convenient method. You can delete the backup files by entering a few commands and following the instructions below.
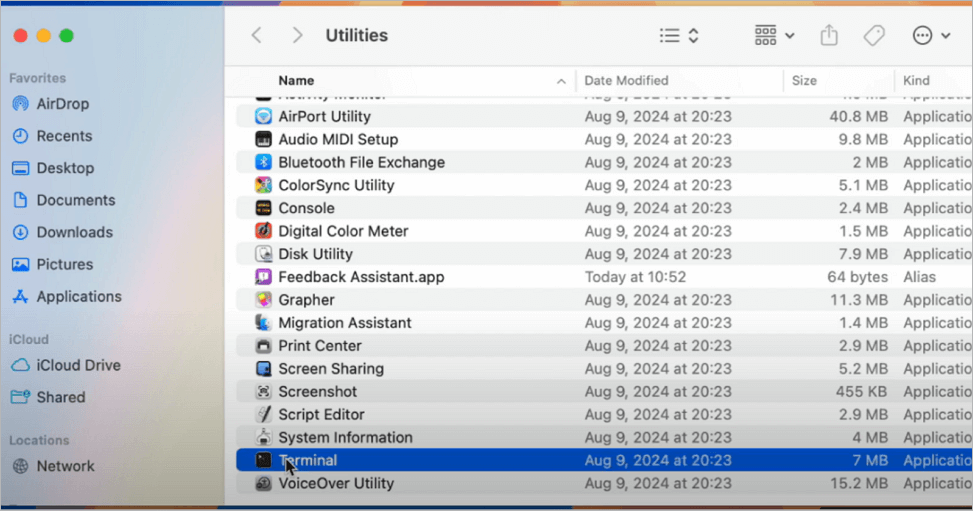
Step 1. Click on "Go" > "Utilities"
Step 2. Open Terminal from the list in the Utilities folder.
Step 3. Type tmutil listbackups in the command line and hit "Enter".
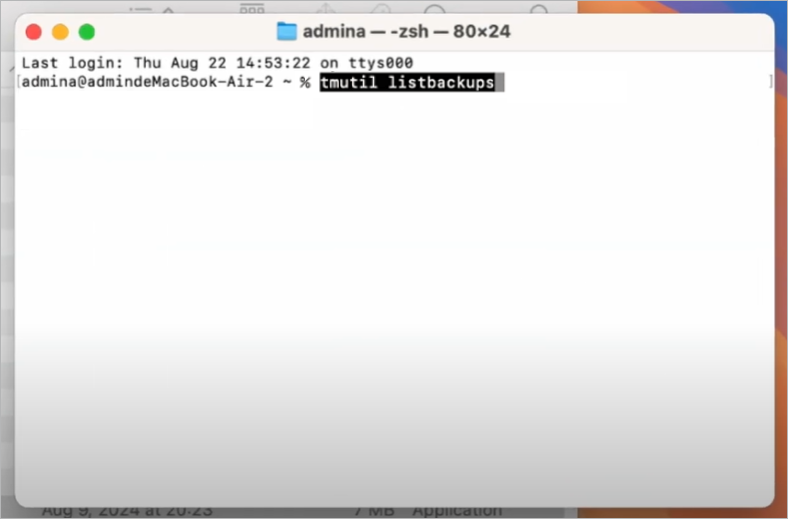
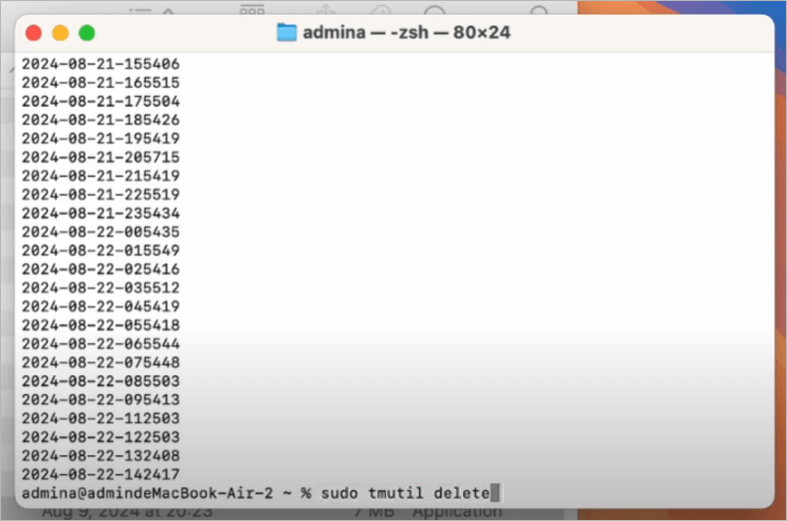
Step 4. All backup files and their paths will be displayed.
Step 5. Enter the command sudo tmutil delete into the "Terminal".
Method 2. Delete Old iOS Backups
Old iOS backups are another space eater increasing the size of System Data on Macs. When you switch to a new version of iOS or your phone, encrypted local backups are safer than iCloud backups and save your login information for email and other accounts that need authentication. It's safe to remove devices that you no longer own.
Step 1. Click the "Apple" button in the upper left.
Step 2. Choose "About This Mac" to view a graph showing whether your iPhone or iPad backups consume unnecessary space on your Mac.
Step 3. To see the local iOS backup files you saved on your Mac, click the "Manage" button and select iOS Files from the left panel.
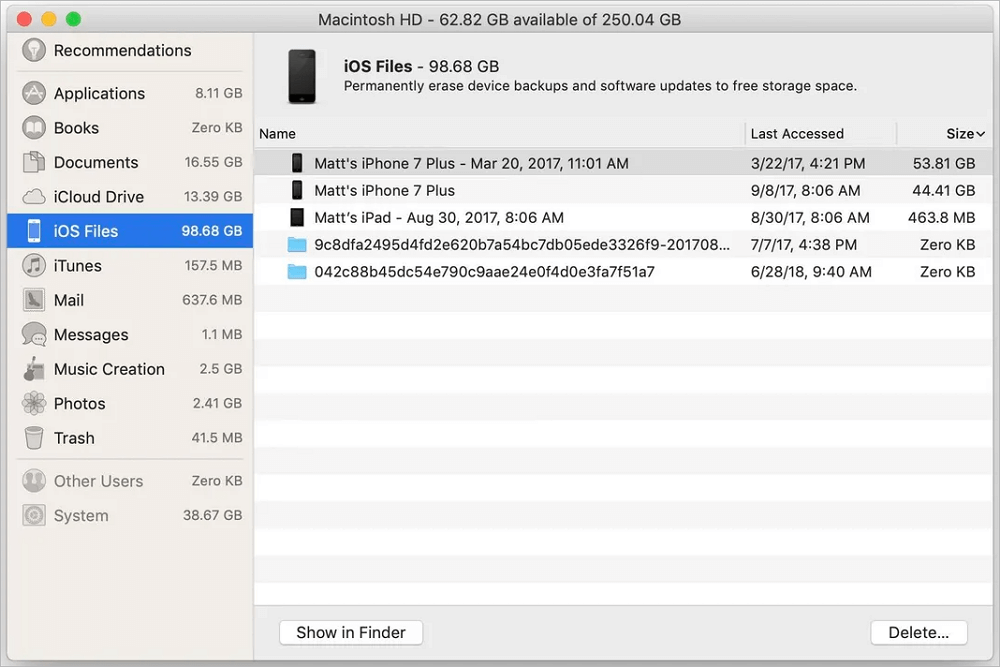
Step 4. Select the iOS backup files you want to remove and click "Delete".
Method 3. Clear Application Logs and Support Files
Application error reports are stored in system log files. If you believe your Mac's system logs are pointless, you can delete them. After a Mac restart, some of the logs will be automatically recreated.
The following procedures can be used to remove log files, which are a component of system data:
Step 1. Press the "Command + Backspace" keys to lauch the Spotlight search.
Step 2.Type~/Library/Logs/ and select Open.
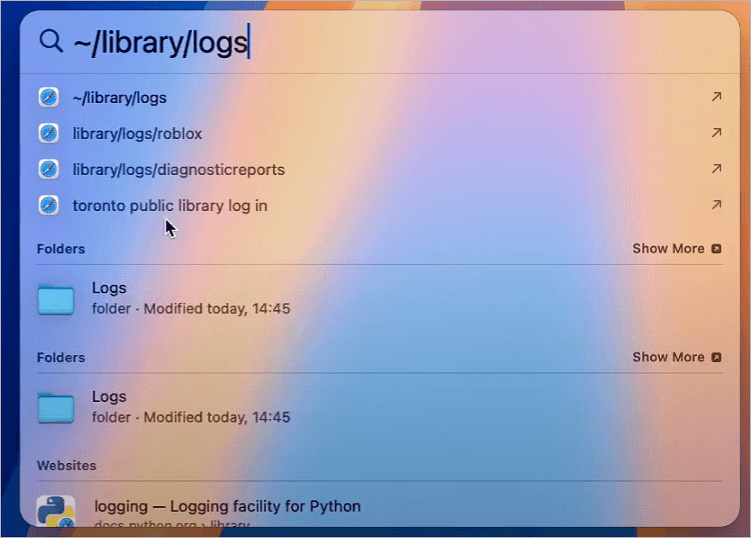
Step 3. Use Command and Delete to select the log files you wish to remove. Alternatively, you can transfer them to the Trash and then empty the trash to remove them permanently.
Method 4. Remove Hidden System Files
The macOS sometimes hides system files, so they can't be seen on the external hard drive. You should unhide folders on Mac and view them to delete them and decide if you want to clear them. Here are the steps:
Step 1. Launch a new Finder window and choose your Mac's name from the "Devices" sidebar.
Step 2. To reveal or conceal hidden folders in the Finder, click System and press "Command + Shift +.".
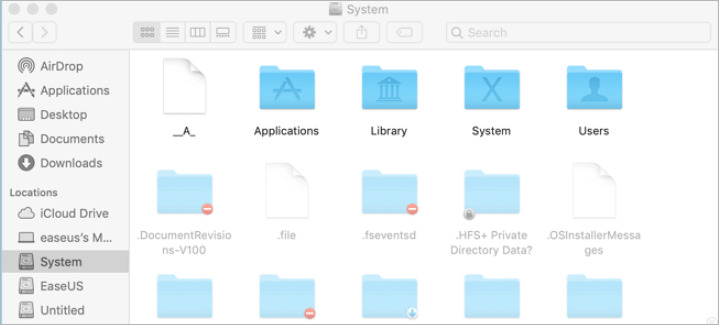
Step 3. Select the system files you think are unnecessary and delete them.
Using CleanMyMac to Clear "System Data" on Mac
If you are not comfortable with Mac or find the manual methods above too time-consuming, using a third-party tool to reduce System Data storage is recommended.
CleanMyMac is great app for this user scenario. It’s a powerful, Apple-notarized tool designed to clear not only System Data but many other types of system junk and unnecessary files as well.
Best of all, CleanMyMac is safe to use and you don’t have to worry about deleting the wrong files. For more information, read our detailed CleanMyMac review here.
📢Get CleanMyMac for 10% Off Today!
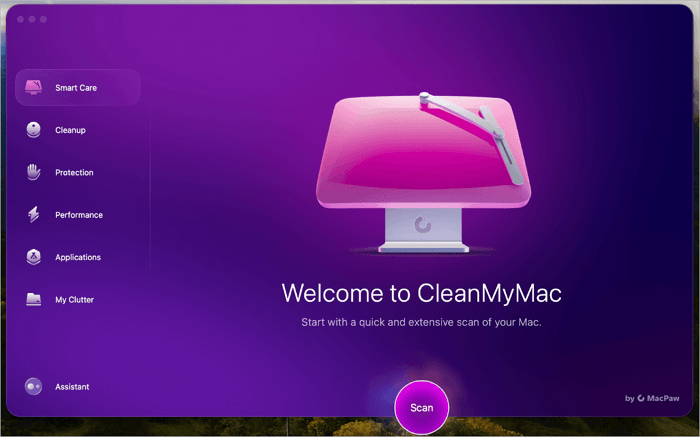
The Cleanup feature of this Mac cleaning software removes superfluous system clutter with only a few clicks.
- Launch the app; you can get the free version here.
- Click "Scan" from the sidebar after choosing "Cleanup".
- Click "Clean" when finished. Completed!
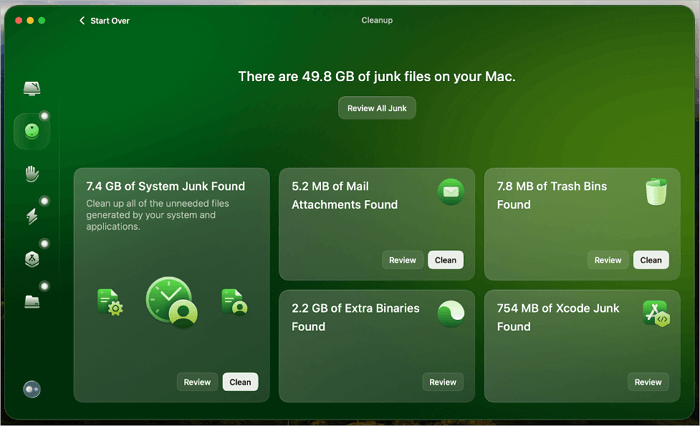
📢 Get CleanMyMac (10% Discount)
Final Tips
Here are some additional tips for clearing storage data on a Mac:
- Be careful not to delete essential data to avoid causing system failure. Consider using a third-party tool like CleanMyMac X to safely clean up unnecessary files without touching critical system files.
- Regularly back up your essential files using Time Machine, iCloud, or an external hard drive or SSD.
- Be more cautious with the system cache located at /Library/Caches. You can delete these files, but ensure the system is not running any updates or installations.
- Regularly check your storage usage and perform maintenance tasks to keep your Mac running smoothly.
- By following these tips, you can effectively manage and clear storage on your Mac while keeping your system and data safe.
Was This Page Helpful?
Related Articles
-
How to Recover Deleted Files on Mac Without Software
![author icon]() Dany/2025-07-02
Dany/2025-07-02 -
How to Remove Windows from Mac | Full Guide
![author icon]() Dany/2025-07-02
Dany/2025-07-02 -
How to Recover Deleted System Files Mac [New Updated]
![author icon]() Jaden/2025-07-02
Jaden/2025-07-02 -
Is MacPaw CleanMyMac Really Legit and Safe?
![author icon]() Cedric/2025-05-20
Cedric/2025-05-20