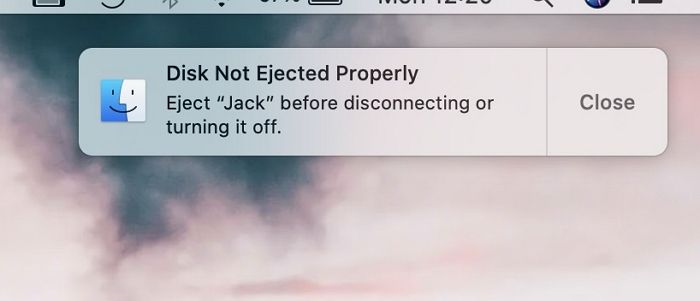
When you eject your disk for a safe removal but unprecedentedly see a disk not properly Ejected notification, then the bothering is obvious. An improper ejection can immediately stop the disk reading/writing process and leave bits of data on your system.
Further, when you eject your external disk, you might come to know later that some of your data is lost! It is annoying and can cause you a considerable loss. You would eject it safely after use, but that fails! If you are searching for Solutions for Disk Not Ejected Properly on Mac, then we have covered you all!
Why Do You Need to Eject The Disk on Your Mac
If you have been a Windows user in the past, there are higher chances that you have directly disconnected the disk from your PC. Ejection is essential, but it does not matter much for Windows users as the chances of losing data are higher for Mac users. Data processing speed may take longer sometimes. There will be instances when the macOS will be copying data to and from, but an abrupt disconnection could lead to data loss.
Thus, when you remove the drive correctly, all your data gets saved, and the system stops transmission. So you can ensure safe removal. Technically, ejecting a disk dismounts it for safe removal. By doing so, you can prevent disk and Data corruption also.
What Are The Reasons for Disk Not Ejected Properly on Mac
Often your Mac does not complete the data processing procedure for your disk, and you would disconnect it. Thus, the system abruptly stops the process, and you can often lose your data from the disk. But many users have faced the issue wherein the disk is not Ejected error popups. In such circumstances, never disconnect the disk till ejection is successful. Several reasons account for the issue. Some of them are given below:
- External Hard Drive Cable Failure: When you do not use the hard drive cable for a long time or have a durable one, it often fails. When you connect the hard drive using a faulty cable, you will have problems with disk operations like this.
- External Desktop Hard Drive Power Failure: If you use an external desktop hard drive that boots your system, it can fail for specific reasons. Therefore, it will not work correctly or instead does not function at all.
- Computer USB or Thunderbolt Port Failure: Often negligence, older system, or similar reasons can lead to USB port failures. The same happens with Thunderbolt ports, also! When the port connecting your drive and system does not work well, your disk operations will not be executed well.
- External Hard Drive Failure: When your external drive fails, safe ejection is impossible!
- Problems Related to macOS updates or the update process: Several users have reported the disk inappropriately ejected error randomly since the updated macOS.
When you see the Disk Not Ejected Properly notification, then you have to tackle it. But losing all your data, whether in your personal or professional life, creates a mishap. You can use Ease Data Recovery Wizard for Mac! The tool is reliable and effective, which is your ultimate savior.
How to Fix Disk Not Ejected Properly on Mac
Several fixes will let you fix disk ejection errors on Mac. Some include checking your connections, restarting your macOS using a mouse or trackpad, and more. You can even use First Aid to assess your disk drive. Let's roll on to all the effective fixes now!
#Solution 1. Log back in and try to roll out the disc again
If you have an older MacBook model having a CD tray, here's how you can resolve the disk ejection error.
- Head over to Apple Menu and navigate to the login
Further, eject the disk once more. If you still face an issue, then you should restart. If the problem persists, then the following method is for you!
- Go to Apple Menu and click on Restart.
When your MacBook reboots, press the mouse or trackpad button on your Mac until the disk ejects.
#Solution 2. Shut Down and Disconnect the Disk
When facing the Disk Not appropriately ejected on Mac, you can shut down your Mac and disconnect the disk. Further, you should connect the disk to your device and switch on your Mac after some time. Later, you can try to eject it safely once again. If this does not work, you can press and hold the trackpad while you restart once again!
#Solution 3. Run First Aid
Often there is an issue with the external hard drive and not your Mac. In such a scenario, checking whether the hard drive has any bugs becomes vital. No matter what causes the issue, a failure in ejection can lead to data loss. The First Aid app can diagnose the external drive for errors.
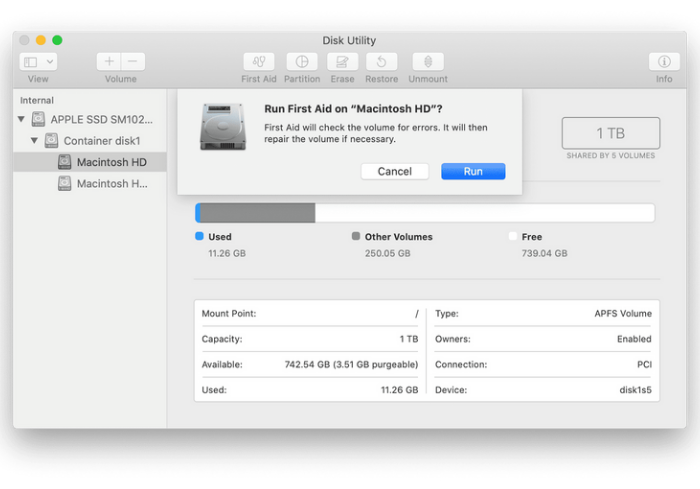
- Head over to Dock on your Mac
- Open Launchpad and navigate to Other
- Now, go to Disk Utility
- From the left pane, click on External Hard Drive
- Navigate to First Aid and press the Run button to proceed
First Aid takes some time for assessment. First Aid will assess your external drive for any errors. If there is an issue on your disk, you can fix it if possible. But if it is not possible, then you should disconnect it immediately.
You can even change the port to which your External Drive is connected. Often there is an issue with the ports leading to the point.
#Solution 4. Test with other connection
Often port failure or a loose connection can lead to the Disk Not Ejected Properly on Mac problem. To tackle it, you can change the external drive connection from one USB port to another. Further, you can change the connecting cable if you do not suspect anything with the port. Changing ports and cables let you interpret if any of them is faulty.
#Solution 5. Resetting NVRAM or PRAM on a Mac
If changing the connection to External Hard Drive does not help, you should reset NVRAM on Mac. NVRAM stores configurational data for your device. A corrupt NVRAM or PRAM can also lead to the issue. Therefore, you can reset it to fix the problem.
Follow the steps given below to reset NVRAM on your Apple PC:
- Turn off your Mac
- Immediately press the Option, Command, P, and R keys simultaneously until 20 seconds.
- Release the keys as soon as the Apple Logo appears
Most importantly, resetting NVRAM or PRAM will not lose your data. It will help you tackle the issue.
For more detailed instructions, please visit this article on resetting NVRAM on a Mac.
But it becomes essential to avoid the disk not Ejected Properly on Mac issue. The following section will help you prevent it from eliminating the vulnerability of Data loss!
How to Avoid Disks Not Ejected Properly on A Mac
The Disk Not Ejected Properly errors can occur due to manual errors. You often head over to disconnect the disk without ensuring a safe removal. Problematic ejecting troubleshooting becomes vital if you want to save your data.
1. Use the proper eject method
Never disconnect the drive directly. Wait for the data reading-writing process to end. After that, follow the proper disk ejection method to fix the same. Disconnecting directly is risky as you could lose your data after the process.
2. Eject the disk after use
Ejecting the disk ensures that the data read/write process is completed and saved. A safe disk removal prevents the loss of data.
Follow the steps given below to eject the disk after the data transfer process ends:
- Go to Finder and search for the External Drive
- Right Click on the external drive and select the Eject
The drop-down menu displays the eject option along with your Drive's name. It will notify if there are any problems during the ejection.
Conclusion
Are you searching for Solutions for Disk Not Ejected Properly on Mac? If yes, you would have got your answer! A faulty cable or port, software bugs, and similar lead to the issue. Whatever the reason, this can lead to even data loss which takes a toll on your overall life! To save yourself, you can use the EaseUS Data Recovery Wizard for Mac for an effortless, safe, and reliant tool that should be your good-to-go friend!
Was This Page Helpful?
Daisy is the Senior editor of the writing team for EaseUS. She has been working at EaseUS for over ten years, starting as a technical writer and moving on to being a team leader of the content group. As a professional author for over ten years, she writes a lot to help people overcome their tech troubles.
Related Articles
-
4 Ways to Factory Reset ASUS Laptop Without Password
![author icon]() Brithny/2024-09-27
Brithny/2024-09-27 -
How to Factory Reset Windows 7 [Follow Detailed Guides]
![author icon]() Brithny/2024-07-01
Brithny/2024-07-01 -
How to Open Dmg Files on Mac Ventura/Monterey/Big Sur/Catalina [4 Fixes]
![author icon]() Jaden/2024-10-25
Jaden/2024-10-25 -
Repair Time Machine Backup (Solved): Time Machine Backup Failed, Corrupted, Missing
![author icon]() Tracy King/2024-10-10
Tracy King/2024-10-10

EaseUS Data Recovery Services
EaseUS data recovery experts have uneaqualed expertise to repair disks/systems and salvage data from all devices like RAID, HDD, SSD, USB, etc.