
Content
Page Table of Contents
About the Author
Hot Topics
Do you want to format C drive but there is no format option? Or you'll see an error message saying the drive is in use. When the C drive is your Windows system drive, you can't format it from inside Windows. However, you can format C drive from BIOS. In this guide, we'll walk through how to safely format your C drive by booting from external media.
Can I Format C Drive from BIOS
You cannot format a drive directly from BIOS or UEFI. BIOS doesn't have built-in tools to format partitions or file systems. But you can enter the BIOS setup to change the boot priority so your computer starts from an installation media. Once booted into that external environment, you can then format the C drive.
What You Need Before Formatting C Drive from BIOS
Before you start to format C drive, you need to prepare for data safety and smooth formatting.
- Back up your data: Anything you want to keep must be copied to an external hard drive, another computer, or cloud storage. Once the C drive is formatted, it's gone.
- A working USB flash drive (at least 8GB, preferably 16GB).
- Another computer (to create the bootable USB if your current one won't boot).
- Windows Installation Media or a reliable third-party bootable tool.
- Your Windows product key (in case you need to reactivate later).
- Sufficient time: the whole process can take 1 or 2 hours.
How to Format C Drive from BIOS
To format C drive from BIOS, you need to boot your computer from external installation media first. There are three ways to format C drive from BIOS.
| Method | Best For | Interface | Ease of Use | Risk of Data Loss | Additional Features |
| Beginners, visual learners | Graphical | Very easy | Low | All-in-one disk manager | |
| Users want no third-party software | Graphical but old | Easy | Low | Install/repair Windows | |
| Advanced users, precise control | Command-line | Difficult | High | Delete, create, extend partitions |
Method 1. Easeus Partition Master
EaseUS Partition Master is a professional bootable USB format tool. Its "bootable USB" feature lets you access full partitioning features even when Windows won't start. With EaseUS Partition Master, you can see all your drives and partitions graphically. This method is helpful for users who want precise control without commands.
- Create a bootable disk
- Fix Windows won't boot
- Fix Windows startup issues, blue screen, black screen, etc.
- Wipe, format, clone hard drive from BIOS
How to format C drive from BIOS with EaseUS Partition Master
Stage 1. Create a bootable USB.
Step 1. To create a bootable disk of EaseUS Partition Master, you should prepare a storage media, like a USB drive, flash drive or a CD/DVD disc. Then, correctly connect the drive to your computer.
Step 2. Launch EaseUS Partition Master, and find the "Bootable Media" feature on the left. Click on it.
Step 3. You can choose the USB or CD/DVD when the drive is available. However, if you do not have a storage device at hand, you can also save the ISO file to a local drive, and later burn it to a storage media. Once made the option, click the "Create" button to begin.
- Check the Warning message and click "Yes".
Step 4. When the process finishes, you'll see a pop up window, asking if you want to restart computer from the bootable USB.
- Reboot Now: it means you want to restart the current PC and enter EaseUS Bootable Media to manage your disk partitions without OS.
- Done: it means you don't want to restart the current PC but to use the bootable USB on a new PC.
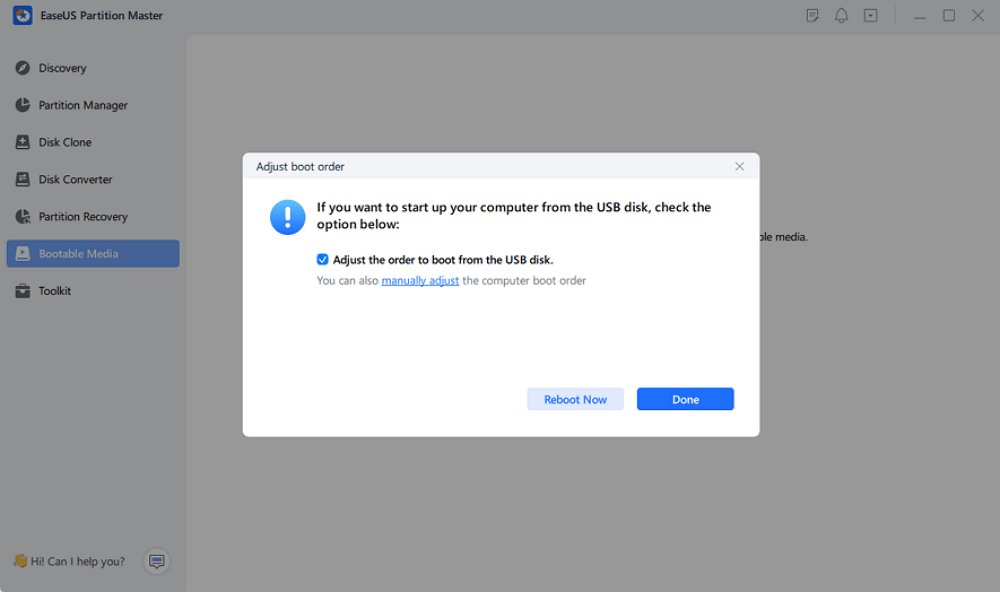
Note: To use the bootable disk on a new PC, you need to resart the target computer and press F2/F8/Del key to enter BIOS, and set the USB bootable disk as the first boot disk.
Wait patitiently and your computer will automatically boot up from the USB bootable media and enter EaseUS WinPE desktop.
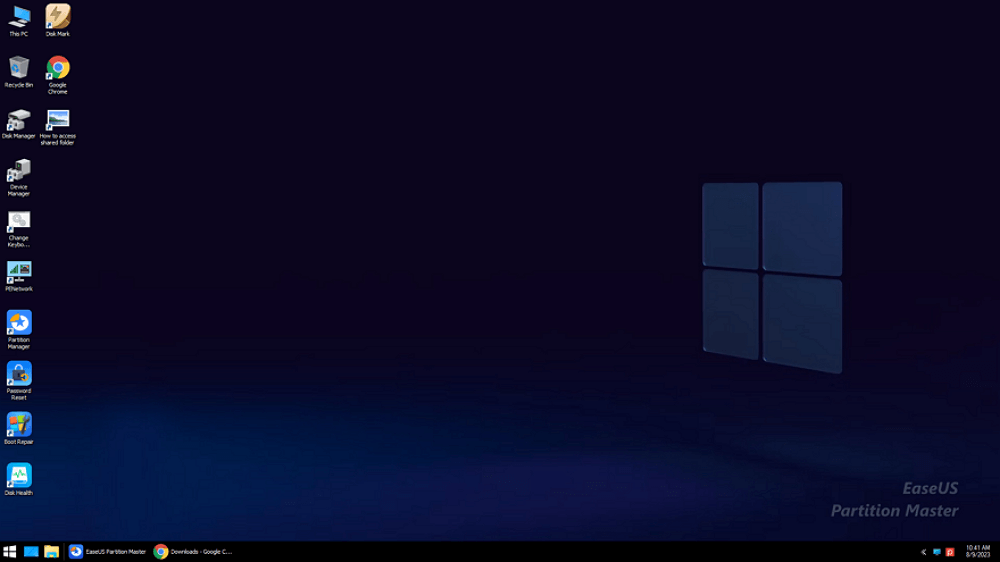
Stage 2. Format C drive from BIOS.
Step 1. Run EaseUS Partition Master, right-click the C drive partition and choose "Format".
Step 2. Set the Partition label, File system (NTFS/FAT32/EXT2/EXT3/EXT4/exFAT), and cluster size for the partition to be formatted, then click "OK."
Step 3. Confirm the operation and click the "Execute 1 Task(s)" button to review the changes.
Step 4. Then click "Apply" to start formatting the C drive.
Method 2. Windows Installation Media
Windows Installation Media is Microsoft's tool to install or repair Windows. It includes a built-in option to format partitions during setup. You create a bootable USB using Microsoft's Media Creation Tool on another computer, then boot from it to access the Windows Setup screen. When you reach the partition selection screen during a custom installation, you can format your C drive.
Step 1. Download the Media Creation Tool from Microsoft's Windows download page.
Step 2. Insert a USB drive (at least 8GB) and run the Media Creation Tool.
Step 3. Select "Create installation media for another PC."
Step 4. Choose the settings and select "USB flash drive."
Step 5. Select your USB drive and let the tool create the bootable Windows installation media.
Step 6. Insert the USB into the computer with the C drive you want to format.
Step 7. Restart the computer and enter BIOS by pressing F2 or F10. (Please refer to the official documentation for the specific key to enter BIOS.)
Step 8. Change the boot order to prioritize the USB drive, then save and exit BIOS.
Step 9. When the Windows Setup screen appears, click "Next" > "Install now."
Step 10. Choose "Custom: Install Windows only (advanced)."
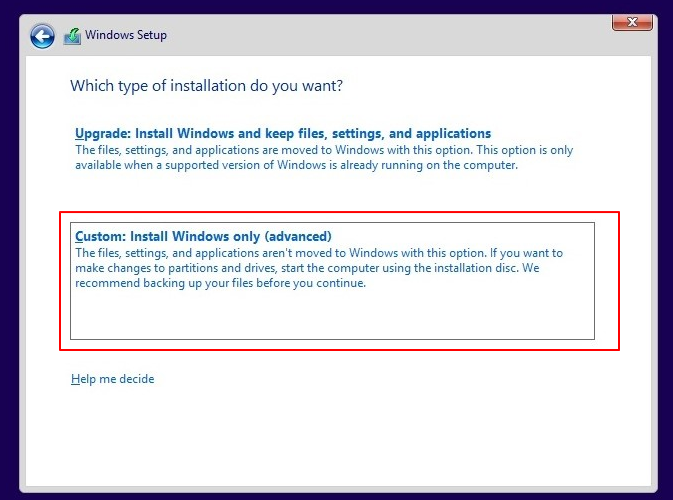
Step 11. Select the C drive partition and click "Format."

Method 3. Command Prompt
For users who are comfortable working with commands, Command Prompt is a good way. It gives you granular control over every aspect of disk formatting. You can access Command Prompt from the Windows installation USB's recovery menu, then use DiskPart commands to format C drive.
Here is how to format C drive from BIOS using Command Prompt.
Step 1. Insert the bootable Windows USB drive into your PC, restart the computer, and repeatedly press F2 to enter the BIOS.
Step 2. Set the USB drive as the first boot device. The PC will boot from the USB and load the Windows installation media.
Step 3. On the Windows Setup screen, click "Repair your computer" in the bottom-left corner.
Step 4. Navigate to: Troubleshoot > Advanced options > Command Prompt.
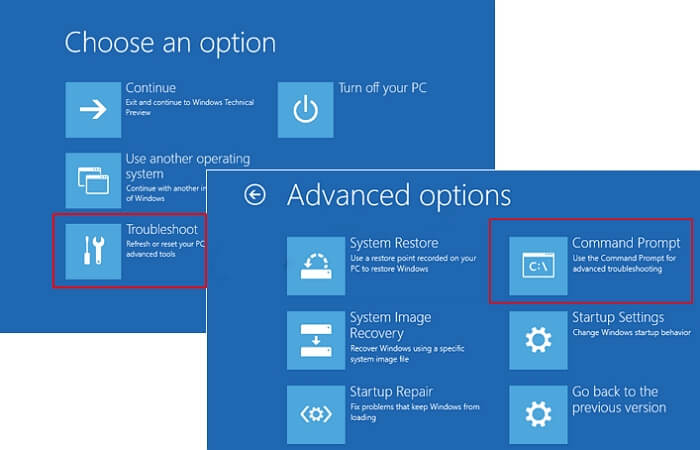
Step 5. Once Command Prompt opens, type the following commands one by one (press Enter after each):
- diskpart
- list volume
- exit
- dir C (If your system drive is not labeled as C, replace it with another label.)
- format C: /fs:NTFS
Conclusion
You can't format your C drive directly from BIOS. But you can format it by booting from external media instead. There are three ways to format C drive from BIOS, including Windows Installation Media, EaseUS Partition Master, and DiskPart. EaseUS Partition Master stands out as the most user-friendly option. Its visual interface makes it easy to format the C drive with just a few clicks.
Before you start, remember to back up your data because formatting wipes everything.
FAQs
1. Will formatting C drive delete everything?
Yes. All files, programs, and the Windows installation on the C drive will be permanently deleted.
2. Can I recover data after formatting C drive?
If it were a quick format and no new data was written, recovery tools like EaseUS Data Recovery might work. Stop using the drive immediately and try recovery software.
3. How long does it take to format C drive?
A quick format takes several minutes. A full format can take 30 minutes to several hours, depending on drive size and speed.
Share this guide to help others learn C drive formatting:

How Can We Help You
About the Author

Sherly joined EaseUS in 2022 and she has always loved writing articles and enjoys the fun they bring. She receives professional training here, focusing on product performance and other relative knowledge. She has written over 200 articles to help people overcome computing issues.

Written by Joey Albert
Joey is an enthusiast of science and technology. With a passion for uncovering the latest tech innovations, she creates clear, engaging how-to guides that make technology accessible and enjoyable for all.
Product Reviews
-
I love that the changes you make with EaseUS Partition Master Free aren't immediately applied to the disks. It makes it way easier to play out what will happen after you've made all the changes. I also think the overall look and feel of EaseUS Partition Master Free makes whatever you're doing with your computer's partitions easy.
Read More -
Partition Master Free can Resize, Move, Merge, Migrate, and Copy disks or partitions; convert to local, change label, defragment, check and explore partition; and much more. A premium upgrade adds free tech support and the ability to resize dynamic volumes.
Read More -
It won't hot image your drives or align them, but since it's coupled with a partition manager, it allows you do perform many tasks at once, instead of just cloning drives. You can move partitions around, resize them, defragment, and more, along with the other tools you'd expect from a cloning tool.
Read More
Related Articles
-
How to Format C Drive in Windows 11/10? [4 Efficient Ways]
![author icon]() Jean/2026/09/29
Jean/2026/09/29 -
How to Extend C Drive Space in Windows 11 [2026 Tutorial]
![author icon]() Tracy King/2026/09/16
Tracy King/2026/09/16 -
C Drive Cleaner Free Download for Windows 11/10
![author icon]() Sherly/2026/09/29
Sherly/2026/09/29 -
How to Extend C Drive with Nonadjacent Unallocated Space on Windows 11/10
![author icon]() Sherly/2026/09/29
Sherly/2026/09/29
 Jean/2026/09/29
  Tracy King/2026/09/16