Welcome
Welcome to User Manual for EaseUS Data Recovery Wizard for Mac. With its easy-to-use and user-friendly design, EaseUS Data Recovery Wizard for Mac is one of the most powerful and successful data recovery products. It can help you easily recover lost data from Mac, hard drives, and other storage media, etc. Being endowed with a straightforward interface, EaseUS focuses on providing easy and smooth use for all users.
This User Manual covers detailed instructions on how to use all the features of this program. Should you have any further questions, please visit EaseUS Knowledge Base.
To get technical support, please email us at:
[email protected]
Getting Started
This part outlines the basic parameters to use EaseUS Data Recovery Wizard for Mac. It is to help you acquire a general understanding before you get started.
Hardware Requirements
500 MHz processor or faster
A minimum of 1 gigabyte (GB) RAM; A minimum of 2 GB RAM for MacOS
A minimum of 100MB of available space on the hard disk
Keyboard, mouse, and other compatible pointing devices
System Requirements
Make sure you are running any one of the listed operating systems:
MacOS 13.x (All versions)
MacOS 12.x (All versions)
MacOS 11.x (All versions
MacOS 10.6 (Snow Leopard) - 10.15 (Catalina)
Supported File Systems
EaseUS Data Recovery Wizard for Mac supports these file systems:
APFS
HFS+
HFS X
exFAT
NTFS
FAT (FAT16, FAT32)
Supported Devices
EaseUS Data Recovery Wizard for Mac supports the devices below:
HDD
SSD
Memory Card
USB Drive
Digital Camera
Mp3/Mp4 Player
SD Card
CF/XD/MMC Card
Camcorder
Supported File Types
EaseUS Data Recovery Wizard for Mac supports common recovery jobs of all file types. However, in some specific cases, the file system directories/indexes are damaged, which makes the files can only be found from the content part of a partition. And files detected in this way are all known as RAW files.
Since not every file type share the same file structure and identifier (which our product use to locate a lost file and rebuild it as a RAW), so only a certain group of common file types can be retrieved as RAW files.
In short, for a partition that contains badly damaged or corrupted file directories/indexes, some very unusual file types cannot be recovered by our product.
Activation
Free Version:
To activate the program, please launch it and click on the Upgrade button located at the bottom left corner of the program. This action will prompt the activation window to appear. If you have not yet received a license code, you can purchase one by clicking on the Buy Now button. Alternatively, if you already have a valid license code, simply click on the Upgrade button that has a key icon and enter your license code in the designated field.

Enter your license code in the designated field and click on the Upgrade button to activate the free version to the full version.

Trial Version:
To activate the program, please launch it and click on the Activate button located at the bottom left corner of the program. This action will prompt the activation window to appear. If you have not yet received a license code, you can purchase one by clicking on the Buy Now button. Alternatively, if you already have a valid license code, simply click on the Activate button that has a key icon and enter your license code in the designated field.

Enter your license code in the designated field and click on the Activate button to activate the trial version to the full version.

After the program is successfully activated, you will notice the appearance of the Pro version in the title.

Choose Scan Target
The initial step in data recovery on a Mac involves selecting a device. EaseUS Data Recovery Wizard for Mac offers two options, including Hardware Disk Recovery and SD Card Recovery.
In Hardware Disk Recovery, the internal drive of your Mac and all the external devices connected to it are listed on the page. Simply select the disk from which you need to recover data and initiate the scanning process.

If you are looking to recover data from the SD/TF card used in your camera devices (such as Canon, Nikon, Panasonic, GoPro, DJI, and more), it is recommended that you choose the SD Card Recovery option.
This algorithm is specifically optimized to ensure a better quality of recovery for videos and photos from these devices. After selecting a device from the disk list, please also choose the appropriate brand name from the drop-down list.

Tips:
1. In case the related partition or hard drive cannot be located during the recovery process, please check if Mac OS also fails to recognize it by navigating to Disk Utility.
2. It is essential to ensure that the connection of the target partition or hard drive is stable; otherwise, the process may hang up or the files found would be of zero size.
Scan Process
The program provides scanning information located at the bottom, which includes a processing bar that displays the current status of the scan, the amount of data found, and an estimated time remaining to complete the scan.

While it is recommended to wait for the scan to finish, there are additional options to facilitate the recovery process:
1. Confirmed files are updated in real-time and can be saved during the scan.
2. A Pause button allows for temporary suspension of the scan process.
3. The scan can be stopped mid-process, but this cannot be undone or resumed. It is advised to pause the scan if files are found midway or recover them after the scan is complete.
Search Lost Files
After the full scan, a vast number of files may be displayed. If the outcome seems excessive and time-consuming, we recommend implementing useful techniques to considerably reduce the number of files you need to inspect.

1. During the session, you can determine the number of files discovered and their combined size.
2. The files are automatically sorted by file type, but if you prefer to view them by directory, click on Path to reorganize them.
3. To view a specific file type, choose a category, and all the corresponding files will be listed in either List or Thumbnail view. They can also be sorted by Size, Date Created, or Date Modified. To further narrow down the results, use the Filter icon to enable the panel and apply filters based on Type, Size, Date Created, and Date Modified.

To verify that the files can be successfully recovered from the result, double-click on a file from the list to open the Preview window. If the preview functions correctly, you can be confident in your ability to recover the file. Preview mode is available for various file formats, including pictures, documents, and videos.

Once you have identified the files you wish to retrieve, follow these steps:
1. Choose the specific files you wish to recover from the list.
2. Verify the total number of selected files, then press the Recover button to save them. Please do NOT saving the files back onto their original drive. Otherwise the files might be lost permanently.

Search Record
Once the scan is finished, click on the Home button to exit the scan result and return to the Home page. The program will save the scan result automatically and add it to Search Record section.

To resume the scan result, select it from Search Records section and click on Load.

Unbootable Mac
The Unbootable Mac feature is primarily utilized to recover data from a device in situations where the computer fails to boot or when lost data is stored on the system drive. It allows you to load and run EaseUS Data Recovery Wizard for Mac in the Recovery Mode. Follow the steps below to create a bootable media:
1. Navigate to the Unbootable Mac feature from the sidebar, the page shows you the steps to start up EaseUS Data Recovery Wizard for Mac in Recovery Mode.

2. Boot your Mac into macOS Recovery Mode.
Please first ensure whether you are using an Apple silicon(M1/M2/M3) Mac or an Intel-based Mac. You can find this information on the About This Mac page.
For Apple silicon(M1/M2/M3) Macs:
Shut down your Mac, press and hold the Power button (Touch ID) until you see "Loading startup options". Select Options and click the Continue button to access the macOS Recovery Mode.

For Intel-based Macs:
Restart your Mac, then immediately press and hold Command+Options+R together until you see a spinning globe on your Mac's screen.
For T2-secured Macs:
Restart your Mac, then immediately press and hold Command+Options+Shift+R together until you see a spinning globe on your Mac's screen.
Note:
Before running EaseUS Data Recovery Wizard for Mac in Recovery Mode, please ensure your Mac is connected to the internet via Wifi.
2. Select "Utilities" from the top menu, and click "Terminal" in the drop-down options.

3. enter the command below and hit the Return button on your keyboard:
sh <(curl https://d3.easeus.com/mac/boot.sh)
Please double-check you fill in the command correctly before you move to the next step.

4. This command line will download and load EaseUS Data Recovery Wizard for Mac from our server. If you see the window below, it means the process is downloading the application. Normally it takes several minutes, please wait patiently.

Note:
If the Terminal says "No such file or directory" or "could not resolve host", please go back to the previous step and check that the command line you typed is. correct. You should also check the internet connection of your Mac is stable, and also your macOS version is higher than macOS 10.12.
5. After the download is completed, EaseUS Data Recovery Wizard for Mac will pop up on your Mac screen. You can now recover your files.

iCloud Recovery
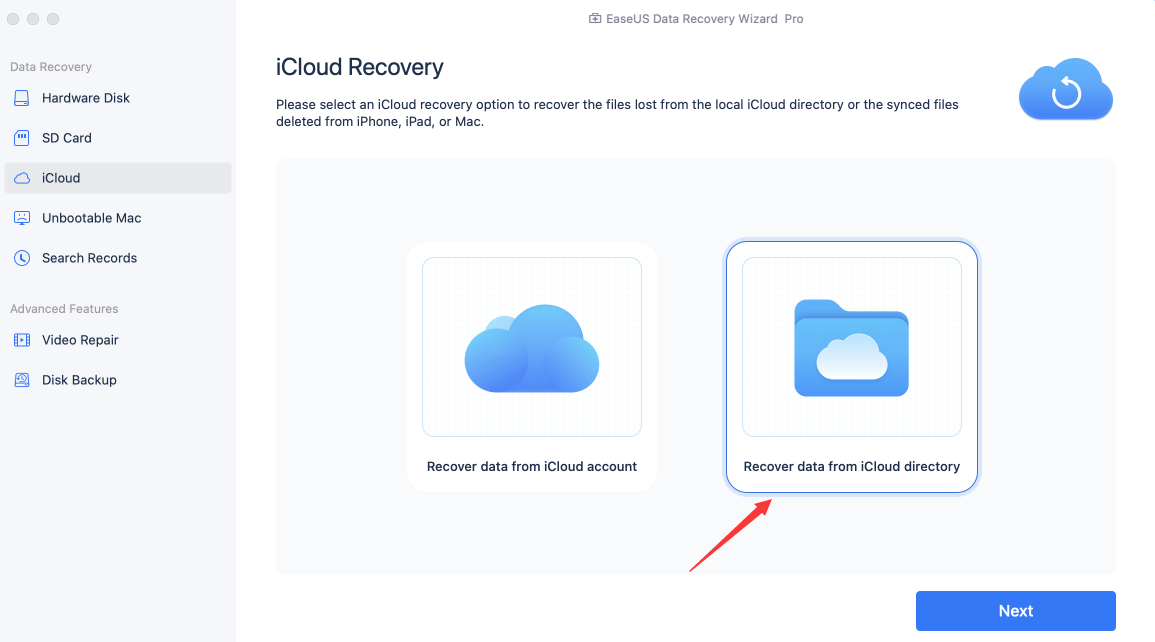
In the cases that you need to recover lost data from the local iCloud directory or retrieve deleted iCloud-synced data from Mac and iOS devices, please select iCloud Recovery. The two options here provide an excellent opportunity to recover valuable data.
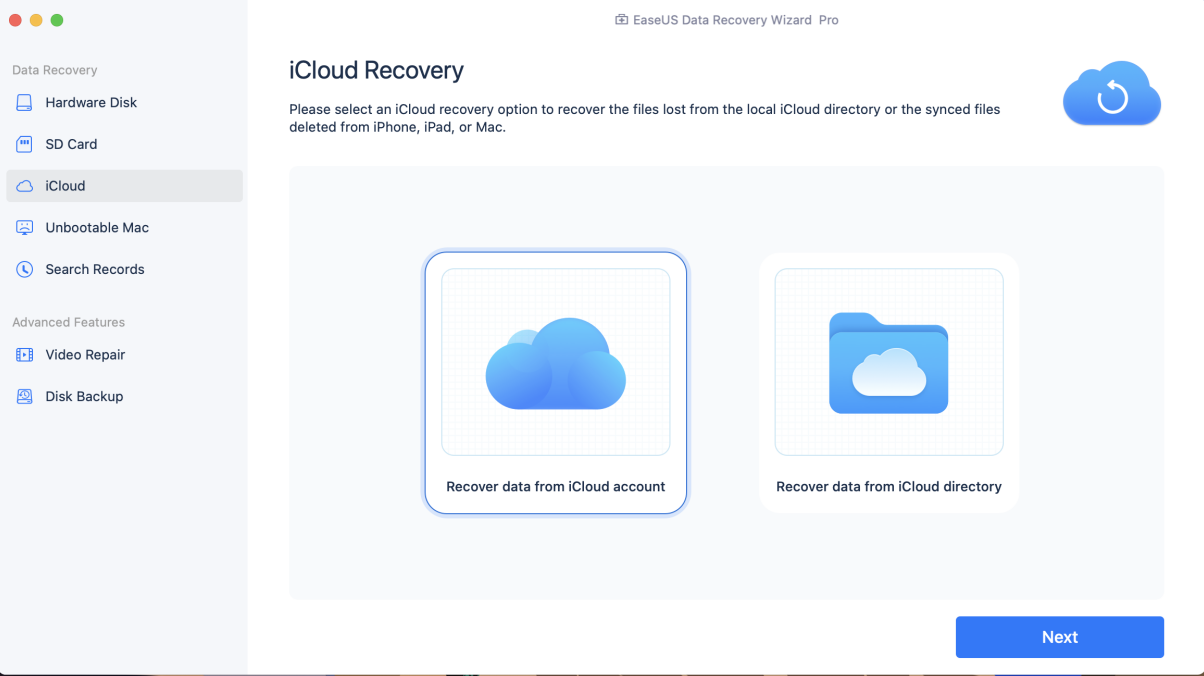
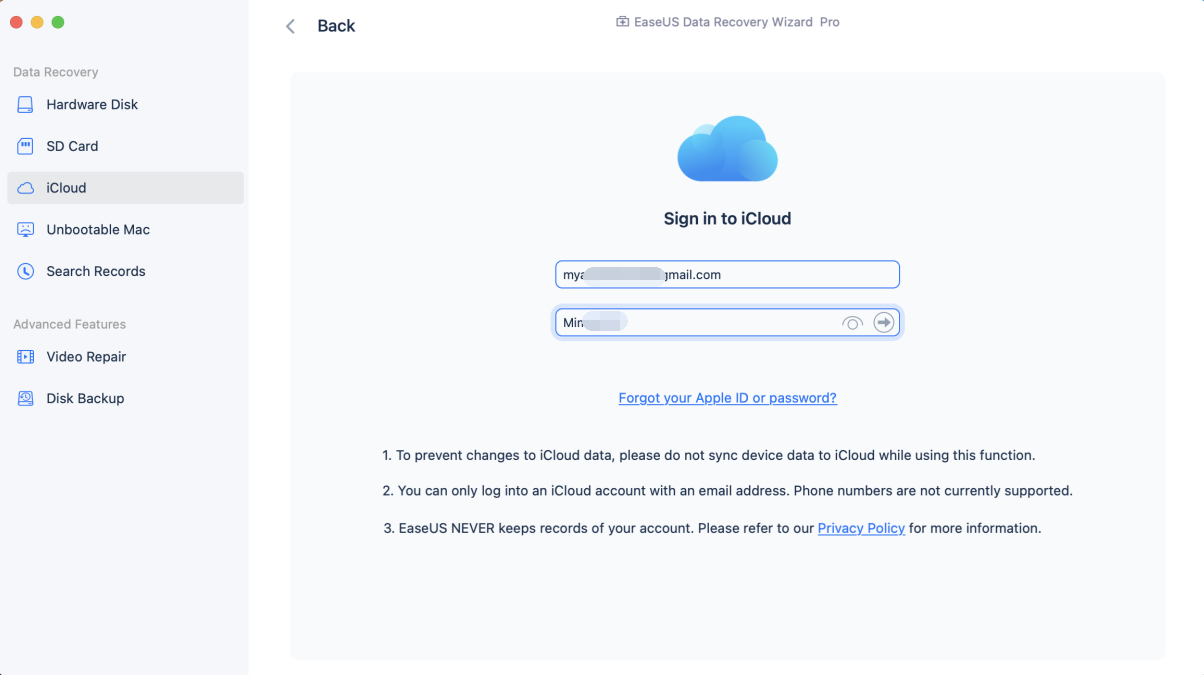
Recover data from iCloud account is designed to obtain the lost data from devices that have been synced to your iCloud account. Enter your Apple ID and password to log into the account first.
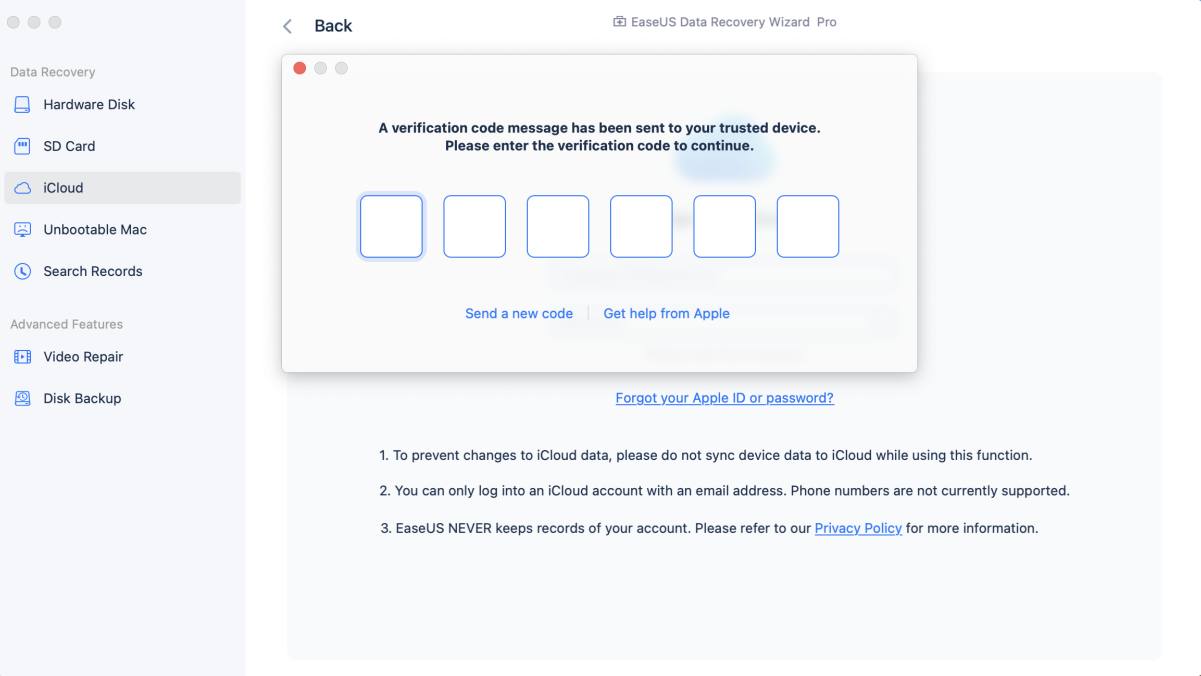
A pop-up window will appear, requesting a 6-digit verification code sent to you. Please locate this code on your trusted device and enter it. If you do not receive the code after a while, please click Send a new one or Get help from Apple.
Please be informed that at present, only iCloud accounts associated with an email address are compatible. Phone numbers are not currently supported.
To prevent changes to iCloud data, please do not sync device data to the iCloud while using the function.
Upon logging in, the product will automatically fetch data from the iCloud Drive, Contacts, Photos, and Notes. If the data reading is inaccurate or some data cannot be read due to a network disconnection, use the Refresh button to update it.
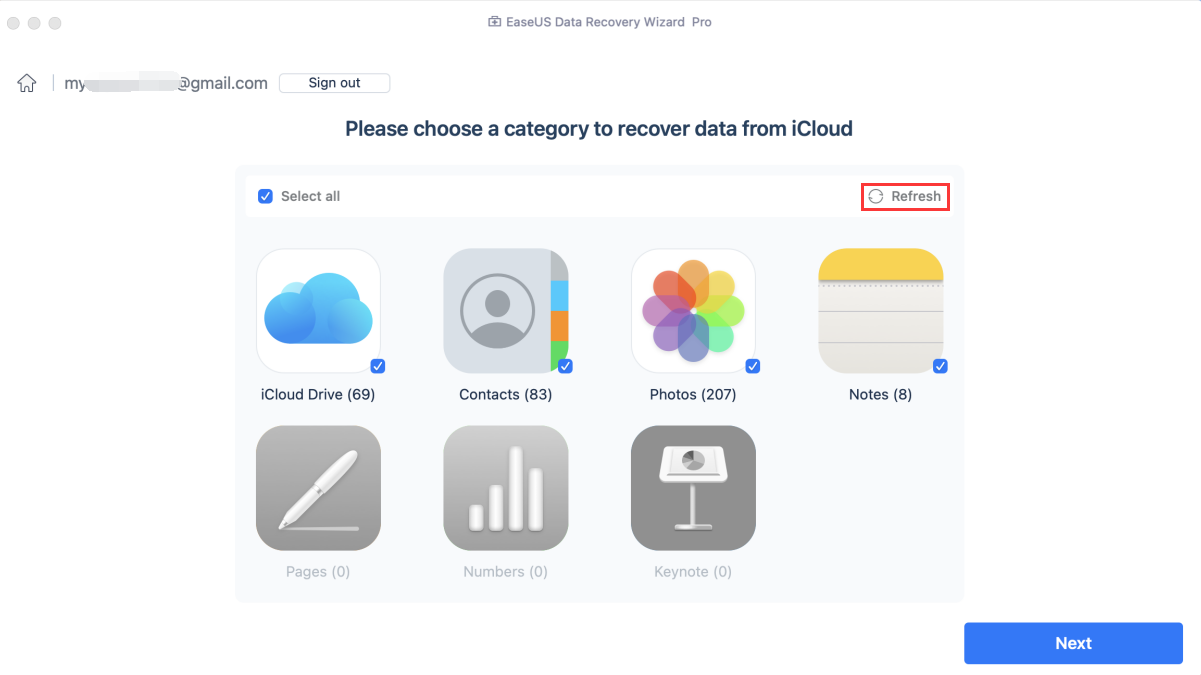
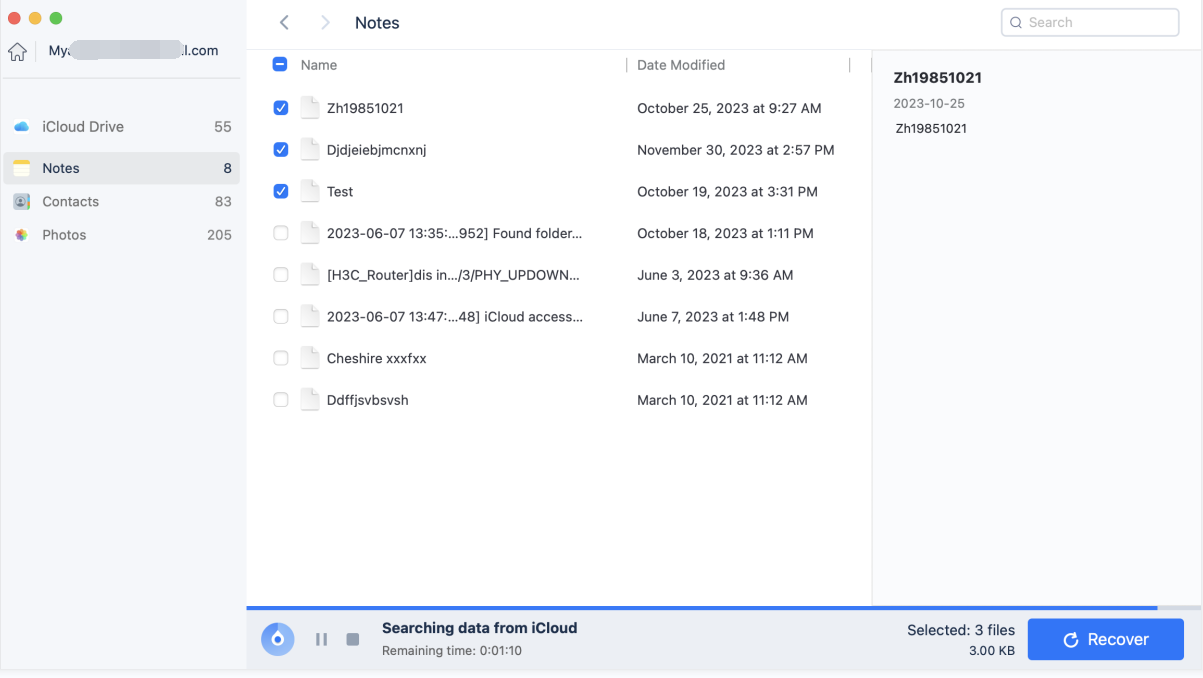
Once you have located your files, select a specific category and extract the files you require.
Please opt for the Recover data from iCloud directory if you are looking for local lost data there. This function assists in scanning and recovering from the local iCloud system files. Additionally, these files can be detected using the Hardware Disk recovery function.
Video Repair
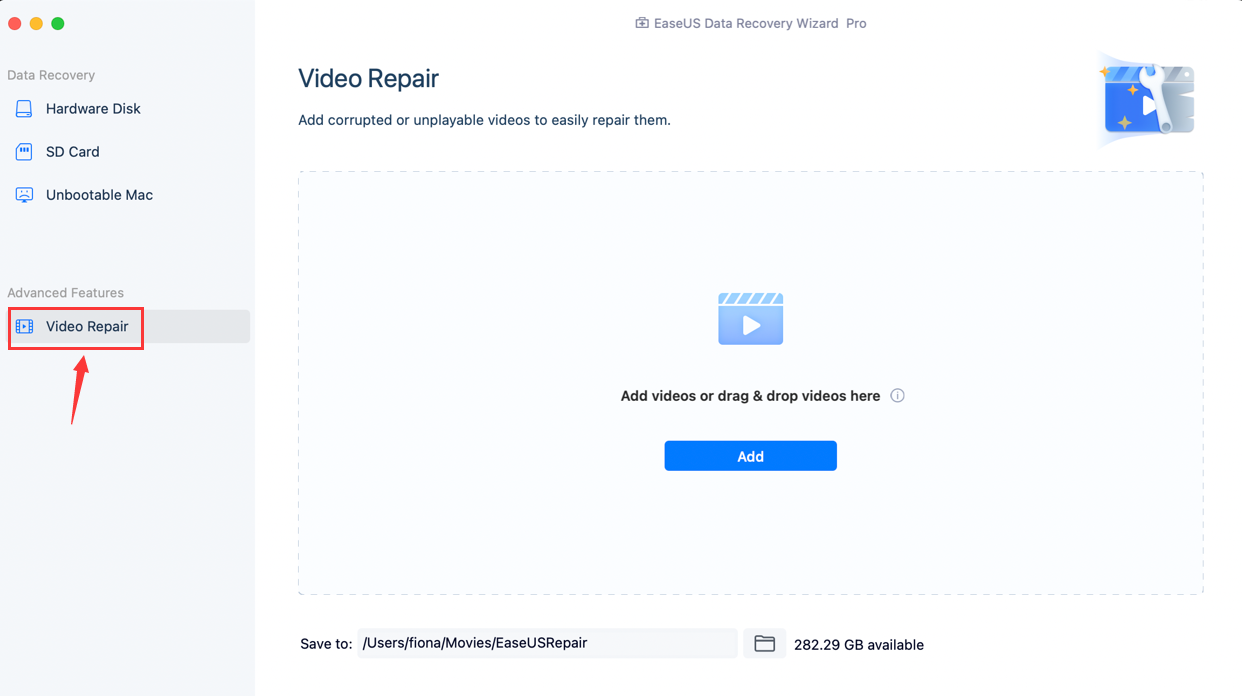
Repairing corrupted or unplayable videos has never been easier with the Video Repair function, available with a few clicks on the paid version of the software. To begin, simply add the videos you wish to repair by either clicking the Add button or dragging and dropping them onto the page. The Target path can be changed by clicking the folder button located at the bottom of the page.
If there are numerous videos to be repaired, click the Add New File button on the top. To remove a single file from the list, click the close button X To clear the Video Repair list, simply click the Remove all button. Once the videos are added, click Repair to initiate the repair process for one file, or click Repair All to repair all of the videos in the list.
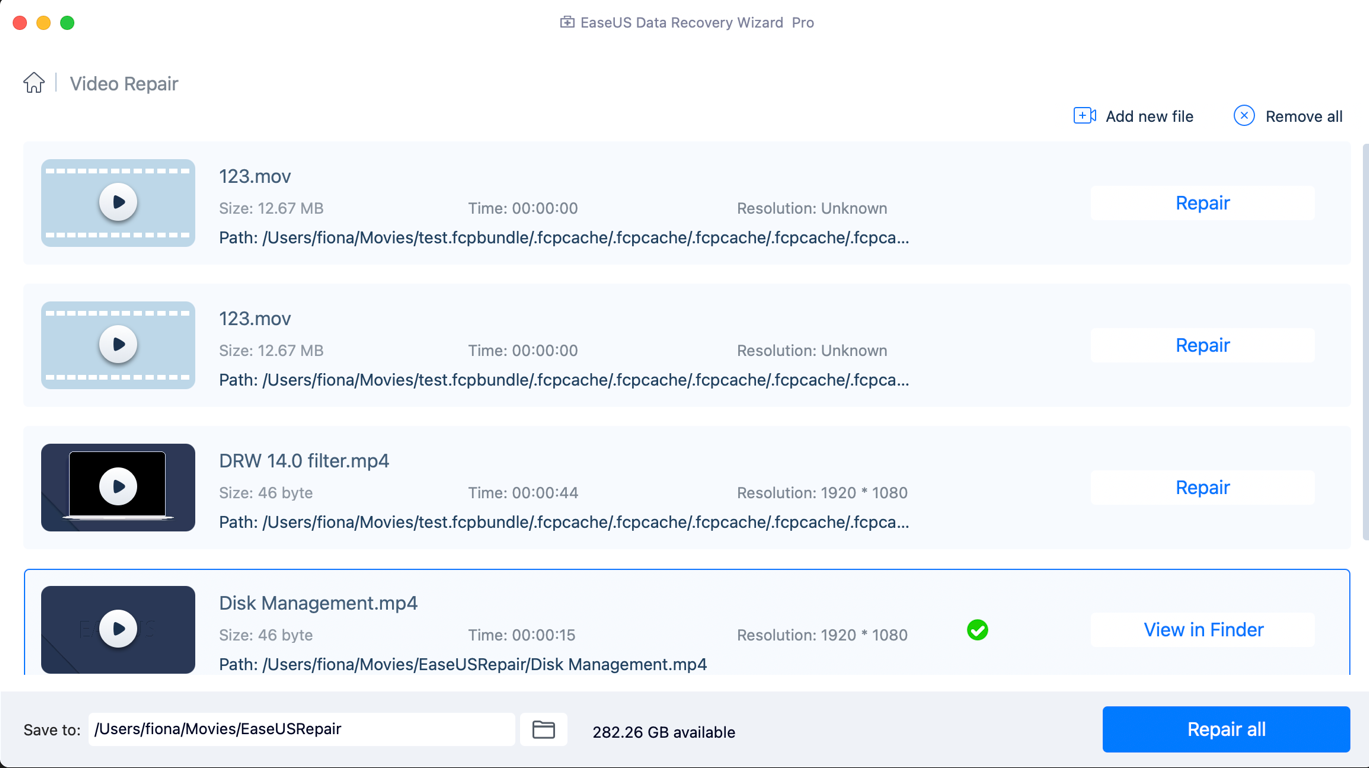
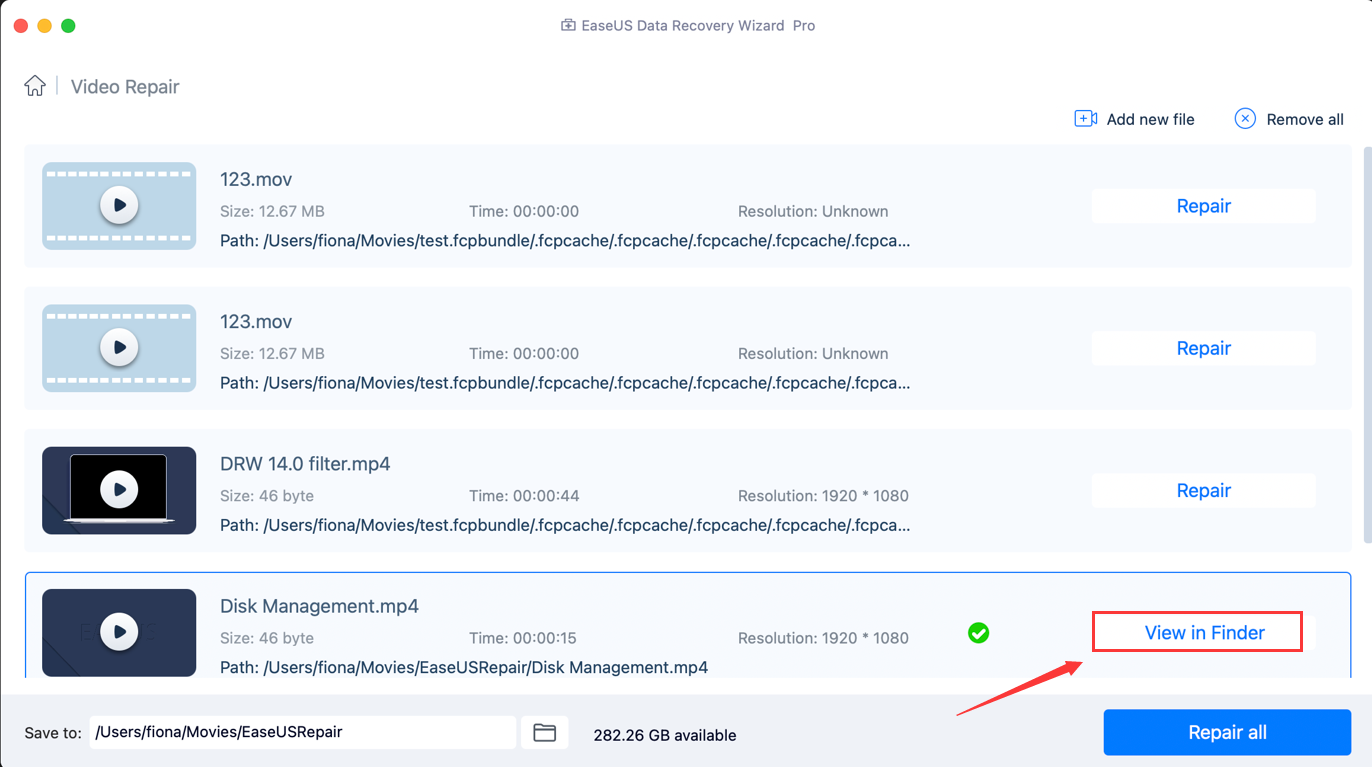
Upon completion of the repair process, it is easy to locate the repaired videos by clicking on the View in Finder option.
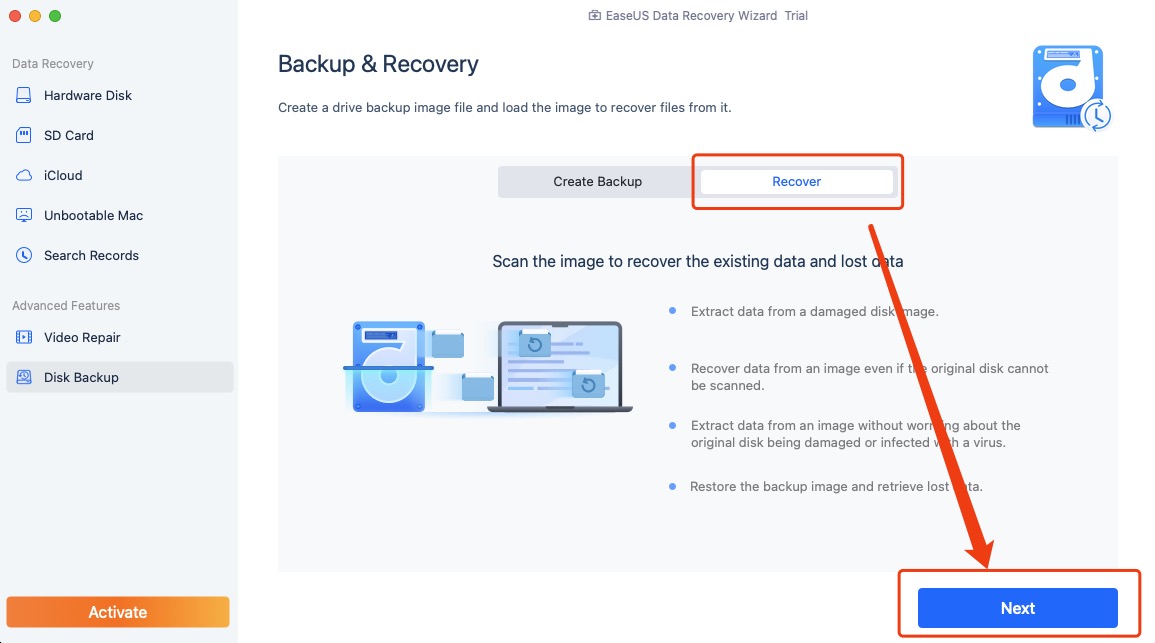
Disk Backup
Use the Create Backup function to make an image of the entire disk as a preventive measure against data loss. If your disk is overwritten, attacked by a virus, or damaged, or if files from the disk are lost, you can directly restore your important data from the image using the Recover button.
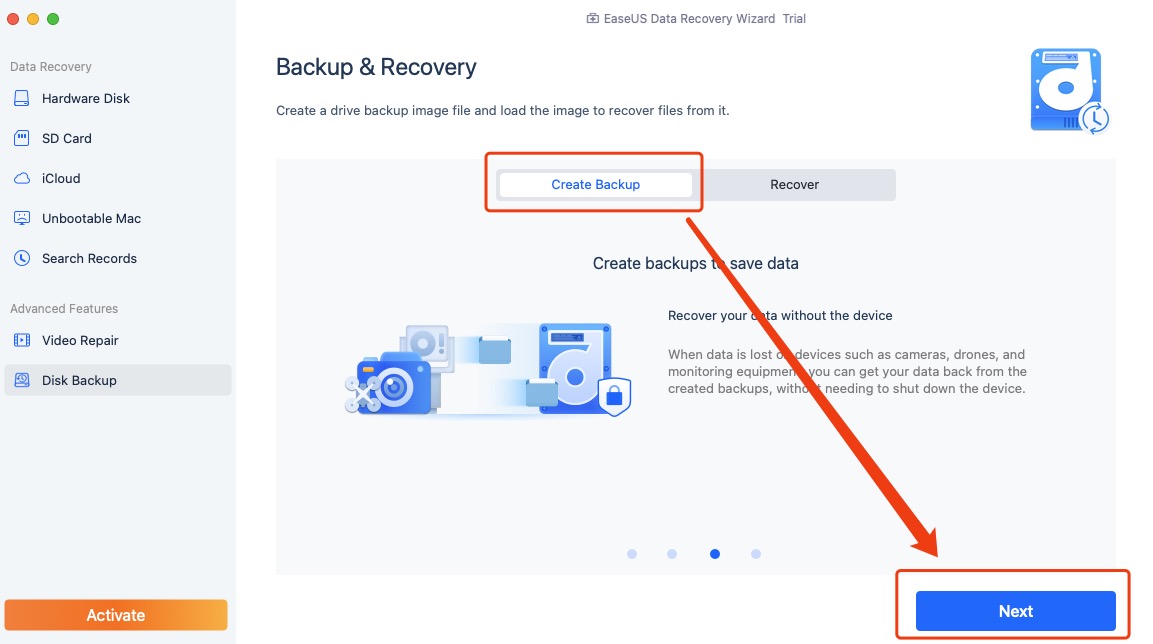
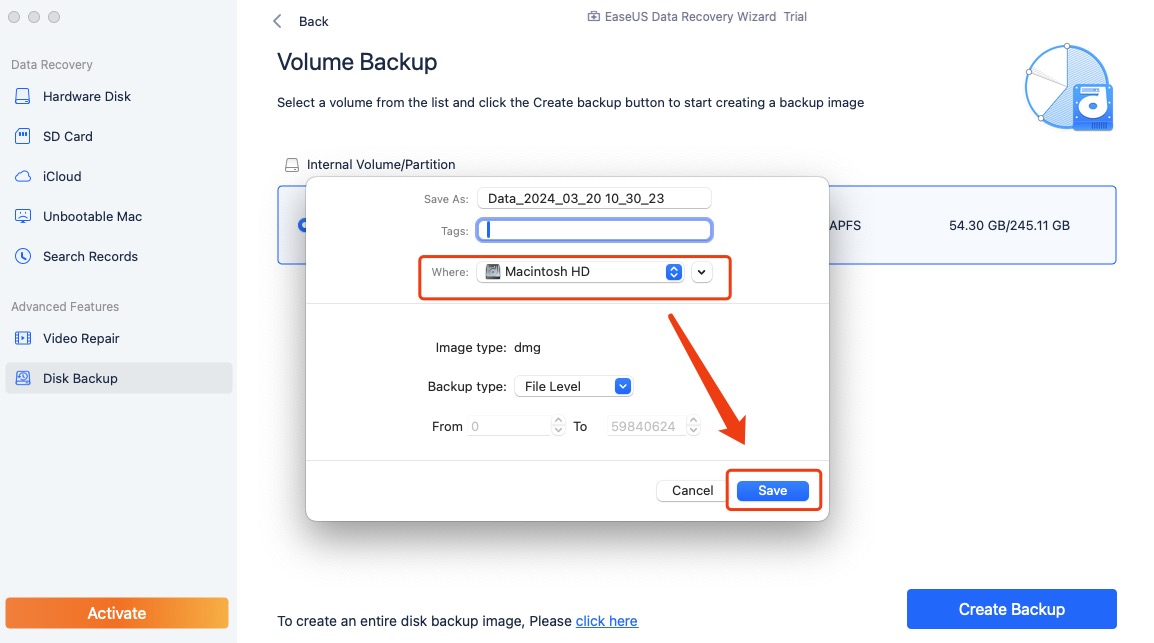
Select the drive you want to back up, and click Create Backup to proceed.
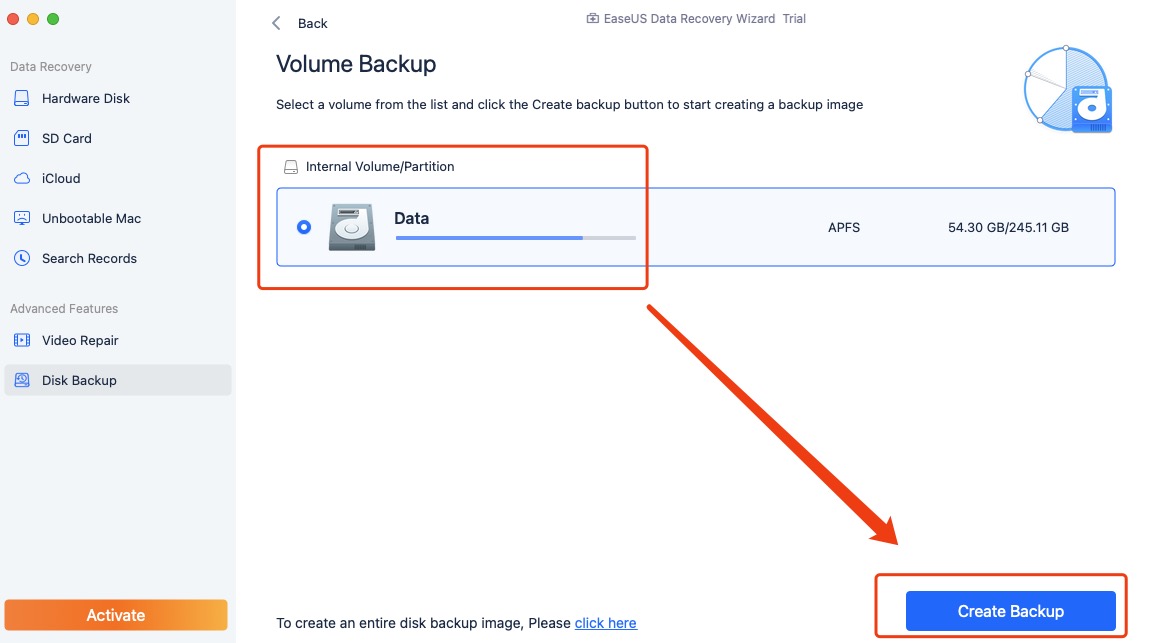
On the prompted window, you can select where to save the image file. Please do not save it back to its original drive.
If you want to restore an image file, switch to the Recover page, click Next, and select your image file. EaseUS Data Recovery Wizard for Mac will scan the image file and extract the data from this image file.