Symptoms of "This app can't run on your PC" Error
The "This app can’t run on your PC" error message is one of the most notorious error messages to have ever affected Windows 10 users. This error message comes in all sorts of different forms and can affect a wide array of different apps ranging from default Windows applications to third-party software designed for the Windows Operating System. Usually, you may receive the following error messages:
- This app can't run on your PC access is denied. Creating a new administrator account should fix it.
- This app can't run on your PC game error.
- This app can't run on your PC Windows Store error.
- This app can't run on your PC batch file. Make sure that you’re running them in administrator mode. If the issue persists, follow the troubleshooting steps in this post to fix it.
- This app can't run on your PC Kaspersky, Bitdefender, Avast. Fix this problem is to uninstall and then reinstall the respective tools.
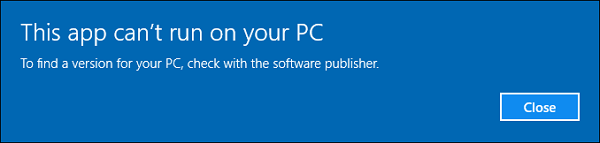
- This app can't run on your PC check with software publisher. Most users are already familiar with this error message. Actually, this alert affects them quite frequently.
Troubleshooting Steps to Fix "This app can’t run on your PC" Error in Windows 10
This post has real fixes to help you solve your problem. Follow the tried and true fixes now!
Fix 1. Download the Right Version of the Programs
One of the most commonly seen reasons for this error message is that you have downloaded the wrong program for your operating system. For example, you’re in Windows 32-bit, but you download a program for Windows 64-bit OS. Double-check the program you are to install and make sure that you have the correct setup files downloaded.
If most of your programs or applications are 64-bit based, you'd better upgrade Windows 10 from 32 bit to 64 bit without losing data. Before you upgrade to 64-bit, you must back up all of your important files with an effective file backup program. EaseUS Todo Backup allows all Windows users to back up their data under Windows 10/8/7 etc with simple clicks. It's easy to back up anything you need.
Secure Download
Fix 2. Create a New Administrator Account
One of the first things you should try is to switch to your administrator account if you’re on a guest account. If you’re already on your administrator account and the problem persists, you need to create a new administrator account to fix this issue.
Step 1. Type Settings in the start menu dialogue box and click on "Accounts".
Step 2. Click "Family and other users" options. Select "Add someone else to this PC".

Windows will guide you through its wizard on how to create a new account. When the new window comes forth, click "I don’t have this person’s sign-in information".
Step 3. Select the option "Add a user without Microsoft". Windows will now prompt you to make a new Microsoft account.
Enter all of the details and choose an easy password which you can remember.
Step 4. You should be able to see the new account just created. We need to Now navigate to "Settings" > "Accounts" > "Your info". Select the option "Sign in with a Microsoft Account instead".
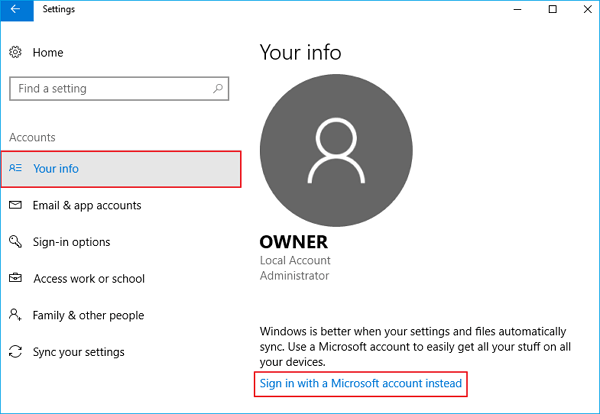
Step 5. Enter your new username and password and click "Sign in".
If switching to a new administrator account solve your problem, you need to move your personal files and folders to this new account and use it from now on.
Fix 3. Enable App Side-loading
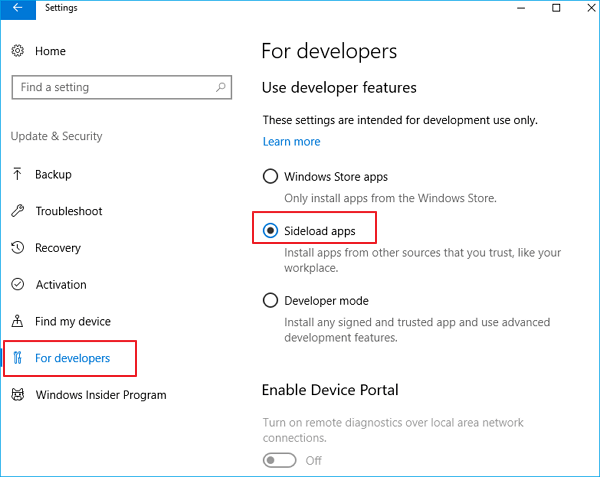
Step 1. On your keyboard, press "Windows + I" at the same time. Then click "Update & security".
Step 2. On the left side of the pane, click "For developers". Then click "Sideload apps" on the right side.
Fix 4. Disable SmartScreen
SmartScreen is a built-in Windows 10 feature designed to protect you from phishing attacks and malware. According to the reports, this feature can sometimes cause “This app can’t run on your PC” error, so it might be best that we disable it.
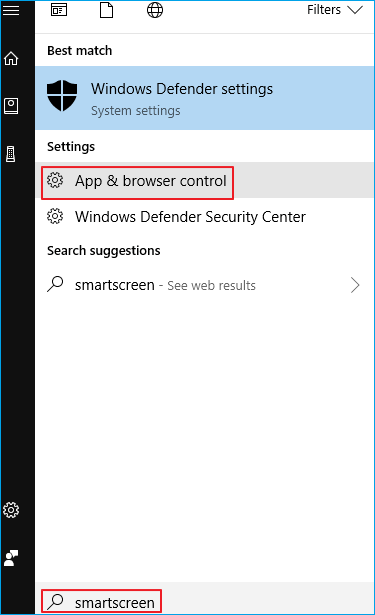
Step 1. On your keyboard, press "Windows + S" at the same time to evoke a search box. Type smart screen in the search box and click "App & browser control".
Step 2. Click the "Off" option under the Check apps and files category.
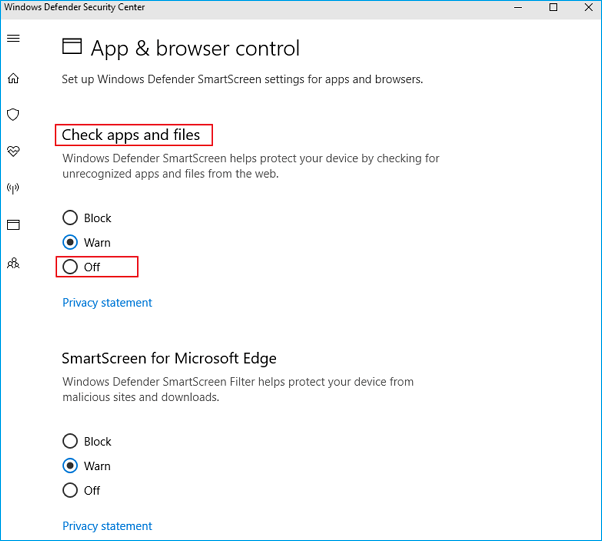
Step 3. You need to provide administrator approval to proceed. Click "Yes" at the User Account Control window to continue.
Step 4. Try to reinstall the app you wanted to install now. See if the notification appears again.
If it reappears, change your SmartScreen filter back to Warn status. This to a large extent prevents you from viruses or malware.
Extra Fixes:
If the error still happens after you have tried one of the fixes above, you can still try the following solutions or ask us for help directly.
- Update Windows Store
- Disable Proxy or VPN
- Repair your registry
- Clear your browser cache
- Download the application again using a different web browser
- Perform a Windows 10 clean boot
Was This Page Helpful?
Daisy is the Senior editor of the writing team for EaseUS. She has been working at EaseUS for over ten years, starting as a technical writer and moving on to being a team leader of the content group. As a professional author for over ten years, she writes a lot to help people overcome their tech troubles.
Brithny is a technology enthusiast, aiming to make readers' tech lives easy and enjoyable. She loves exploring new technologies and writing technical how-to tips. In her spare time, she loves sharing things about her game experience on Facebook or Twitter.
Related Articles
-
How to Format SD Card on Chromebook [With Specific Steps]
![author icon]() Tracy King/2024-01-11
Tracy King/2024-01-11 -
How to Change Time and Date on Windows 10/11
![author icon]() Daisy/2024-01-11
Daisy/2024-01-11 -
macOS Monterey Installation Failed? Here Are Trustworthy Fixes for You
![author icon]() Jaden/2024-10-25
Jaden/2024-10-25 -
Samsung 990 EVO vs 980 Pro: Which SSD to Buy?
![author icon]() Jerry/2024-11-25
Jerry/2024-11-25

EaseUS Data Recovery Services
EaseUS data recovery experts have uneaqualed expertise to repair disks/systems and salvage data from all devices like RAID, HDD, SSD, USB, etc.