When it comes to copying voice memos from iPhone to the computer, iTunes might be your first choice. But during the process of syncing voice memos with iTunes, you may meet many problems, some of which are listed below:
- All voice memos you synced to the iTunes library are not accessible and viewable.
- It will take forever to get the job done if you have lots of voice memos and each of them over 1hour long.
- Your music and voice memos will be replaced if you want to get those synced voice memos back to your iPhone.
If you also meet the issues we mentioned above and want to transfer voice memos without iTunes, four roundabout ways - Email, AirDrop, Google Drive, and EaseUS MobiMover we offered in this post can help you out. Before you proceed, you can take a look at the following comparison table so that you can quickly choose the method that suits your needs.
Method 1. How to Copy Voice Memos from iPhone to Computer via MobiMover
Speaking of the third-party tool to copy iPhone voice memo from iPhone to PC, you can't miss EaseUS MobiMover, the ultimate iOS data transfer tool and management software. With this tool, you can export whatever you need to Windows PC and Mac computers, including voice memos, photos, messages, music, movies, books, contacts, podcasts, and more. What's more, EaseUS MobiMover allows you to highly-customized save the whole iPhone data, or a file category, or even a specific data item from iPhone the computer without restriction. Apart from that, it has many other outstanding features, as below shows.
- Sync data between two iOS devices directly.
- Transfer files from PC to iPhone.
- Download online videos to the iPhone using URL.
- Manage iOS data with intelligent solutions.
Now, download MobiMover and start to transfer voice memos from iPhone to PC with the step-by-step guides below. We guarantee you 100% Safe & Security. Please feel free to use it.
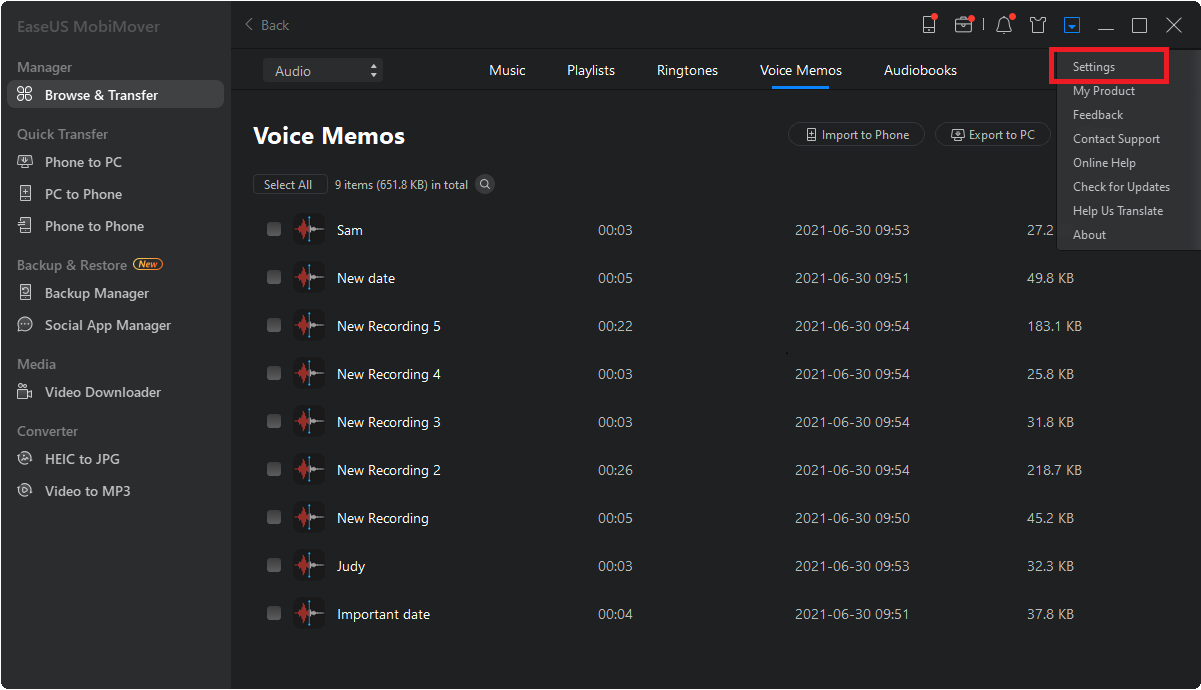
Step 1. Have your iPhone connected to the computer > Launch EaseUS MobiMover > Click "Content Management" on the main screen of EaseUS MobiMover > Click "Audio" > Select "Voice Memo."
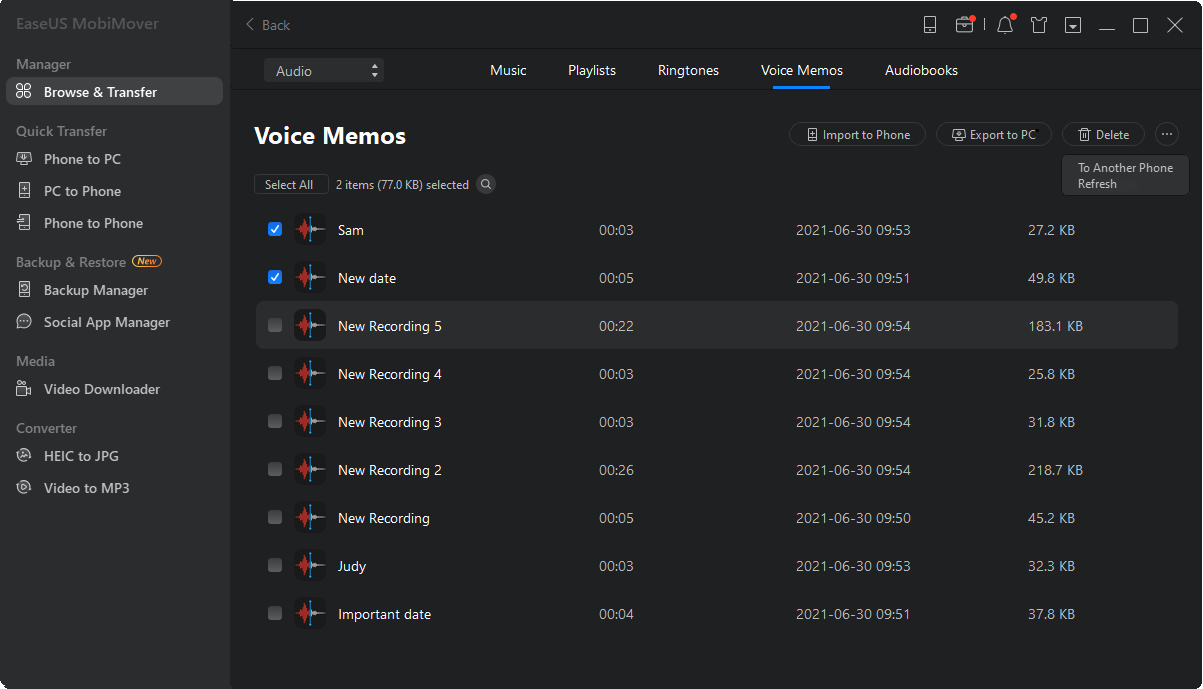
Step 2. From the listed voice memos, select your desired items > Click the "Settings" button to set a location on your PC to house the transferred items.
Step 3. Click "Transfer to PC" to start tranferring. Please don't disconnect the connection between your iPhone and the PC until the process accomplishes.
Video Memo is saved in M4A by default. If you want to make it compatible with more devices, you can convert M4A to MP3.
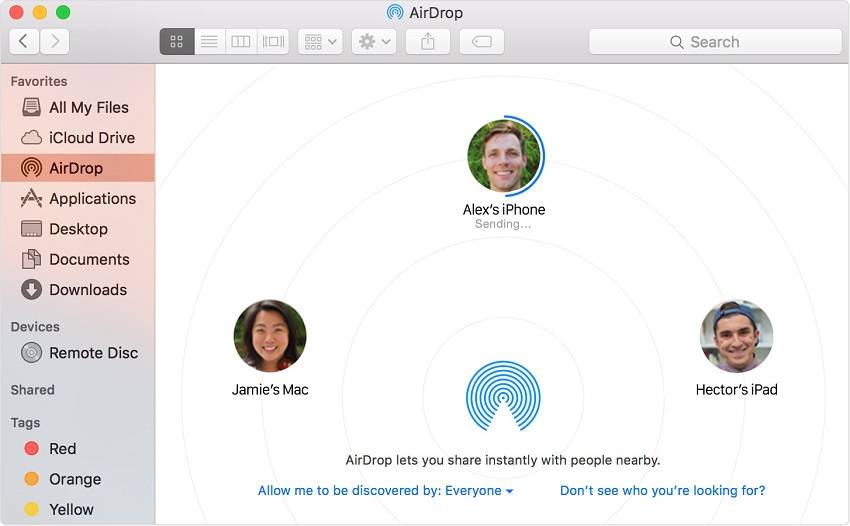
Method 2. Transfer Voice Memos from iPhone to Computer via Email/AirDrop
Perhaps this is the easiest method to copy voice memos from iPhone to the computer. But with this method, you can only transfer one item at the same time. If you want to copy multiple files to your computer, you'd better use Method 1.
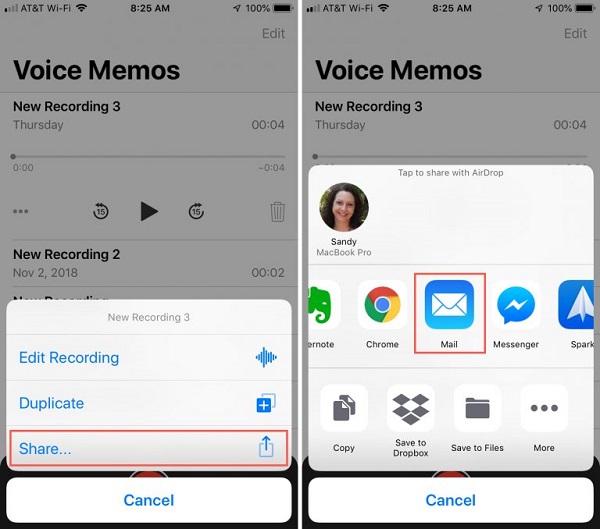
Step 1. Launch your Voice Memos app.
Step 2. Select the memo you want to transfer > Tap on the More (three-dot icon) button > Tap on the Share button.
Step 3. Then, you can either choose to send the memos via Email (PC & Mac) or AirDrop (Mac).
![Copy Voice Memos to Computer via Email/AirDrop]()
This process works very well if your memos are too big to send over Google Drive.
Method 3. Transfer Voice Memos from iPhone to Computer Without iTunes via Google Drive
Another possible way to get voice memos off the iPhone is to use the cloud drives like Dropbox, Google Drive, OneDrive, etc. All of them offer their users transfer and backup services, but they differ from one another in terms of features and the free space they offer. Of these cloud services, Google Drive - offers 15 GB storage for free, is the most cost-effective. Here we will take Google Drive as an example.
Step 1. Download the Google Drive app on your iPhone.
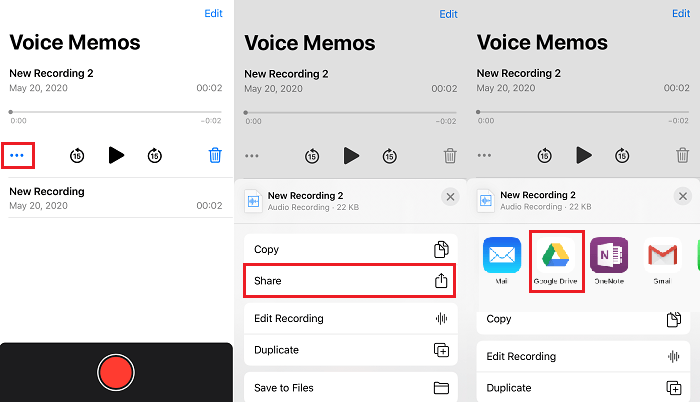
Step 2. Go to your Voice Memo > Find the voice memo you'd like to transfer to the computer > Tap the "Share" button (three dots) > "Share."
Step 3. From the "Share" list, select the service you want to share to, here you can choose "Google Drive."
![Share Voice Memos with Google Drive]()
Step 4. Then you will be asked to input the information or recipient, just complete it.
Step 5. Then you can log into your Google Drive on your computer and download voice memos from Google Drive to your computer. (Repeat the process for each voice memo you want to share)
The Bottom Line
That's all answers to how to download voice memos from iPhone to the computer without iTunes. We hope the methods listed above can help you out. As you can see, with Method 2 and Method 3, you can only send one voice memo at a time. And it requires you to log in your email and Google Drive on the computer and then download it to use, which makes it complicated to operate. If you want to copy multiple voice memos from iPhone to computer straightforwardly, then MobiMover is precisely what you need.
 NEW
NEW HOT
HOT