





 About the Author
 Reviews and Awards
 Mac SD Card Recovery
What Is com.apple.diskmanagement.disenter Error 49218
The com.apple.diskmanagement.disenter error 49218 pops up on macOS when your computer can't mount a disk or volume the way it's supposed to. Usually, you'll run into this message if you're trying to open an external drive, mount a partition through Disk Utility, or even just access a drive in Finder.
Here's what the error looks like: "Could not mount disk. com.apple.diskmanagement.disenter error 49218."
This hard drive won't mount on Mac error doesn't always mean your files are gone forever. Often, macOS still recognizes the physical drive, but it can't mount the volume because it can't read the file system or partition details correctly.
Why does this happen? There are a handful of reasons:
- You unplugged your external drive without ejecting it first.
- The file system got corrupted.
- Something's wrong with the partition table.
- The USB cable, port, or adapter isn't working right.
- The drive uses a file system that macOS can't read.
- A system crash or sudden power loss damaged the volume.
- The device itself is starting to fail.
- macOS or Disk Utility ran into a hiccup while trying to mount the drive.
Here's what you should do first: see if your Mac actually detects the drive. Open Disk Utility, click on "View" and choose "Show All Devices." Check if your drive shows up there.
If you can see the disk but the volume is grayed out or won't mount, the issue probably lies with the volume or its file system, not necessarily with the USB connection.
How to Recover Data Before Fixing Error 49218 on Mac
If you run into the com.apple.diskmanagement.disenter error 49218, don't jump straight to erasing or fixing the disk. First, think about your files on the storage device. If your Mac sees the storage device but can't mount it, there's still a chance a good data recovery app can scan the drive and find your stuff.
Take EaseUS Data Recovery Wizard for Mac, it's made for these situations. You can use it to scan drives you can't access and pull your files out before you try any risky fixes. This really matters if you've got photos, videos, or documents on there you can't lose.
Check the following guide and try to rescue data from your drive:
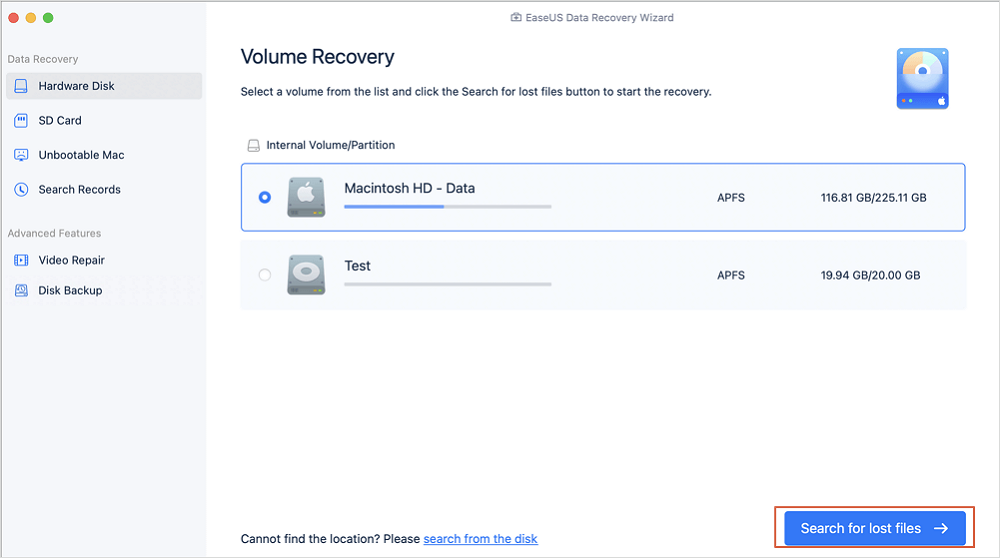
Step 1. Select the drive to be scanned
In the main EaseUS Data Recovery Wizard window, there will be a list of the drives connected to your Mac. Select the drive you need to recover lost/deleted files from, and click the "Search for lost files" button.
Step 2. Select your lost data/files
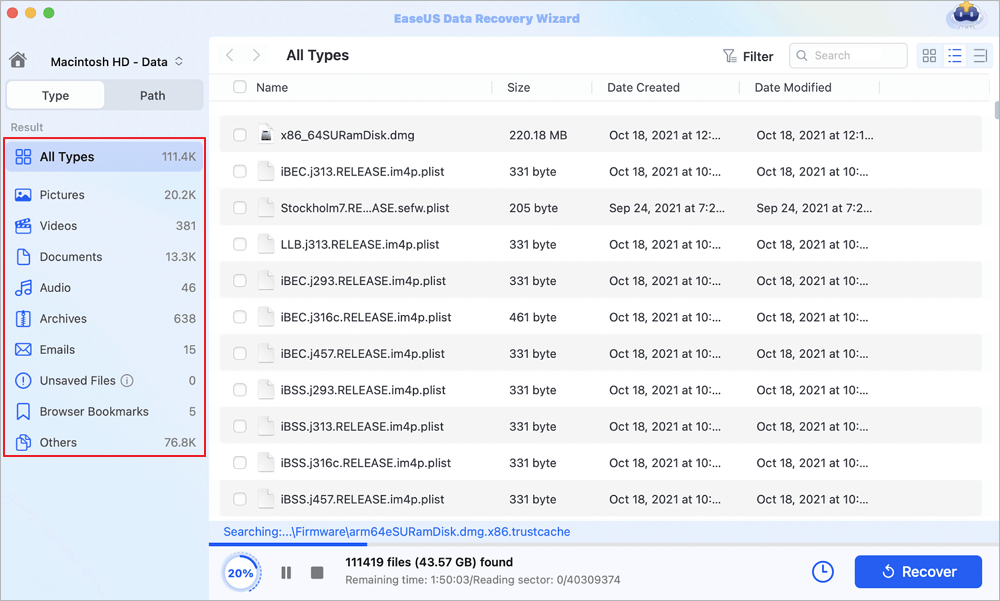
EaseUS Data Recovery Wizard for Mac will immediately scan your selected disk volume and display the scanning results on the left pane. You can sort the results to find the wanted files if you are looking for certain files.
Step 3. Recover lost/deleted data
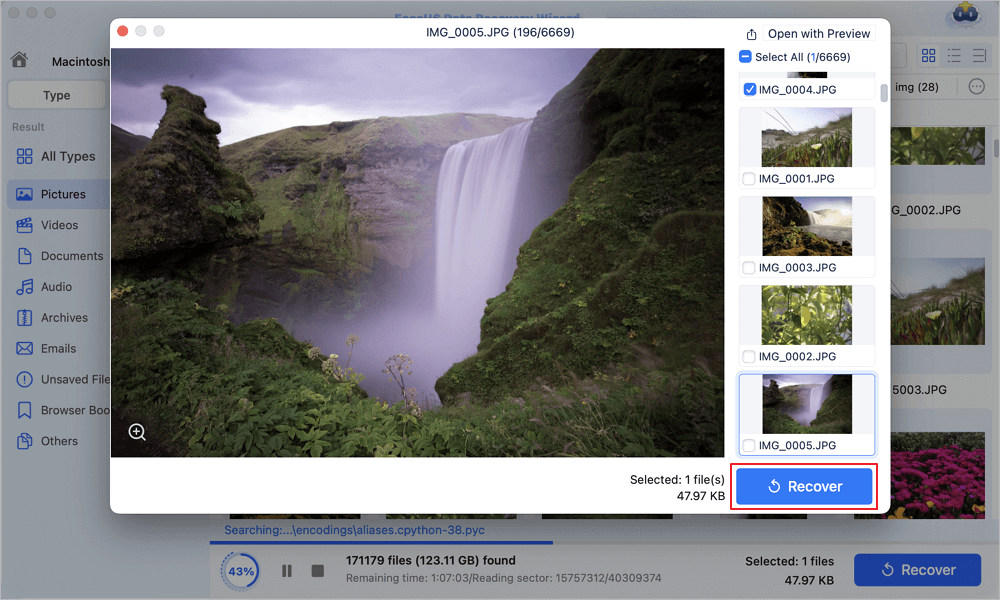
Once you have found the desired files, preview the files and then click "Recover" to begin the recovery of your deleted/lost Mac files.
Once your important data has been successfully recovered and backed up, you can proceed with the troubleshooting methods below with much less risk. You can share this recovery method on social media to help more friends!

How to Fix com.apple.diskmanagement.disenter Error 49218
Once you've rescued those important files, it's time to figure out what's actually wrong with your drive.
Do not reformat your hard drive to fix this error code directly; it's way safer to unplug and replug before you think about wiping anything. Formatting should really be the last resort because you'll lose everything that's still there.
All these fixes can be workable for the similar issues including:
- com.apple.DiskManagement.disenter error -119930868
- com.apple.DiskManagement.disenter error 49223
- com.apple.DiskManagement.disenter error -119930872
- com.apple.DiskManagement.disenter error 49244
- com.apple.DiskManagement.disenter error 49180
Fix 1. Reconnect Your Drive
Sometimes, your Mac just loses contact with your drive for no good reason. So, before you start poking around in Disk Utility or anything serious, check the basics.
Step 1. Unplug the USB drive, external hard drive, SSD, or card reader. If Finder doesn't let you "eject" safely, just be gentle about unplugging it.
Step 2. Bad cables cause all kinds of weird problems, such as drives not mounting; make sure your cable is functional.
Step 3. If nothing works, try plugging the drive into a different USB port on your Mac. Using a hub or docking station? Skip it for now and plug the drive straight into the computer.
Step 4. Go ahead and restart your Mac. After it's booted back up, reconnect the drive and see if it shows up in Finder or Disk Utility.
If still nothing's working, try the drive in another Mac, or even a Windows computer if it's compatible.
Fix 2. Run Disk Utility to Repair Disk Errors
Disk Utility has a First Aid tool that scans your drive for file system issues and tries to fix them.
You'll want to use this if your Mac can see the drive, but the volume won't mount.
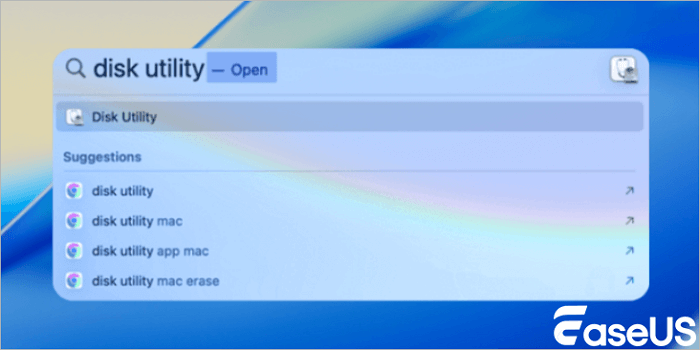
Step 1. Hit Command + Space to bring up Spotlight, type "Disk Utility," and launch it.
Step 2. Next, make sure you're seeing everything. Click "View" in the menu bar and select "Show All Devices." Sometimes Disk Utility just shows you the volumes, not the actual disk.
Step 3. There might be a physical device listed, with one or more volumes underneath. Click the volume that's causing trouble.
Step 4. Now, click "First Aid" up in the toolbar. When macOS asks if you want to run it, say yes. Disk Utility will check the volume for errors and try to fix them.
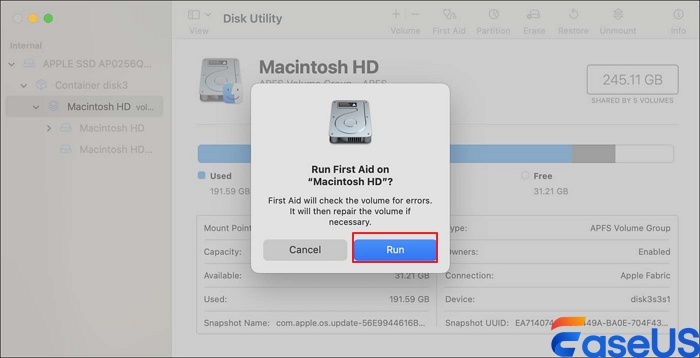
Wait for it to finish. If it says the repair worked, try mounting the volume again. Open Finder and see if your external drive shows up.
If you still get the com.apple.diskmanagement.disenter error 49218, try another solution.
Fix 3. Mount Disk with Terminal
So, if Disk Utility sees your disk but can't mount it, Terminal might be your next best shot. It's handy when Disk Utility just won't do what you need.
Step 1. Hit Command + Space, type "Terminal," and press Enter.
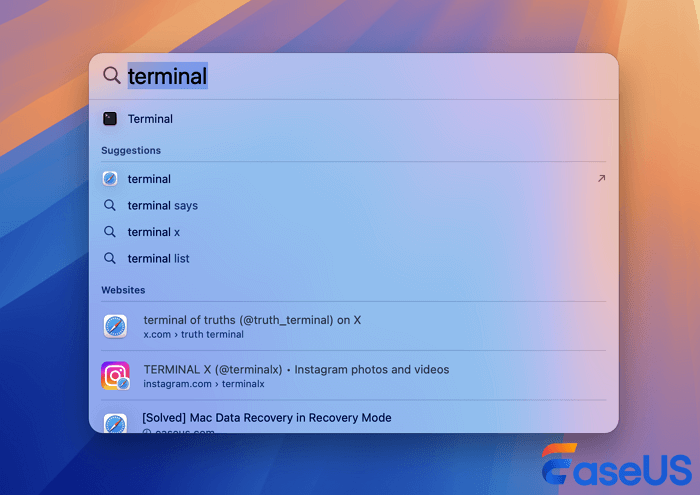
Step 2. Now, you'll want to see what disks are connected. Type: diskutil list and hit Enter.

Step 3. Terminal shows a list like /dev/disk0, /dev/disk1, /dev/disk2. Find your external drive and enter the correct disk letter; using the wrong disk identifier with certain commands can wipe your data.
Step 4. Next, look through the list for the partition or volume that's giving you trouble. It'll usually be something like disk2s1. The exact name depends on your setup. To try mounting the volume, enter: diskutil mount disk2s1, and Change "disk2s1" to the real identifier for your drive. If it works, your Mac should mount the volume, and you'll see it in Finder.
Fix 4. Format Your Disk in Disk Utility
If nothing else works and you've already saved the files you care about, it's probably time to format the disk and start fresh. This wipes everything on it, so make sure you really have those backups.
Step 1. Open Disk Utility.
Step 2. Next, make sure you're seeing all your drives. Click "View" at the top and pick "Show All Devices." You'll now see both the actual disks and their individual volumes.
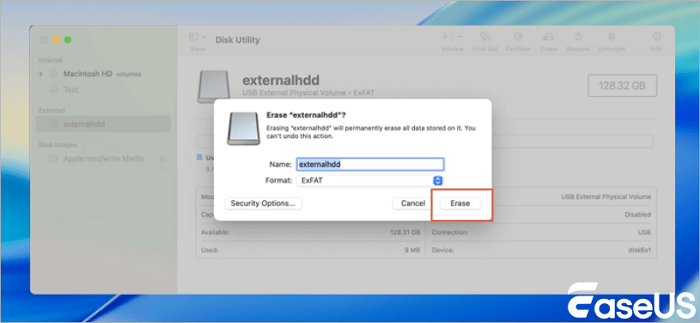
Step 3. Find your drive and hit the "Erase" button at the top.
Step 4. Then, you should choose a file system and a drive name; if you'll mostly use this with Macs, go with "APFS". If you need it to work between Mac and Windows, exFAT is usually the way to go.
Step 5. You also need to pick a "scheme." Most of the time, you'll want GUID Partition Map.
Step 6. Click "Erase." Once it's done, macOS will set up a fresh file system on your drive.
Summary
After formatting the hard drive, it's hard to recover files with data recovery software. It's better to download software in advance and rescue data.
Diskmanagement Error 49218 FAQs
1. How can I prevent DiskManagement errors on Mac?
Always eject external drives before you unplug them. Don't disconnect any storage devices while files are still transferring. Back things up regularly, and keep macOS up to date. If you notice a drive keeps disconnecting or stops responding, keep an eye on it, it could be a sign of trouble.
2. Can Terminal mount a disk that Disk Utility cannot mount?
Sometimes it works. The diskutil command in Terminal gives you more options for finding and mounting disks. Start by running diskutil list to get the right disk identifier, then try the mount command.
3. Will Disk Utility First Aid delete my files?
First Aid is meant to check for and fix file system problems without deleting files. But there's always some risk when repairing a really corrupted or failing drive. If there's anything important, recover those files first before running repairs.
Was This Page Helpful?

Dany is an editor of EaseUS who lives and works in Chengdu, China. She focuses on writing articles about data recovery on Mac devices and PCs. She is devoted to improving her writing skills and enriching her professional knowledge. Dany also enjoys reading detective novels in her spare time.
-
EaseUS Data Recovery Wizard is a powerful system recovery software, designed to enable you to recover files you’ve deleted accidentally, potentially lost to malware or an entire hard drive partition.
Read More -
EaseUS Data Recovery Wizard is the best we have seen. It's far from perfect, partly because today's advanced disk technology makes data-recovery more difficult than it was with the simpler technology of the past.
Read More -
EaseUS Data Recovery Wizard Pro has a reputation as one of the best data recovery software programs on the market. It comes with a selection of advanced features, including partition recovery, formatted drive restoration, and corrupted file repair.
Read More
Related Articles
-
Disk Utility Not Loading? Effective Solutions to Fix Disk Utility Not Loading Issue
![author icon]() Brithny/Sep 20, 2026
Brithny/Sep 20, 2026 -
Could Not Mount disk2s2 [Mac Error Fix Guide]
![author icon]() Dany/Sep 20, 2026
Dany/Sep 20, 2026 -
WD My Passport Not Showing Up on Mac | Quickly Solve It
![author icon]() Jean/Sep 20, 2026
Jean/Sep 20, 2026 -
How to Fix LaCie Hard Drive Not Mounting Mac | No Data Loss
![author icon]() Dany/Sep 20, 2026
Dany/Sep 20, 2026
 Brithny/Sep 20, 2026
  Jean/Sep 20, 2026

