
Content
Page Table of Contents
About the Author
Hot Topics
- Fix 1: Remove External Devices
- Fix 2: Disable Your Antivirus Temporarily
- Fix 3: Disable or Remove Certain Programs
- Fix 4: Restart BITS Service
- Fix 5: Run Update Troubleshooter
- Fix 6: Check Drivers
- Fix 7: Free Up Hard Drive Space
- Fix 8: Edit Your Registry
If you are facing the error This PC can't be upgraded to Windows 10 when trying to upgrade from Windows 7 to 10, then you are at the right place. Today, in this post from EaseUS, we will guide you on how to fix this error, so follow this post till the end.
How to FixThis PC Can't Be Upgraded to Windows 10 Error
In this part of the post, we will provide eight fixes for the PC that can't be upgraded to Windows 10 error. So, let's get into the details.
Fix 1: Remove External Devices
You must remove external devices to fix the PC that can't be upgraded to Windows 10 error. If your computer is connected to any external devices like USB flash drives, printers, or SD cards during the installation process, then there is a chance that the drive will be reassigned improperly, which leads to the error.
So, we will always recommend removing all external devices during the installation process of Windows 10. If you are upgrading Windows 10 with the help of a USB drive, copy the installation files to your local drive and then run the setup files to restart the installation process from the local drive.
Don't forget to share this article to help more users trying to upgrade to Windows 10.
Fix 2: Disable Your Antivirus Temporarily
Turning off the antivirus can quickly fix the error that the PC can't be upgraded to Windows 10. Antivirus may interfere with the installation process of Windows 10, so we recommend temporarily turning off the antivirus. You must turn off third-party antivirus software and built-in Windows Defender and Firewall. Follow the below steps to disable the defender and firewall.
Disable Firewall:
Step 1. Left-click on the Windows menu, search for the Control panel, and click on it.
Step 2. From the Control Panel page, click on the System and Security option.
Step 3. Click on Windows Defender Firewall from the new page and choose Turn Windows Defender Firewall on or off from the left sidebar.

Step 4. Select the Turn off Windows Defender Firewall option for private and public network settings.
Disable Windows Defender:
Step 1. Left-click on the Windows menu, search for Settings, and click on it. From the settings page, choose the Privacy and Security option from the left side panel.
Step 2. From the privacy and security page, click on the Windows security option. It will show you Protection area options. Choose Virus and Threat Protection.

Step 3. From the Virus and Threat Protection page, click on the manage settings option available under the Virus and Threat Protection settings.
Step 4. From the Virus and Threat Protection settings page toggle of the Real-time protection.
Also Read:
Fix 3: Disable or Remove Certain Programs
It found that specific programs usually create updating error issues in Windows. Like antivirus, other applications like iTunes, FutureMark, and BattleEye Anticheat typically lead to the Windows update error. If you have any of these applications installed on your computer, we recommend you disable or remove them before upgrading to Windows 10.
Fix 4: Restart BITS Service
Restarting the BITS(Background Intelligent Transfer Service) service can effectively resolve the PC can't be upgraded to Windows 10 error. To restart this service, follow the steps below.
Step 1. First, we need to open a Run window by pressing Ctrl and Enter. Type services. msc and click OK to open the Services app.
Step 2. Find and right-click on the Background Intelligent Transfer Service in the list. If it is not running, click on Start to make it running. If it is already running, then click on Restart.
Step 3. Double-click the BITS service to open its Properties. Under the General tab, choose Automatic from the list of Startup types. Then, choose and click Apply and OK button to save the settings.

Fix 5: Run Update Troubleshooter
If you cannot upgrade Windows 7 to Windows 10 and are facing an error, running the update troubleshooter is always the best option to identify and resolve the issue. Follow the steps to run the Update Troubleshooter.
Step 1. Press Windows + I to open the Settings window.
Step 2. Choose the Update & Security category.
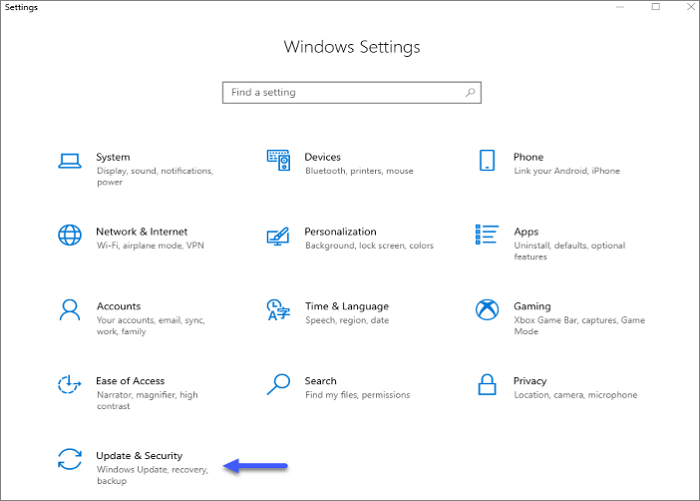
Step 3. Click the Troubleshoot section from the left pane, choose Windows Update in the right pane, and hit Run the troubleshooter.
It will take some time to detect problems related to Windows updates. Follow the onscreen instructions to troubleshoot the detected issues.
Fix 6: Check Drivers
Sometimes, outdated drivers cause the Windows 10 update issue because of compatibility issues. In such cases, you must check your drives and ensure they are up to date, and if any of them are outdated, then update and, if required, reinstall them. Let's follow the steps to check your drives and update them.
Step 1. Open the Run dialog by pressing the Windows + R keys together, giving input devmgmt. msc, and click OK to run the tool.
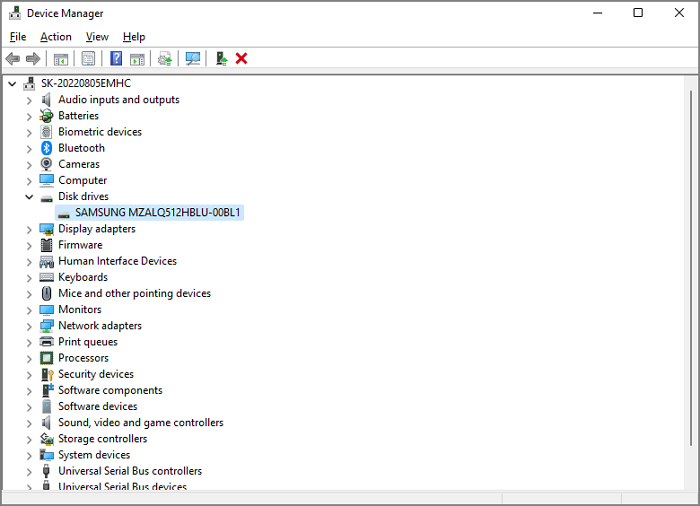
Step 2. Expand all the device categories to check if any drivers are displayed with yellow exclamation marks. If there's such a driver, update the device driver or reinstall it.
If you upgrade your computer from Windows 7 to 10 and do not have sufficient disk space, it will show the error. A minimum of 20 GB of free disk space is required for the Windows 10 installation. Clean up unnecessary files if your hard drive is running out of space. You can extend the c drive space using a premium third-party tool like EaseUS Partition Master Professional. Let's learn more about this tool and its advanced features.
Fix 7: Free Up Hard Drive Space
EaseUS Partition Master is a reliable, advanced tool with unique, valuable features. The best part of this tool is that it can easily extend the C drive using the unallocated space on the disk or the free space from other drives with a few clicks, which helps users extend the space of their drive for any emergency. We recommend downloading this reliable and useful tool from its official portal for safety purposes.
To learn how to complete the process of extending the C drive with the help of this tool, follow the steps below.
Option 1. Extend System C drive with unallocated space
- 1. Right-click on the System C: drive and select "Resize/Move".
- 2. Drag the system partition end into the unallocated space so to add it to the C: drive. And click "OK".
- 3. Click "Execute Task" and "Apply" to execute the operations and extend the C drive.
Option 2. Extend System C drive without unallocated space
- 1. Right-click a big partition with enough free space on the system disk, select "Allocate Space".
- 2. Select the system drive at the Allocate Space From (*) To section, and drag the end of System C drive into the unallocated space. Click "OK" to confirm.
- 3. Click "Execute Task", it will list the pending operations, and click "Apply" to save the changes and extend the C drive.
0:00-0:26 Extend System Drive with Unallocated Space; 0:27-0:58 Extend System Drive without Unallocated Space.
Using this tool, you can easily free up hard drive space by extending partitions and system partitions. Use this tool to try.
Fix 8: Edit Your Registry
According to some users' feedback, you can quickly resolve the PC can't be upgraded to Windows 10 error by modifying the Windows Registry. We recommend backing up your important data before changing the Windows Registry. Follow the instructions below to modify the Windows Registry to resolve the Windows 10 update error.
Step 1. First, open the Run dialogue. To do so, type regedit and press Enter to open Registry Editor.
Step 2. Type the following path to the address bar and hit the Enter key.
Computer\HKEY_USERS\.DEFAULT\Software\Microsoft\Windows\CurrentVersion\Explorer\User Shell Folders
Step 3. In the right panel, double-click the AppData string and set its Value data as %USERPROFILE%\AppData\Roaming. Click OK to save the change.

Conclusion
If you are still following this post, you must know how to effectively fix a PC that can't be upgraded to Windows 10 error. In this post, we have discussed why this error occurs and given you eight of the best solutions to resolve this issue. We recommend you try all of our fixes to understand which works better and consumes less time.
Can't Be Upgraded to Windows 10 FAQs
Here, we have answered frequently asked questions that might help you clear your doubts about this topic. So don't skip this section.
1. Why won't my laptop upgrade from Windows 7 to Windows 10?
If your laptop is not upgrading from Windows 7 to 10, there can be several reasons, like insufficient system requirements, outdated drives, hardware issues, insufficient disk space, antivirus interference, and much more.
2. How do you fix the Windows 10 installation that has failed to upgrade from a Windows 7 error?
To fix Windows 10 installation failure to upgrade from Windows 7, follow the steps below.
Step 1. Ensure you have enough free space on your hard drive for the upgrade. The upgrade process might require up to 20GB of free space.
Step 2. Remove external devices like printers, scanners, or hard drives that might interfere with the upgrade process.
Step 3. During the upgrade, temporarily turn off your antivirus software, as it might block specific necessary files.
Step 4. Update all drivers to the latest versions, especially the chipset drivers.
Step 5. Run the Windows Update Troubleshooter.
3. How do you install Windows 10 after a free upgrade from Windows 7?
To install Windows 10 after upgrading from Windows 7, follow the below steps.
Step 1. Go to the Microsoft Store online or visit a retail store to purchase a Windows 10 license.
Step 2. Download the Windows 10 installation media using the Media Creation Tool.
Step 3. Make a bootable USB drive or DVD with the installation media and set the
Step 4. Boot your computer from the bootable media.
Step 5. Follow the prompts and instructions on the screen to install Windows 10.
Step 6. Enter your Windows 10 license key when prompted.
Step 7. Once the installation is complete, you can activate Windows 10 online
How Can We Help You
About the Author
Oliver is an EaseUS professional writer who dares explore new areas. With a passion for solving tech issues with straightforward guides for common users, Oliver keeps honing his writing craft by developing in-depth solutions for disk and partition management, computer boot-up issues, file transfer, etc.
Sherly joined EaseUS in 2022 and she has always loved writing articles and enjoys the fun they bring. She receives professional training here, focusing on product performance and other relative knowledge. She has written over 200 articles to help people overcome computing issues.
Product Reviews
-
I love that the changes you make with EaseUS Partition Master Free aren't immediately applied to the disks. It makes it way easier to play out what will happen after you've made all the changes. I also think the overall look and feel of EaseUS Partition Master Free makes whatever you're doing with your computer's partitions easy.
Read More -
Partition Master Free can Resize, Move, Merge, Migrate, and Copy disks or partitions; convert to local, change label, defragment, check and explore partition; and much more. A premium upgrade adds free tech support and the ability to resize dynamic volumes.
Read More -
It won't hot image your drives or align them, but since it's coupled with a partition manager, it allows you do perform many tasks at once, instead of just cloning drives. You can move partitions around, resize them, defragment, and more, along with the other tools you'd expect from a cloning tool.
Read More
Related Articles
-
How to Check Hard Drive Temperature on Windows 11/10 [Full Guide]
![author icon]() Cici/2024/04/19
Cici/2024/04/19 -
Your Best OS Migration Software Free Download 2024 [Pros & Cons]
![author icon]() Tracy King/2024/04/19
Tracy King/2024/04/19 -
ASUS Laptop Won't Turn On: 6 Easy Fixes with Guide🔥
![author icon]() Sherly/2024/04/19
Sherly/2024/04/19 -
How to Copy Hidden Partition to Another Drive/USB with Success
![author icon]() Cici/2024/04/19
Cici/2024/04/19
Hot Topics in 2024


EaseUS Partition Master

Manage partitions and optimize disks efficiently