"Hi, I've recently started using iCloud Photo Sharing and have created a few albums that I and my other half can contribute to. I would now like to share one of the albums (56 photos) to Facebook, but when I try and share the album, Facebook is not an option - you can see below. Is there a way allows me to upload photos from iCloud to Facebook?"
iCloud has already provided the option to upload photos in a photo album to Facebook through icloud.com on the website. Before leading you to share pictures on Facebook, you need to know how to access iCloud photos on PC, if you don't, go to check the online tutorial. Then, follow the tips below to upload photos from iCloud photos to Facebook without effort.
How to upload photos from iCloud to Facebook easily
After logging in to icloud.com, you can view and manage the iCloud backup contents on your iPhone in multiple ways. For example, you can delete multiple or all iCloud photos at one time with the more straightforward keyboard operation or download iCloud photos to your PC for locally using.
1. Open a browser on your PC or Mac, and go to www.iCloud.com.
2. Sign in with your Apple ID username and password. Then, you will get to the primary interface of iCloud backup.
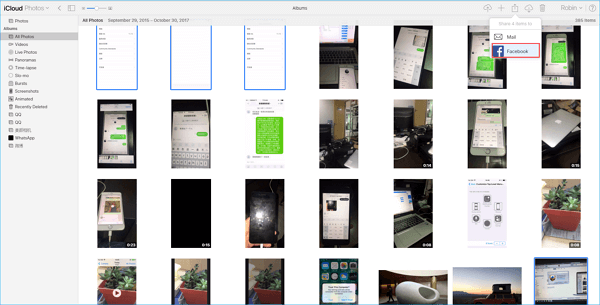
3. Now, click "Photos" on the main screen > choose "All Photos" or the specific photo album as you need. Then, all the photos within the photos album will be displayed in thumbnail.
4. Use the "Ctrl" command to check photos you want to share on Facebook.
5. Go to the left top corner, select "Share" button and choose Facebook. On the pop-up window, choose "Continue" to log in to Facebook to share the photos.
![choose-photos-to-share-on-facebook]()
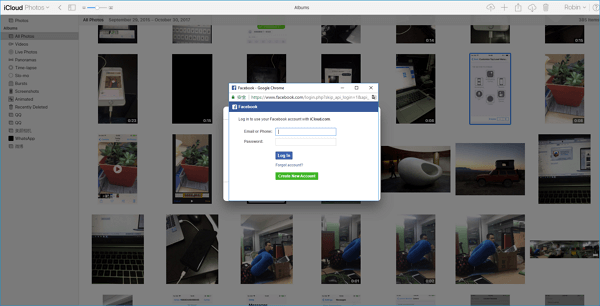
6. Sign on your Facebook with username and password, then click "OK" to post the photos on iCloud to Facebook.
![sign-in-facebook]()
How to backup iPhone photos without iCloud
When you meet iPhone photos not syncing to iCloud, whereas you need to back up your iPhone without postponing, how to make it possible? Try EaseUS MobiMover Free, the all-in-one iPhone data transfer and management tool, which enables you to back up the whole iPhone files to the Windows and Mac computer in one-click, transfer data from iPhone to iPad without iTunes syncing and put contents to iPhone without wiping any previous data. What's more, MobiMover Free also allows you to edit your iPhone data on the computer with comprehensive solutions.
With EaseUS MobiMover Free, you are able to transfer contacts, messages, notes, calendars, voice mails, books, Safari bookmarks & history, photos, videos, music, playlists, ringtones, and audiobooks from iPhone to PC or laptop in a highly customized way. Following tips are for back up iPhone photos to PC, if you want to transfer photos from iPhone to Mac but don't know how to make it, go to check the online user guide.
Step 1. Connect your iPhone to your computer (Mac or PC) with a USB cable and run EaseUS MobiMover. In MobiMover, choose "Phone to PC" to back up all your iPhone photos to the computer at once. Then, click the "Next" button to go on.
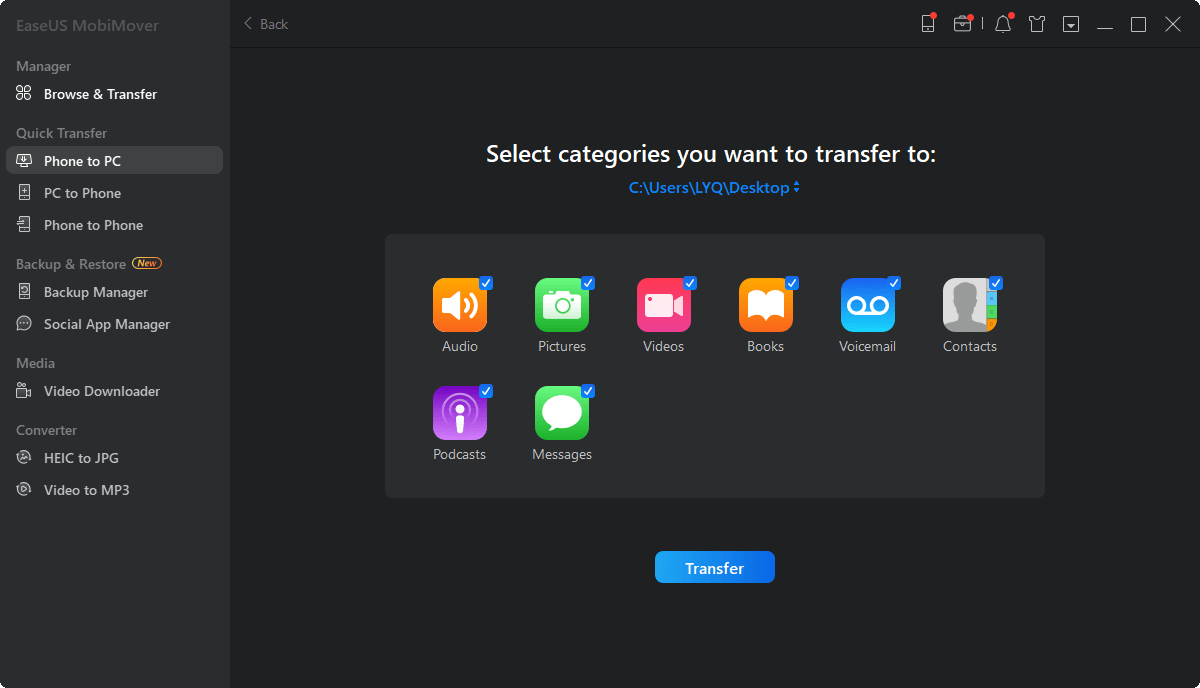
Step 2. Select the category/categories you'd like to back up. It's an excellent choice to make a copy of all the supported file types on your iPhone using the data transfer feature. You can see from the screenshot below, MobiMover enables you to back up iPhone data on your desktop or customize the storage path by yourself.
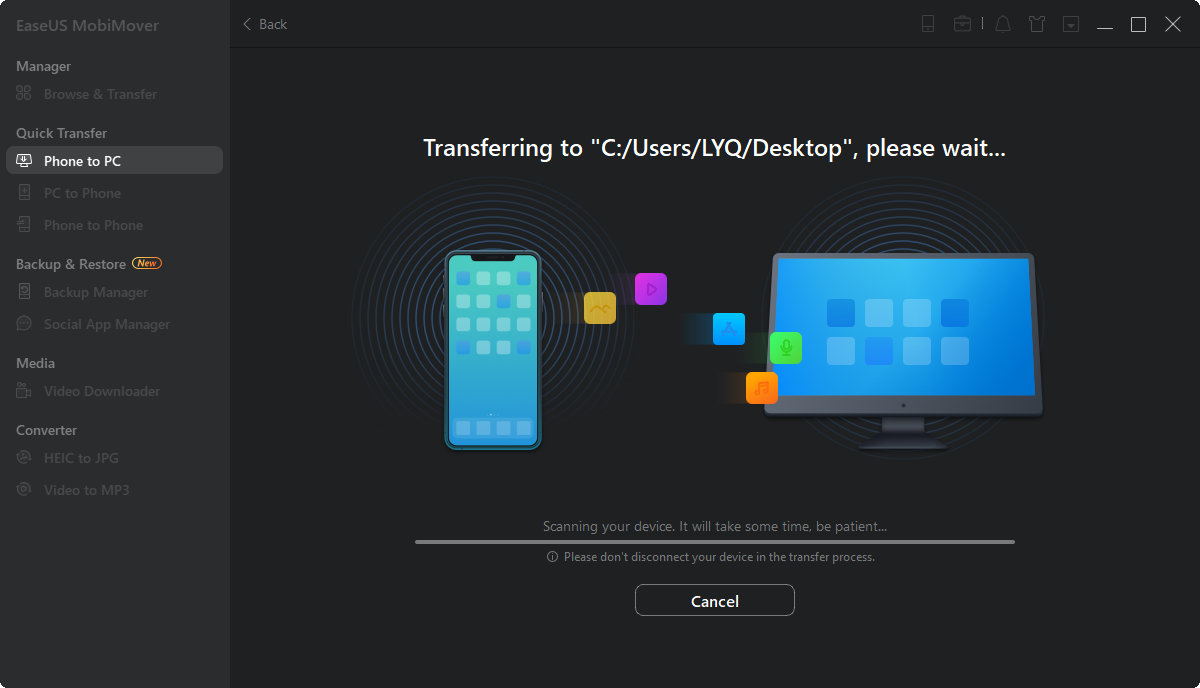
Step 3. Now, click the "Transfer" button to start backing up your iPhone photos to computer without iCloud. The transmission is high-speed, and you don't have to wait too long.
 NEW
NEW HOT
HOT