Table of Contents
![]() About the Author
About the Author
![]() Reviews and Awards
Reviews and Awards
- Video Recovery
- SD Card Recovery
- Recycle Bin Recovery
- Recover Data from USB
- Recover Deleted Emails
- Hard Drive Not Showing Up in Windows
- Recover Unsaved Word Documents
- Recover Deleted Files
- Recover Files from Virus Infected Hard Drive
- Best Free Photo Recovery Software
- Recover Files from Formatted Hard Drive
Imagine having hundreds of photo memories or important data files in a partition and losing all of them in a second. Whether the data loss is due to accidental deletion, virus/malware assault, system breakdown, hardware failure, or other causes, the consequences are the same.
TestDisk is a robust open-source data recovery tool that offers a solution to recover or retrieve unintentional deletions and hidden data. This article aims to simplify how to use TestDisk and its commands. Let's discover tips on how to run TestDisk and how to recover your valuable data:
TestDisk's Alternative: EaseUS Data Recovery Software
EaseUS Data Recovery Wizard is an excellent choice for users looking for a user-friendly alternative to TestDisk, particularly those unfamiliar with complex recovery techniques or bothered by the lack of proper TestDisk GUI. This recovery application is suitable for many data loss cases, making it an excellent option for beginners and professionals.
EaseUS Data Recovery Wizard easily recovers lost data after accidental deletions, formatted disks, or system crashes. Its significant features include an easy-to-use interface, fast scanning, and the ability to recover various file formats. Furthermore, its dependability extends to multiple types of storage media, offering a thorough recovery experience.
EaseUS Data Recovery Software's Key Features:
- Locate recently lost files quickly or do a deep check for more difficult data loss scenarios than the function of testdisk.
- Capable of recovering unsaved documents, photographs, movies, and other media and supporting various file formats.
- Users can see recoverable files before restoring them, enabling them to pick the necessary things.
- EaseUS allows recovery across multiple storage media, including hard drives, SSDs, USB drives, and external storage.
Consider EaseUS Data Recovery Wizard as a trustworthy partner on your data recovery trip, providing a smooth and efficient retrieval procedure.
Step 1. Choose the exact file location and then click the "Scan" button to continue.
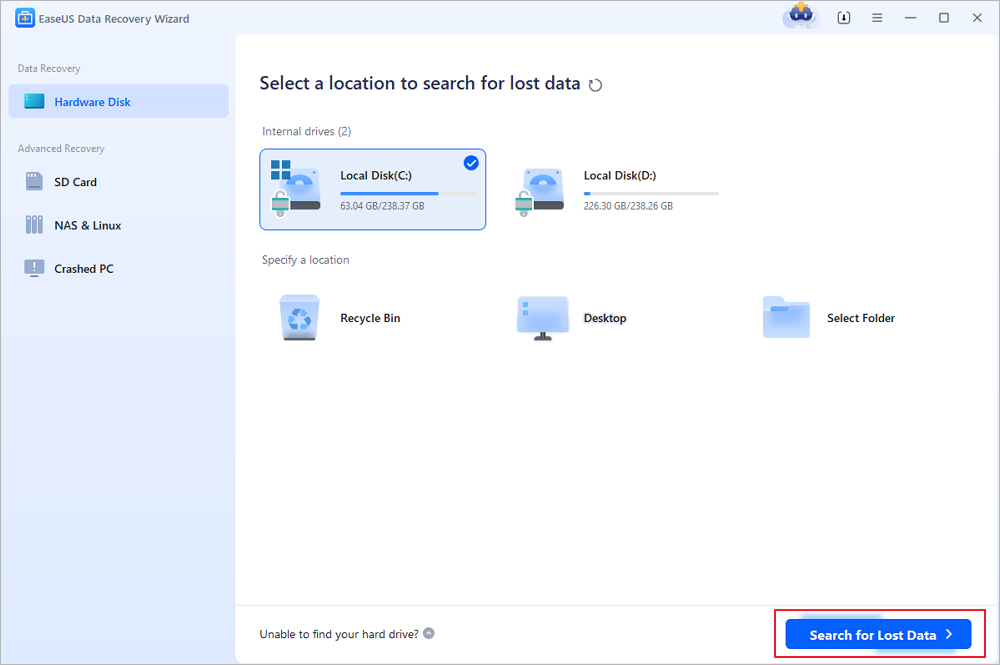
Step 2. After the process, select the "Deleted Files" and "Other Lost Files" folders in the left panel. Then, you can apply the "Filter" feature or click the "Search files or folders" button to find the deleted files.

Step 3. Click the "Recover" button and save the restored files – ideally, it should be different from the original one.

Please share this valuable information with your social media friends dealing with similar data recovery issues.
How to Use TestDisk to Recover Data
TestDisk is an effective application for recovering lost data on Windows and Mac computers when confronted with the problem of tampered data or deleted/missing files. Although the restoration process seems complicated, it can become simple by following a few simple steps. This part will introduce how to restore data or recover partitions with TestDisk on Windows or Mac.
Let's find out how to use TestDisk:
🖥️On Windows
Data recovery on a Windows machine is complex, so you must navigate it carefully and systematically. The steps below will teach you how to use TestDisk on Windows.
Step 1. To begin, download and launch "TestDisk" on your Windows PC.
Step 2. Click the "Create" button and then press "Enter". TestDisk will start scanning for all available hard disks.

Step 3. Choose the appropriate disk from the list using the arrow keys and select "Proceed".

Step 4. Select the Intel partition table type and click "Enter".

Step 5. Select "Analyze" and press "Enter" to begin analyzing the selected hard disk.
Step 6. After analyzing the disk, utilize the "Quick Search" option for lost data files.

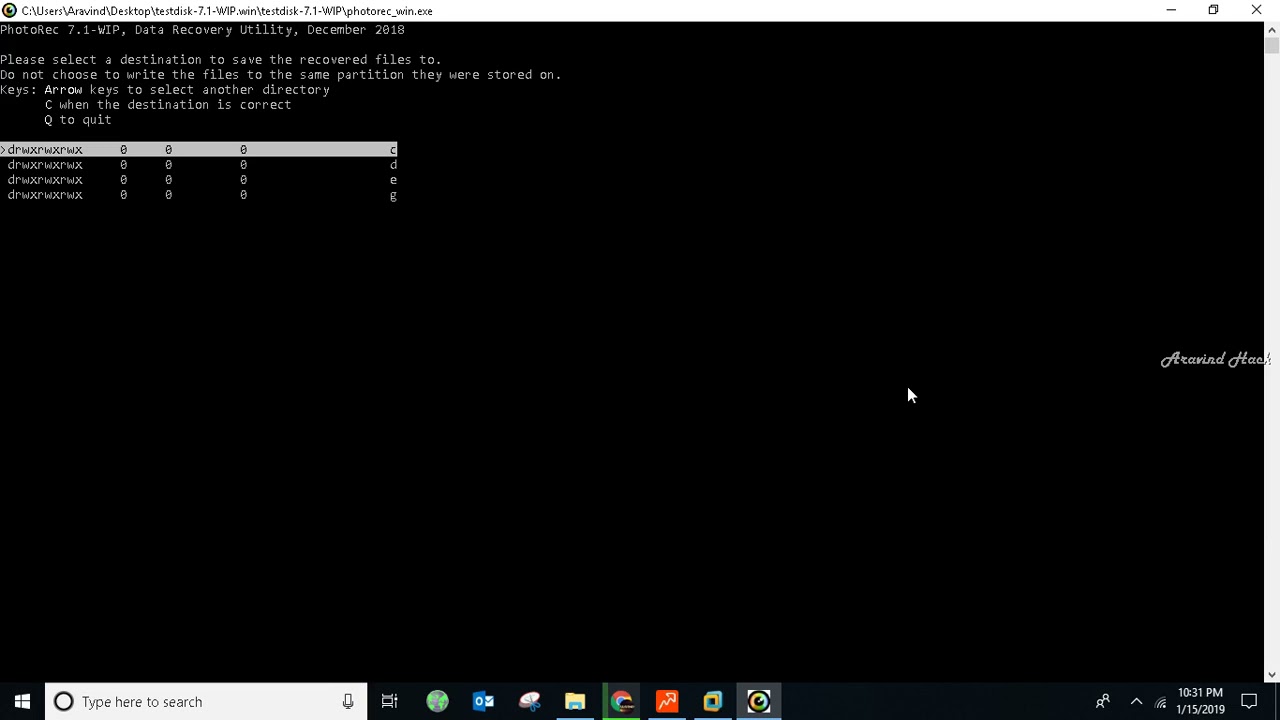
Step 7. Go through the list of lost files, choose the ones you want to recover, and then hit "C" to copy them.
Step 8. Select the destination folder for copying, hit "Y" to begin, and wait for the "Copy Done!" message to appear.
🍎On Mac
TestDisk provides a dependable option for Mac users looking to recover deleted data. The Mac approach is comparable to Windows but also has some macOS-specific options. To effectively go through the recovery procedure, carefully follow these steps.
Step 1. Open Terminal on your Mac.

Step 2. In Terminal, type sudo TestDisk and press "Enter".

Step 3. Select "No Log" and hit "Enter".

Step 4. Choose the hard disk to be analyzed and click Enter. By hitting P, you can choose the partition to scan.

Step 5. Press "Enter" after selecting "EFI GPT" for a newer Apple Mac model or Mac for an old Mac.

Step 6. Choose "Analyze", hit "Enter", and do a "Quick Search".
Step 7. Navigate through the list of missing files, click "C" to copy, then pick the destination by hitting "Y."
By carefully following these procedures, you can use TestDisk to recover deleted data on Windows and Mac. Consider viewing the following video instruction for a more visual approach, where critical actions are emphasized at key points:
- 00:00 - TestDisk Overview
- 02:03 - Starting the Scan
- 04:15 - Hard Drive Analysis
- 06:40 - Quick File Recovery Search
Final Thoughts
With TestDisk, users of both Mac and Windows computers have access to a strong data recovery solution. Its simple interface and ease of usage make it accessible to a broad spectrum of people looking to recover deleted information.
However, for individuals unfamiliar with the complexities of data recovery, EaseUS Data Recovery Wizard is a great option that ensures a smooth experience. The importance of dependable data recovery software in recovering files cannot be emphasized, whether using TestDisk or EaseUS. So, secure your precious data with these complete solutions, then set out to retrieve lost information.
How to Use TestDisk FAQs
Below are some relevant and recurring queries that users ask regarding how to use TestDisk; let's have a look below:
1. How do I run TestDisk?
Run TestDisk as an administrator on Windows. Simply open TestDisk by right-clicking testdisk_win.exe and selecting "Run as administrator."
2. How does the TestDisk work?
TestDisk detects the partition map, although you can provide a location. Selecting a partition scheme brings up TestDisk's main menu. In this section, you can examine files, retrieve them, or change the disk's parameters and shape. Analyzing and recovering is the usual procedure.
3. How do you run TestDisk from the terminal?
To run TestDisk from the terminal command on a Mac, open the Terminal application, type sudo TestDisk, and press Enter. Select "No Log" and the appropriate hard disk for examination. Follow the on-screen instructions to begin recovery and restore deleted data from the Terminal.
4. How do you use TestDisk to recover deleted files from Windows?
To recover lost data using TestDisk on Windows, follow these steps:
- 1. Launch TestDisk on your PC.
- 2. To scan linked hard disks, choose "Create" and press Enter.
- 3. Select the selected disk using the arrow keys, then hit Enter.
- 4. Select the partition table type (Intel) and hit the Enter key.
- 5. To begin an analysis, choose "Analyze" and press Enter.
- 6. Scan the drive using Quick Search.
- 7. Navigate to the missing files list and click "C" to copy.
- 8. Select the destination and hit "Y" to begin copying. "Copy Done!" indicates that the recovery was successful.
Was This Page Helpful?
Jaden is one of the editors of EaseUS who lives and works in Chengdu, China. She focuses on topics concerning PCs and Mac data recovery. Jaden is committed to enhancing professional IT knowledge and writing abilities. She is always keen on new and intelligent products.
-
EaseUS Data Recovery Wizard is a powerful system recovery software, designed to enable you to recover files you’ve deleted accidentally, potentially lost to malware or an entire hard drive partition.
Read More -
EaseUS Data Recovery Wizard is the best we have seen. It's far from perfect, partly because today's advanced disk technology makes data-recovery more difficult than it was with the simpler technology of the past.
Read More -
EaseUS Data Recovery Wizard Pro has a reputation as one of the best data recovery software programs on the market. It comes with a selection of advanced features, including partition recovery, formatted drive restoration, and corrupted file repair.
Read More
Related Articles
-
Solved: Hard Drive Not Showing Files Though They Still Exist
![author icon]() Jean/2024/01/11
Jean/2024/01/11 -
Fix 'You Need to Format the Disk in Drive' Error | No Data Loss
![author icon]() Tracy King/2024/01/24
Tracy King/2024/01/24 -
How to Fix Memory Card Locked Error Without Losing Data in 4 Ways
![author icon]() Tracy King/2023/11/08
Tracy King/2023/11/08 -
6 Proven Ways to Fix Windows 11/10 Won't Shut Down in 2024
![author icon]() Brithny/2024/01/09
Brithny/2024/01/09