
How to Screenshot on Windows 8/8.1 [Custom Hotkey]
Windows 8 has its default methods to take the whole screen or part of it. However, the combo rules are leading you to check the guides each time you want to screenshot the desired area of your devices' screen. Especially when you frequently take snapshots, so do you want to use a custom hokey from F1 to F12?
If so, a beneficial screenshot tool is needed. EaseUS RecExperts offers an efficient and time-saving way to take the desired area of a snapshot on Windows 11/8.1/8/7. Here, you know how to screenshot on Windows 8.
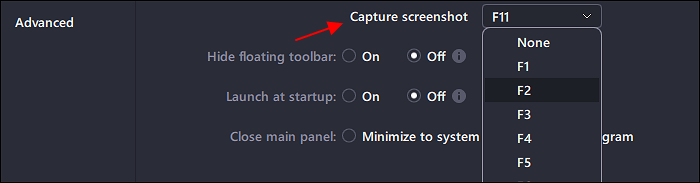
Firstly, download this software and open it. Change the hotkey of screenshots from F1 to F12 in....>> More Detail
You may also need:
How to Take a Screenshot on Windows 8 via EaseUS ScreenShot
Sometimes the Snipping Tool on Windows is not working or you don't want to check the combo rules each time you use it. Therefore, you need an all-in-one screen screen capture software, EaseUS ScreenShot. As mentioned above, you can take customizable screenshot of your PC screen. If you like taking partial screenshots, just drag your mouse to select the area you want to capture. Most importantly, you can enjoy some other advanced editing features here, for instance, you are able to add text and numbers to enhance the screenshots you captured effortlessly for quick sharing.
Feel free to try it! In the trial version, you don't need to register an account.
How to take screenshots on PC Window 8:
Step 1. Download and install EaseUS Screenshot on your PC, then launch it.
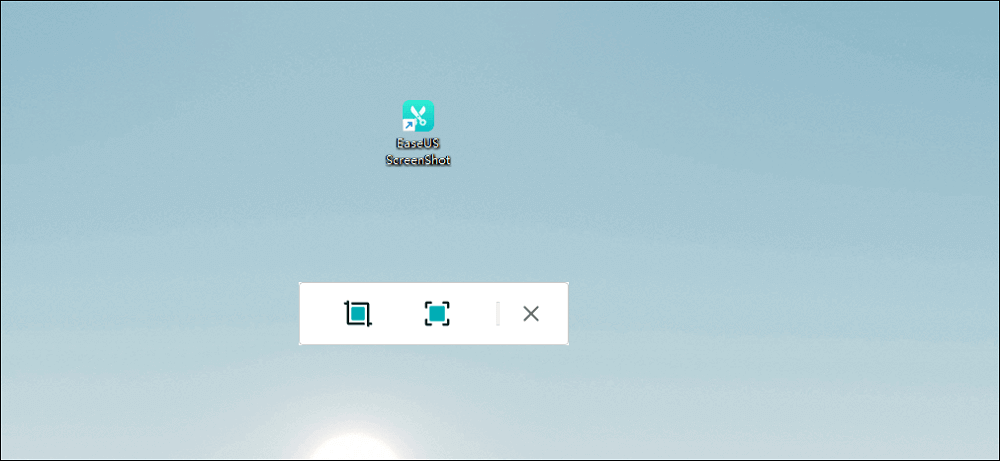
Step 2. You will see two options on the toolbar. The left one is for "Rectangular screenshot", and the right one is for "Full screenshot".
To take a partial screenshot, you just click on the left button (or double click the "Ctrl" key), then drag your mouse to select the area on your screen; To take a full screenshot, you can click the right button (or double click "Alt" on keyboard).

Step 3. When the screen is captured, you can see an editing toolbar below the screenshot. It provides a set of tools to modify the screenshot by drawing, adding text, mosaic, etc.
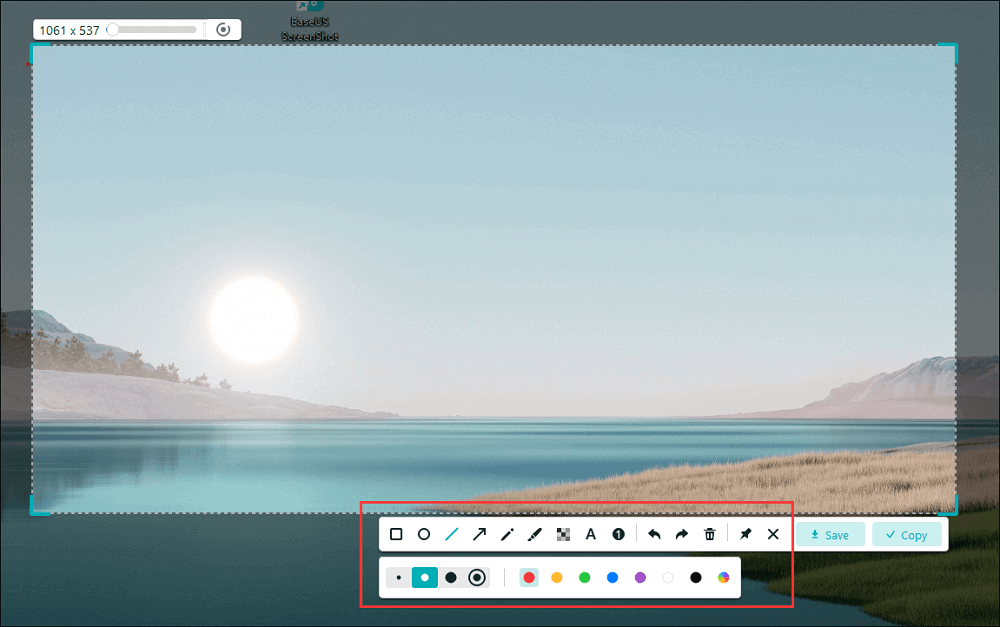
Step 4. Once done, click the "Save" button or press "Space" to save the screenshot. Or, you can click "Copy" or hit the "Enter" key to copy the screenshot to the clipboard.
How to Screenshot on Windows 8 through OBS Studio
To take a screenshot without using Snipping Tool, your can try OBS Studio, an open source screen recorder. Many users have it for their streaming video and audio capture. But it also offers the ability to take a snapshot on Windows 8 with a custom hotkey. If you already installed this software on your PC, then follow the below guide.
Where are screenshots saved? You can change the path as you like from Settings in OBS Studio.
Guide on taking a screenshot on Windows 8, using OBS Studio:
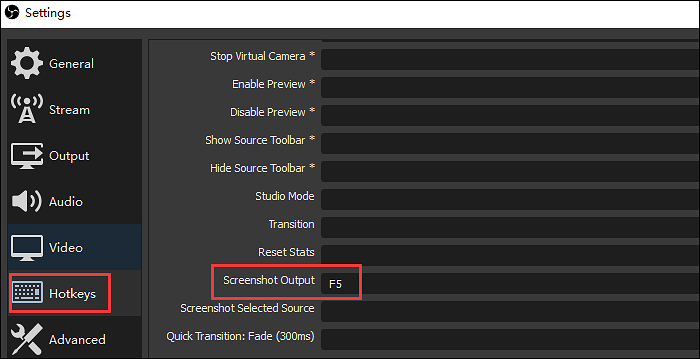
Step 1. Download and install this software on Windows 8. Perform it and click "Settings" from the bottom dock. Choose "Hotkeys" and find "Screenshot Output". Then customize the setting you like.
Step 2. Close the window and go back to the main interface. Hit "Start Recording" and then press the custom hotkey you set to take a snapshot on Windows 8. If you want to take the partial screen, use your mouse to drag the area from the above window. Then press and hold down the hotkey again to save it.
Step 3. To find the saved images on Windows 8, navigate the location you set for snapshots.
How Do You Take a Screenshot Using Windows Default Tools?
There are many occasions you need to take a screenshot like a web page, how-to guide, and specific detail of instruction. When using Windows 8, you can use Snipping Tool to take a custom area of the screen or just press and hold down the keyboard to deal with the whole screen. Below are more details.
Take a Partial of Screen via Snipping Tool
This method is suitable for dealing with a specific screen area. Snipping Tool, as its name suggests, you can apply the quick and fast method to take a snapshot on a PC.
Steps on using it to take a custom area of the screen:
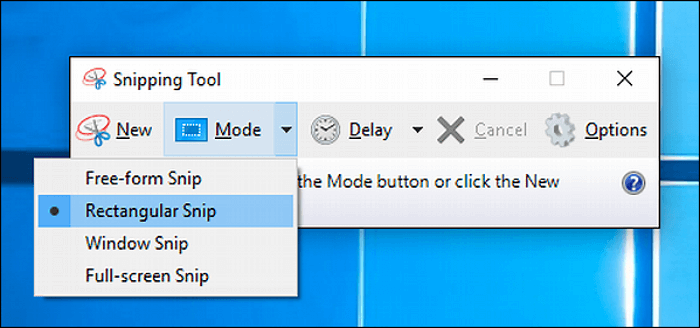
Step 1. Perform Windows 8. Press the Windows logo key + Q to show all applications. Find Snipping Tool.
Step 2. You can choose from Rectangular Snip, Window Snip, and Full-screen Snip to deal with your screenshots.
Step 3. You are also allowed to edit the snapshots simply before saving them.
Take a Whole Screen with Combo Rules on Keyboard
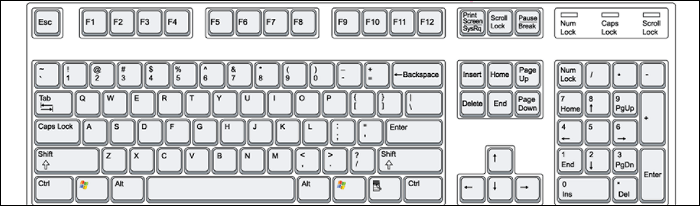
Without a doubt, the most versatile method to grab a still image from the computer screen is using Windows combo rules. For a desktop computer with a keyboard, simply pressing Windows logo Key and PrtScn is OK.
Where are screenshots saved on Windows 8? It can be found in a folder in Screenshots > Pictures.
Conclusion
For "how to screenshot on Windows 8?", you may find the best solution in this post. No matter you are using the third-party software or Windows default method, taking a still image is very easy. To select a tool with a simpler interface, try EaseUS ScreenShot! Without registration, get started to screenshot on Windows 8!
Was This Page Helpful?