Explanation: Select the Disk Where to Install macOS Blank
Have you recently encountered the "select the disk where to install macOS blank" error while trying to upgrade your Mac? Several Mac users have reported this issue. During installation, the system asks you to select the disk where to install macOS. Generally, two options appear – the external drive and the internal drive.
Due to the "select the disk where to install macOS blank" error, a blank screen appears with no disk. It is enough to confuse users and make them anxious about finding the right solution. Multiple causes can explain the occurrence of the error. Moreover, several solutions can help.
For starters, you can re-download and create a new macOS installer. You can also use Disk Utility to verify and repair disk issues. Other solutions include resetting NVRAM/PRAM and SMC, checking the compatibility of Mac and macOS version, and updating firmware and system software.
How to Upgrade to macOS Sonoma
Every year Apple reveals the major version at the WWDC event. That explains the curiosity of Apple users and developers. This post explains how to upgrade to macOS 14.

Causes of Select Blank Disk Where to Install macOS
Several reasons explain why the "select disk where to install macOS blank" error occurs. Here, let's take a look -
💾Cause 1. Corrupted or incompatible macOS installer
An incompatible macOS installer is one of the primary reasons for the "select disk where to install macOS blank" error. Ensuring the macOS you want to install is compatible with the system is vital. Moreover, you also need to ensure the macOS installer is not corrupted. It can be done by downloading from the official website.
💽Cause 2. A disk format or partition issues
You might not know, but partition issues can also cause disk errors. Similarly, disk formatting issues can also explain the occurrence of the issue. In that case, using Disk Utility to check, identify, and repair the problems are imperative.
⚔️Cause 3. Software or hardware incompatibility
Another reason for the "select disk where to install macOS blank" error is the hardware and software incompatibility. Whenever you think of upgrading the system, check the compatible devices list. If the software is incompatible with the hardware, you will face multiple problems.
📱Cause 4. Outdated firmware or system software
Keeping the system up-to-date is of critical importance. If that is not done, this disk error can occur. The ideal solution is to update the firmware and then try upgrading to the macOS you want. Remember that checking updates regularly is a great idea to keep your system up-to-date.
5 Ways to Fix the Select Disk Where to Install macOS Blank
Are you anxious about the "select disk where to install macOS blank" error? Don't worry! Five fixes can help you overcome the issue. Let's check out –
- Method 1. Re-download and create a new macOS installer
- Method 2. Verify and repair disk issues using Disk Utility
- Method 3. Reset NVRAM/PRAM and SMC
- Method 4. Ensure compatibility with your Mac and macOS version
- Method 5. Update firmware and system software
In addition, to prevent the inconvenience of losing important data, it is recommended that you back up your important files via EaseUS Data Recovery Wizard for Mac Pro before installing or updating macOS.
Back Up Your Mac and Never Lose Data
Back up and restore your MacBook/iMac without Time Machine, iCloud, or external hard drives.
Method 1. Re-download and create a new macOS installer
One of the best ways to fix the "select disk where to install macOS blank" error is to re-download and create a new macOS installer. For that, you need to follow the steps given below.
How to re-download the macOS installer?
Here are the steps –
Step 1. Visit the App Store.
Step 2. Search for macOS Ventura (or the version you are on)
Step 3. Once you find it, click on the "View" or "Get" button.

Step 4. From here, you can re-download the macOS installer.
How to create the new bootable installer?
Check out these steps –
Step 1. Connect the USB drive to the system.
Step 2. Open "Terminal".
Step 3. Type - sudo /Applications/Install\ macOS\ Ventura.app/Contents/Resources/createinstallmedia --volume /Volumes/MyVolume.
Remember that you need to type the name of the downloaded macOS.

Step 4. Press "return".
Step 5. Enter the admin password.
Step 6. To erase the volume, enter Y.
Step 7. Hit "Return".
Step 8. A pop-up appears seeking permission to access files on the removable volume. Press "Ok".
Step 9. Close the Terminal.
Step 10. Disconnect the drive.
Method 2. Verify and repair disk issues using Disk Utility
To fix drive-based errors, you can use Disk Utility. The First Aid feature inspects and repairs the issues. Check out the steps to follow –
Step 1. Enter the macOS Recovery Mode.
Step 2. From the utility screen, choose "Disk Utility".
Step 3. Select the "View" button.
Step 4. Go to "Show All Devices".
Step 5. Click the "First Aid" button.

Step 6. Press "Run" when you are asked for confirmation.
Step 7. Choose "Continue".
Step 8. Now install macOS and see if the problem persists.
You can move on to the next solution if this doesn't fix the issue. Don't forget to mark this passage by sharing it on Facebook, Twitter, or SNS.
Method 3. Reset NVRAM/PRAM and SMC
Resetting NVRAM/PRAM and SMC can also help resolve this disk error.
Here are the steps to reset NVRAM/PRAM –
Step 1. Turn off the system.
Step 2. Press the "Power" button.
Step 3. Press the "Cmd, Option, P, and R" buttons simultaneously.
Step 4. Release the keys when you hear the startup chime for the second time.
For T2-based Macs, you must wait until the Apple logo comes and goes for the second time. After that, you can release the keys.
Apart from that, you can also reset SMC. However, the steps to reset it varies based on the model.
For Macs with T2 security chip –
Step 1. Turn off the system.
Step 2. Press the power button for a few seconds and hold it.
Step 3. Restart the system.
Step 4. If that doesn't work, turn off the device again.
Step 5. Press the left Option key, right Shift key, and left control key and hold them.
Step 6. Now, press the Power button and hold it at the same time.
Step 7. After a few seconds, release the keys.
Step 8. Restart the macOS.
For desktop Macs –
Step 1. Turn off the system.
Step 2. Remove the power cord.
Step 3. After a few seconds, reconnect it.
Step 4. Turn on the device.
For Macs with a removable battery –
Step 1. Turn off the system.
Step 2. Take out the battery.
Step 3. Press the power button and hold it.
Step 4. Put in the battery.
Step 5. Turn on the system.
For Macs with a non-removable battery –
Step 1. Turn off the system.
Step 2. Press the left Shift, Option, and Control keys and hold them.
Step 3. At the same time, press the Power button and hold it.
Step 4. Release the keys after a few seconds.
Step 5. Turn on the system.
Method 4. Ensure compatibility with your Mac and macOS version
Another simple solution to fix this error is to check the compatibility of the Mac and macOS version. You can go to Apple's support page and check your system's compatibility details. Then, you will have a better idea bout the software-hardware compatibility.

How Do I Update My Mac When It Says No Update | 8 Tested Methods for Mac
How do I update my Mac when it says no update? Here are possible solutions that can help you. Read more >>
Method 5. Update firmware and system software
Lastly, you can update firmware and system software to see if it resolves the error. Follow these steps –
Step 1. Go to "Apple Menu".
Step 2. Click on System Settings or System Preferences.

Step 3. For System Settings users, select "General" and choose "Software Update".

Step 4. For System Preferences users, click on Software Update.
Step 5. If there is any update, you will see an Upgrade Now option. Click on it.
You can also use the Recovery Mode to update the firmware option.
For that, here are the steps –
Step 1. Enter the macOS Recovery Mode.
Step 2. Choose "Reinstall macOS".
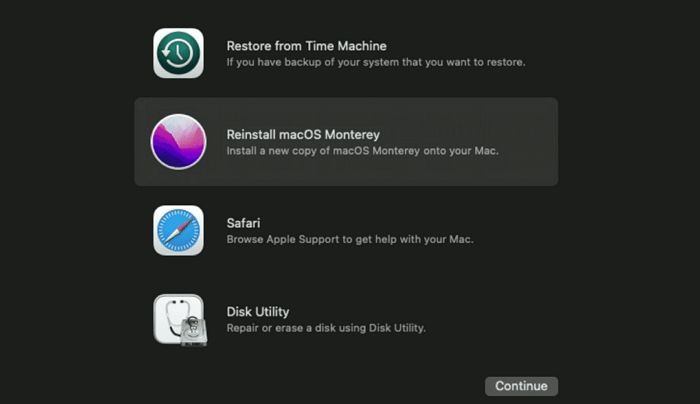
Step 3. Click "Continue".
How to Recover Lost Data After Installing macOS
Have you lost data after upgrading to the latest macOS? Despite following procedures rigidly, data loss can sometimes occur. The best way to recover lost data is to opt for professional data recovery software. Here, you can choose EaseUS Data Recovery Wizard for Mac.
The EaseUS Data Recovery Wizard for Mac is a powerful and reliable data recovery tool. This software can retrieve different data types, such as photos, videos, emails, audio, etc.
You can use EaseUS Data Recovery Wizard for Mac in various scenarios. These are –
- Virus attack: Malware attacks are brutal and can wipe out the entire system. You can use this amazing recovery tool to restore lost data.
- Formatting: Formatting drives can sometimes lead to data loss. But don't worry! With this tool, you can recover formatted hard drive Mac.
- Wrong macOS restoration: Issues with macOS installation can cause data loss.
- Damage to the hard drive: Physical damage to the hard drive or other software-related issues can cause data loss. Using this tool will assist in the restoration of data.
Do you want to use EaseUS Data Recovery Wizard for Mac? Here are the easy steps you need to follow –
Note: You can create a backup by clicking the "Disk Backup" on the left first. When the disk is damaged or the data on the disk is accidentally deleted or lost, you can get the data back from the backup image.
Step 1. Select the location
Select the disk where you lost data after updating to macOS Sonoma/Ventura/Monterey/Big Sur. Then, click "Search for lost files".

Step 2. Find lost data after the scan
EaseUS Data Recovery Wizard for Mac will immediately scan your selected disk volume and display the scanning results on the left pane. Use the file type and file path to find wanted data on Mac.

Step 3. Recover data after macOS update
Select the target files that were unknowingly lost during or after the update and click the "Recover" button to get them all back.

Conclusion
The "select the disk where to install macOS blank" error is a common yet frustrating Mac problem. Multiple solutions can resolve the issue. For instance, you can verify and repair problems using Disk Utility. You can also reset SMC to see if the error is resolved.
However, data loss can occur while applying these solutions. For that, you can use EaseUS Data Recovery Wizard for Mac. It is a reliable yet user-friendly recovery software that allows users to recover different data types.
Select Disk Where to Install macOS FAQs
To know more about Select Disk Where to Install macOS, read the questions and answers listed here -
1. How do you select the disk where to install macOS?
While installing macOS, users can select the disk where they want to install it. The majority of the users opt for Macintosh HD for macOS installation.
2. Why I can't see the disk to install the macOS?
Various reasons can lead to you not seeing the disk to install the macOS. For instance, it can be due to the device's macOS incompatibility. It can also be due to a corrupted macOS installer or disk format/partition issues.
3. How do I reinstall Mac from a blank hard drive?
To reinstall Mac from a blank hard drive, here are the steps –
- Enter the macOS Recovery Mode.
- From the Utility menu, choose Disk Utility.
- Choose the external drive, and then press the Erase button.
- Opt for GUID in the partition scheme.
- Enter volume name and format type (AFPS).
- Select Apply, and then click Done.
- Close Disk Utility.
- Go to install OS and follow the on-screen instructions.
4. How to install macOS on a blank MacBook?
To install macOS on a blank MacBook, follow these steps –
- Connect the bootable installer.
- Turn off the device, and then Press the Power button.
- In the startup options window, select the bootable installer volume.
- Select Continue, and when the macOS installer opens, follow the on-screen instructions.
Was This Page Helpful?
Brithny is a technology enthusiast, aiming to make readers' tech lives easy and enjoyable. She loves exploring new technologies and writing technical how-to tips. In her spare time, she loves sharing things about her game experience on Facebook or Twitter.
Jaden is one of the editors of EaseUS who lives and works in Chengdu, China. She focuses on topics concerning PCs and Mac data recovery. Jaden is committed to enhancing professional IT knowledge and writing abilities. She is always keen on new and intelligent products.
Related Articles
-
Failed to Personalize the Software Update, How to Fix?
![author icon]() Dany/2024-01-11
Dany/2024-01-11 -
How to Fix the 'API-Ms-Win-Crt-Runtime-l1-1-0.dll Missing' Error?
![author icon]() Daisy/2024-02-21
Daisy/2024-02-21 -
[FIXED] Could Not Initialize Graphics System on Windows 10 Computer
![author icon]() Daisy/2024-01-11
Daisy/2024-01-11 -
Fix A Device Which Does Not Exist Was Specified [100% Working Solutions]
![author icon]() Cici/2024-01-11
Cici/2024-01-11

EaseUS Data Recovery Services
EaseUS data recovery experts have uneaqualed expertise to repair disks/systems and salvage data from all devices like RAID, HDD, SSD, USB, etc.