What Causes This macOS Update Error
Upgrading to the latest macOS version lets you cherish several customization options without selling your MacBook away. It's impressive until you get error texts while the update continues. Thankfully, you've come to the correct spot!
We will go into more detail about how to resolve the "failed to personalize the software update" issue in this article. Also, are you wondering why software updates stop working? Several reasons set out this macOS update error, which are the following:
| 📡Poor internet connectivity | This is one of the significant reasons for this "failed to personalize the software update" error. Therefore, you should obtain a stable internet connection and install the macOS update manually. |
| 💾Inadequate storage space | You need more storage space to upgrade your macOS version. Try clearing a few spaces before installing the update. |
| 💿An issue with your startup disk | You need to mend the boot disk with Disk Utility to rule out the error in the startup disk that's causing the failed software update. |
Now, without delay, let's start with the probable fixes to this error: "Failed to Personalize the Software Update".

How to Fix 'Failed to Personalize the Software Update'
When you notice this error text "Failed to Personalize the Software Update, Please Try Again." while updating the macOS, don't fret! It's usual nowadays for OS updates to malfunction. To fix this error, the top 6 fixes are given below.
- Fix 1. Check Mac Internet Connection
- Fix 2. Retry the macOS Update in Safe Mode
- Fix 3. Clear Junk Files on Mac
- Fix 4. Reset NVRAM/PRAM
- Fix 5. Upgrade the RAM of Your Mac
- Fix 6. Reinstall macOS in Recovery Mode
Fix 1. Check Mac Internet Connection
In order to update to macOS Sonoma or other versions, the MacBook must pass the Apple server's authentication process. It consists of verifying the measurements given by the requesting Mac against the versions whose installation is allowed. The Mac's distinct ECID is appended to the measurement by the server upon finding a match, and the outcome is then signed.
Due to the incorporation of ECID, the process is customized. That's why you require a stable internet connection to upgrade your Mac with Apple T2 or Silicon chips. However, in case the upgrading process gets paused because of an unstable internet connection, you will obtain this error on the different macOS versions.
Follow the steps below to rule out this error:
Step 1. Employ a distinct Wi-Fi network. For example, if you're trying to upgrade macOS at your workplace, you may complete it at home with your home's Wi-Fi connection.
Step 2. Reset the router's DNS to its default in case it's personalized.
Step 3. Consider using an Ethernet connection to finish the personalized software update.

Fix 2. Retry the macOS Update in Safe Mode
Start Mac in Safe Mode impedes everything but vital extensions from getting loaded, executes checks on your disk, and eliminates some system malfunction issues. The steps to retry the macOS update in safe mode are different for Apple silicon Macs and Intel-based Macs. The steps to start up your Mac with Apple Silicon in safe mode are the following:
Step 1. Opt for the "Apple" menu > Shut down.

Step 2. Press the power button until you notice "Loading startup options" on your MacBook.

Step 3. Opt for a volume.
Step 4. Press & hold the "Shift" key, and hit the "Continue" button in safe mode.
The steps to start up your Intel-based Mac in safe mode are the following:
Step 1. Turn on your MacBook or reboot.
Step 2. Keep pressing the "Shift" key until you notice the login panel.
Step 3. You may need to log in again.
Your MacBook will reboot automatically. Once everything's done, you will get to see "Safe Boot" in the menu bar. Then, you can use Software Update to update your Mac again.
Share this passage with your friends on social media.
Fix 3. Clear Junk Files on Mac
Not having sufficient storage on your MacBook is a vital factor that might cause this error on Big Sur/Monterey/Ventura/Sonoma. But you may eliminate space on your Mac by sending the unnecessary files to the Trash folder and emptying the Trash on your Mac. To clean junk file accumulation on Mac, you need to remove user log files. The steps are the following:
Step 1. Go to "Finder".
Step 2. Hit the keys together: "Command + Shift + G".
Step 3. Type in ~/Library/Logs in the field, and hit the "return" button.

Step 4. You will observe every user log file, which can be moved to trash manually.
In case you would like to free up your Mac entirely, opt for every user log file and delete them. You can learn the shortcut of moving to Trash in the following passage:

Move to Trash Shortcut on Mac [3 Sets of Shortcut]
Want to know move to the Trash shortcut on Mac? This article will teach you three ways to move files to Trash with the shortcut. Read more >>
Fix 4. Reset NVRAM/PRAM
Resetting NVRAM/PRAM will assist you in fixing this "Failed to Personalize the Software Update" error. Go through the steps below to reset NVRAM/PRAM on your MacBook with the help of Mac Terminal:
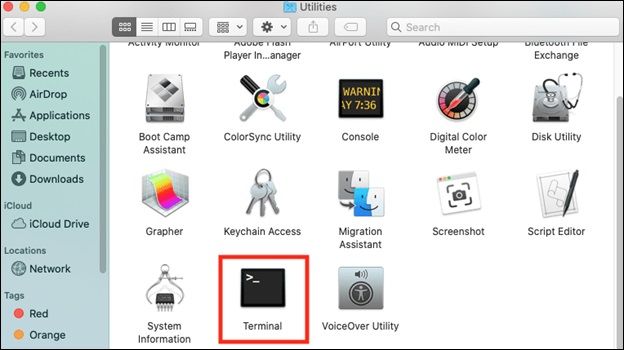
Step 1. Shut down every running application, and launch "Terminal" from "Finder"> "Utilities"> "Terminal".
Step 2. Type in sudo nvram -c and hit the "Enter" or "Return" button. Don't forget to type the "Admin password" and hit the "Enter" or "Return" again.
Step 3. Type sudo shutdown -r now and hit "Return" or "Enter". You're done - your MacBook will now reboot!
If you want to learn more methods on resettings NVRAM, the following article may help:

NVRAM Reset | 3 Proven Ways to Reset NVRAM/PRAM on Mac
Doing an NVRAM reset is one of the most effective Mac troubleshooting methods. You can perform an NVRAM/PRAM reset to help. Read more >>
Fix 5. Upgrade the RAM of Your Mac
Poor RAM is another reason for this error on Ventura or Monterey. You may either investigate by running Apple Diagnostics if there's a bad stick, or you may run a complimentary app covered under the GNU GPL, known as Rember. In case you have identified insufficient RAM, you may either replace it or upgrade it. The steps are the following to upgrade RAM:
Step 1. Switch off your Mac and allow it to cool down entirely. It's time to cut off the cables, cords, and accessories.
Step 2. Turn your computer upright so that the screen is facing down.
Step 3. Eliminate the bottom case by unscrewing it.
Step 4. To release any static energy stored in your body, contact a metal surface within the MacBook.
Step 5. Search for the "RAM module" and take it out using the ejection levers.
Step 6. Instead of contacting the gold connectors, you must remove the RAM module.
Step 7. If another RAM module exists, continue the process.
Step 8. Incorporate your brand-new "RAM modules" for your MacBook without contacting the gold connectors.
Step 9. After inserting the first module, press down on the following one until it snaps into position.
Step 10. Put the bottom cover back on and tighten the screws.
If your RAM is giving you trouble, use the aforementioned actions, and don't forget to share with your friends on social media.
Fix 6. Reinstall macOS in Recovery Mode
In this fix, you need to know the ideal vital combinations. Prior to starting, you must ensure you possess a robust and consistent internet connection. Follow the steps below:
Step 1. Switch your MacBook on.
Step 2. Now it's the right time to hit the combination of keys: "Command + R" for using the newest version of macOS installed and operating on your device.
Next, you may hit the "Option + Command + R" keys, which shows that you wish to install the most recent version that integrates with your macOS.
To learn a more detailed tutorial, here:

[macOS Guide] | How to Reinstall macOS - EaseUS
Are you looking to reinstall macOS on your Mac device? If you run into any problems, you can lose motivation and find it difficult to finish the operation of installing macOS. Read more >>
Restore Lost Data After Fixing Update Error
Have you lost data after trying one of the aforementioned fixes for "Failed to Personalize the Software Update?" If yes, you can retrieve every lost data with the help of professional data recovery software, EaseUS Data Recovery Wizard for Mac Pro.
After rummaging your hard drive for missing files, you can select which ones you wish to recover. This valuable data recovery program can recover deleted files on Mac from data loss scenarios, including formatting, HDD damage, virus attacks, repartition, system crashes, unmounted drives, and more. It provides a range of capabilities to assist with data recovery:
- ✅Recover deleted files on macOS Sonoma, Ventura, Monterey, Big Sur, Catalina, and older versions.
- ✅Retrieve data from various forms of storage, such as USBs, HDDs, SSDs, and more.
- ✅Utilize robust scan methods to recover data after the Sonoma update failed.
Download this professional data recovery tool today! You can learn more about EaseUS Data Recovery Wizard for Mac in the following passage:

EaseUS Data Recovery Wizard for Mac Review [Update in 2023]
EaseUS Data Recovery Wizard for Mac is a trusted and effective data recovery software that supports data recovery of various file types, including images, videos, documents, etc. Read more >>
Summary
It can be pretty unsettling to get an error notice such as "failed to personalize software update" when upgrading macOS, particularly if you have no idea why it occurred. Nonetheless, it's typically not risky and is quickly rectified. To find and fix the issue, adhere to the previously mentioned steps. Also, if you have lost data while fixing this error, download the EaseUS Data Recovery Wizard for Mac Pro.
Failed to Personalize Error FAQs
Go through the FAQs below to understand the topic better:
1. How to fix macOS Sonoma failed to personalize the software update?
Go through the above fixes, and opt for anyone you find suitable. You may either verify your internet connection or reset NVRAM/PRAM.
2. How do you free up space for macOS updates?
If you have encountered not enough space to update your Mac, in order to free up space for the latest macOS updates, you may either open the downloads that delete any unnecessary files or open the trash bin and eliminate the junk files.
3. Why does Apple software update fail?
Apple software updates mostly fail due to needing more storage space or a better internet connection.
4. How do you recover data after the macOS Ventura update fails?
You need to opt for the disk where you lost data after updating to macOS Ventura. After that, hit "search for lost files." Then, the professional data retrieval software, EaseUS Data Recovery Wizard for Mac, will scan the chosen disk volume and exhibit the scanning outcomes on the left pane.
Was This Page Helpful?
Dany is an editor of EaseUS who lives and works in Chengdu, China. She focuses on writing articles about data recovery on Mac devices and PCs. She is devoted to improving her writing skills and enriching her professional knowledge. Dany also enjoys reading detective novels in her spare time.
Related Articles
-
{Solved}How to Fix No Audio in Windows 11?
![author icon]() Daisy/2024-01-11
Daisy/2024-01-11 -
SD Card File System for Android | What Is the Best Format for Android [Detailed Guide]
![author icon]() Sherly/2024-01-11
Sherly/2024-01-11 -
What Is System Restore Command and How to Use It on Windows 11/10
![author icon]() Tracy King/2024-01-11
Tracy King/2024-01-11 -
[Detailed Guides] How to Backup WeChat in 5 Ways
![author icon]() Rel/2024-01-11
Rel/2024-01-11

EaseUS Data Recovery Services
EaseUS data recovery experts have uneaqualed expertise to repair disks/systems and salvage data from all devices like RAID, HDD, SSD, USB, etc.