Photography and image management are vital to our everyday lives. A trustworthy and effective image management program is essential for saving memories, organizing vital documents, and moving photographs from your camera or iPhone to your Mac. Luckily, macOS has a powerful and easy-to-use program, Image Capture on Mac.
Mac users can easily import, organize, and edit photographs and videos from numerous devices using Image Capture. This article discusses how to use Image Capture on your Mac or MacBook Pro, including a shortcut to speed up image transmission. Let's get started!
What Is Image Capture on Mac
Mac computers' built-in Image Capture streamlines uploading photographs and movies from external sources. Users may import photographs from digital cameras, iPhones, iPads, scanners, and other compatible devices.

How to access an SD card on MacBook Air to view photos on it? Image Capture shows all media files on a linked device. It lets users choose and import photographs and movies to their Mac's Photos program or folder.
Image Capture works on a simple procedure. A suitable device connected to your Mac via USB is instantly detected, and all media files are displayed in a neat and organized interface. Users may import files, alter import settings, and transfer data from Mac to Mac or from the linked device. Visit Launchpad to utilize Image Capture. Then launch the Other folder. The Other folder has the Image Capture symbol.
How to Use Image Capture on Mac to Transfer Images
Image Capture transfers photos and videos from a camera, iPhone, iPad, iPod touch, or other camera-equipped device to your Mac. Erase the items from the device after transferring. Here's how to use it:
Step 1. Power on and connect your device to the Mac. You may need a password to unlock your smartphone.
Step 2. Select the device from the Devices or Shared list in Image Capture on your Mac and select the photos to transfer.

Step 3. Click the "Import" on the pop-up menu at the bottom of the window, then choose where to store the photographs or make a PDF or website.
Step 4. To download photographs to a different place, choose "Other", then select a destination.
Step 5. If you chose photos, click "Download" or "Download All".
Some users reported that their photos are missing after macOS Sonoma updating; if this problem occurs on your Mac, don't worry; this article can solve your problem.

Missing Photos After macOS Sonoma Update [5 Recovery Tips]
This article discusses how to recover the missing photos after macOS Sonoma updating. Read more >>
How to Use Image Capture on Mac to Scan
If you have no idea where are photos stored on Mac, Image Capture can help you find them. Once you have connected a scanner to your Mac, you can capture images using Image Capture.
Multiple pages can be scanned simultaneously if your scanner has an automatic document feeder. You can scan multiple images with a flatbed scanner, rectify any placed crookedly on the scan platform, and save each image to its file. Follow the steps below to scan:
Step 1. Connect your scanner to your computer, and then power it on.
Step 2. Select your scanner from the Devices or Shared list in the Image Capture app on your Mac.

Step 3. Once done, scan your photographs.
Suppose you can't find some important images, such as screenshots, on your Mac when using Image Capture to scan, don't worry. This article will introduce effective ways to find your screenshots and perform Mac screenshots recovery without any hassle or complications.

(2023 Fixed) Can't Find Screenshots on Mac | Mac Screenshots Recovery
Read this guide to know how to find your screenshots and perform Mac screenshots recovery. Read more >>
Share this article on social media to help others learn more about Image Capture on Mac and how to use it.
Image Capture on Mac Not Showing All Photos
Image Capture on Mac not displaying photographs during transfer might be irritating. File corruption or device compatibility issues may cause this issue. Mac image recovery methods are available, so don't worry. EaseUS Data Recovery Wizard for Mac is suggested to use in such situations.
It is a powerful and user-friendly data recovery tool designed to help Mac users recover permanently deleted photos on Mac. Whether your photos were accidentally deleted, lost during the transfer process, or due to a system crash, this software can easily handle various data loss situations.
Its intuitive interface allows users to scan their Mac's storage, external devices, or even formatted drives to locate and recover their missing images or iCloud recently deleted photos. When Image Capture fails to display your photos, EaseUS Data Recovery Wizard for Mac becomes a reliable lifeline for recovering lost images and other valuable data.
Its comprehensive scanning capabilities and user-friendly features make it a go-to solution for users seeking to reclaim their precious files and maintain peace of mind when facing unexpected data loss scenarios. Recover your missing photos with 3 steps below:
Note: You can create a backup by clicking the "Disk Backup" on the left first. When the disk is damaged or the photos on the disk are accidentally lost, you can get the photos back from the backup image.
Step 1. Scan for lost photos
Select the location where your valuable photos were lost and click the "Search for lost files" button.

Step 2. Select wanted photos
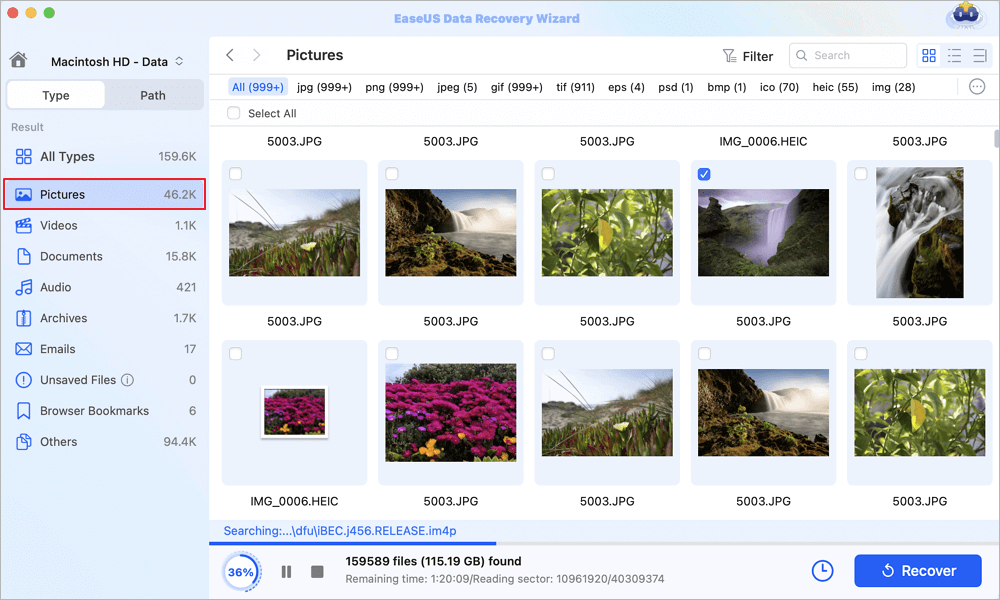
EaseUS Data Recovery Wizard for Mac will immediately start a scan on your selected disk volume. Meanwhile, the scanning results will be presented in the left pane. By Path and Type, you can quickly filter the photos you've lost earlier.
Step 3. Recover lost photos
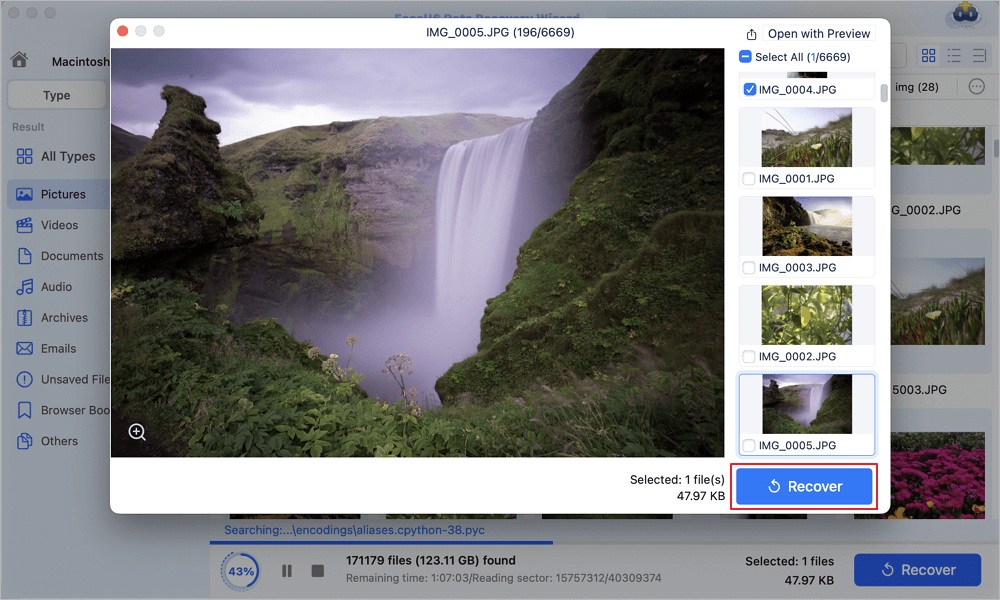
Select the target photos and click the "Recover" button to get them back at once.
How to Uninstall Image Capture on Mac
Many people find Image Capture handy, but you may uninstall it if you don't use it or think it takes up too much space on your Mac or MacBook. Mac users can remove this using the following steps:
Step 1. Open "Finder" from the left menu, and choose "Applications".
Step 2. Right-click "Image Capture" and choose "Uninstall".

Conclusion
Mastering Image Capture on a Mac or MacBook Pro enables users to manage their visual material more effectively and easily import photographs and movies from multiple sources. The simplicity and strength of this built-in application make it a great tool for managing treasured memories and important papers.
However, suppose data is lost during the transfer process or in other unforeseen conditions. In that case, EaseUS Data Recovery Wizard for Mac is a dependable and practical solution for recovering lost files, including irreplaceable photographs. Mac users can enjoy a smooth and safe picture management experience by combining the simplicity of picture Capture with the dependability of EaseUS.
Image Capture on Mac FAQs
Here are some questions people frequently ask when they search for Image Capture on Mac:
1. How do you use Image Capture on a Mac?
After connecting your device to your PC via a cable, please turn it on. In Mac Image Capture, choose the device from the Devices or Shared list. Select photographs to import just a subset of them.
To save the images, use the Import To pop-up menu at the bottom of the window. To download images, choose "Other", then select a location. Click "Download" or "Download All" if you selected photographs.
2. Where is Image Capture on my Mac?
Image Capture is, by default, located in the Other folder. All you need to do is open the Launchpad on your Mac from the Dock. Then, find the Other folder, where you will see the Image Capture icon.
3. Does Mac have Image Capture?
Image Capture allows you to transmit photographs and movies to your Mac from a camera, iPhone, iPad, iPod touch, or other camera-equipped device. After transferring, delete the items from the device.
4. What can I use instead of Image Capture on Mac?
On macOS, there are several excellent third-party scanning alternatives to Image Capture. They are more sophisticated, can scan film and slides, are accessible on more platforms, and are simpler to use.
Was This Page Helpful?
Brithny is a technology enthusiast, aiming to make readers' tech lives easy and enjoyable. She loves exploring new technologies and writing technical how-to tips. In her spare time, she loves sharing things about her game experience on Facebook or Twitter.
Related Articles
-
How to Fix the Windows Key Not Working on Windows 10/11
![author icon]() Jaden/2024-01-11
Jaden/2024-01-11 -
SD Card File System for Android | What Is the Best Format for Android [Detailed Guide]
![author icon]() Sherly/2024-01-11
Sherly/2024-01-11 -
Solved: AirDrop Not Working on Mac [ 7 Workable Fixes]
![author icon]() Dany/2024-01-11
Dany/2024-01-11 -
Computer Powers On But Won't Boot - Causes & Fixes
![author icon]() Larissa/2024-03-15
Larissa/2024-03-15

EaseUS Data Recovery Services
EaseUS data recovery experts have uneaqualed expertise to repair disks/systems and salvage data from all devices like RAID, HDD, SSD, USB, etc.