Welcome
Thank you very much for choosing EaseUS Disk Copy.
Disk Copy allows you to clone source disk/partition(s) to the target disk/partition(s) "as is" or resized proportionally. It is possible to clone a larger disk to a smaller one, provided that the smaller hard disk has enough capacity to fit the contents of the larger disk.
Disk Copy can be run from a live Windows operating system or a bootable disk based on Windows WinPE.
Glossary
Disk and Partition
A partition can be thought of as a division or "part" of a real hard disk drive, and it is really only a logical separation from the whole drive. Partitions are also sometimes called disk partitions and when someone uses the word drive, they usually mean a partition with a drive letter assigned.
Sector by Sector copy
A sector by sector copy ensures that destination hard disk/partition is exactly the same as source hard disk/partition. With this option enabled Disk Copy will replicates all the sectors, even if the sector is blank or it is a logically bad sector. As a result, the target will be equal in size to the disk being cloned after the process.
Getting Started
This part outlines basic parameters to use EaseUS Disk Copy. It is to help you acquire a general understanding before you get started.
Hardware Requirements
The list below shows the necessary requirements of Disk Copy.
● 800 MHz processor or faster
● A minimum of 1 GB RAM
● CD-R/RW, DVD-R/RW, DVD+R/RW or DVD+R DL drive for bootable media creation
● PS/2 or USB 1.1/2.0/3.0 Mouse and Keyboard
● A minimum of 1GB available space on the hard disk
System Requirements
Make sure you are running any one of listed operating systems:
● Windows XP/Vista/7/8/8.1/10/11
● Windows Server 2003/2008/2012/2016
● Windows Small Business Server 2003/2008/2011
● Windows Home Server 2011
File System Supported
EaseUS Disk Copy supports file systems, including FAT12, FAT16, FAT32, NTFS and EXT2/3. Other files systems are shown to be unknown.
Devices Supported
EaseUS Disk Copy supports the type of disk as below:
● Parallel ATA (IDE) HDD
● Serial ATA (SATA) HDD
● External SATA (eSATA) HDD
● SCSI HDD
● All levels of SCSI, IDE and SATA RAID controllers
● USB 1.0/2.0/3.0 HDD
● IEEE 1394 (FireWire) HDD
● SATA SSD/PCI-E SSD/mSATA SSD/M.2 SSD
MBR and GPT hard disk, Basic and Dynamic hard disk are supported. EaseUS Disk Copy can support up to 16TB hard disk and 32 disks at most.
Language Supported
● English
● German
● Spanish
● French
● Italian
● Portuguese
● Polish
● Japanese
● Chinese (Traditional)
● Chinese (Simplified)
● Korean
Edition Comparison
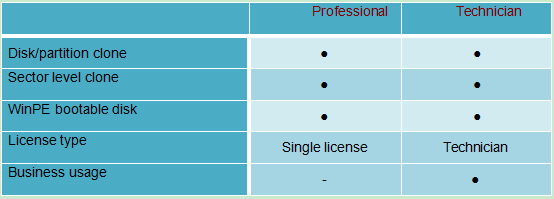
EaseUS provides two paid editions of Disk Copy, Professional, and Technician edition. Both of them can be converted from EaseUS Disk Copy Demo edition by filling in a purchased license code.
Professional Edition - The license is intended to use the software only on one computer and for your own personal use. It can only be used on non-server operating system computers.
Technician Edition - It allows usage for up to 99 devices, exclusively by one independent technician who is defined as an independent managed service provider. After serving your customers, EaseUS Disk Copy Technician Edition should be Removed. This edition can be used on server and non-server operating systems.
Tips:
Disk Copy provides the demo edition for testing. It is able to make a plan, but it cannot apply the real operation.
Feature Comparison
Activation
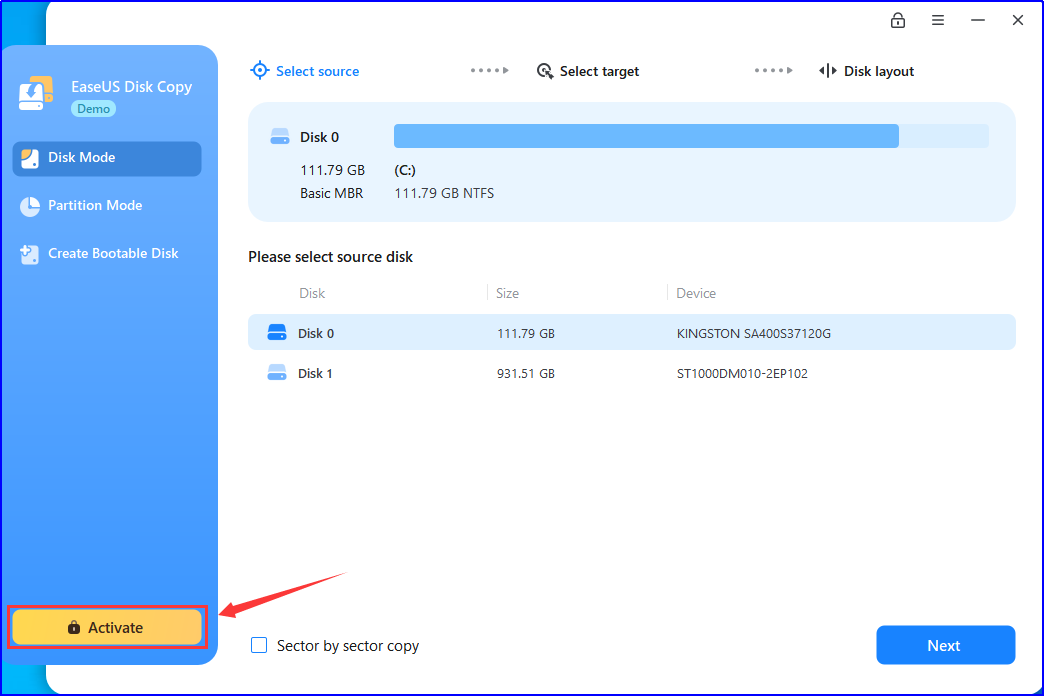
When you launch EaseUS Disk Copy Demo for the first time, an activation window will appear. To upgrade it to the full version, please enter your 25-digit license code in the provided field.
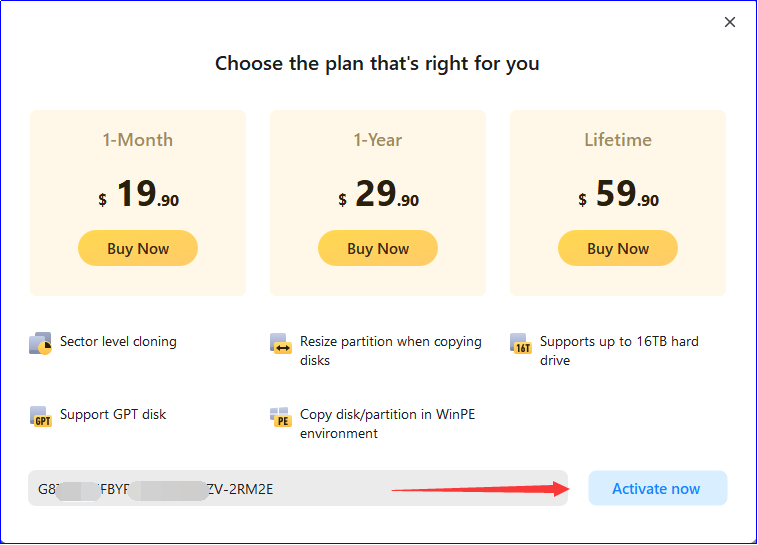
To start your demo experience, you can easily close the window. Nevertheless, if you possess a license code, please click Activate to open the activation window.
1-Click OS Migrate
1-Click OS Migrate feature automatically detects your new disk and prompts you with the option to migrate the operating system to the new drive. This prompt appears whenever a new drive is detected.
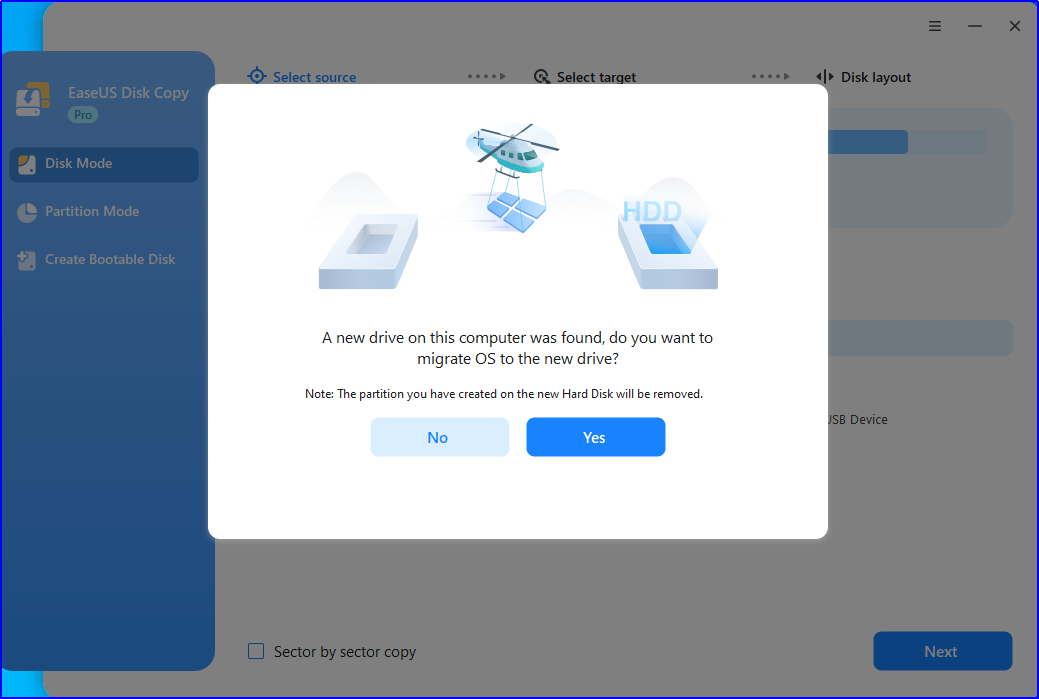
After clicking on Yes and then selecting the Proceed button, the system and boot partitions will be cloned to the target disk.
Kindly Note: All data on the destination disk will be erased.
Disk Clone
Disk Clone is a process that duplicates the content of one disk onto another, resulting in both disks containing identical data.
Read the precautions below before starting the clone:
1. Sector by sector copy is a method of copying data from one storage device to another by copying each individual sector, regardless of whether it is used or empty. If you opt for this option, please ensure that the size of the destination disk should be equal to or larger than the source disk.
2. It is possible to clone a larger disk to a smaller one if the smaller hard disk has enough capacity to fit the contents of the larger disk without choosing the Sector by sector copy option.
3. All data on the destination disk will be erased.
Four Steps for Disk Clone:
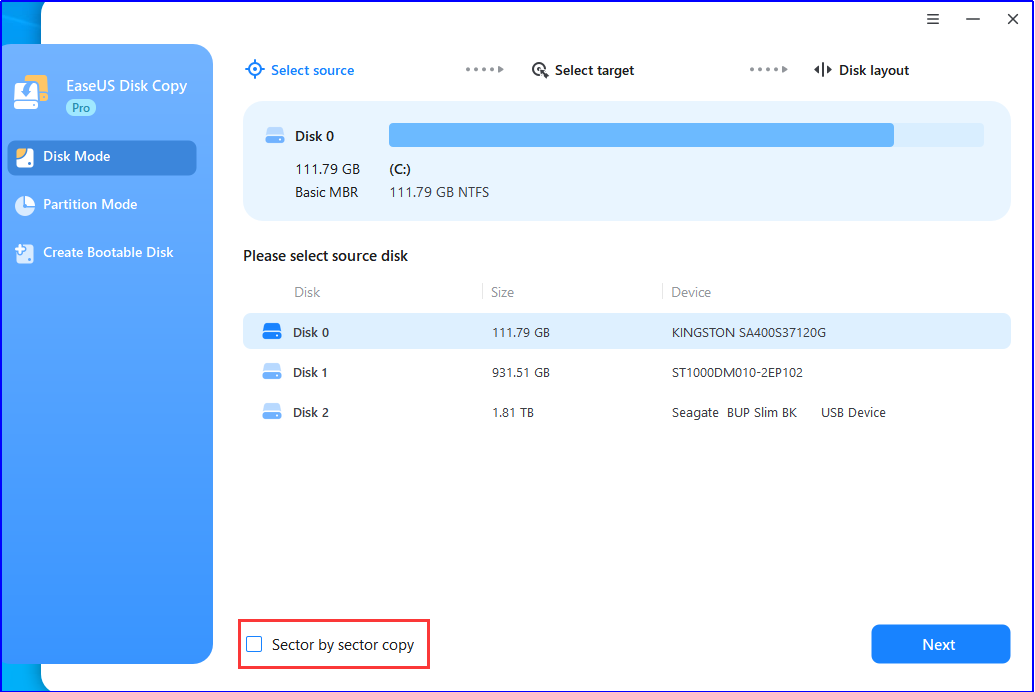
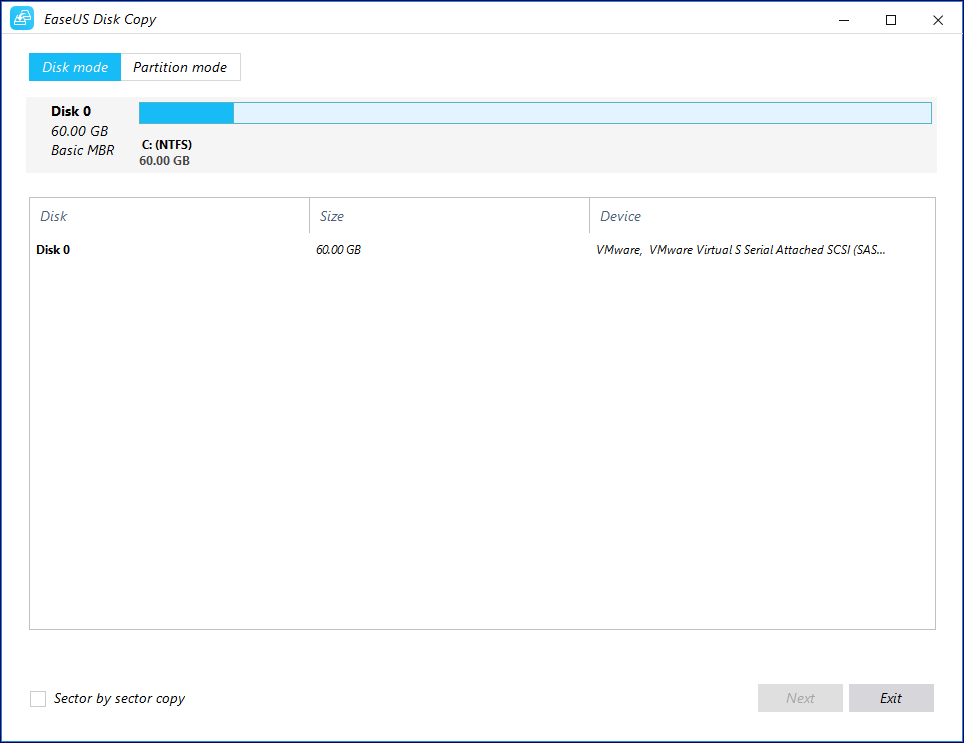
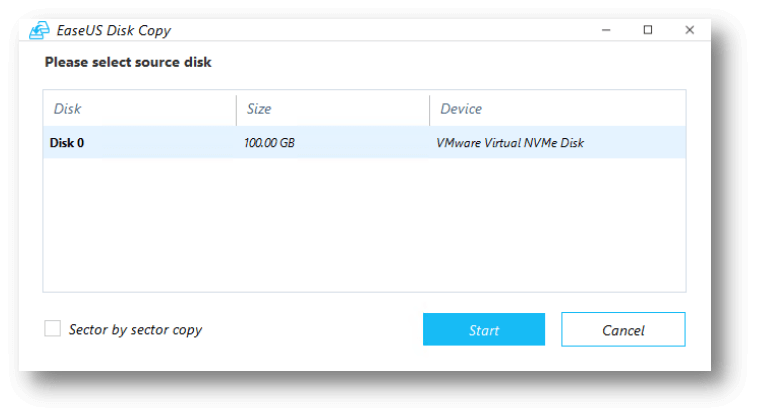
1. Choose Disk mode and select a source disk, then click Next. The top section will display the details of the source disk, such as the disk layout, disk type, disk capacity, and partition size.
Note:
If you require a clone at the sector level, please make sure to tick Sector by sector copy option.
2. Choose a destination disk, then click Next.

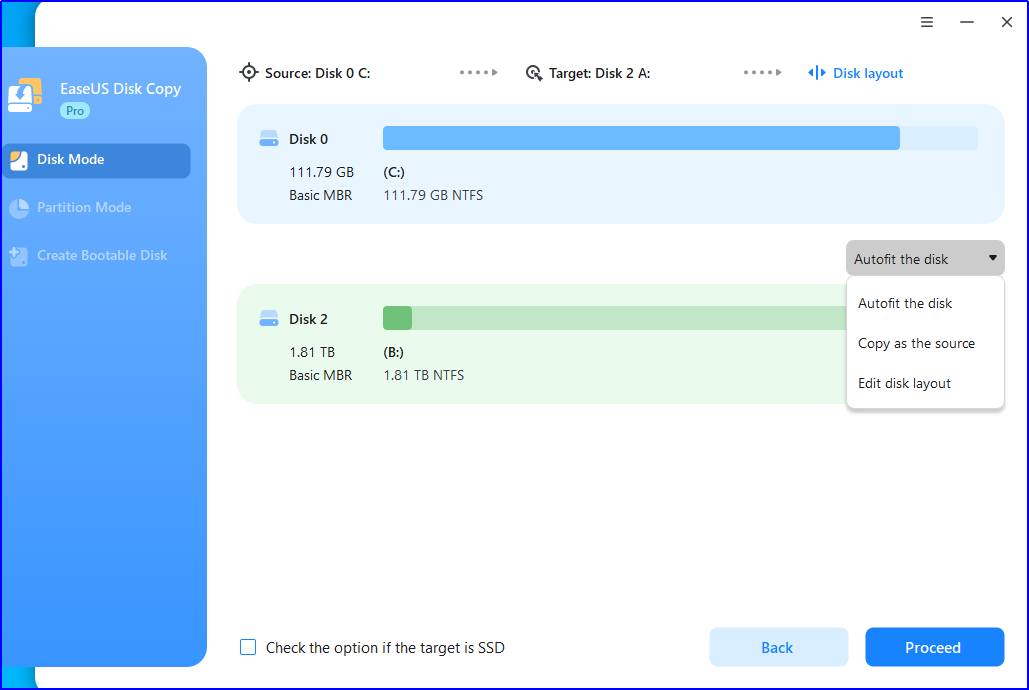
3. Edit the disk layout and then click Proceed to continue. Please be careful not to mis-select the disks. You can double-check the source and target disk info displayed on the software.
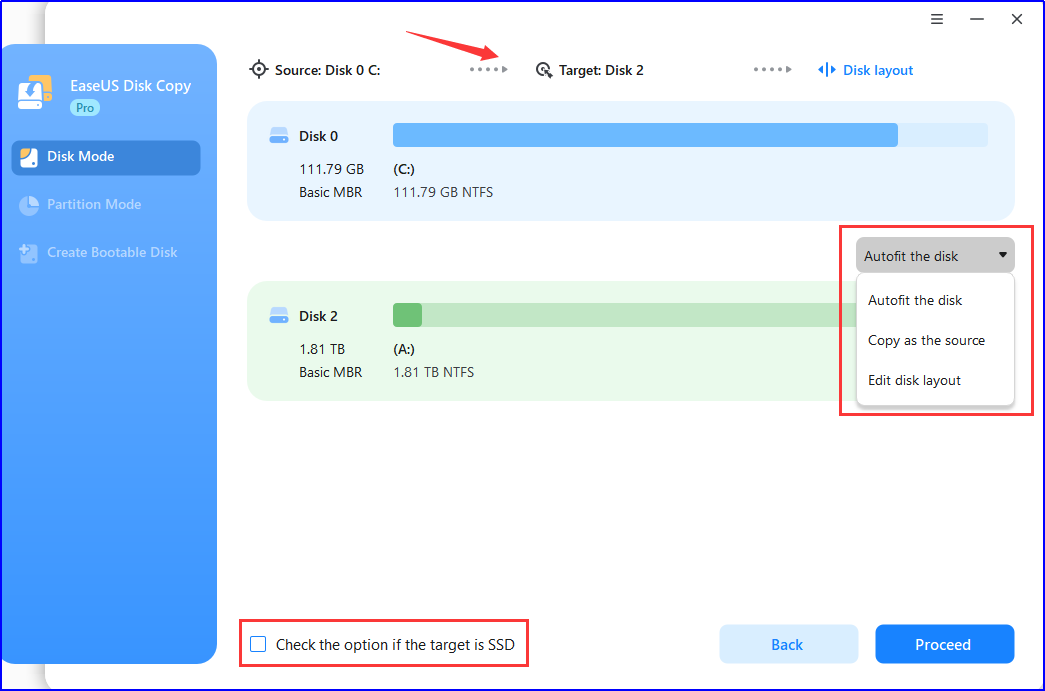
Autofit the disk: intelligently resizes the layout on the destination disk to optimize its performance and ensure that it is in the best possible state.
Copy as the source: make no change on the destination disk and the layout is the same as the source one.
Edit disk layout: allows you to manually resize/move partition layout on this destination disk.
Note:
Check the optimization for SSD option if the target disk is SSD.
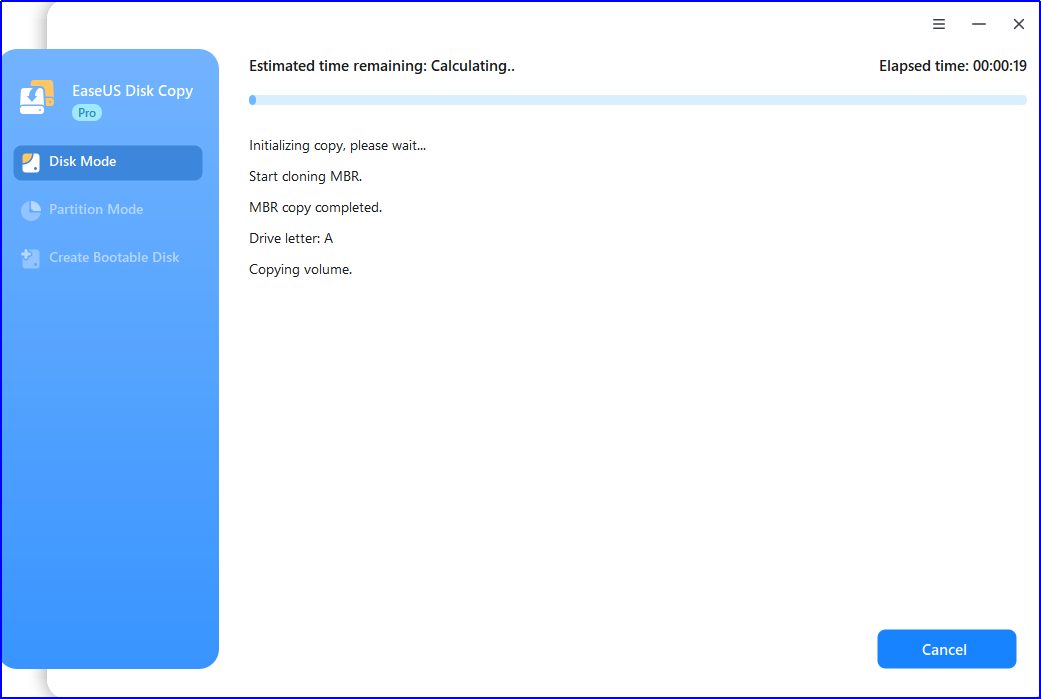
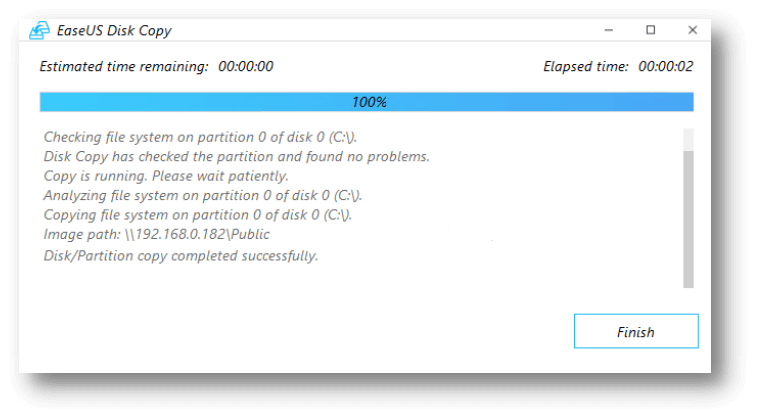
4. Finish the cloning.
Note:
If the source disk is a system disk and you want to replace it with the target one, please ensure that you disconnect the source disk before booting the computer from the cloned disk.
Partition Clone
Partition Clone is a feature that duplicates the source partition onto the destination partition or unallocated space, ensuring that the data on both the source and destination become identical.
Read the precautions below before starting the clone:
1. The size of the target partition should be equal to or larger than the source partition when using sector by sector clone.
2. It is possible to clone a larger partition to a smaller one. Please make sure that the smaller partition has enough capacity to fit the contents of the source partition and Sector by sector copy option is not ticked.
3. All data on the destination partition will be erased.
Four Steps for Partition Clone:
1. Choose Partition mode and select a source partition, then click Next. The top section will display the details of the source partition, such as the partition size, file system, and used space.
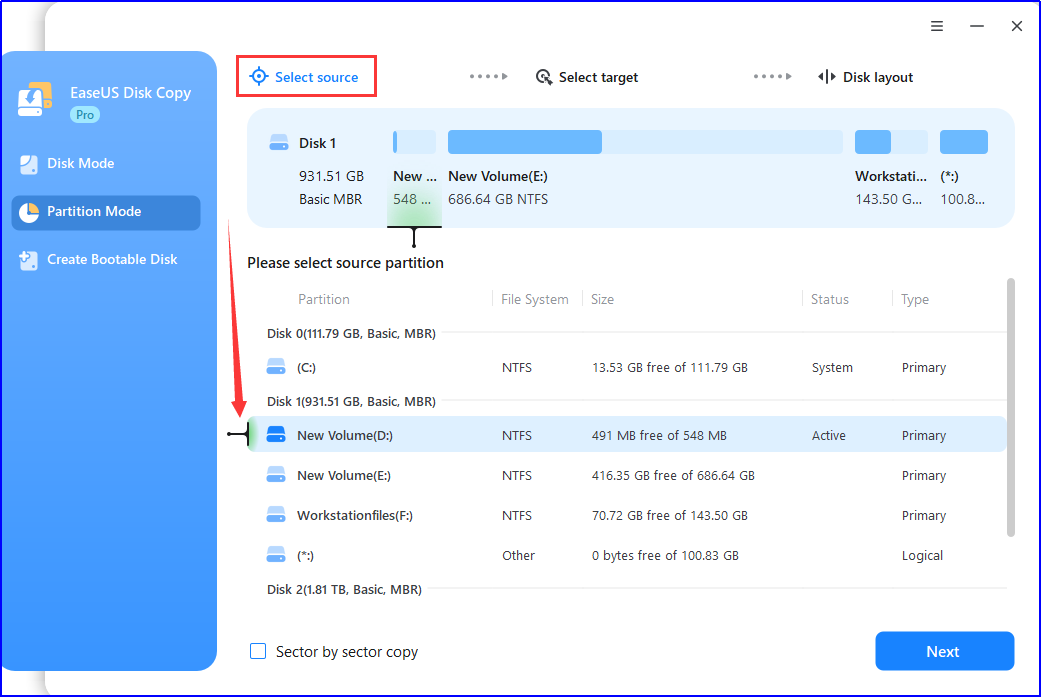
Note:
Check the Sector by sector copy option if you need a sector level clone.
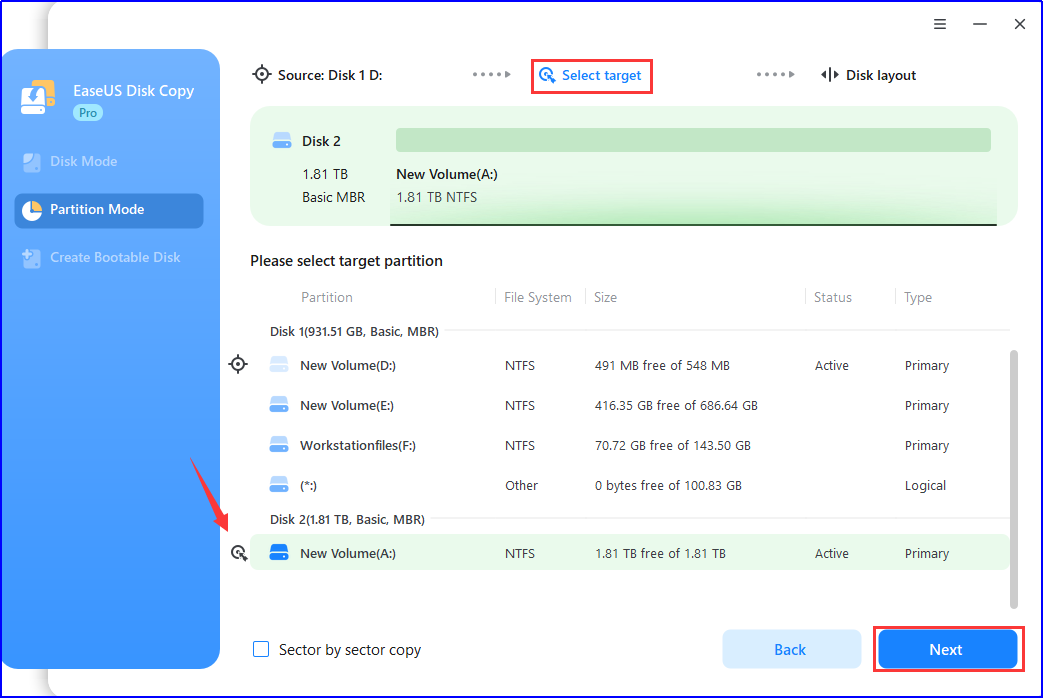
2. Choose a destination partition and then click Next.
3. Edit the target disk layout and then click Proceed to continue. Please be careful not to mis-select the partitions. You can double-check the source and target partition info displayed on the software.
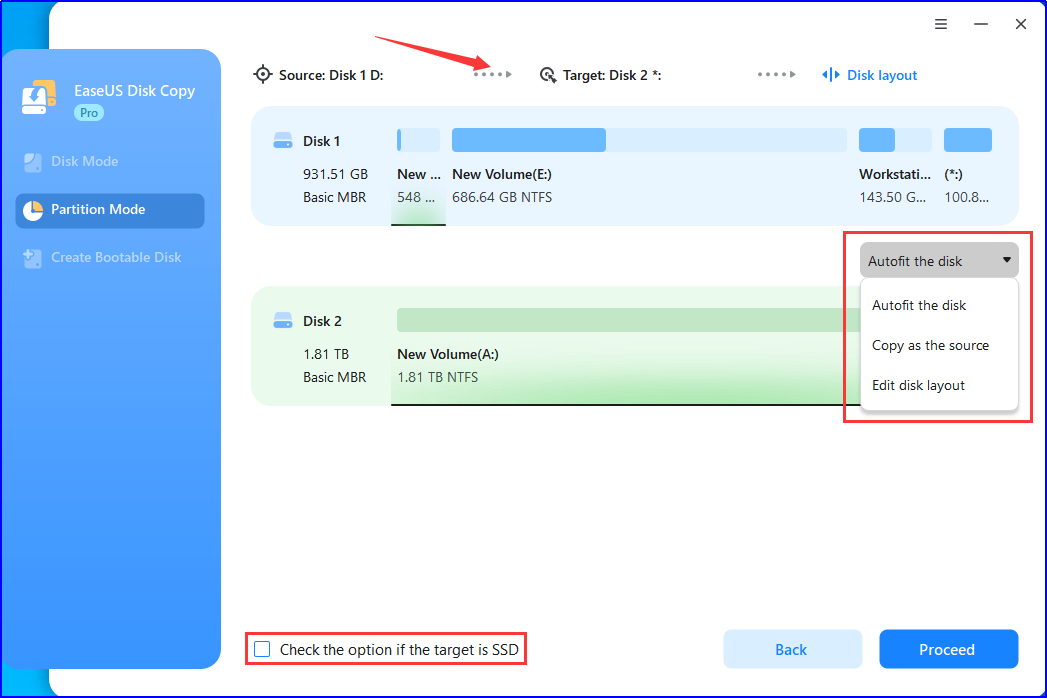
Autofit the disk: intelligently resizes the layout on the destination disk to optimize its performance and ensure that it is in the best possible state.
Copy as the source: make no change on the destination disk and the layout is the same as the source one.
Edit disk layout: allows you to manually resize/move partition layout on this destination disk.
Note:
Check the optimization for SSD option if the target disk is SSD.
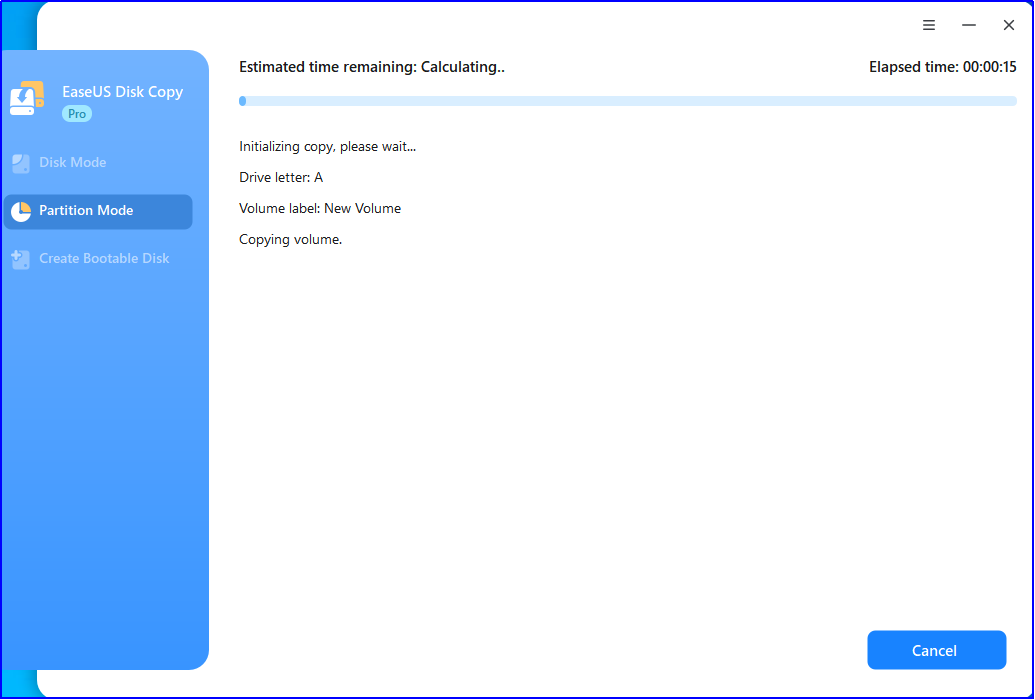
4. Finish the cloning.
WinPE Bootable Disk
A WinPE Bootable disk can be created using a paid edition. This disk can then be used to boot a computer into the WinPE environment in order to clone a disk or partition.
Create a bootable disk
Click Create Bootable Disk function on the main interface, and select one option (USB or CD/DVD) to create the bootable disk.
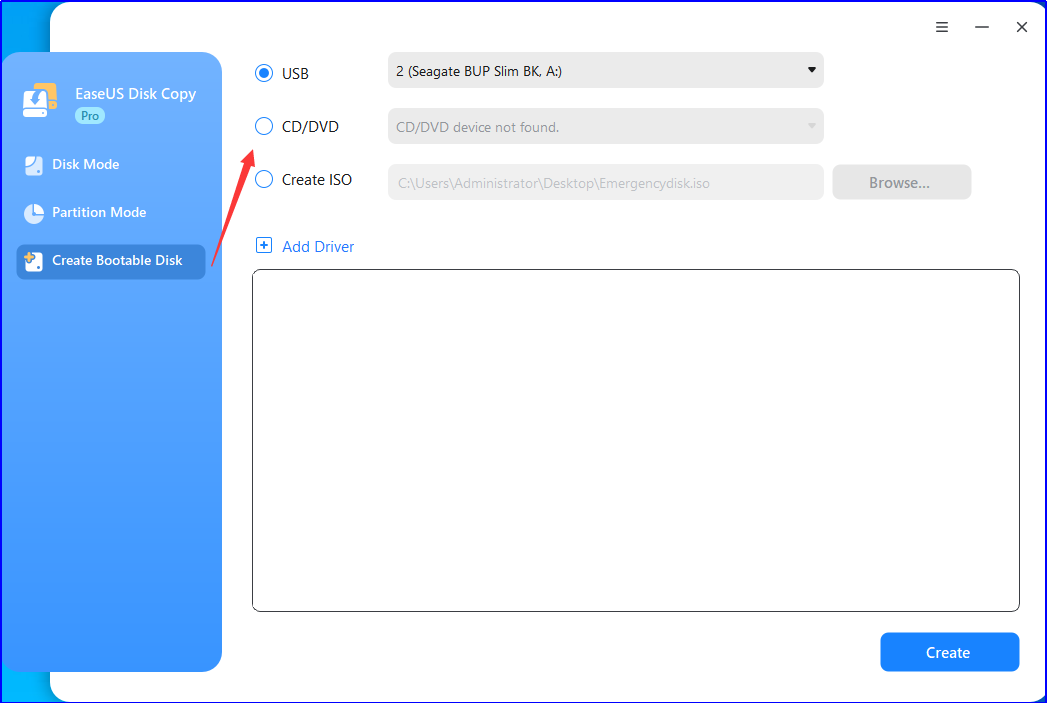
You can also export the ISO file with Create ISO option. Select this option and click Browse to specify a location for the ISO file storage. The ISO file can be used to burn a bootable Disk Copy CD/DVD or USB drive with any operating system using a burning software of your choice as far as it supports creating a bootable disk from an ISO image.
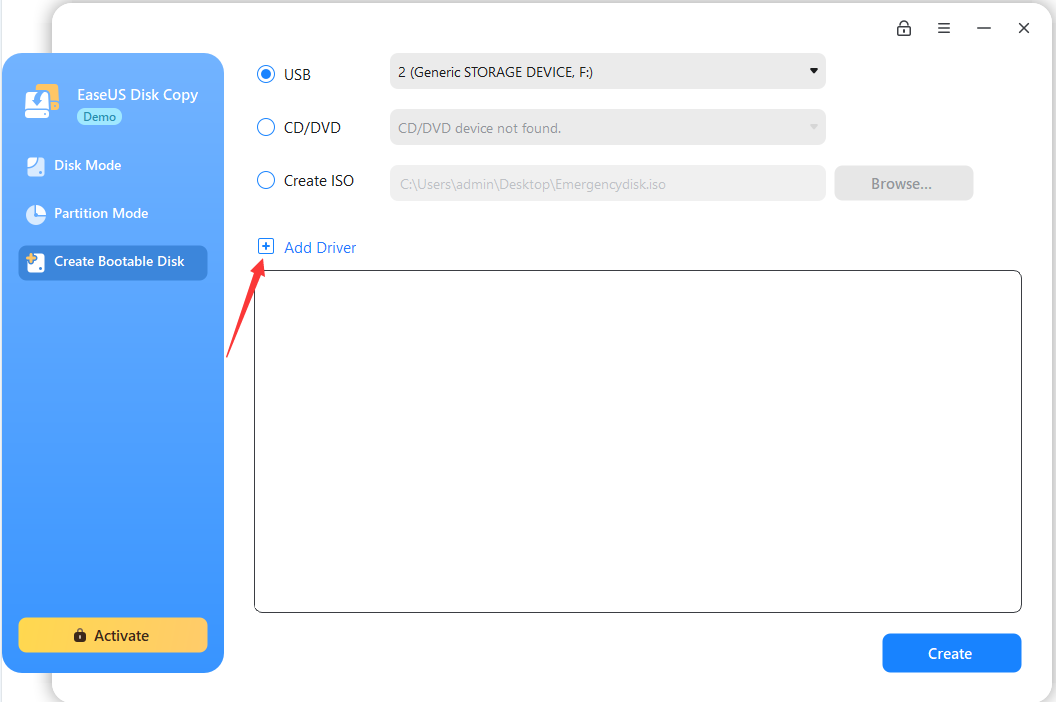
If your hardware components require additional drivers in order to function properly during the boot process, you can click the Add Driver option to add the specific drivers.
Once you have completed these steps, you will have a bootable Disk Copy disc or USB drive ready. You can use this disk to start Disk Copy on any PC.
Boot from the bootable disk
Insert the bootable Disk Copy bootable disk into the corresponding drive. Switch on the computer or reboot it. Make sure that the BIOS boots from the respective drive.
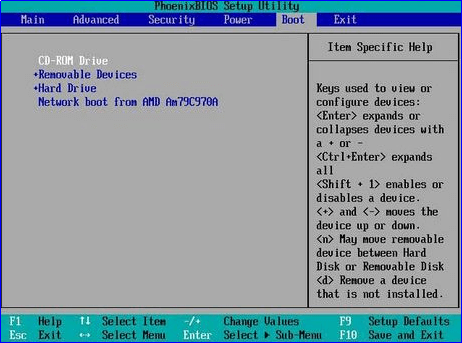
After booting from the bootable Disk Copy disk, the main interface of Disk Copy shows on the screen.
Please select a clone mode to start cloning, the operation is the same as running this software in Windows.
Note:
WinPE bootable disk doesn't include all drivers of hard disk, some special RAID disks cannot be recognized because of the lack of desired drivers. Please do the clone in Windows environment or manually add driver to WinPE bootable disk.
Deploy Mode (Server Only)
Deploy Mode is a newly released function since version 5.0. It is only available in server or higher version and aims to create a clone image and deploy the image to multiple PCs via PXE service. With this technology, the users will be saving lot of time on repeatedly configuring the cloning task.
Read me before starting the deployment:
1. The size of the destination disk should be equal to or larger than the source disk when using the Sector by Sector Copy.
2. It is possible to clone a larger disk to a smaller one if the smaller hard disk has enough capacity to fit the content of the larger disk when the Sector by Sector Copy option is disabled.
3. All data on the destination disk will be erased.
Steps for Deployment:
On Server:
Step 1: Specify the deployment image
1. Create an image after starting the service
it provides 2 options to specify the deployment image. For the very first time to use this function, please select Create an image after starting the service. Click on Browse to select a network location to save that image.
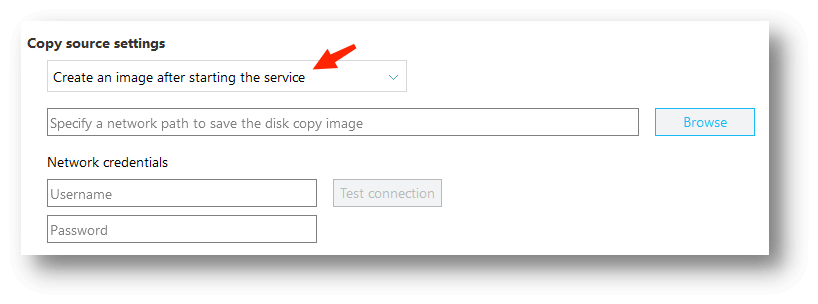
Note: The image file can only be saved to a network location.
2. Select an existing clone image
If you already have a created clone image, you can click on Browse to select that image.
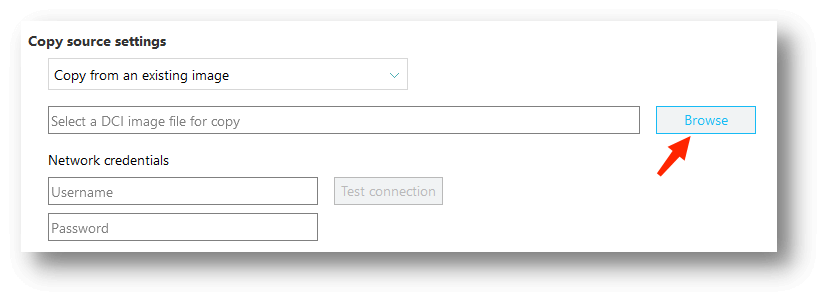
Note: You will have to fill in the network credentials here to authorize the upcoming deployment.
Step 2. Clone target settings
It provides 2 options to select the target machines: Clone all the machines booted via PXE service or manually select a certain machine by entering the corresponding MAC or IP address.
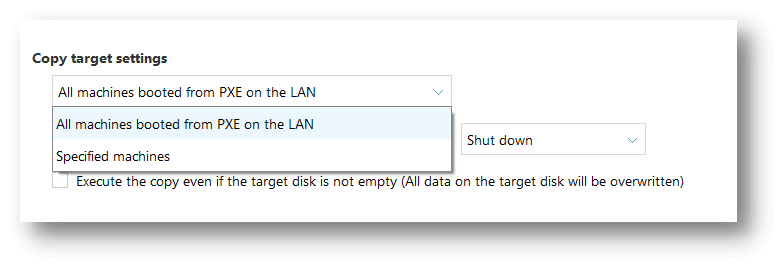
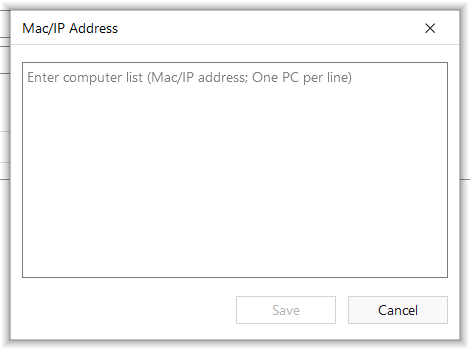
Here you can input the MAC/IP address for the target machine. Use Enter to separate the address of each machine by line.
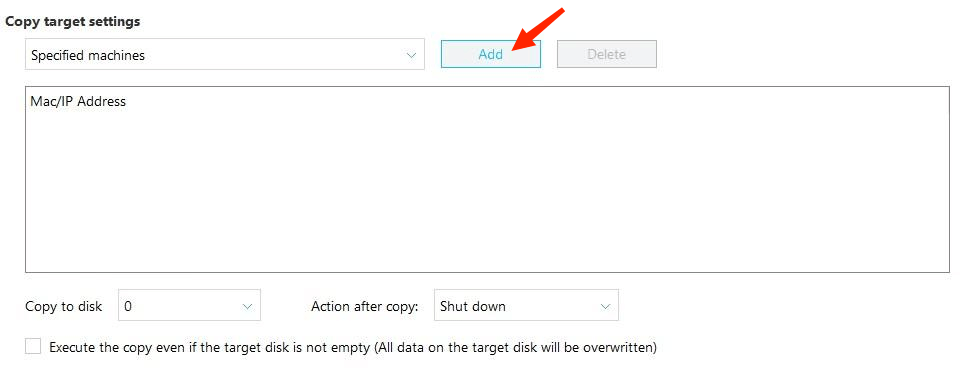
Note: The software will not execute the deployment on a non-empty disk in case of any data loss, if you do not hit the option Clone the target disk when it is not empty.
Step 3. Deployment
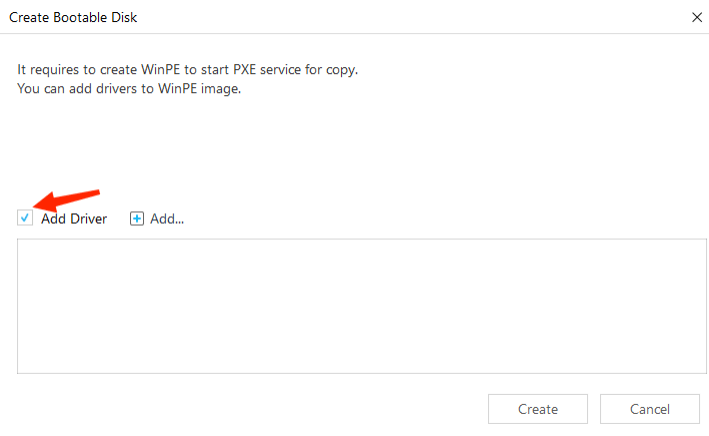
Once click on the Start button, it will immediately ask you to create a bootable disk to start with the PXE service. You can add drivers for specific target disks like RAID, iSCSI, etc.
Then it will enter the deployment interface. Here you will be monitoring the deployment status as the screenshot below.
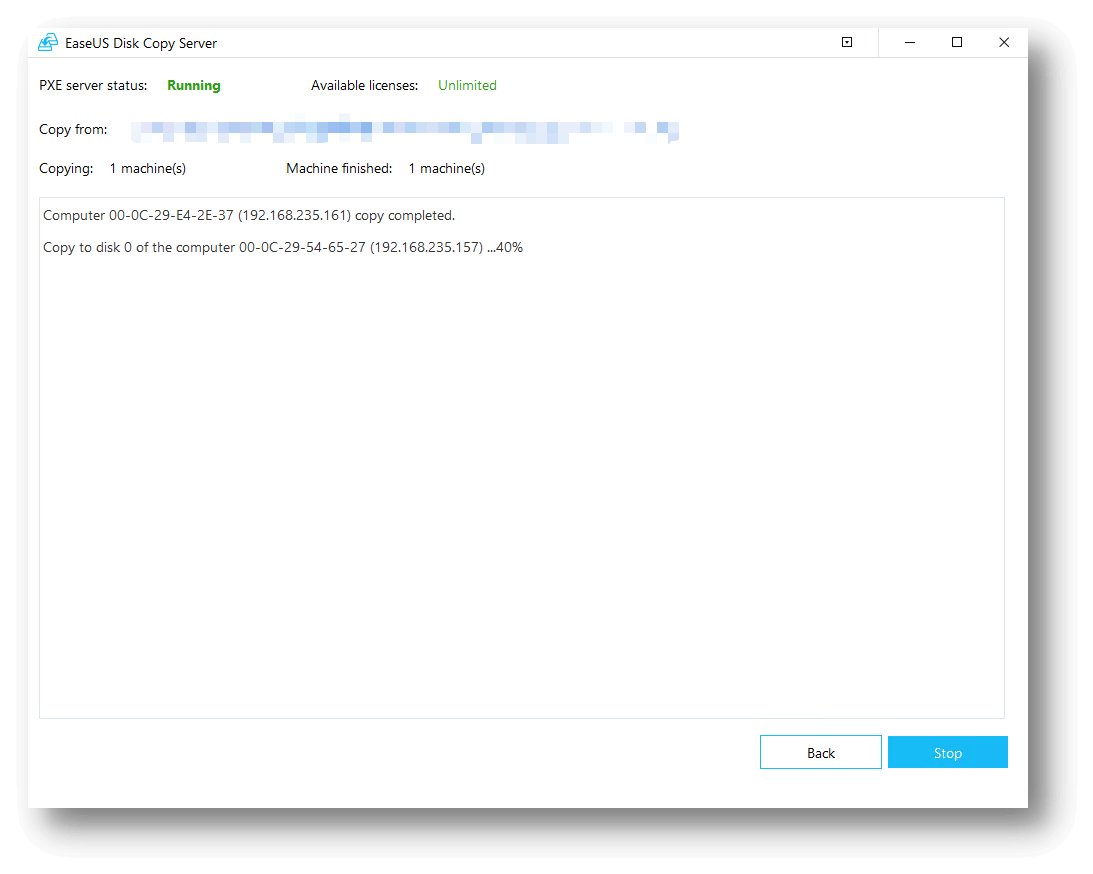
It will stop the deployment when it runs out of the available authorization seats or the current license is expired. You can click on Buy now to add more seats.
On Client:
1. Select the source disk after booting the client from the PXE service.
Note: Check the Sector by Sector Copy option if you need a sector-level clone.
2. Start to create a clone image and the image will be saved to the network location you specified on the server end.
3. Automatically restore the clone image to the target you specified on the server end.
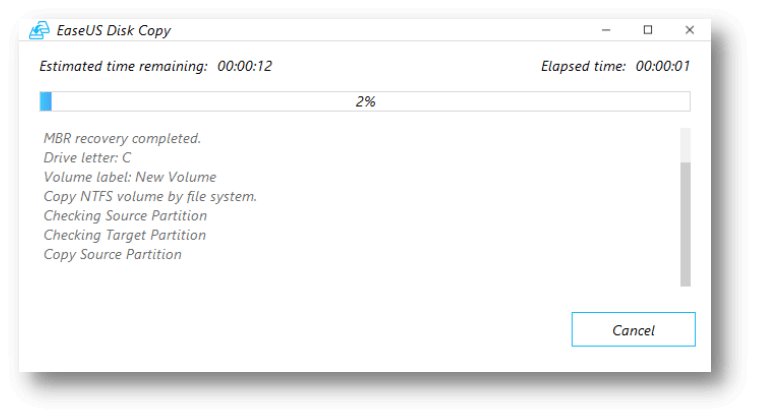
4. Finish the restoring process and reboot the machine.
Feedback and Support
We invite your comments on how well EaseUS Disk Copy performed, and we are also enthusiastic in replying all your questions about using it. Please feel free to contact us at:
[email protected]
We also provide online chat service and the Live Chat option can be located in the top navigation bar of EaseUS official website www.easeus.com.