If you use Time Machine on your Mac for backups and see the message, "Time Machine couldn't finish the backup to DiskStation.local", it often suggests an issue with the backup process, possibly because of connectivity problems or difficulties with the target disk, like 'DiskStation.local'.
You must deal with this error to prevent potential data loss. In this case, you can recover all your important files using EaseUS Data Recovery Wizard for Mac, which can restore documents, pictures, videos, and more on your Mac, adding double security to your Time Machine backups.
Possible Causes: Why Time Machine Couldn't Complete the Backup
Time Machine might have trouble finishing a backup to 'DiskStation.local' for various reasons. Knowing these possible causes can help you figure out and fix the problems. Here are some common things to check:
- Problems with the USB connection or errors on the Time Machine disk or Mac.
- There is not enough free space on the Time Machine backup disk, so the Time Machine is waiting to complete the first backup.
- Corrupted files on the Time Machine backup disk or your Mac is running out of free space.
- The Time Machine backup disk is not mounted successfully due to unmounting errors, such as com.apple.DiskManagement.disenter error 0.
Once you have a general idea of what's causing this error, there are two ways you can fix it: first, free up Time Machine backup disk storage space; second, repair the Time Machine backup disk errors with Mac First Aid.
Keep reading, and we will provide step-by-step guides on how to solve the Time Machine. We couldn't complete the backup to the "DiskStation.local" error.
Fix Insufficient Storage Space on the Time Machine Disk
Here are some of the methods you can use to create enough space on your Time Machine Disk:
Fix 1. Delete Unwanted Time Machine Backups
To create up space on your Time Machine backup disk, you can delete old backups manually. Keep in mind that with Time Machine using APFS volumes, you can't delete backups directly from the Time Machine app or remove individual files in a backup.
Instead, you can delete an entire backup from a specific time using Finder or Terminal. Just be aware that the chosen backups will be permanently deleted, so decide which ones to remove before you go ahead.
Use Finder to Delete Time Machine backups.
Step 1. Open your Time Machine backup disk on the desktop by double-clicking the disk icon.
Step 2. Find the backup from a particular time, right-click on it, and choose "Delete Immediately".
Use Terminal to delete Time Machine backups
Step 1. Press "Command + Space" to open Spotlight Search, then type Terminal and press "Enter".
Step 2. Open the "Terminal" app.

Step 3. Type this command: tmutil list backups and press "Enter" to see all Time Machine backups.
Step 4. Use the command sudo tmutil delete -d /Volumes/volume_name -t time_stamp to delete unwanted backups permanently. For example, sudo tmutil delete -d /Volumes/Backup -t 2023-07-05-173850.
Step 5. Enter your admin password (it won't show on the screen). Repeat step 4 for other backups you want to remove.
Once your Time Machine backup disk has enough space, try backing up your Mac again. If it still doesn't work, consider trying other solutions below.

Delete Files Mac But Still No Space: 4 Fixes
This article discusses the possible solutions for the problem that deleting files doesn't free up space on a Mac. Read more >>
Fix 2. Delete Large Files on the Time Machine Backup Disk
You must be careful when removing big files from your Time Machine backup disk because it could impact your backups. If you want to make space on the backup disk, you can try these simple steps:
Step 1. Click the "Enter Time Machine" button.
Step 2. Use the timeline on the right to find the backup date with the files you want to remove.
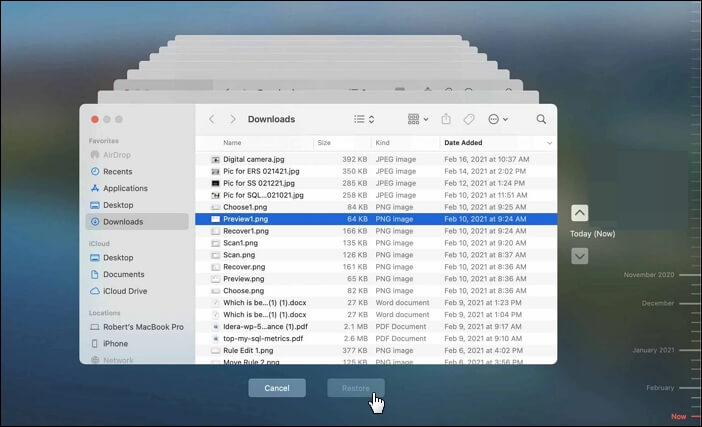
Step 3. Once you spot the big files, select them.
Step 5. In Time Machine, find the gear or action menu (usually with a downward arrow). Click on it and select "Delete All Backups of [File]".
Share this article on social media to help others learn how to fix the 'Time Machine couldn't complete backup to Disktastion.local' error.
Fix 3. Erase Time Machine backup disk and try again
Another solution you can use is to erase all the backups and start over.
Step 1. Go to the "Application > Utilities" folder and Open "Disk Utility".

Step 2. Click "View > Show All Devices".

Step 3. Pick the physical disk of your Time Machine backup disk and click "Erase".
Step 4. Give the disk a name and choose "APFS". Set the scheme to GUID Partition Map. Click "Erase" once more.

Step 5. Head back to Time Machine to set up your disk again.
Now, your Time Machine backups should hopefully work. If you find these solutions useful, please share this post!
Repair the Time Machine Disk via First Aid
Repairing a Time Machine disk using First Aid involves using the Disk Utility tool on macOS. Here are the steps to fix a Time Machine that is not working due to disk errors using First Aid:
Step 1. Go to the "Application > Utilities" folder and Open "Disk Utility".
Step 2. In "Disk Utility", locate and click on your Time Machine disk in the list on the left.
Step 3. Click the "First Aid" button at the top.
Step 4. Enter your admin username and password if needed, and hit the "Run" button.

If the First Aid process has failed, don't worry! Install EaseUS software to restore your stored data first.
Step 5. Wait as Disk Utility scans and resolves any problems on your Time Machine disk. This process may take a while.
After completion, review the results. Disk Utility will report if it is discovered and address any issues.
Conclusion
From the article, you've learned that it's easy to fix Time Machine, but it couldn't complete the backup error. Ensure your backup is connected to your computer. Delete unnecessary backups. If you need to recover your file, we recommend downloading EaseUS Data Recovery Wizard for Mac.
Time Machine Couldn't Complete the Backup to DiskStation.local FAQs
In this section, you'll get common questions people ask about the "Time Machine Couldn't Complete the Backup" issue.
1. Why is Time Machine not completing my backup?
Time Machine may not finish backing up for a few reasons. It could be problems with the USB connection, not enough space on the backup disk, clashes with other programs, your Mac running out of space, or errors on either the Time Machine disk or your Mac.
2. How do I back up Time Machine to Synology?
To back up Time Machine to Synology, first, create a shared folder on your Synology NAS. Then, enable Time Machine in Synology DSM, set user permissions, and finally, select the Synology share as your Time Machine backup destination in your Mac's Time Machine preferences for seamless and reliable data protection.
3. Why can't Time Machine create a local snapshot?
If Time Machine is unable to create a local snapshot, there might be several reasons. Check for issues with available disk space on your Mac, conflicts with third-party applications, or problems with the file system.
Make sure that your Time Machine preferences are correctly configured, and troubleshoot any underlying factors affecting the creation of local snapshots.
Was This Page Helpful?
Brithny is a technology enthusiast, aiming to make readers' tech lives easy and enjoyable. She loves exploring new technologies and writing technical how-to tips. In her spare time, she loves sharing things about her game experience on Facebook or Twitter.
Related Articles
-
5 Solutions on Samsung 990 Pro SSD Health Drops Issue
![author icon]() Cici/2024-01-11
Cici/2024-01-11 -
How to Optimize Mac Performance | 8 Proven Ways to Speed Up Slow MacBook Pro
![author icon]() Brithny/2024-01-11
Brithny/2024-01-11 -
(Top 8 Picks) What to Do If Computer Turns Off and On Repeatedly
![author icon]() Jerry/2024-01-26
Jerry/2024-01-26 -
SD Card Keeps Disconnecting or Disappearing
![author icon]() Tracy King/2024-01-11
Tracy King/2024-01-11

EaseUS Data Recovery Services
EaseUS data recovery experts have uneaqualed expertise to repair disks/systems and salvage data from all devices like RAID, HDD, SSD, USB, etc.