Having your Mac stalled at the "Searching for Time Machine backups", particularly if you require data recovery, is aggravating. This problem typically occurs while restoring Time Machine backups or setting up Time Machine, which makes it impossible for you to access Time Machine backups.
The good news is that various efficient ways exist to fix this problem and get your Mac back online. This article will help you fix the "Searching for Time Machine backups" problem on your Mac, from data recovery without backups to disk connection issues. Let's delve into further details!
| Workable Solutions | Step-by-step Troubleshooting |
|---|---|
| Solution 1. Recover Mac Data Without Time Machine | Select the disk location to search for lost files where you lost data, and click Search for lost files...Full steps |
| Solution 2. Reconnect the Time Machine Disk | Check that the physical backup drive is switched on and has a sufficient charge...Full steps |
| Solution 3. Restart Your Mac and Search Again | Navigate to the Apple menu, which is situated in the upper left corner of your screen...Full steps |
| Solution 4. Repair the Time Machine Hard Drive | Restart the Mac in Recovery Mode. Then, navigate to Applications > Utilities > Disk Utility...Full steps |
| Solution 5. Partition a New Drive | Go to the Utilities folder and launch Disk Utility; choose the freshly inserted drive from the left side...Full steps |
Solution 1. Recover Mac Data Without Time Machine Backups
Are you worried about your important documents being lost due to a Time Machine Backup error? Worry not! EaseUS Data Recovery Wizard for Mac is an effective data recovery tool that can help users recover lost or deleted data from their Macs quickly and safely!
You Can Trust EaseUS Data Recovery Software
EaseUS Data Recovery Wizard has acquired an extensive technical base in data recovery and trusted by billions of users since 2005. Check out reviews on Trustpilot.
You can retrieve almost all types of files in a few clicks. EaseUS Data Recovery Wizard for Mac is a reliable method for repairing Time Machine backups and recovering data from the "Searching for Time Machine backups" or "No Time Machine backup found" issue on your Mac.
This program uses advanced algorithms to regain data even when Time Machine backups are taking forever to scan. It also allows you to recover deleted files on a Mac without Time Machine backup; check out the following steps:
Step 1. Search for lost files
Select the disk location to search for lost files (it can be an internal HDD/SSD or an external hard drive) where you lost data and files. Click the "Search for lost files" button.
Note: Before data recovery, you'd better click "Disk Backup" from the left sidebar to create a backup of your HDD/SSD to avoid further data loss. After backing up, the software can recover data from your disk backup, and you can use the HDD or SSD again.

Step 2. Go through the scanning results
This software will immediately scan your selected disk volume and display pictures, documents, audio, videos, and emails on the left pane.

Step 3. Select the file(s) and recover
Click the data to preview, and click the "Recover" button to have them back.

Solution 2. Reconnect the Time Machine Disk to Fix the Error
To fix the issue of macOS recovery becoming stuck when looking for the Time Machine backup disk, ensure a steady connection between the backup drive and your Mac. Follow these steps to reconnect the Time Machine disk and properly resolve the issue:
Step 1. Check that the physical backup drive is switched on and has a sufficient charge.
Step 2. Disconnect the backup disk from your Mac.

Step 3. After a little while, reattach the disk to your Mac.
Step 4. Restart the recovery procedure.
Step 5. If the USB does not connect to the backup drive, try connecting using a different USB port and cable.
Step 6. For network drives, make sure a reliable network connection is established.
Share this article on social media to help others learn how to fix the "Searching for Time Machine backups" error when restoring your Mac from Time Machine.
Solution 3. Restart Your Mac and Search the Time Machine Backups Again
If your Mac is still having difficulties finding Time Machine backups after trying previous troubleshooting options, a simple restart may assist. Restarting your MacBook Pro or Air will refresh its system processes and may address any underlying problems causing the problem.
Follow these instructions to restart your Mac and look for Time Machine backups again.
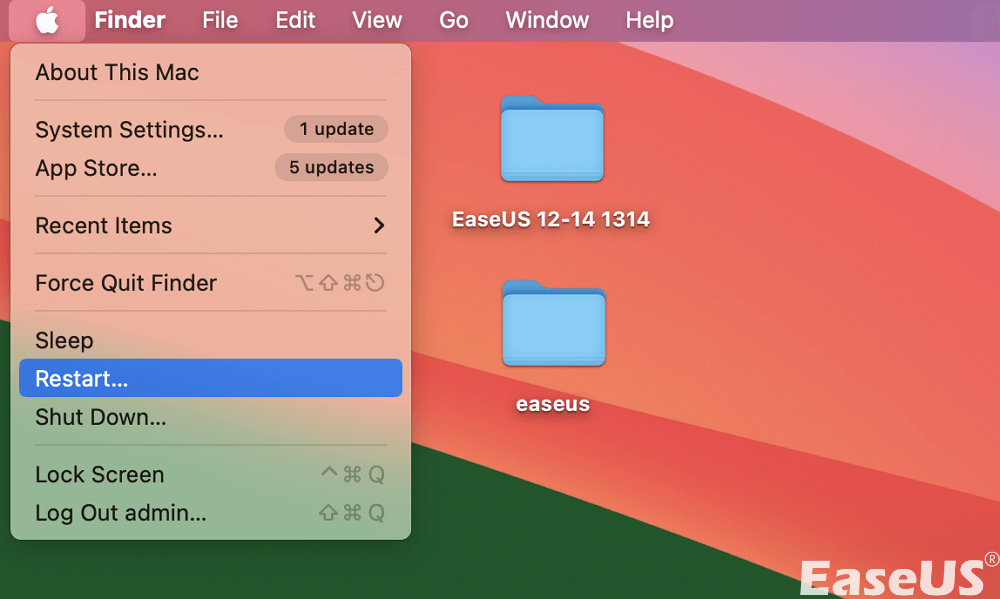
Step 1. Navigate to the Apple menu, which is situated in the upper left corner of your screen. Click "Restart".
Note: Hold the Command + R keys to restart your Mac until you see the Apple logo.
Step 2. When the macOS Utilities window displays, release the keys. If asked, enter your Mac's password to continue.
Step 3. After the starting procedure is completed, the macOS Utilities window will open. To continue searching for Time Machine backups, pick "Restore from Time Machine Backup" from the available alternatives.

Solution 4. Repair the Time Machine Disk via First Aid
If your Mac is still having trouble finding Time Machine backups, you may try repairing the Time Machine disk using Disk Utility's First Aid tool. Follow these procedures to use First Aid and repair the backup disk:
Step 1. Restart the Mac in Recovery Mode. Then, navigate to "Applications > Utilities > Disk Utility".

Step 2. In Disk Utility, use the sidebar to pick the disk holding the Time Machine backups.
Step 3. Select the option "First Aid" on the Disk Utility window.
Step 4. To begin the First Aid procedure, click the "Run" button.

Step 5. If Disk Utility declares that everything is alright, it means that the disk was repaired successfully.
Step 6. If Disk Utility finds issues, follow the steps to identify and fix any faulty files, which may include replacing, removing, or recreating them.
Running First Aid in Disk Utility allows you to try to repair the Time Machine disk and cure any problems that are causing the Time Machine backup search to take so long.
Solution 5. Partition a New Drive when a Mac Forever to Search for TM Backups
Have you installed a new drive, and is your Mac taking forever to search Time Machine backups? Partitioning a new disk may help address the problem.
Follow the instructions below to partition the new drive:
Step 1. Go to the "Utilities" folder and launch "Disk Utility".
Step 2. Choose the freshly inserted drive from the left side of the Disk Utility window.
Step 3. In the main window, choose the "Partition" tab and enter a partition number.
Step 4. Click the Options option, choose "GUID Partition Map" as the partition scheme, and then save your modifications.

Step 5. Change the format type to "macOS Extended", then apply your changes and wait for the process to finish. Once the partitioning is complete, pick the newly formed volume and go to the "Erase" tab.
Step 6. Change the format type to Mac OS Extended, click the Security icon, choose Zero data, and then click "OK". To begin the erasing process, click the "Erase" button. Depending on the size of the disk, this might take many hours.
Conclusion
Resolving the problem of Time Machine backups failing to perform correctly is critical for Mac customers' data security and peace of mind. By following the techniques given in this tutorial, users may successfully diagnose and resolve any difficulties with Time Machine backups.
There are many solutions for ensuring that Time Machine runs well, including correcting disk issues, reconnecting backup disks, and partitioning new drives. Furthermore, given the necessity of data backup, users should utilize reputable recovery software, such as EaseUS Data Recovery Wizard for Mac, to retrieve their valuable data from the Time Machine Backups.
Searching for Time Machine Backups FAQs
Let's have a look at what users search for when they face the error 'Searching for Time Machine Backup" on Mac:
1. How long should searching for a Time Machine backup take?
The size of the backup drive, the quantity of data being backed up, and the Mac's CPU performance may affect how long Time Machine backup searches take. Locating the backup shouldn't take more than a few minutes, but bigger backups or disk difficulties may take longer.
2. Why is my Time Machine backup not showing up?
Your Time Machine backup may not display for numerous reasons. A disconnected or faulty backup drive, Time Machine settings, or damaged backup data might cause it. This problem may be fixed by checking the connections, configuring the backup drive in Time Machine options, and fixing disk failures.
3. Where are my Time Machine backups stored?
Time Machine backups are usually kept on an external hard disk or NAS. The backups are stored in the "/.MobileBackups" folder located in the root volume. However, in the newer Mac version, the backup is stored on the startup disk but is hidden and cannot be scanned.
Was This Page Helpful?
Brithny is a technology enthusiast, aiming to make readers' tech lives easy and enjoyable. She loves exploring new technologies and writing technical how-to tips. In her spare time, she loves sharing things about her game experience on Facebook or Twitter.
Related Articles
-
What Is the Best Format for External Hard Drive Mac [2024 New]
![author icon]() Tracy King/2024-01-11
Tracy King/2024-01-11 -
How to Factory Reset M1/M2 Mac in 2024 [for MacBook, iMac, Mac mini]
![author icon]() Dany/2024-01-11
Dany/2024-01-11 -
Fix GRUB Loading Error 15, 17, 21, 22 and Recover Data
![author icon]() Jean/2024-01-11
Jean/2024-01-11 -
System Service Exception Stop Code 0x0000003B in Windows 10 [10 Fixes]
![author icon]() Brithny/2024-01-11
Brithny/2024-01-11

EaseUS Data Recovery Services
EaseUS data recovery experts have uneaqualed expertise to repair disks/systems and salvage data from all devices like RAID, HDD, SSD, USB, etc.