Welcome
Thanks for using EaseUS Todo PCTrans. Usually, a new computer (PC) comes with faster processing, more memory, and enhanced graphics. After purchasing a new PC, one of the most daunting tasks is to figure out how to transfer the accounts, settings, programs, and data from the old PC to a new one and maintain routine jobs as usual.
Todo PCTrans is born to make the migration process easier for you. This powerful and cost-effective application is able to move all of your selected accounts, settings, applications, files, and folders between 2 computers in an easy and simple way, and it is also able to transfer programs and data from a smaller partition to a larger one for releasing space within a computer.
Todo PCTrans transfers your PC through the network connection (local area) or compressed image file, and both source and target computer require a client of Todo PCTrans installed. It is worth mentioning that the two computers can also be directly connected via an ethernet crossover cable when using the network connection method.
Glossary
Old PC/Source PC
The source PC is the "old" PC that contains the accounts, applications, files, and settings that you wish to move to the destination "new" PC.
New PC/Destination PC
The "new" PC is the PC to which the accounts, applications, files, and settings are moved.
Transfer
The process of copying all of your selected accounts, applications, files, and settings from your "old" PC to your "new" PC.
Pre-Transfer Checklist
1. System Requirements
- • Windows XP 32bit
- • Windows Vista 32bit/64bit
- • Windows 7 32bit/64bit
- • Windows 8/8.1 32bit/64bit
- • Windows 10 32bit/64bit
- • Windows 11 32bit/64bit
- • Windows Server 2003/2008/2012/2016/2019
2. Operating System on the new PC must be equal or newer than the source PC. For example, the data and applications cannot be moved from Windows 7 to XP via the network connection transfer method.
3. Todo PCTrans has been installed on both PCs.
Also, pay attention to the next two if you are transferring via LAN.
4. Keep network connection stable and unobstructed while transferring.
5. Disable anti-virus programs and firewall on source and target computer to ensure successful connection.
Activation
Different versions of EaseUS Todo PCTrans
Free version
- ♦ Software title reads EaseUS Todo PCTrans Free
- ♦ Allow users to transfer no more than 2 programs and 500MB files, disk junk cleanup no more than 500 MB files
Trial version
- ♦ Software title reads EaseUS Todo PCTrans Trial
- ♦ Allow users to view which programs, data, and the user account can be transferred, but it is not allowed to do a real transfer without a license code
How to activate
To enjoy all features on business use, please simply click Upgrade to Full Version to open the window for purchasing or entering the license code. You can also see the edition difference of Todo PCTrans.

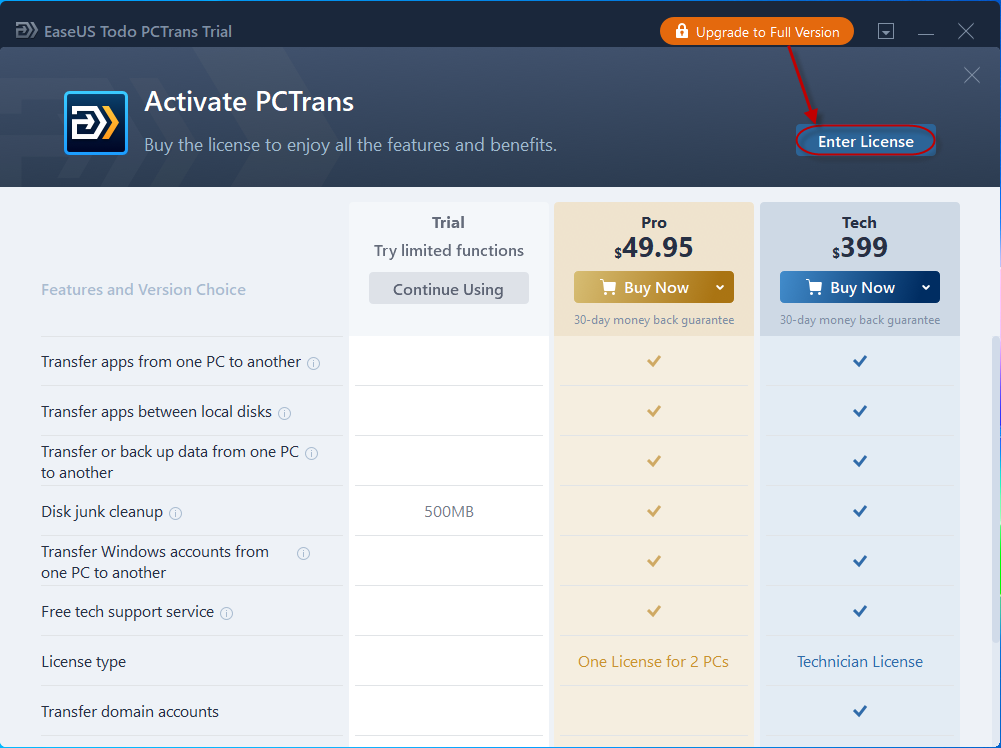
Press the Enter License button then copy and paste your license code to activate the software.
Once activated, the program title reads EaseUS Todo PCTrans Professional/Technician without further indication of Free or Trial.
Transfer
There are four methods of transferring: PC to PC/Backup & Restore/App Migration/Data Rescue.

PC to PC is able to transfer applications, data, accounts, and settings between two network-connected PCs.
Backup & Restore prepares an image file to include applications, data, accounts, and settings in advance, then transfer from the image to the target PC. It transfers between two PCs or on the same PC after reinstalling the system. This method can also be used to back up your programs, data, and accounts.
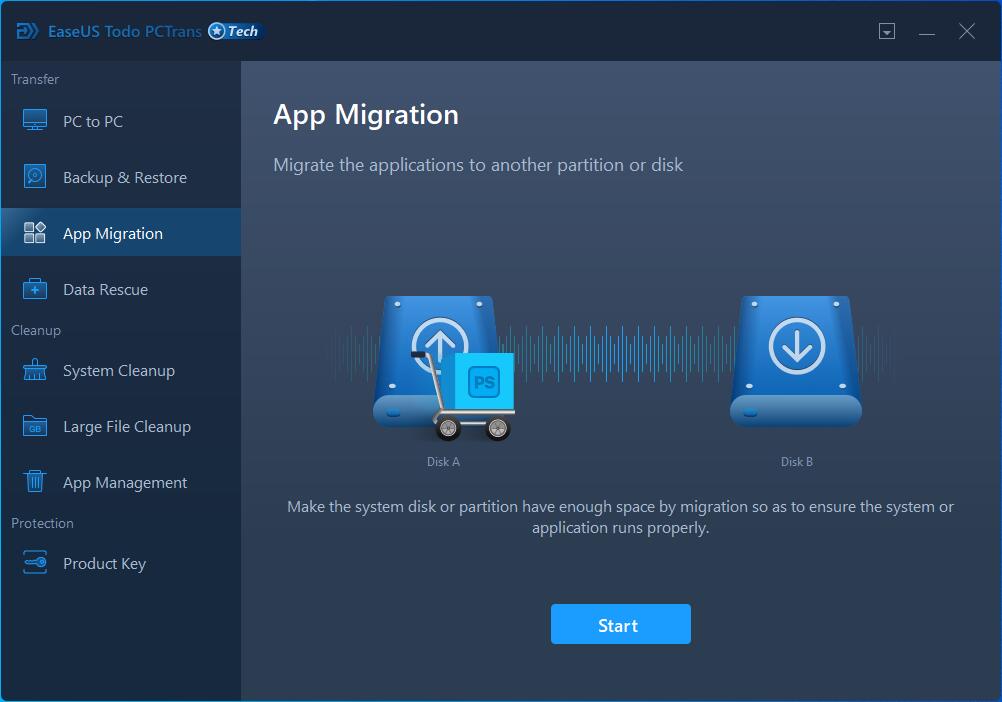
App Migration only transfers applications from one to another partition on the internal hard disk.
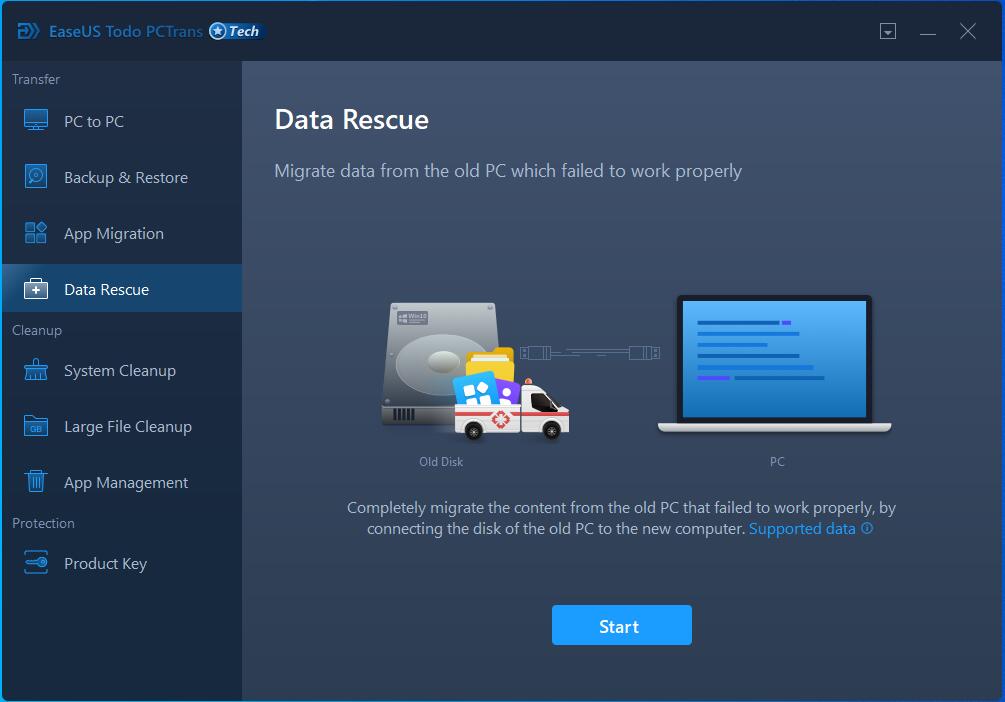
Data Rescue is able to migrate the content from the old PC that failed to work properly, by connecting the disk of the old computer to the new computer.
PC to PC
Connect source and target PC
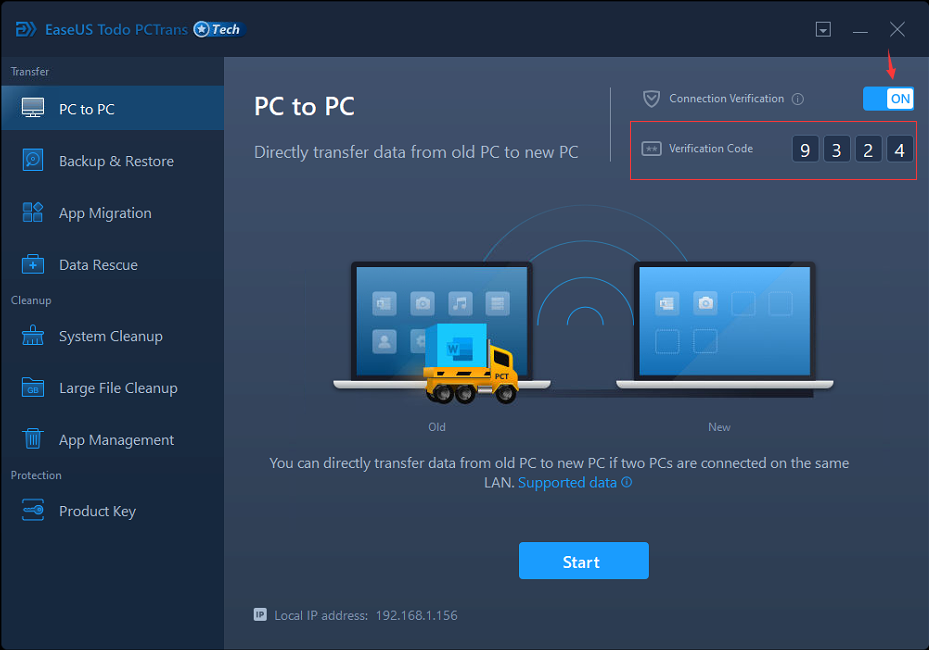
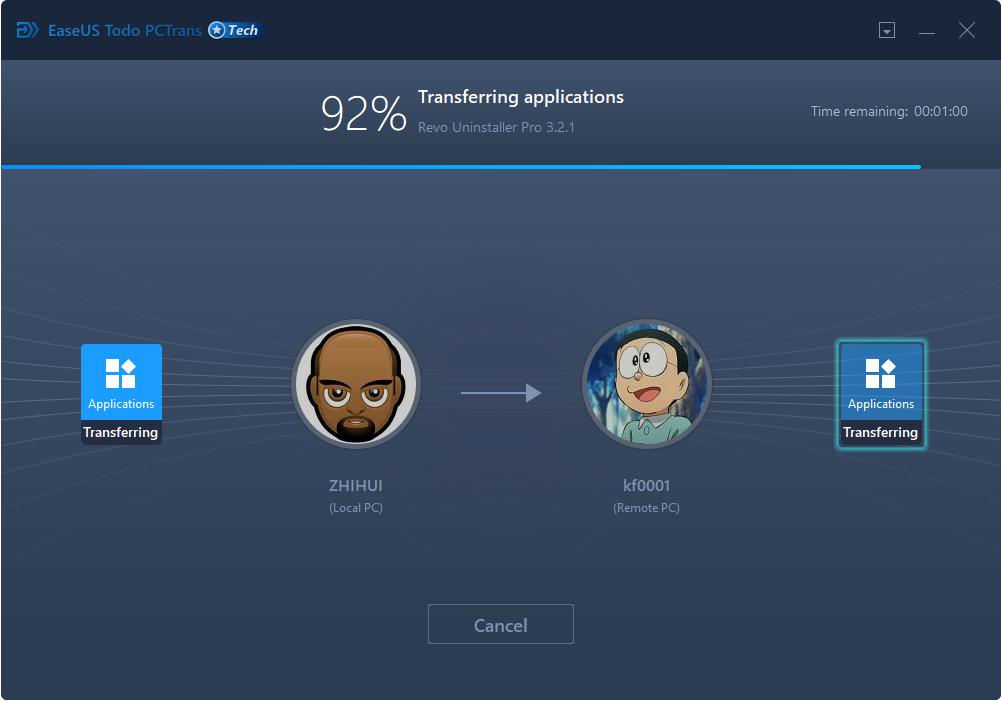
1. Launch Todo PCTrans and select PC to PC. The IP address information on the current PC will be stated at the bottom.
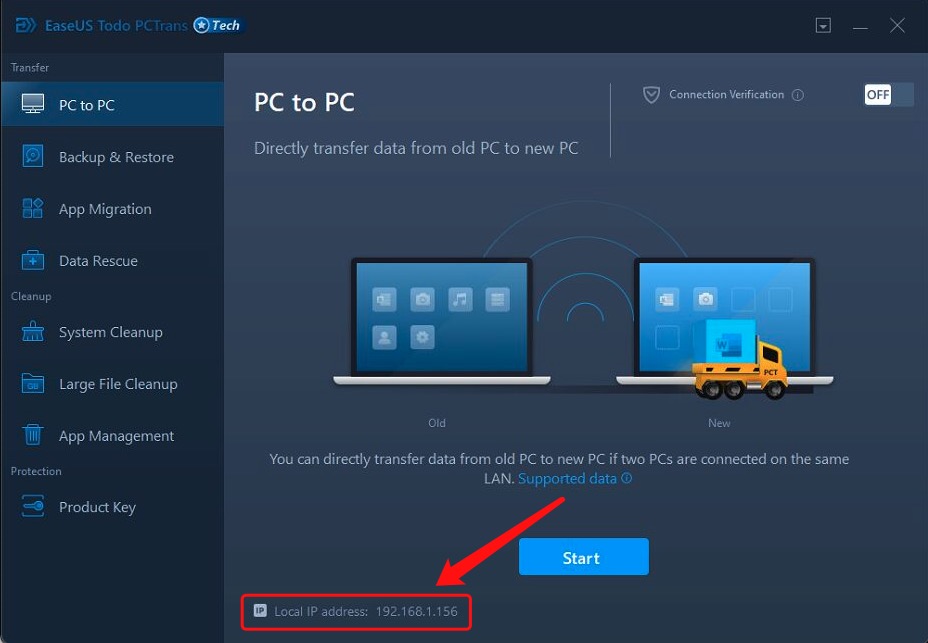
2. Click PC to PC button and get the window to choose the current PC as the new PC(target)or the old PC(source). Target PC is the PC you want to transfer the applications and files to, while the Source PC is the PC you want to transfer the applications from.

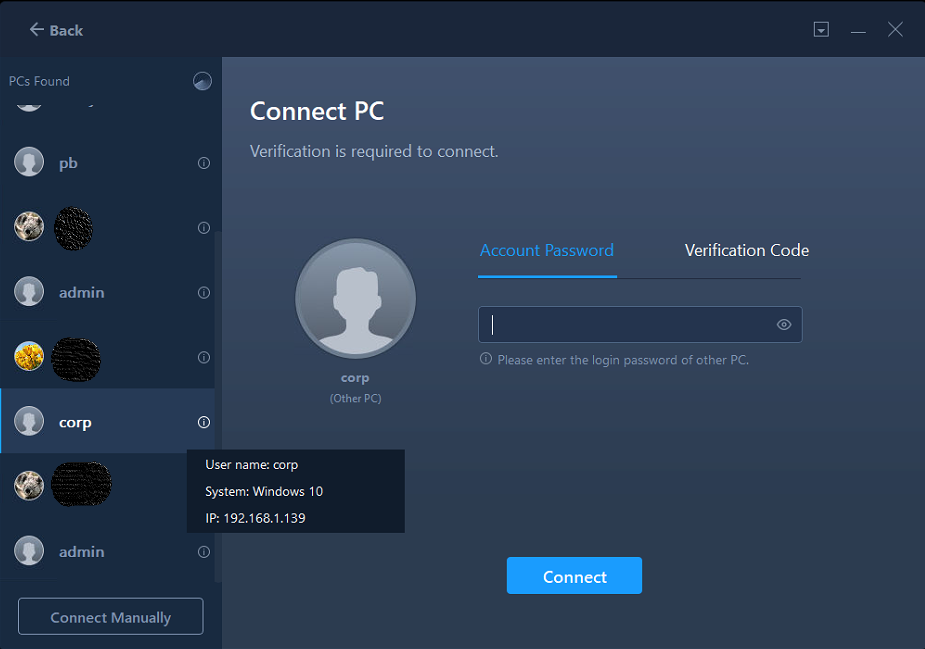
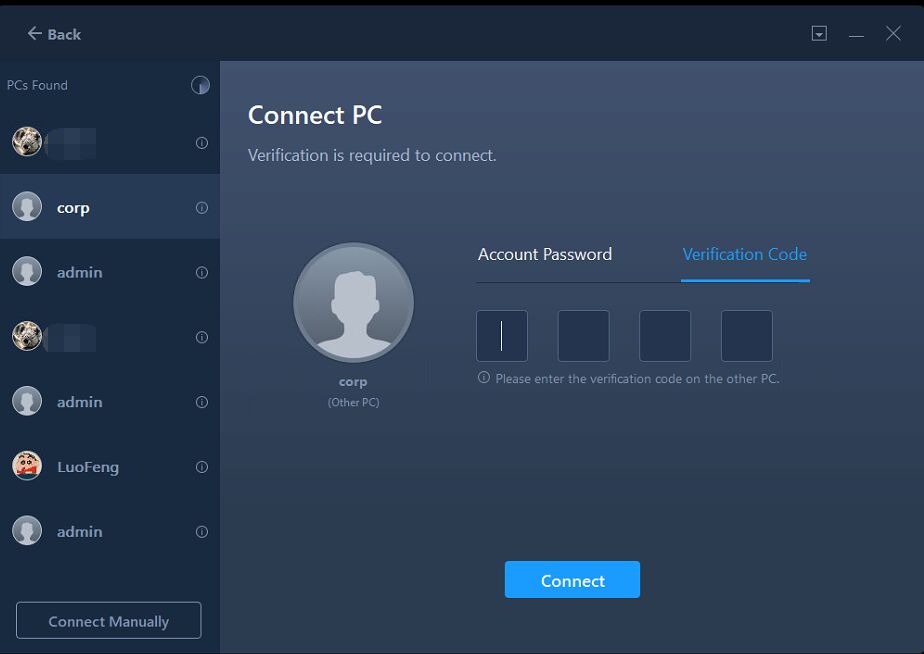
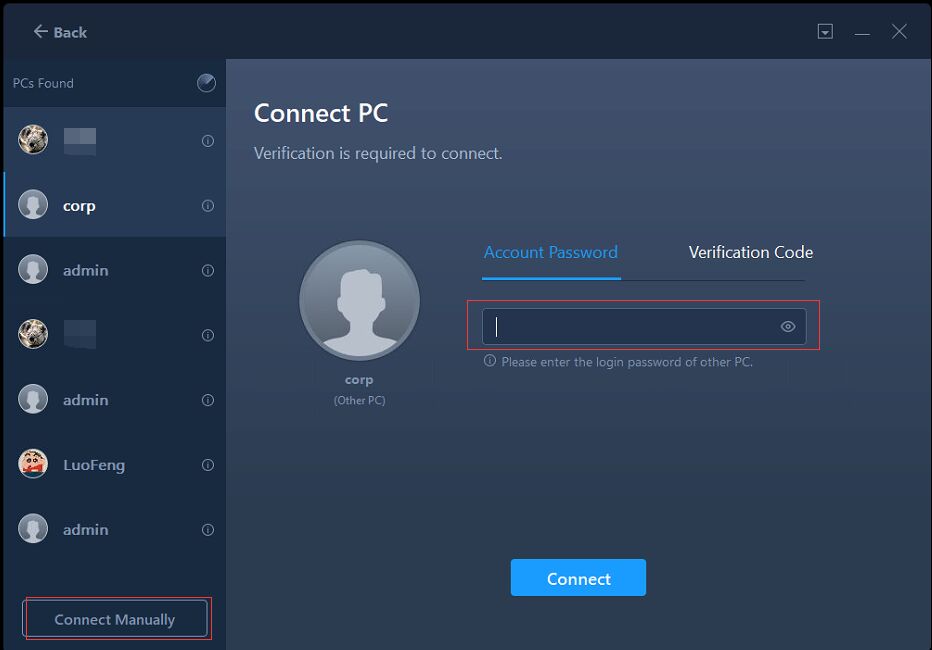
3. After you select your drive, the product will scan all the computers in the same network and list them on the left panel. Select a computer according to the username (Windows account) and IP address, then input the password of the account on that computer and select the transfer direction to connect the two computers. If you do not have a password for that account, leave it blank and directly click Connect.
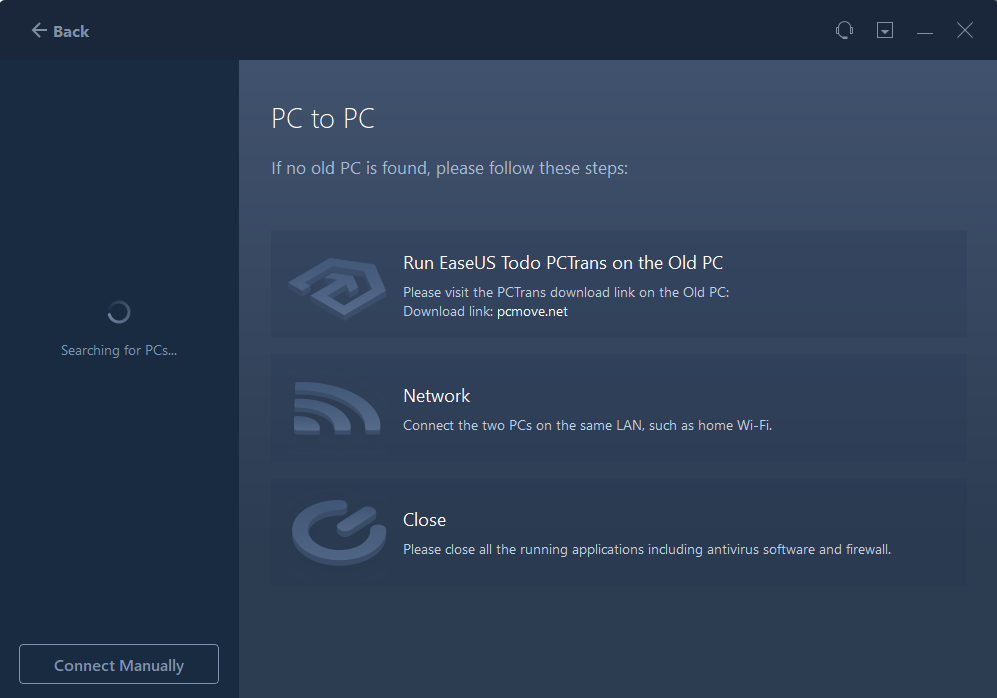
In case no PC is detected, a page will be presented containing useful hints to help you troubleshoot the issue.
1. Visit www.pcmove.net to download and install the app on the other PC.
2. Make sure the two PCs are connected to the same LAN.
3. Turn off all the safety tools and firewall temporarily
Todo PCTrans also provides the verification code method to connect the two computers. The Verification code can be located on the machine you selected.
If the PC cannot be listed directly, please click the Connect Manually to add it via IP or computer name.
Note:
Please ensure the source and target PCs are on the same LAN and the target PC has the same version of Todo PCTrans installed.
Select the content for transfer
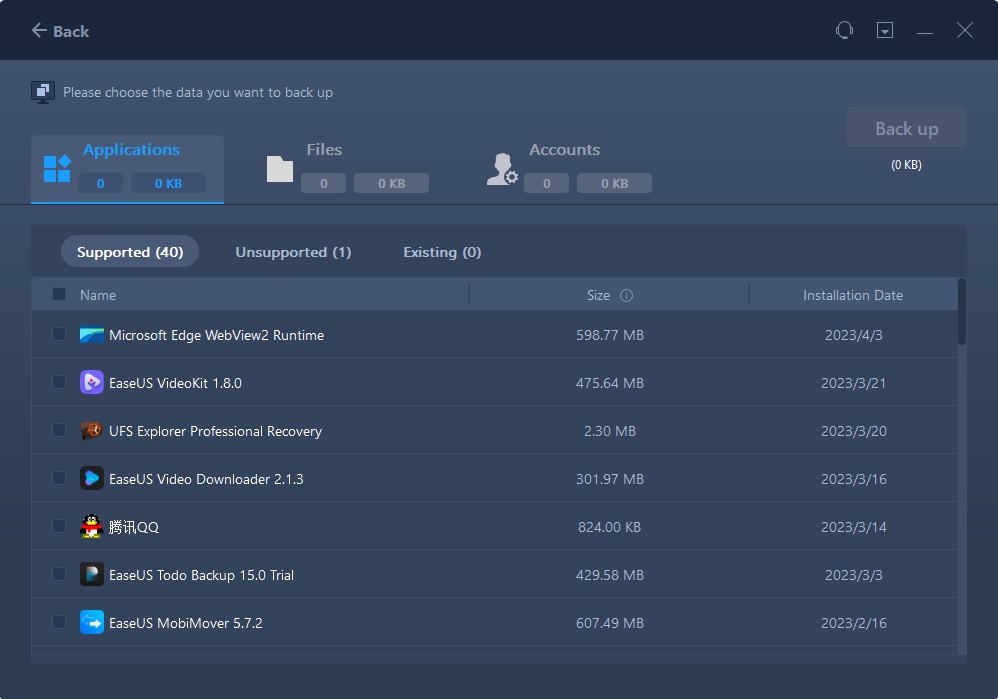
1. Todo PCTrans needs some time to enumerate (load) all the applications, data, and accounts from the old (source) PC. The edit button will be clickable when enumeration completes. The required time varies due to the amount of data that needs to be transferred.
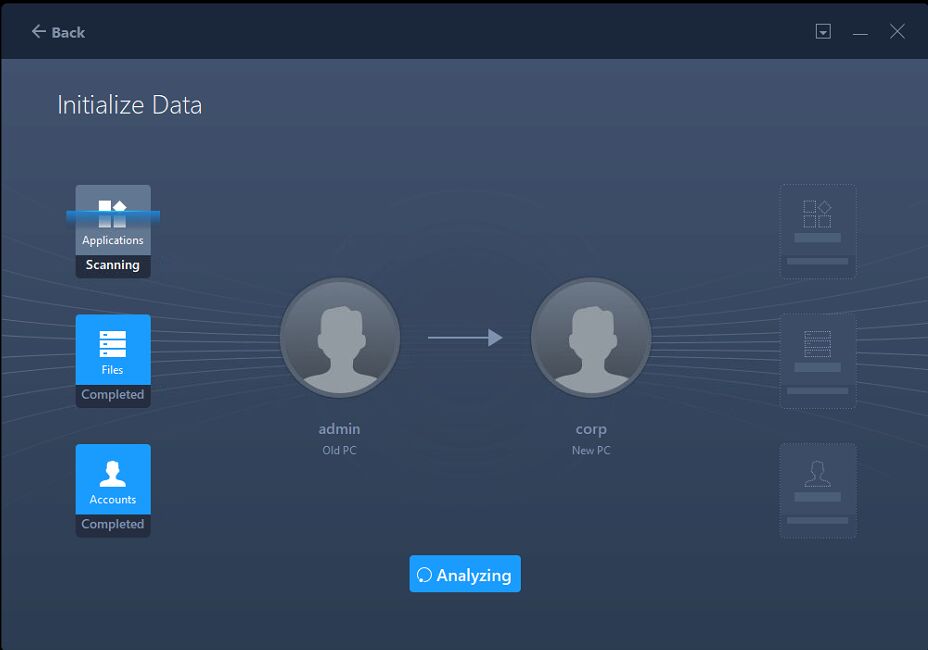
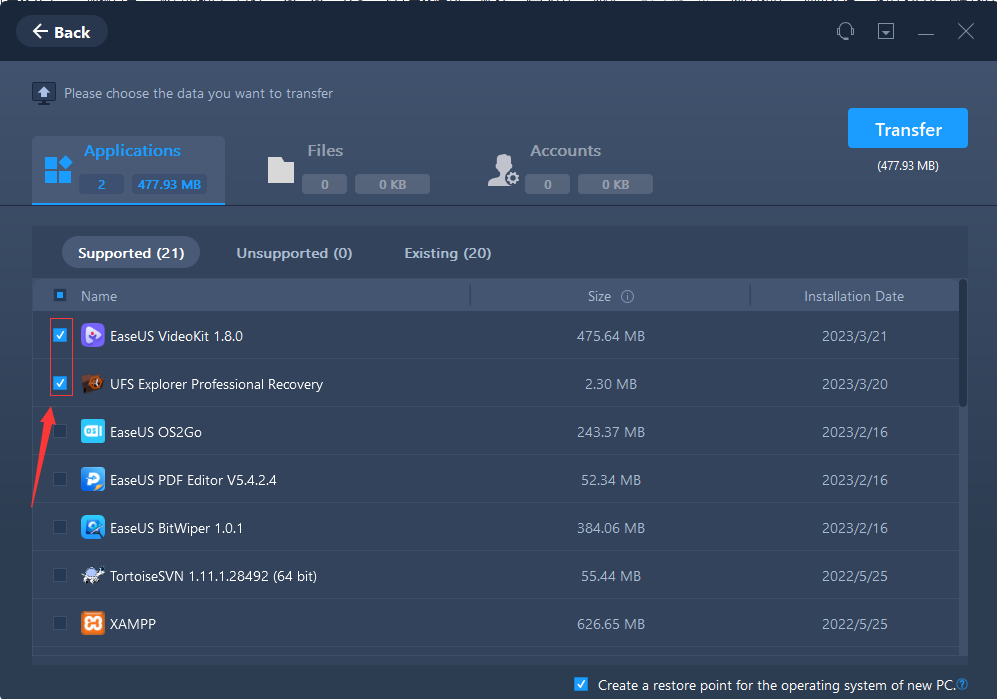
2. You will see all the applications, files, folders, accounts, and settings found by our product in the list.

Creating a restore point for the operating system of the other PC ensures that you are always able to roll back your system to the status before transfer. However, enabling this option requires several minutes to finish the process.
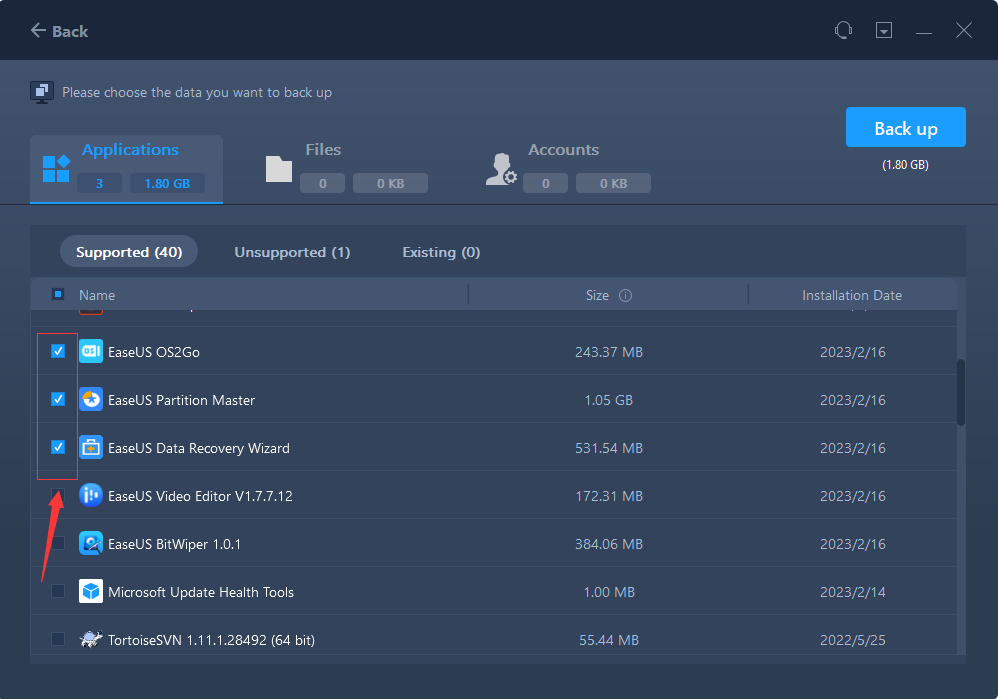
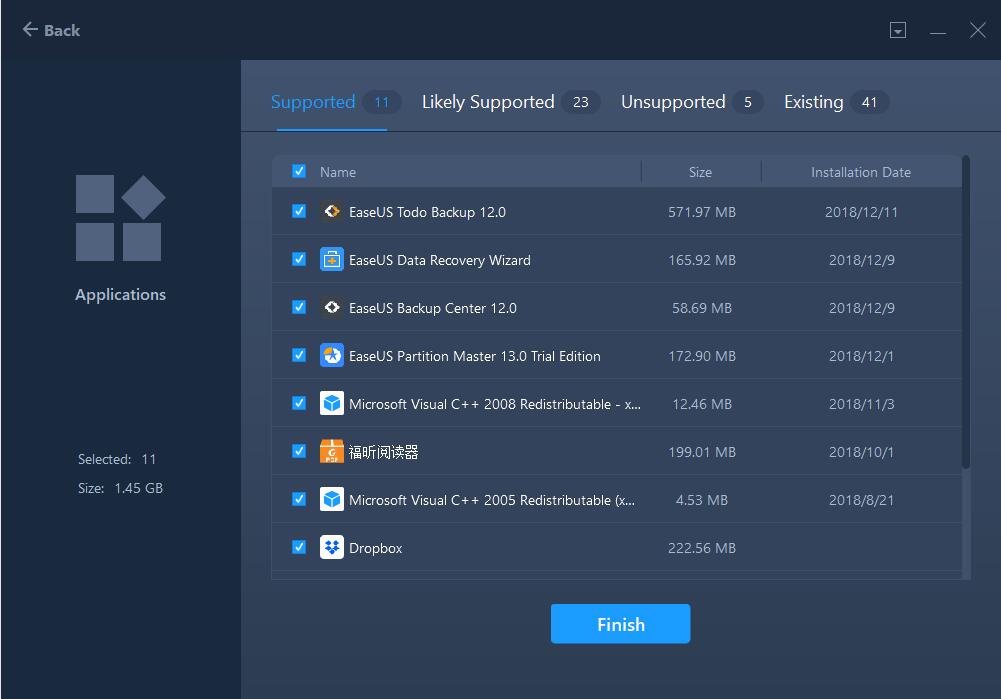
3. Tick the check box to select the applications you want to transfer.
Note:
There are three categories of software compatibility:
Supported: the application is fully compatible with new PC.
Unsupported: the application is not compatible with new PC.
Existing: the application already exists on both PCs, transfer is not necessary.
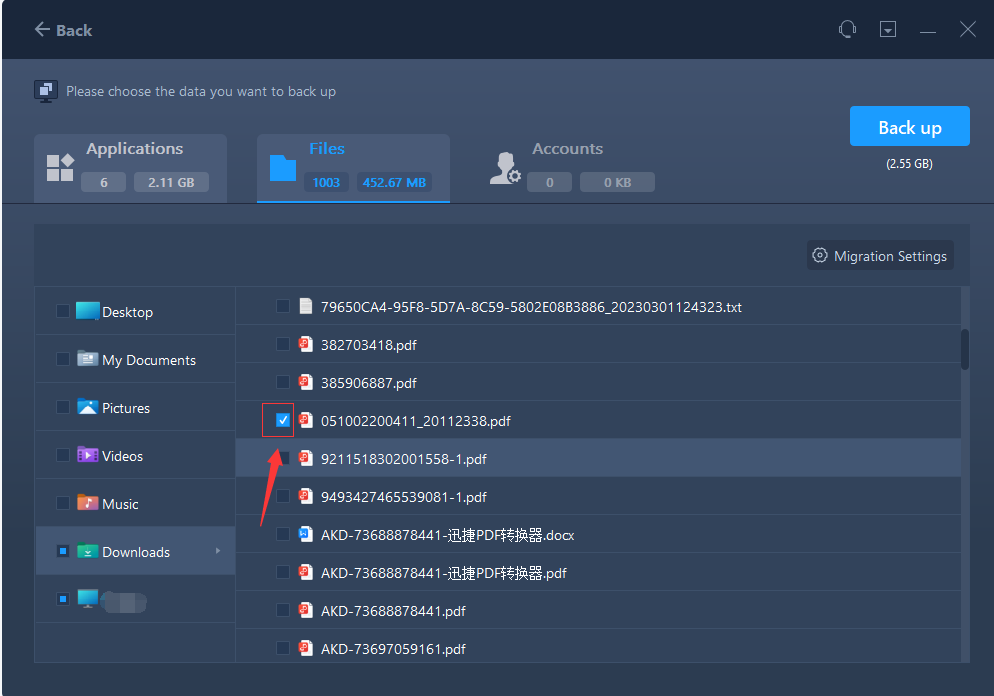
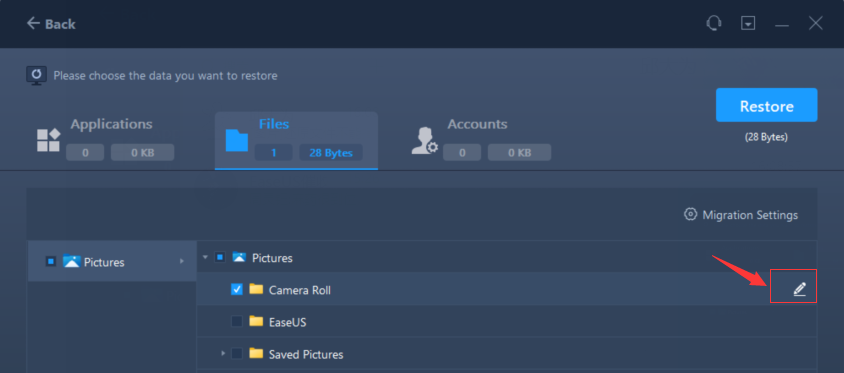
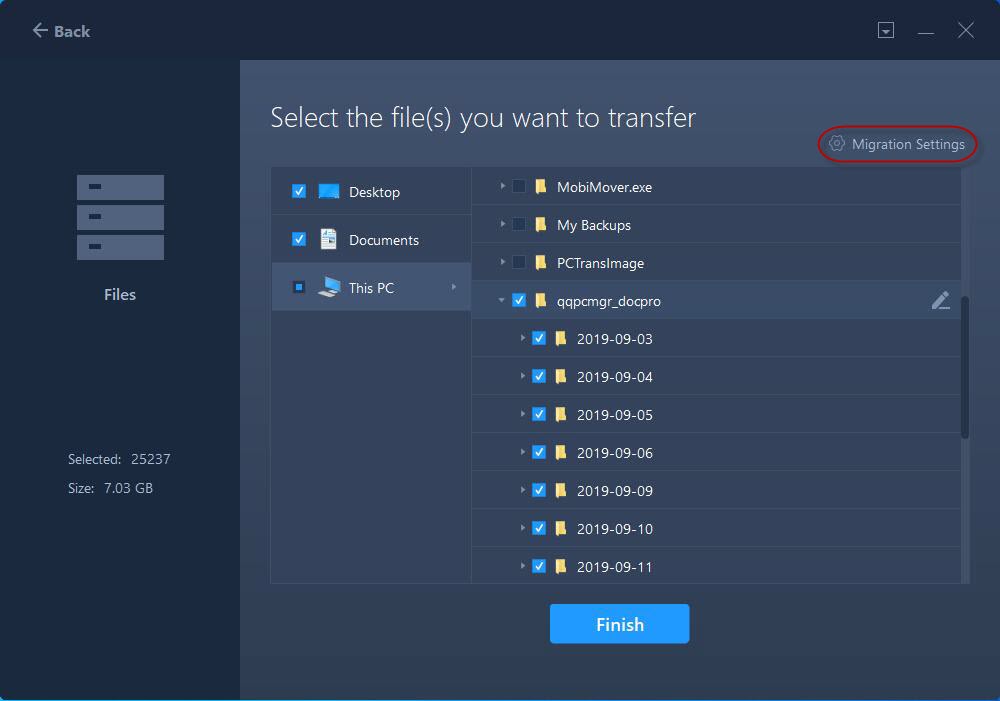
4. Regarding Files option, all the root folders will be listed after a double click on the disk icon. You are able to check them for transferring.
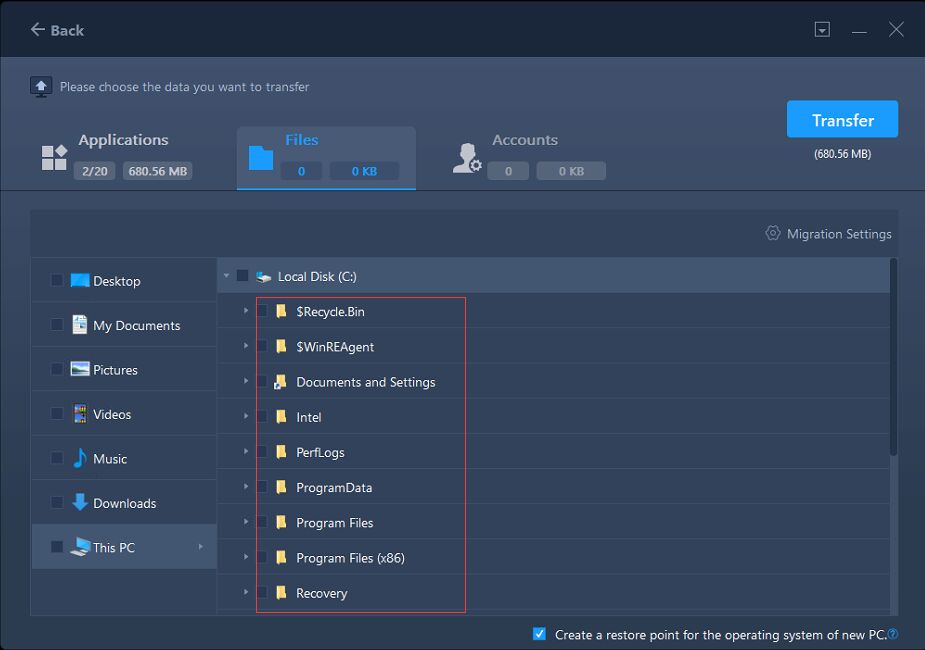
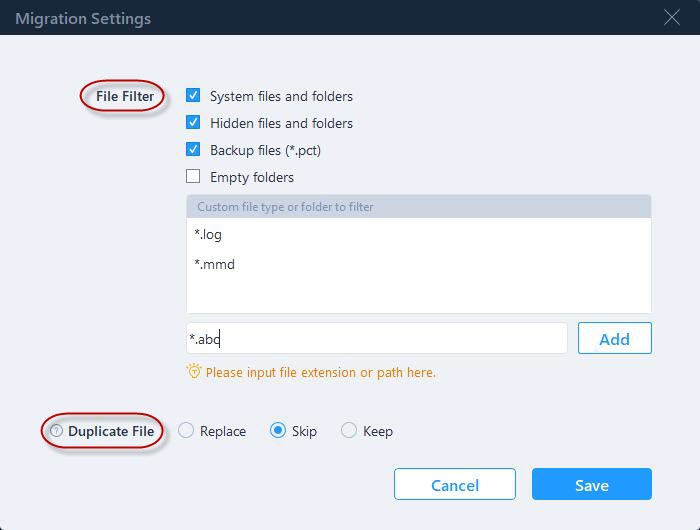
Migration Settings include File Filter and Duplicate File.
File Filter - To add file extension or file path for filtering them during the transfer process.
Duplicate File - You can select the option to replace, skip or keep the transferred duplicated files.
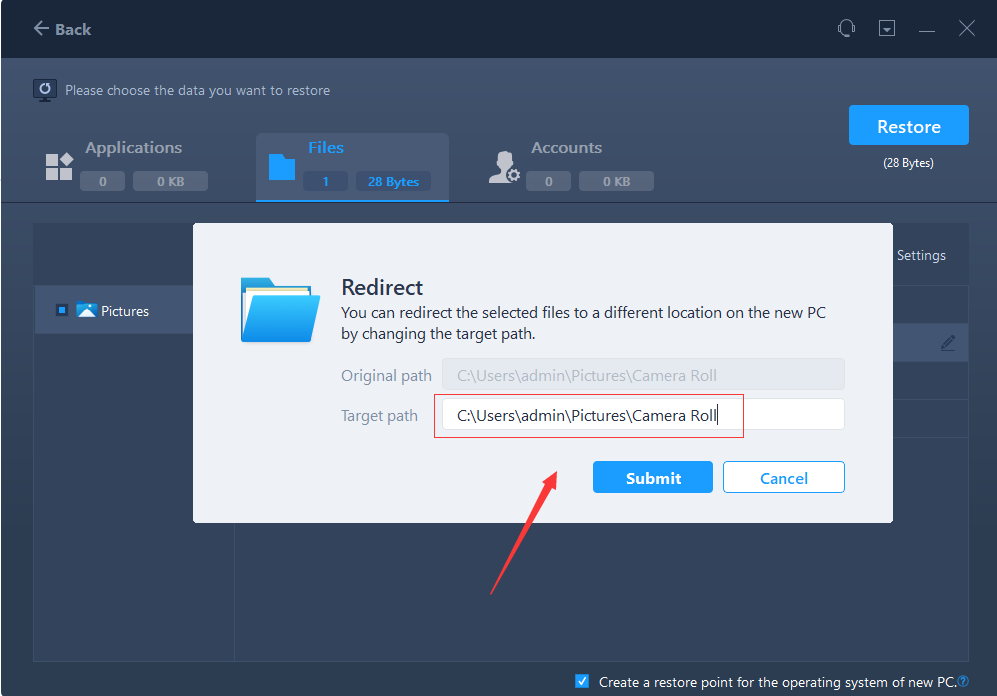
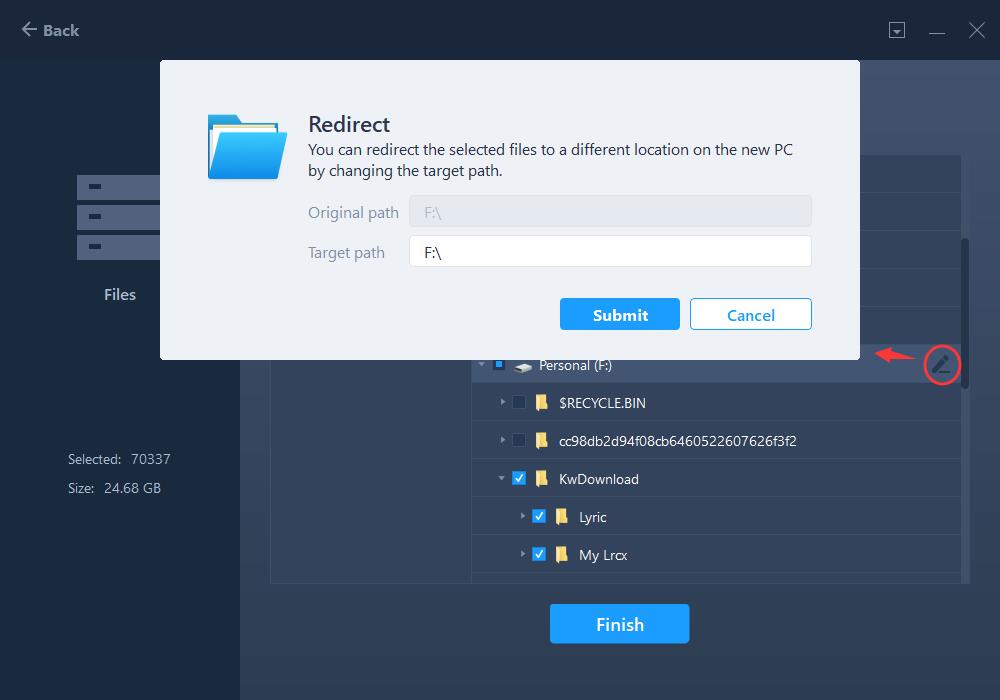
The edit button can be used to redirect the selected files to a different location on the new PC by changing the target path.
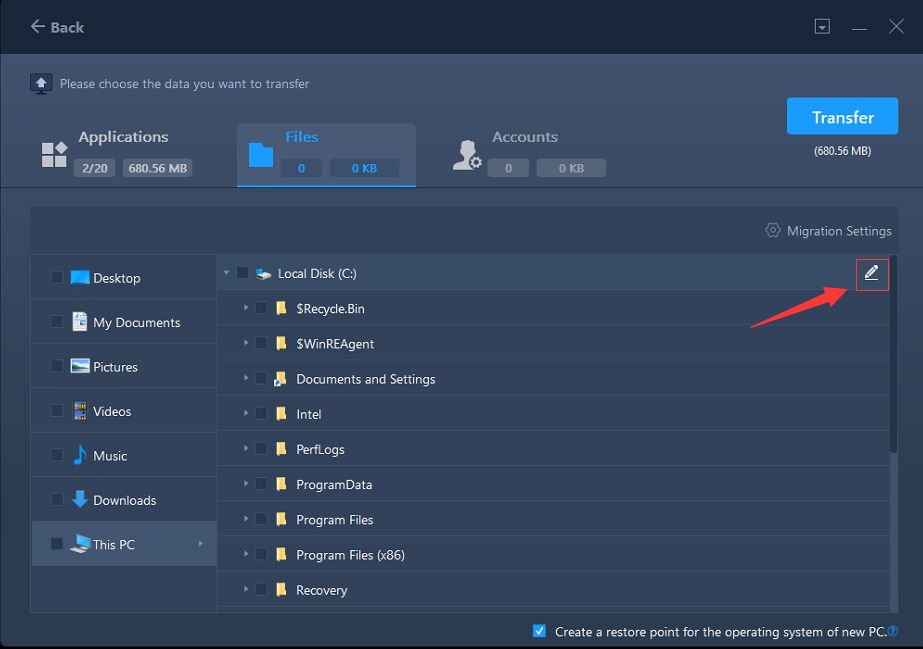
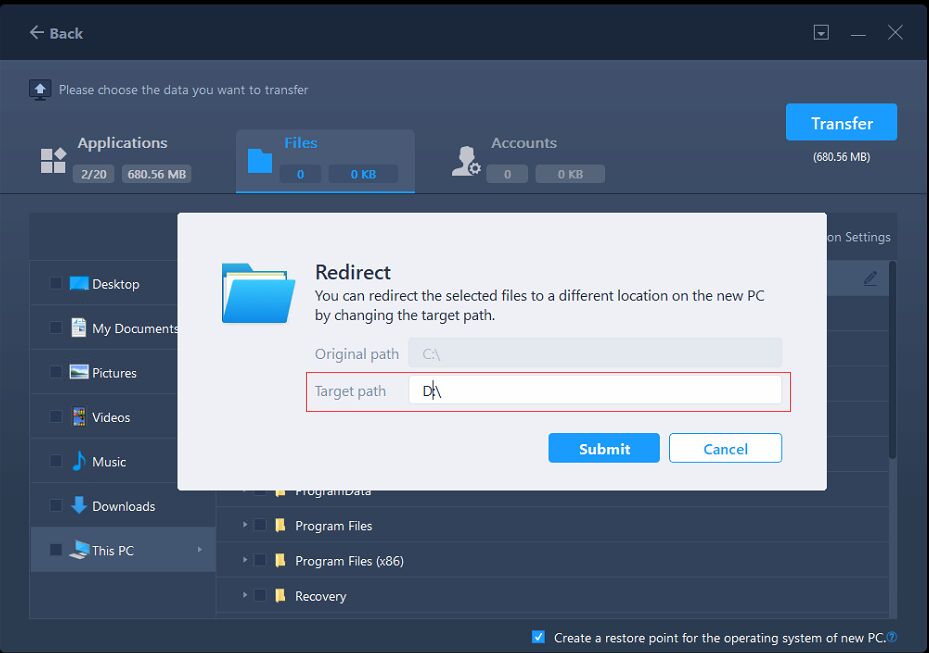
Note:
To edit the Target Path, you are able to fill in a drive letter on your target machine. All the files will be transferred to the root directory of this drive.
Unlike the Files option, you are not able to edit the target path for applications. Applications will be transferred to the "Program" folder on the new PC by default. Usually, the "program" folder is located in C: drive.
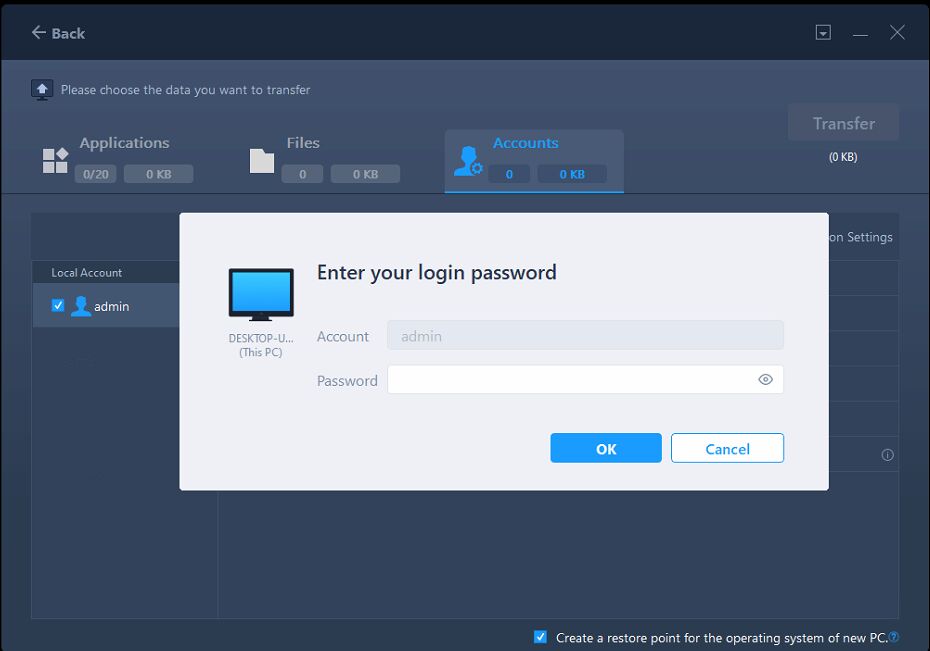
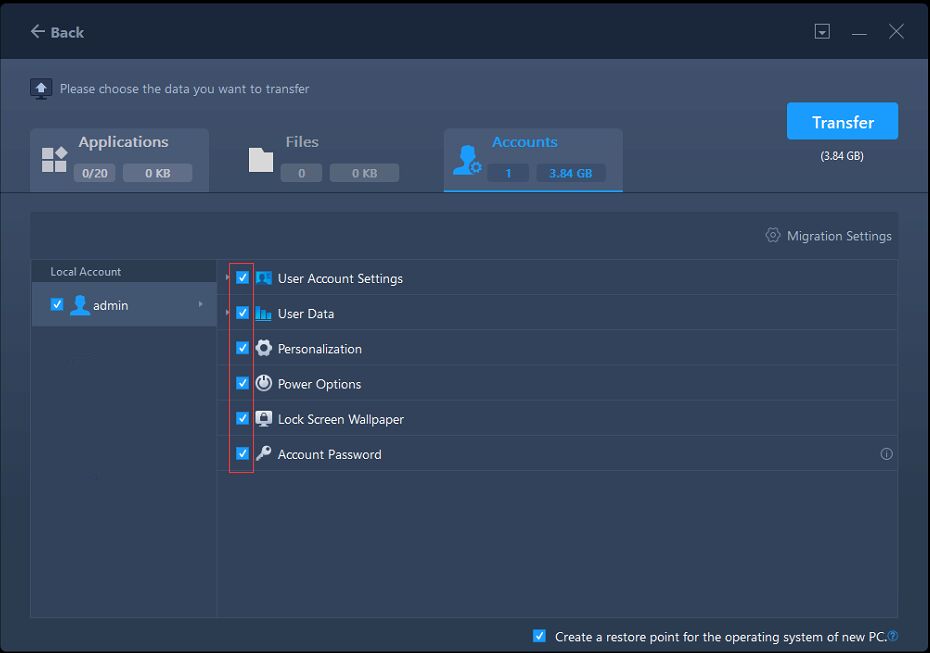
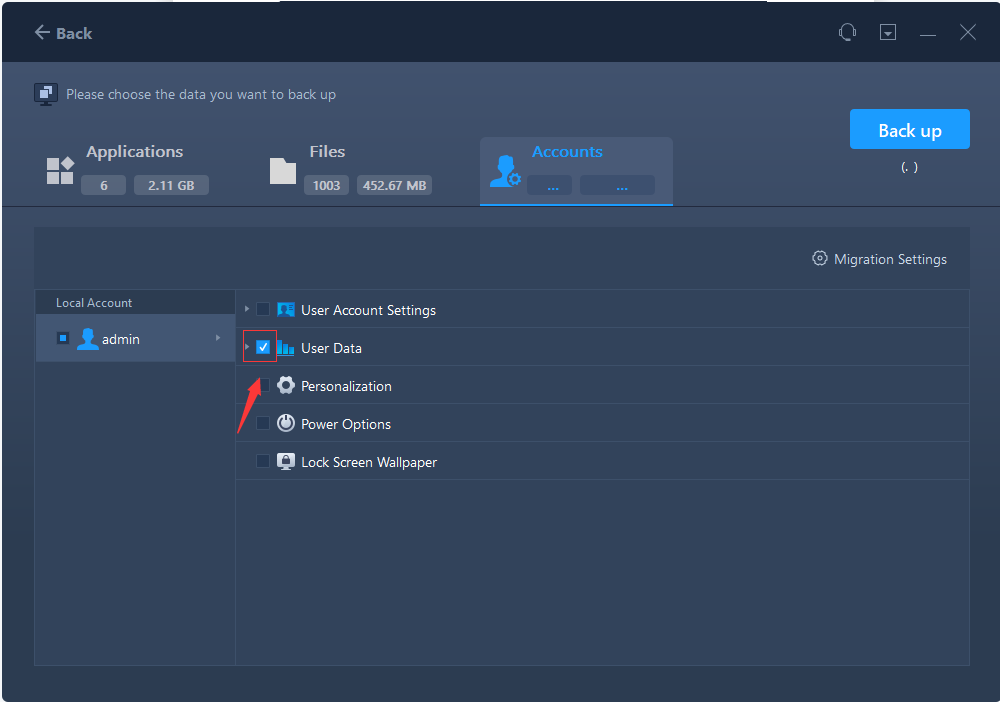
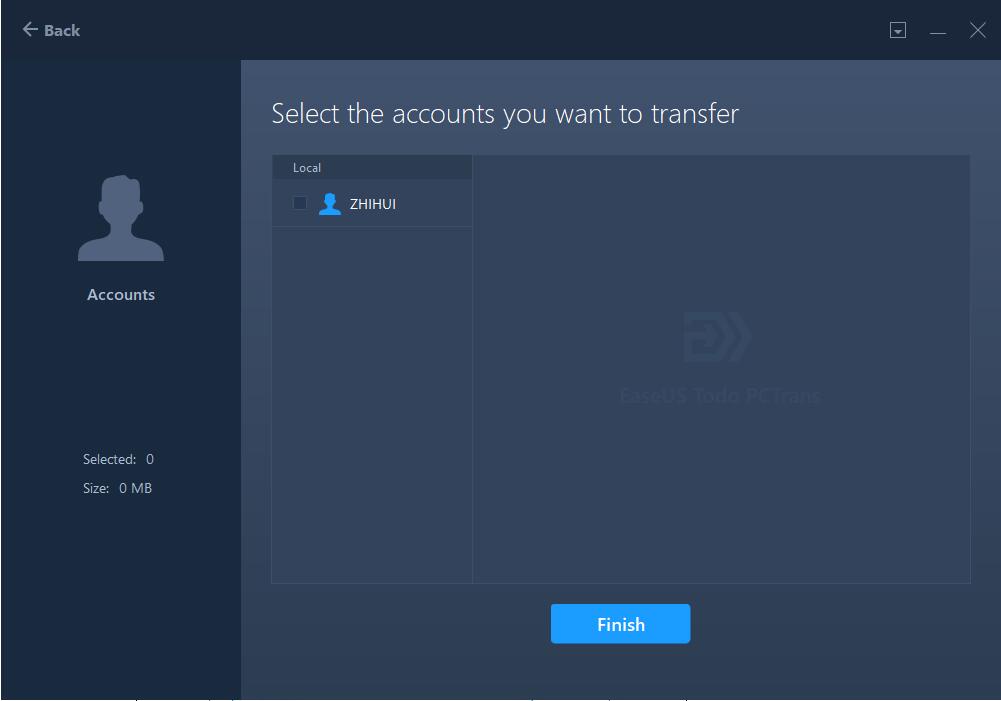
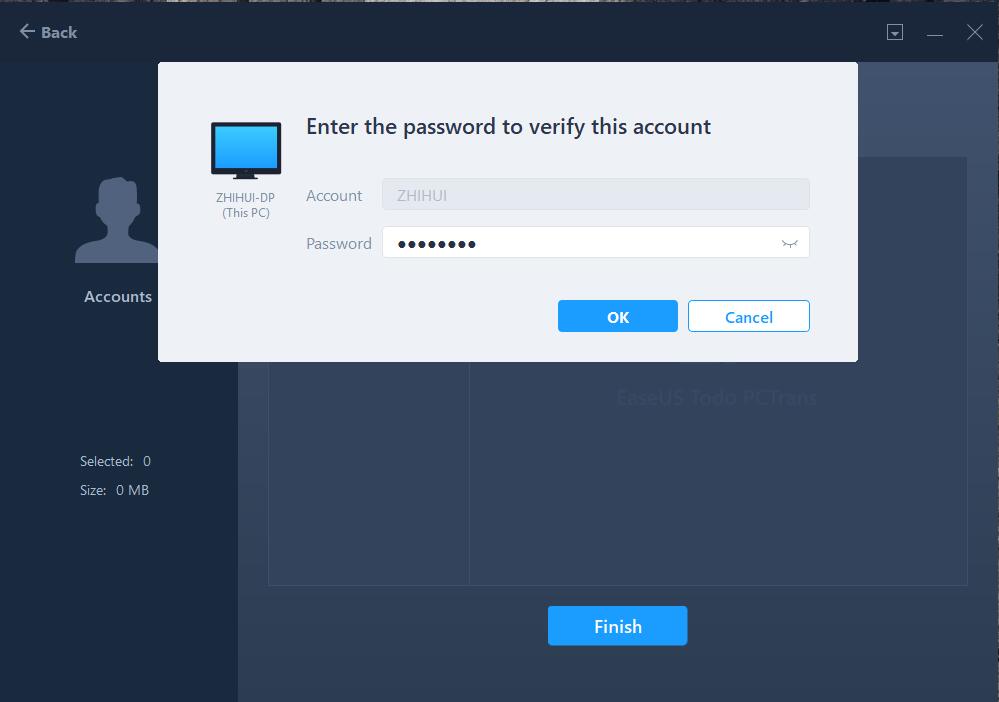
5. Switch to the Accounts option, all the accounts on the source PC will be listed in the program.

By selecting an account from the list, you will be asked to authorize the password of this account. After the authorization, select what content you want to transfer in this account. This includes the User Account Settings, User Data, Personalization, Power options, Lock Screen Wallpaper and Account Password.
Note:
The password of the account on the destination PC is the same as the one on the source PC after transferring.
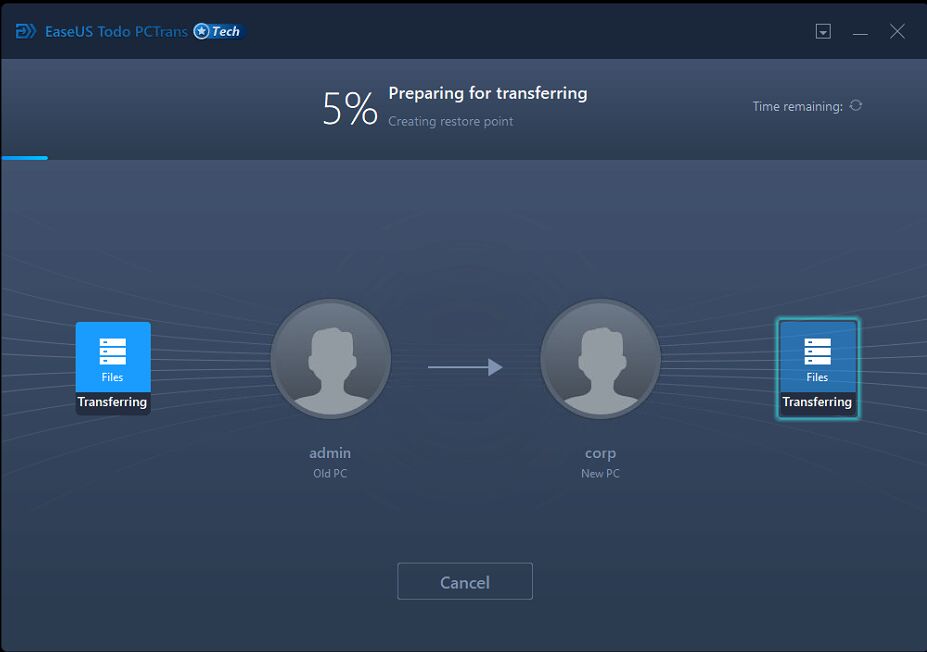
Start the transfer
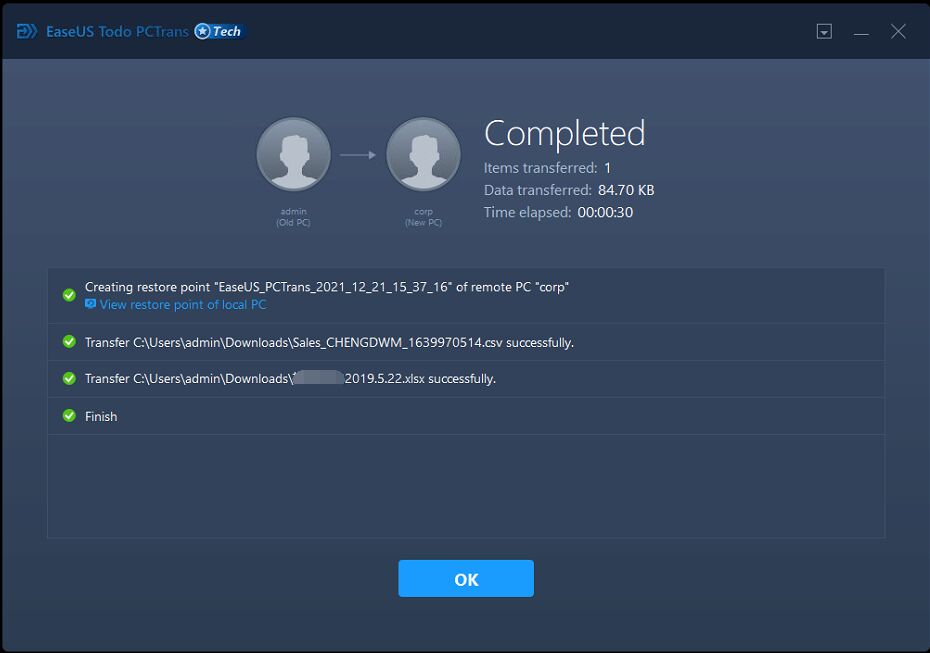
After completing all the settings above, please click the Transfer button to start.
Note:
When the transfer is finished, a reboot is required to refresh all transferred information.
The Migrate Logs can be seen on the main window for checking the trasnferred result after using PC to PC method.

Backup & Restore
Data Backup
1. Launch Todo PCTrans, select Backup & Restore at the home page of EaseUS Todo PCTrans, then click the Start.
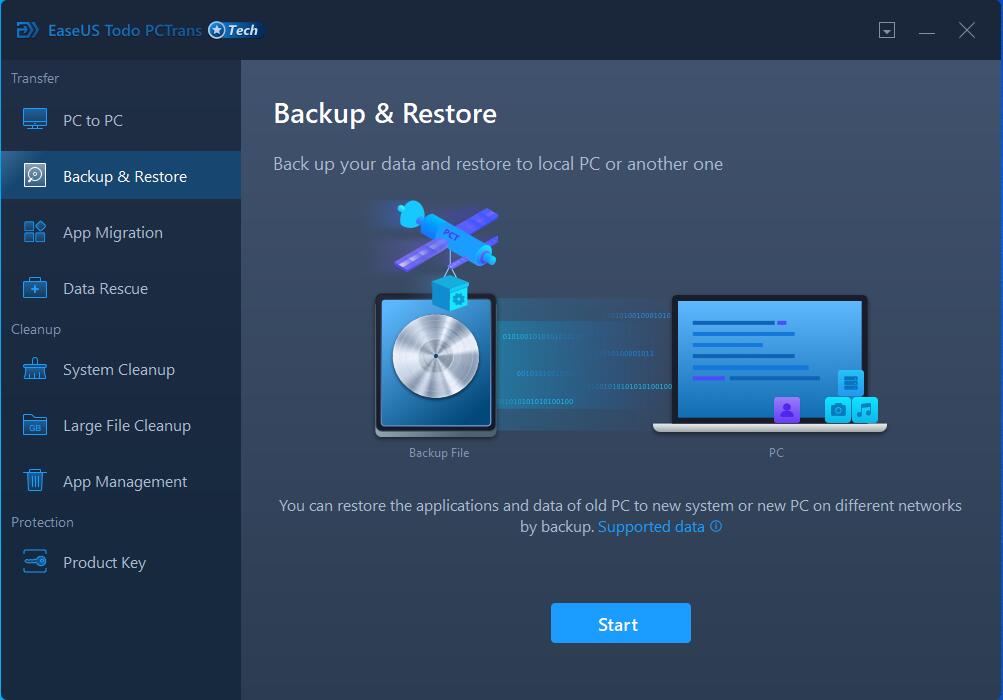
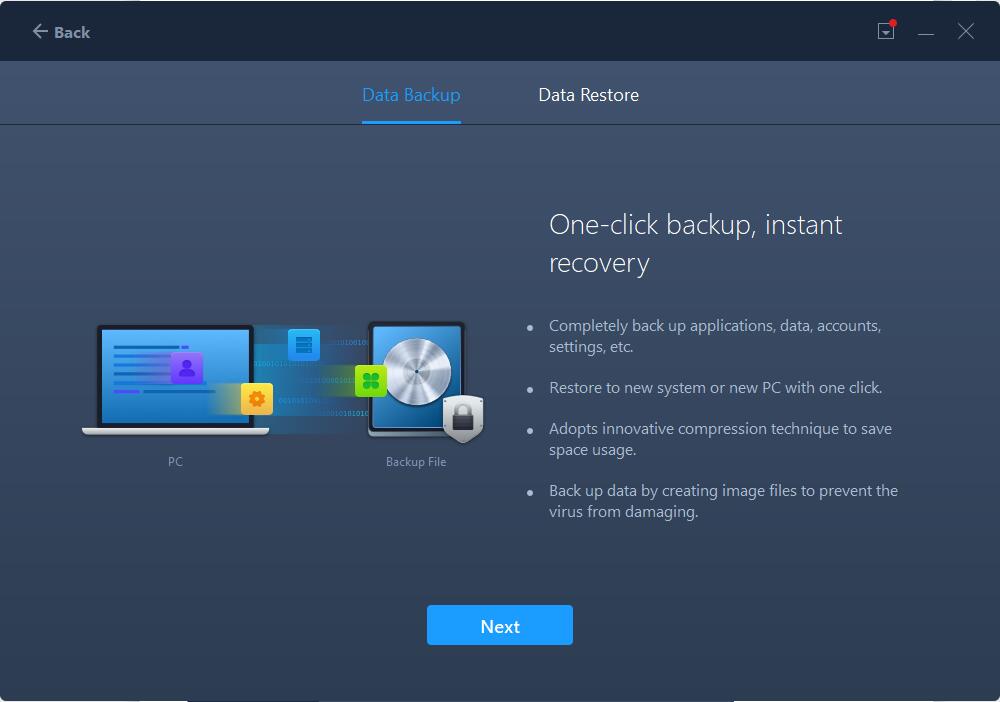
2. Select the Data Backup method and click the Next.
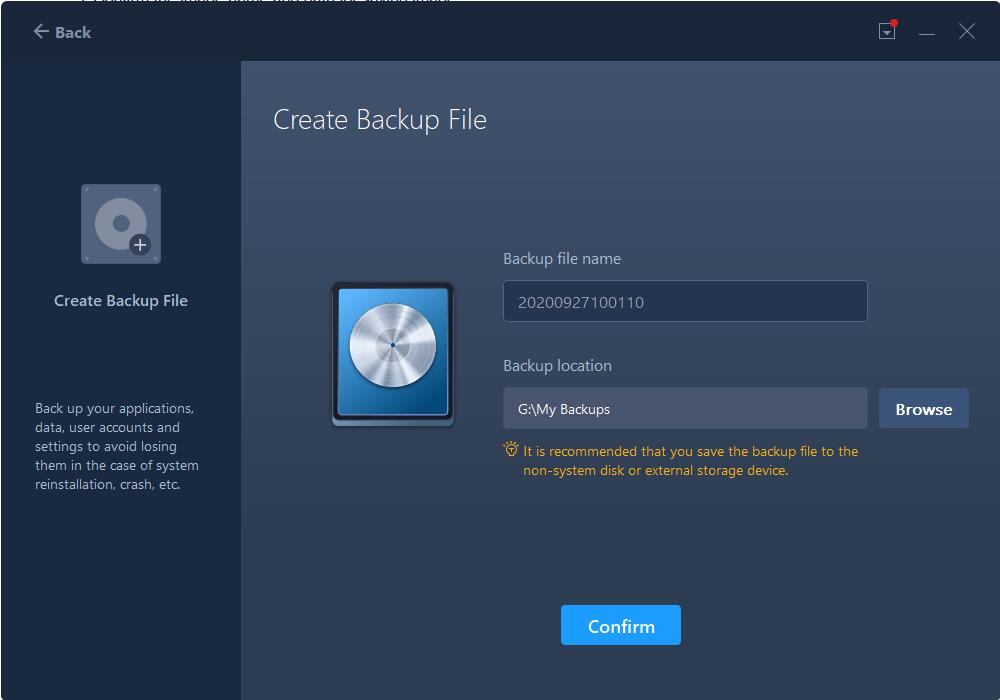
3. Confirm the image name and path for saving images.
4. Todo PCTrans will start enumerating all the applications and data that can be transferred. This process will take a while and the speed varies due to the amount of data and performance of the computer. Once the program finishes counting, you can see the size of Applications, Accounts, and Files.
5. Tick the check box to select the applications, files or accounts you want to transfer.
Migration Settings include File Filter and Duplicate File.
File Filter —To add a file extension or file path for filtering them during the transfer process.
Duplicate File —You can select an option to replace, skip, or keep the transferred duplicate files.
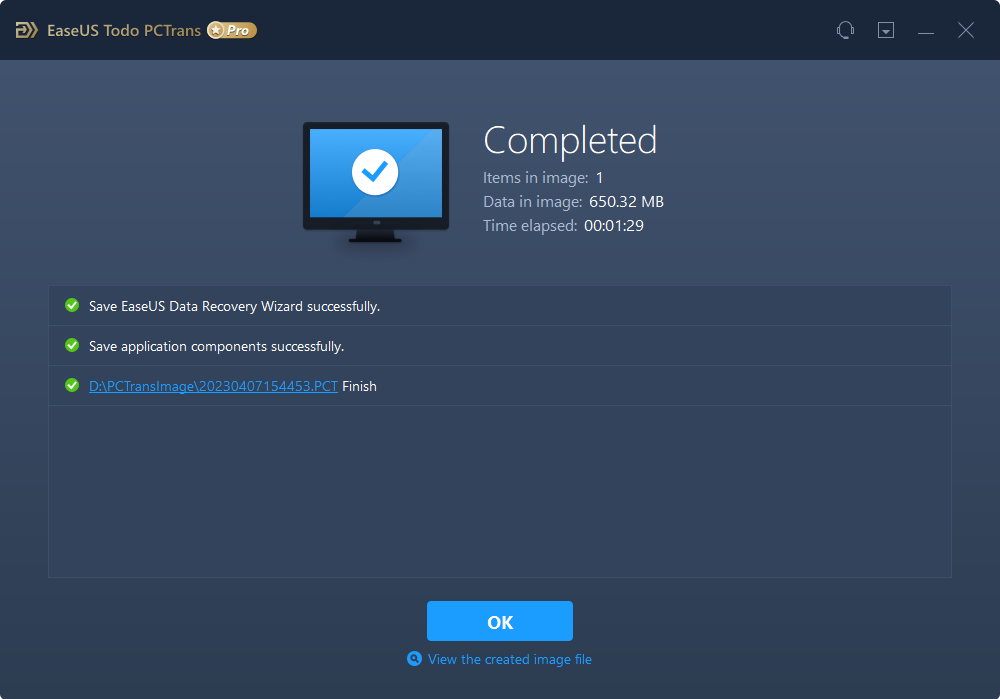
6. Click the Backup to execute the backup


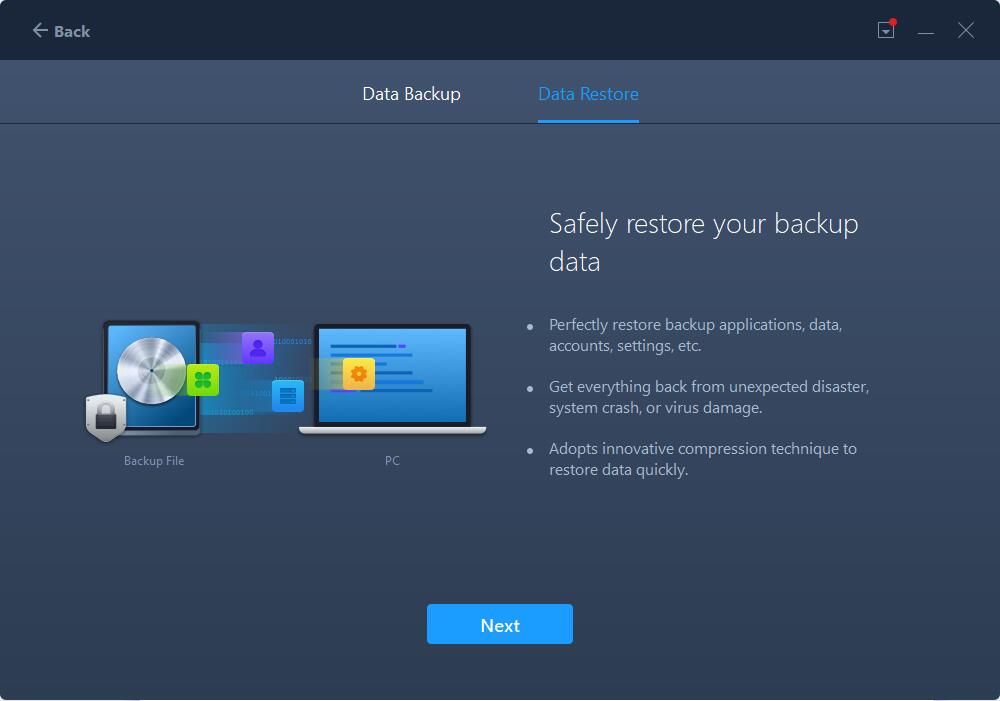
Data Restore
At this step, there are two different operations:
If you are upgrading the operating system and wish to transfer the data in the image file in the new operating system, just run Todo PCTrans again, select Backup & Restore->Data Restore.
Suppose you are transferring data to a separate computer, please copy the image file to the target computer and run the program, select Backup & Restore->Data Restore.
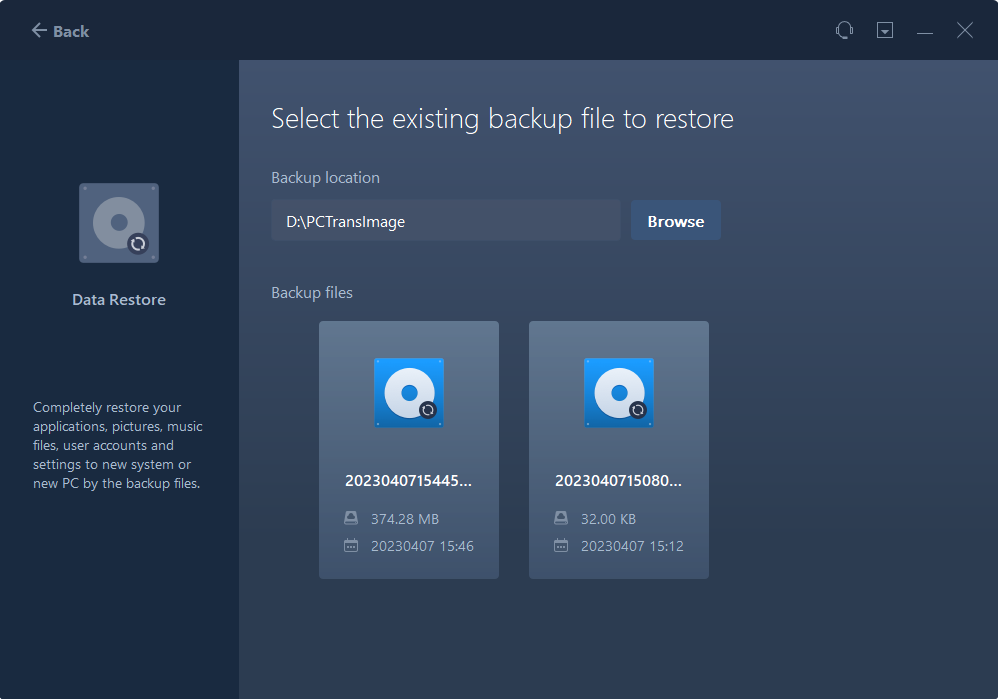
1. Select Data Restore and click Next.
2. Browse the location of your backup image and select the image to Restore. You could also click the Edit to only select a part of the items to recover.
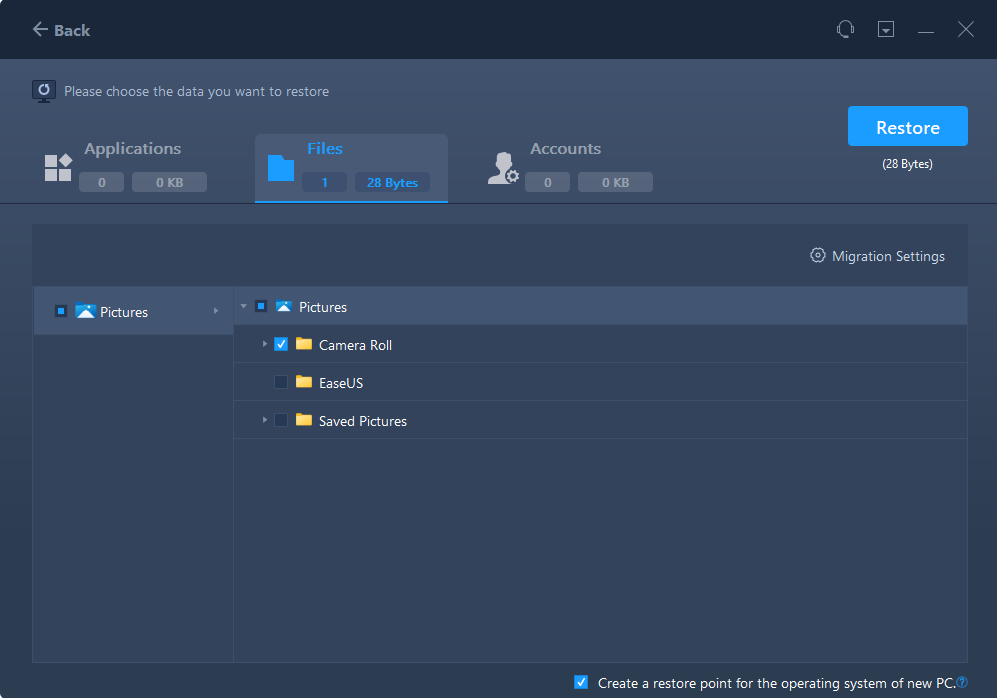
Note:
1. To edit the Target Path, you are able to fill in a drive letter on your target machine. All the files will be transferred to the root directory of this drive.
2. Unlike the Files option, you are not able to edit the target path for applications. Applications will be transferred to the "Program" folder on the new PC by default. Usually, the "program" folder is located in C: drive.
By the way, the image file can also be opened by double-clicking, and the data files can be copied from the image directly.

App Migration
1. Launch Todo PCTrans, select App Migration at the home page of EaseUS Todo PCTrans and click Start.
2. Tick the little boxes in front of applications to decide transfer programs and select the target partition, then click Transfer to continue.
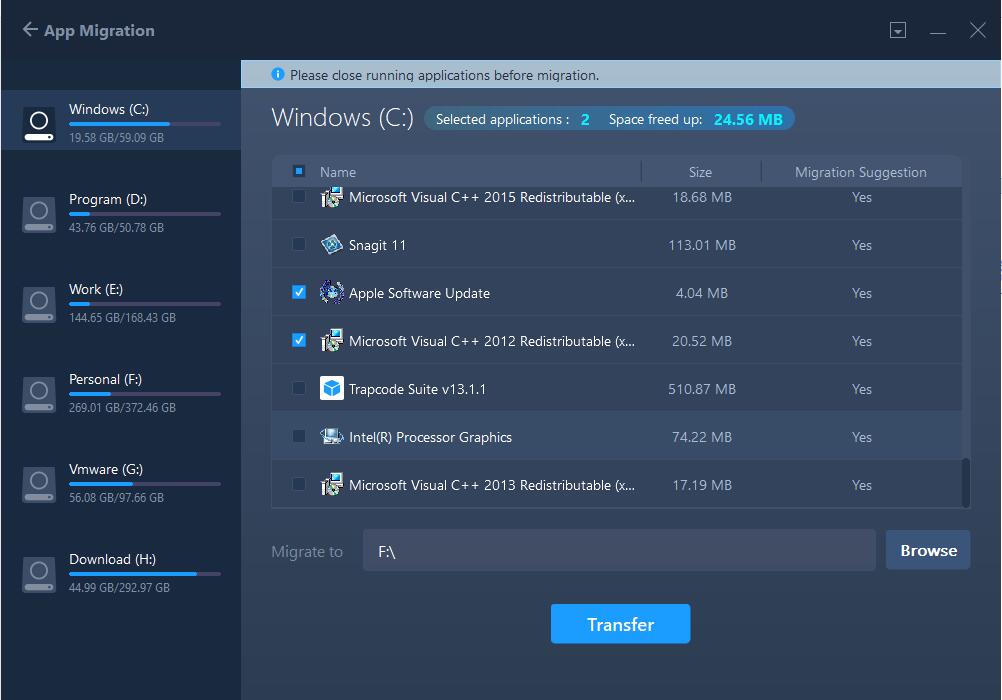
3. Finish the transferring.
Note:
When the transfer is finished, a reboot is required to refresh all transferred programs.
Data Rescue
1. Take out the system hard drive from your old computer and connect it to the new computer, then run the Data Rescue to click the Start.
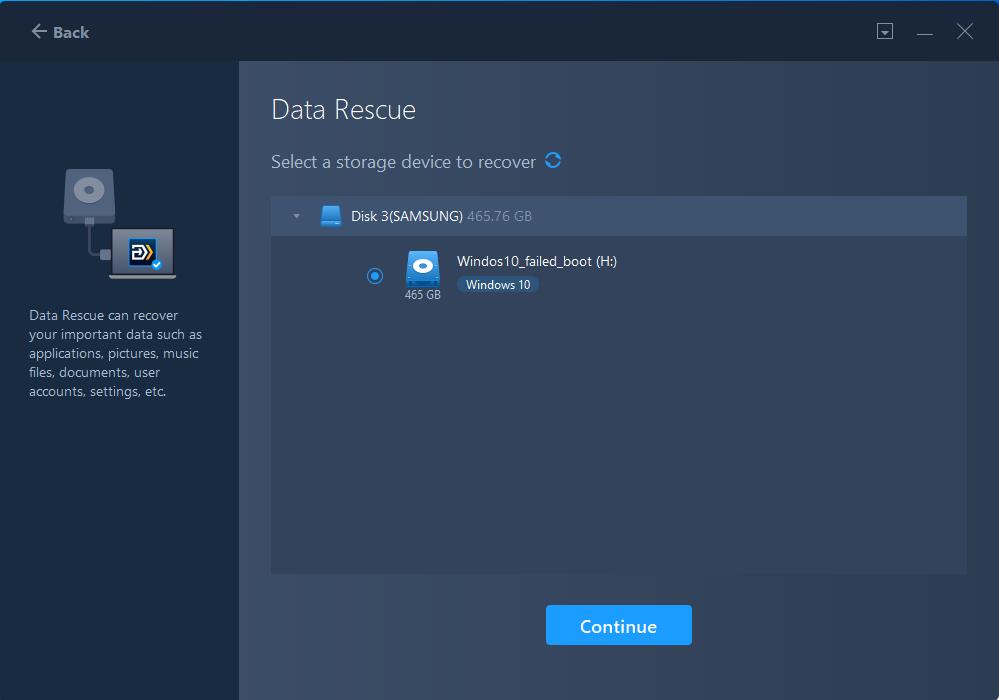
2. Further check the Data Rescue steps and ensure you have done step 1 and 2 correctly, then click the Scan.

3. Select the system drive from the Old PC which failed to work properly then click the Continue.
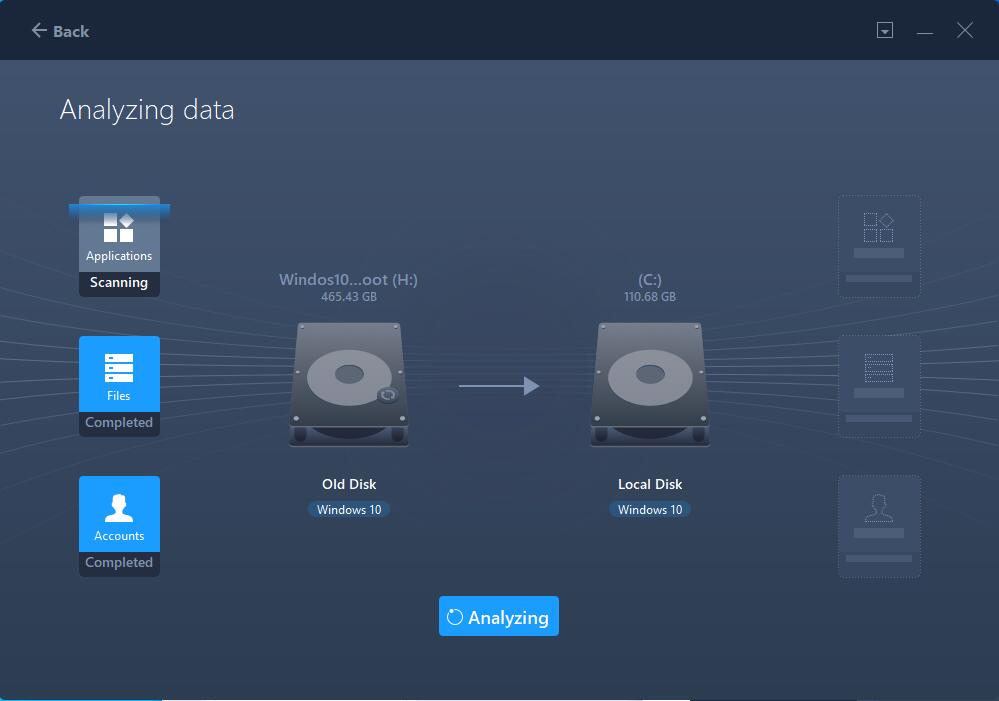
4. Your programs, files, and accounts will be listed after the analysis.
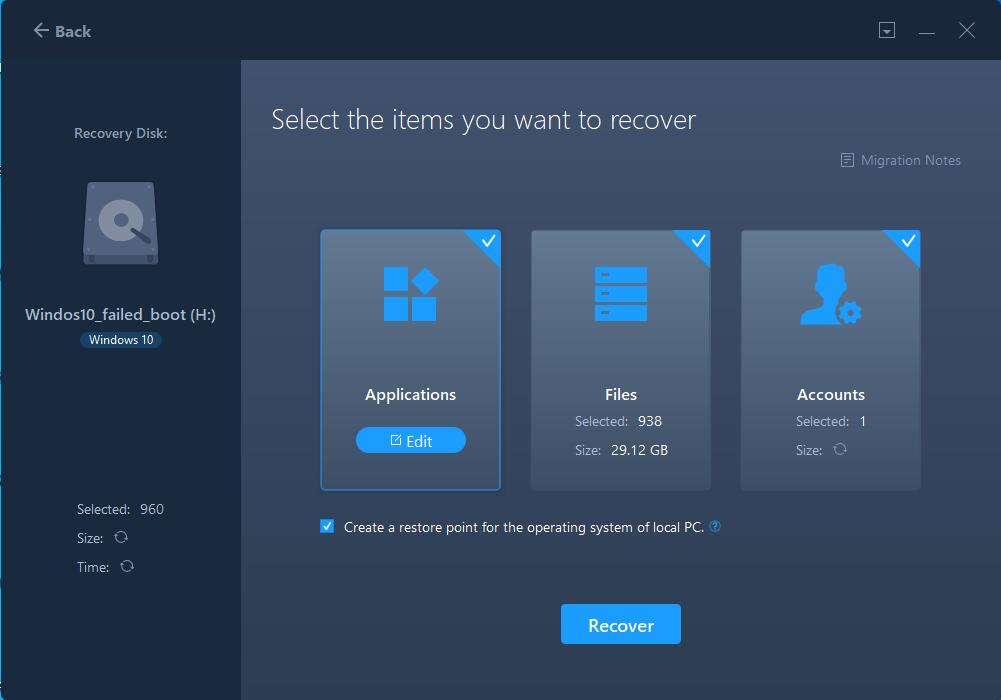
Creating a restore point for the operating system of the local PC ensures that you are always able to roll back your system to the status before transfer. However, enabling this option requires several minutes to finish the process.
5. Select the applications you want to transfer.
Note:
The Compatibility has 3 statuses: "Supported", "Unsupported" and "Existing":
Supported: the application is fully compatible with new PC.
Unsupported: the application is not compatible with new PC.
Existing: the application already exists on both PCs, transfer is not necessary.
6. Regarding the Files option, all the root folders will be listed after clicking the edit button. You are able to check them for transferring.
Migration Settings include File Filter and Duplicate File.
File Filter —To add a file extension or file path for filtering them during the transfer process.
Duplicate File — You can select an option to replace, skip, or keep the transferred duplicate files.

The edit button can be used to redirect the selected files to a different location on the new PC by changing the target path.
Note:
To edit the Target Path, you are able to fill in a drive letter on your target machine. All the files will be transferred to the root directory of this drive.
Unlike the Files option, you are not able to edit the target path for applications. Applications will be transferred to the "Program" folder on the new PC by default. Usually, the "program" folder is located in C: drive.
7. User Accounts option lists the account on the source PC.
And you need to be authorized by entering the password of the account before selecting User Account and User data.
8. After completing all the settings above, please click the Transfer button to start.
Note:
When the transfer is finished, a reboot is required to refresh all transferred information.
Cleanup
Cleanup is the tool to keep your system clean and fast. It helps you clean up system disks, free up disk space, and delete useless large files. It includes System Cleanup and Large File Cleanup functions.
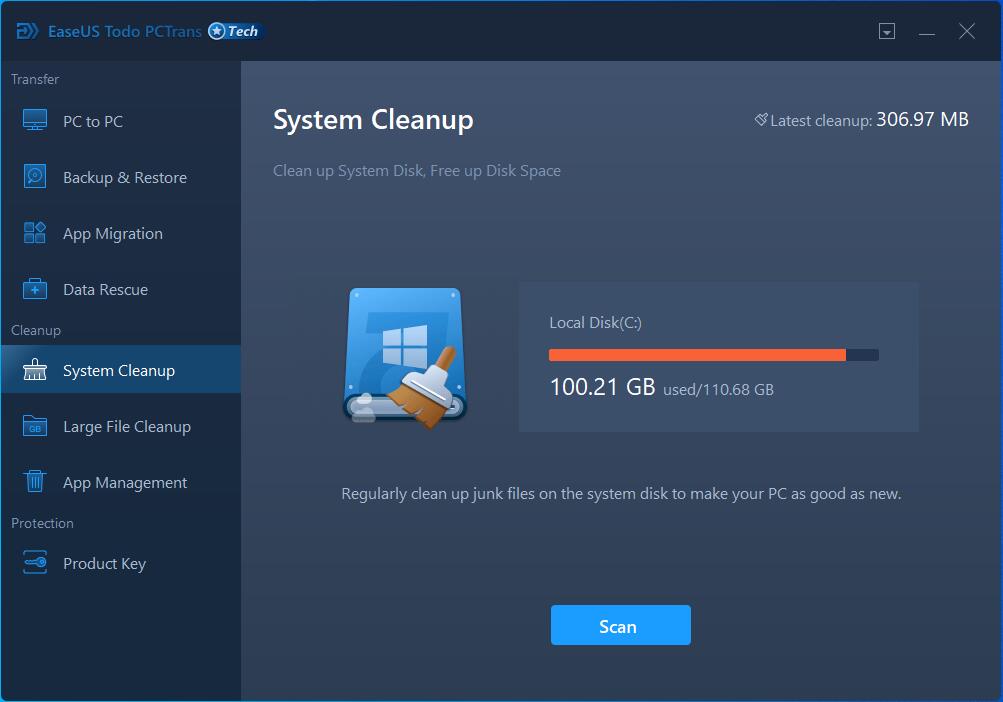
System Cleanup
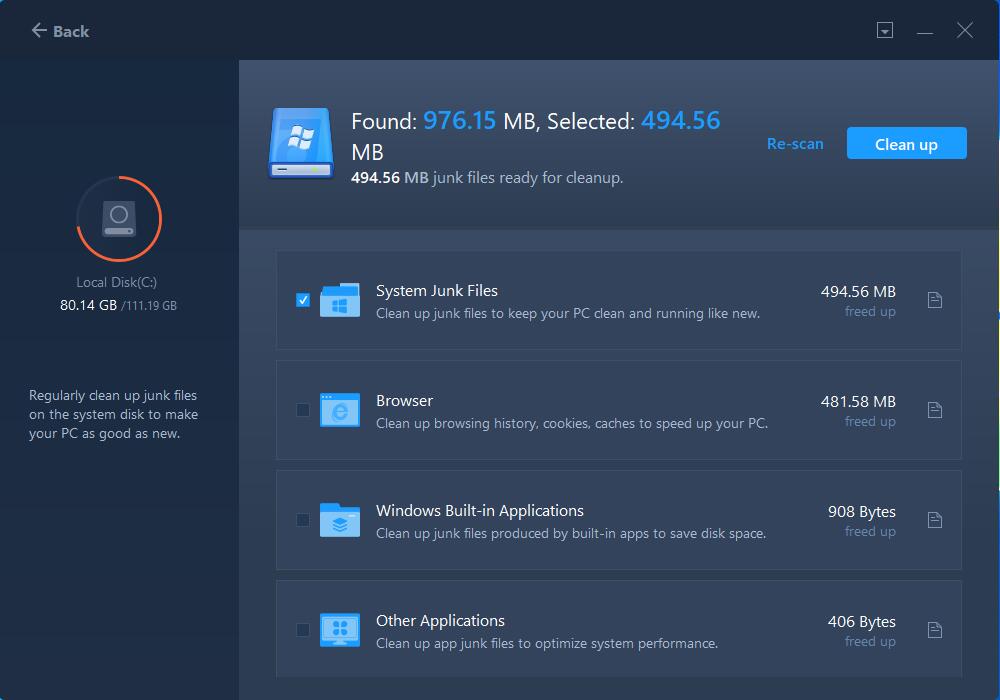
System Cleanup cleans junk files from System, Browser, Windows Built-in Applications, and Other Applications, it will save disk space and improve your computer performance.
1. Scan your C partition after running the System Cleanup function.
The scanning may need a long time if you have lots of junk files. Please wait patiently.
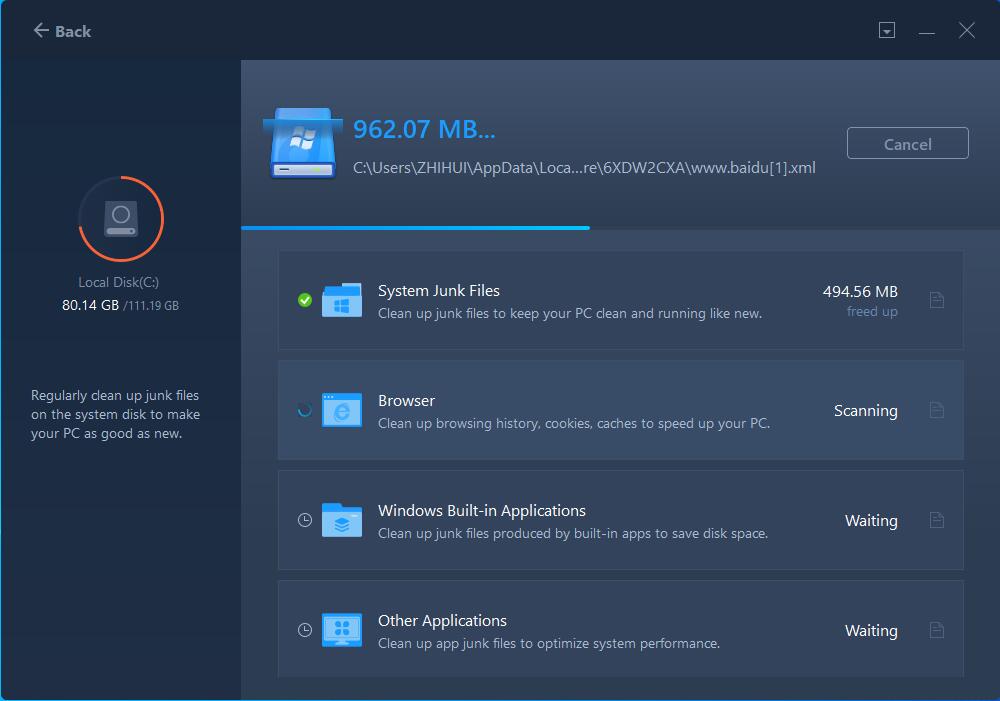
2. Check all listed junk files to manually select them or select them by default option.
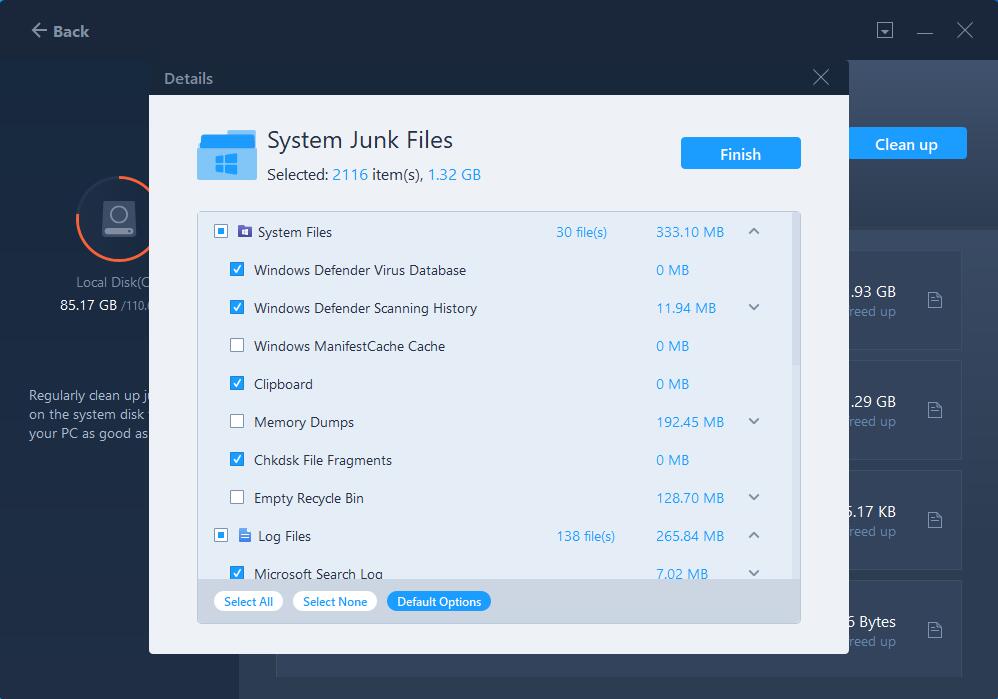
3. Click the Clean up button to delete your selected junk files.
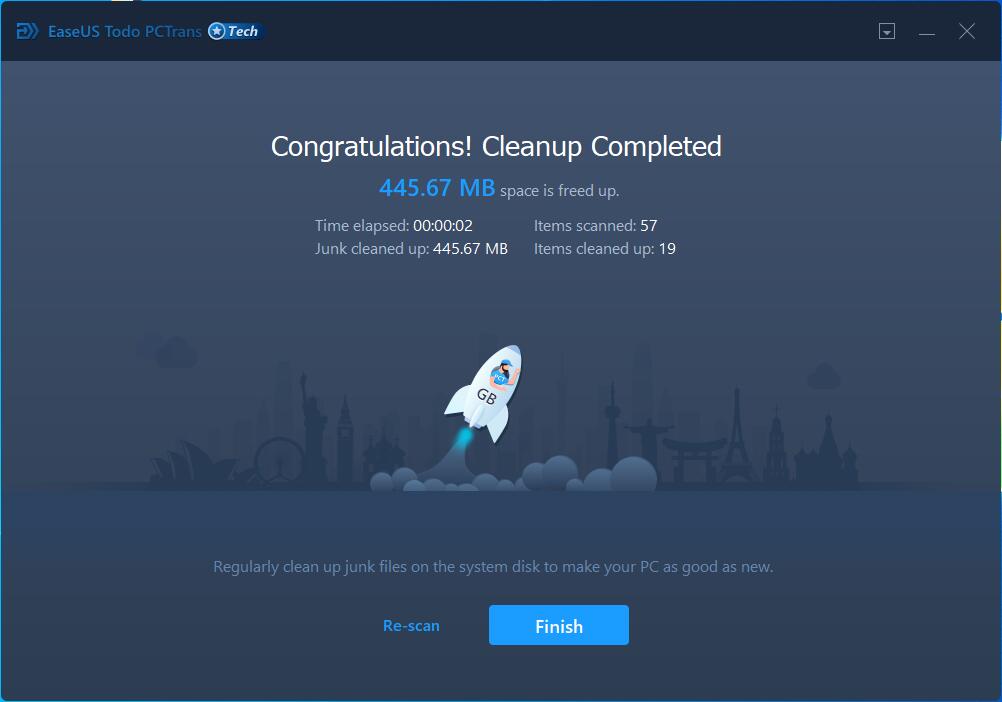
Cleanup Completed window appears once it is finished.
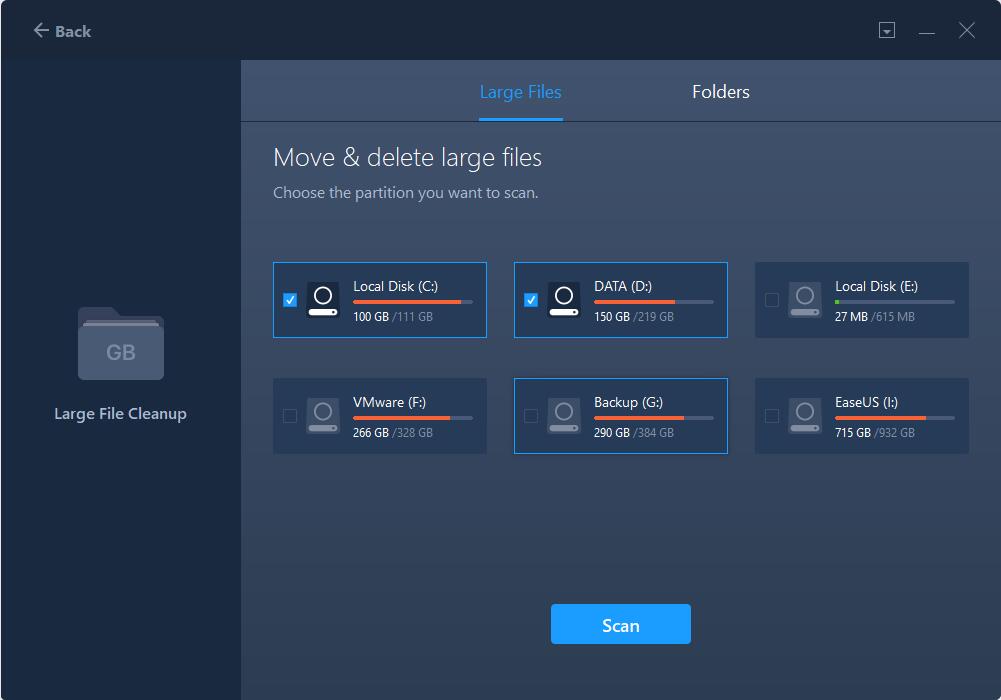
Large File Cleanup
If the capacity of your hard drive is running low, it is time to clean off some files. A good place to start is by locating the largest files on your hard drive. Large File Cleanup can locate these files and easily remove them from your hard drive.
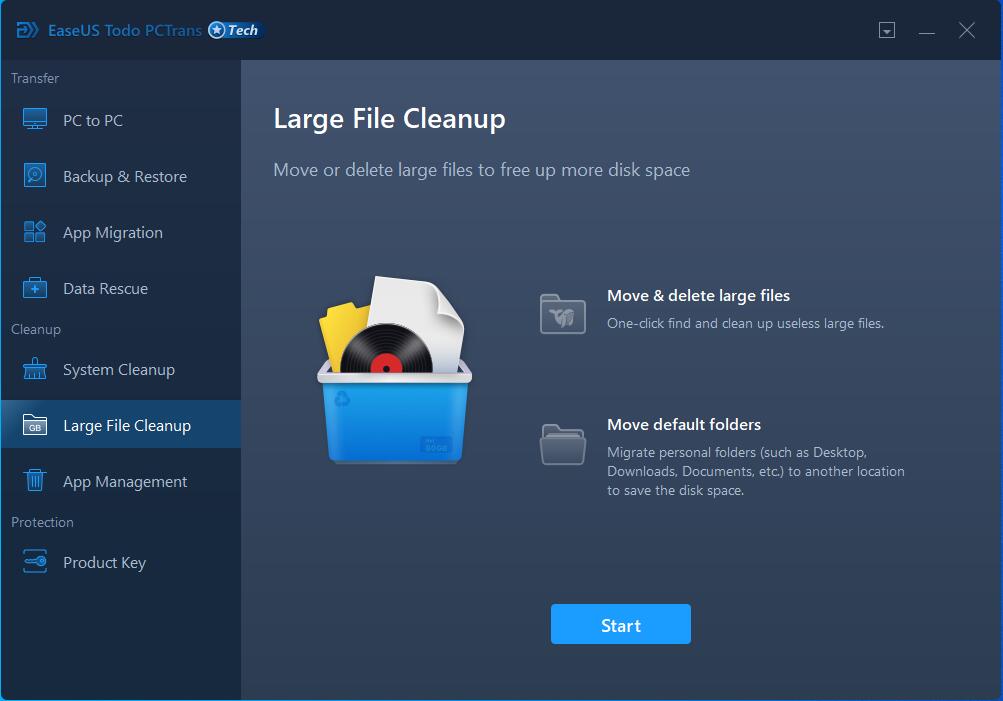
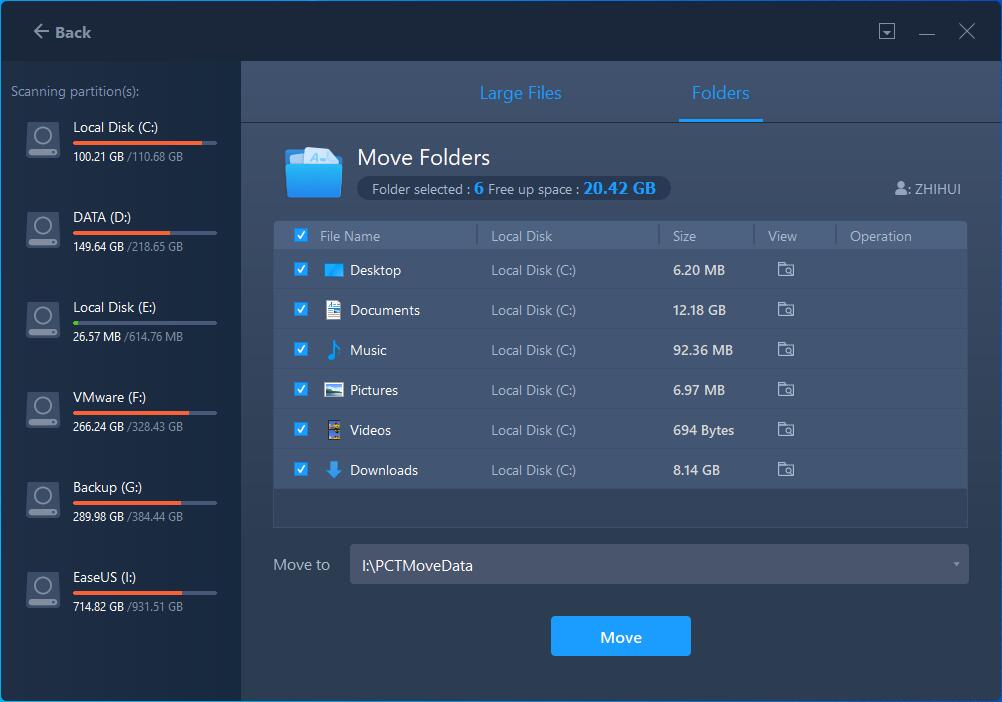
There are two options in this function: Large files and Folders
Large files: Move or delete large files from the selected partition(s).
Folders: Migrate personal folders (Such as Desktop, Downloads, Documents, etc) to another location to save disk space.
Note:
Please do not delete the files from the installation directory of your programs, otherwise, it may cause the program cannot be used.
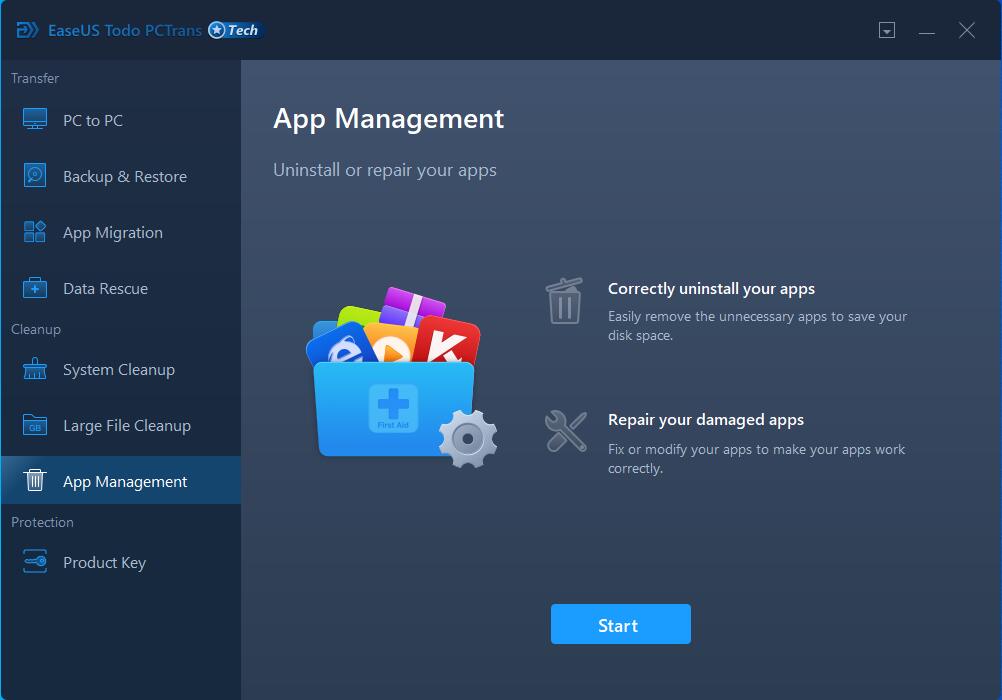
App Management
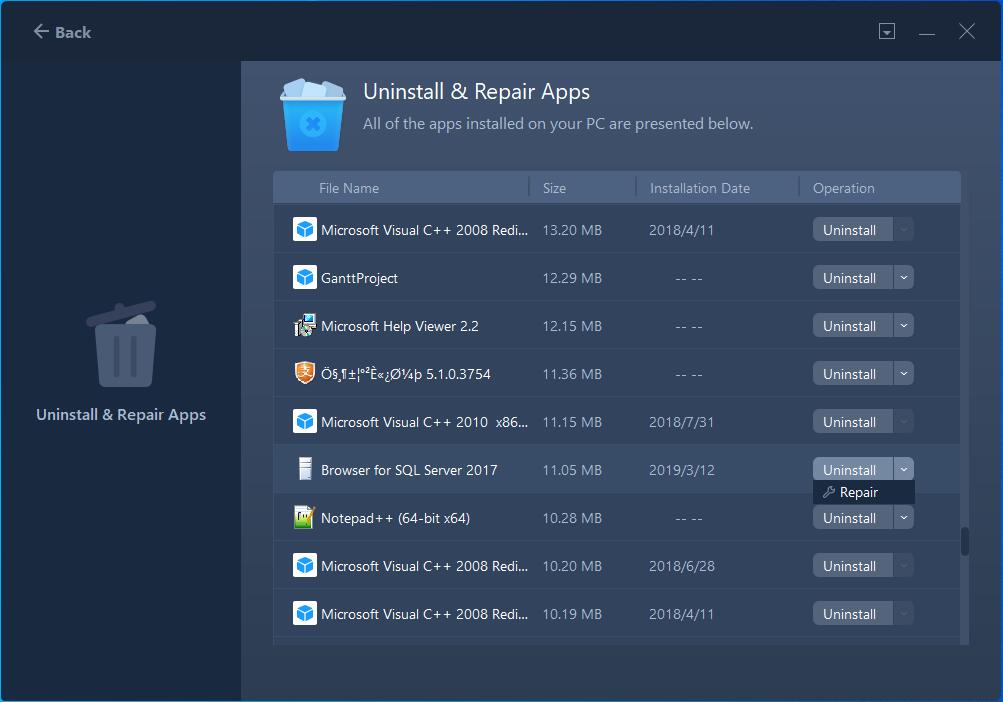
This feature is used to uninstall programs, repair the damaged programs, or delete the program registry information from your computer.
There are three operation options for your selected programs:
Uninstall: Uninstall the selected program from your computer.
Repair: Fix your programs to make it work normally.
Delete: Delete the registry key of the selected program but still keep the program files in the installation directory.
Protection
Protection is the tool to keep your useful information. It only includes the Product Key function now.
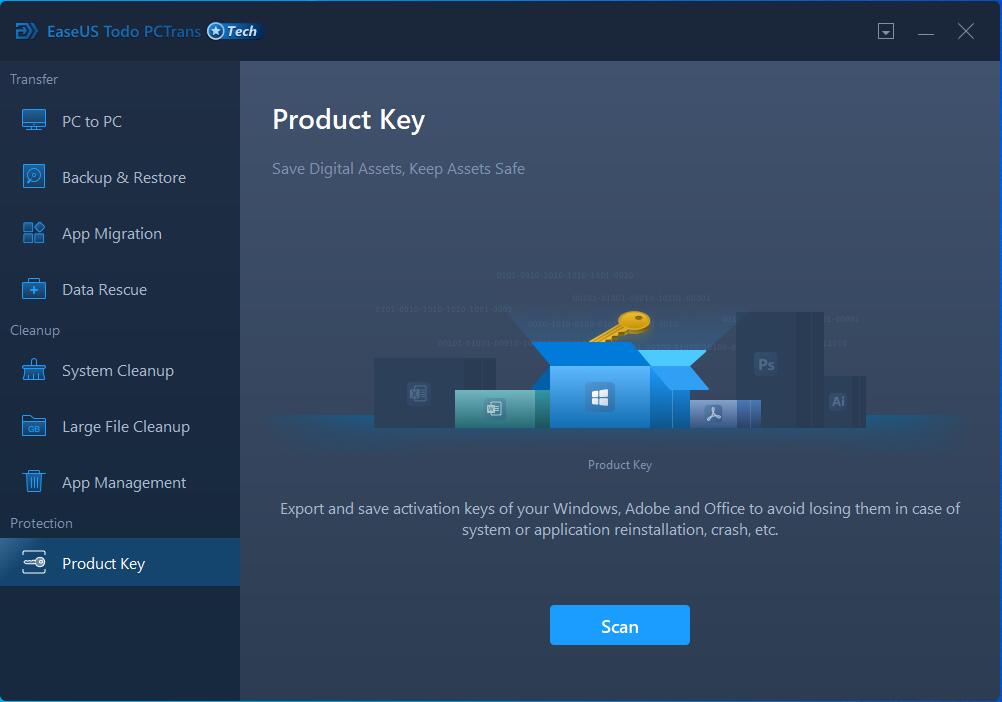
Product Key
This feature is used for saving activation/license keys of your system and applications to avoid losing them in case of system reinstallation, crash, etc.
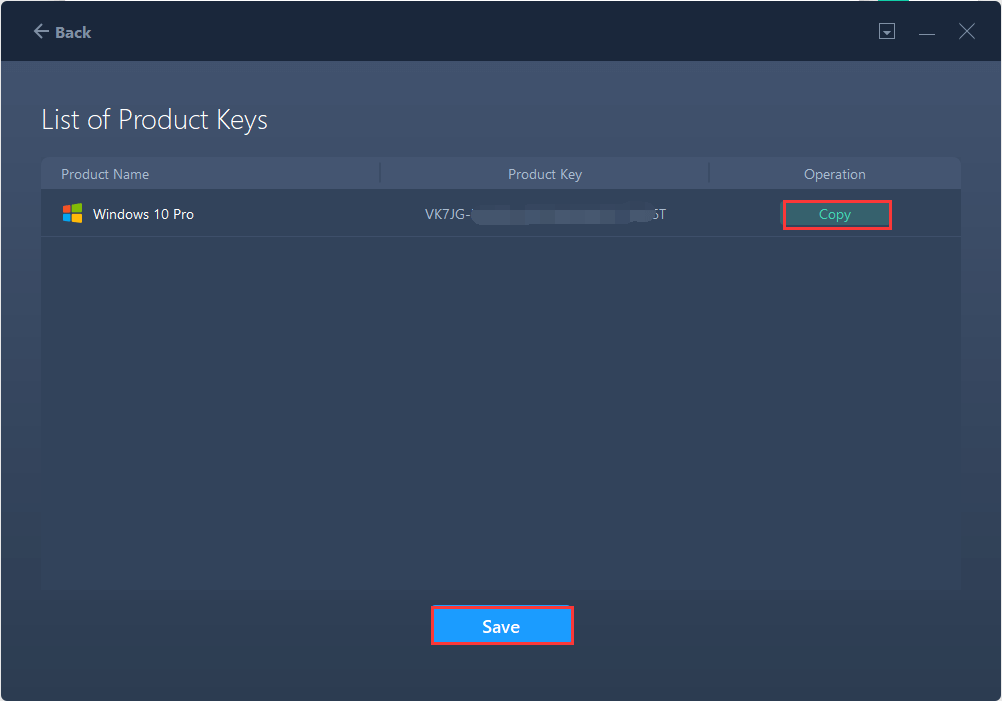
1. Click the Scan to scan the license key of your Operating System and Applications.
2. Save your keys to a *.txt file or directly copy the key.
Note:
Only the keys of the Windows operating system, Microsoft Office, and Adobe are supported.
Feedback and Support
We invite your comments on how well EaseUS MobiUnlock performed, and we are also enthusiastic about replying to all your questions about using it. Please feel free to contact us at:
[email protected]
We also provide an online chat service and the Live Chat option can be located in the top navigation bar of EaseUS official website www.easeus.com.
 Partition Manager