EaseUS RecExperts Online Help
This is a dedicated online help to assist you understand our product easily and quickly, for any questions and concerns not addressed on this page, please do not hesitate to contact and we will always be happy to help.
RecExperts
- Hardware Requirements
- System Requirements
- Floating Toolbar
- Output Format
- Output Folder
- Hotkeys
- Mouse Settings
- Quality Settings
- Start Recording
- Stop Recording
- Auto Stop
- Auto Split
- Task Scheduler
- Watermark
- Trim the Video
- Add Intro & Outro
- Extract Audio
- Screenshot
- Add Media Player
- Manage Recording
Welcome
Thank you for using EaseUS RecExperts. RecExperts is a multipurpose screen recording software integrated with the ability to annotate recordings, create recording tasks, upload captured videos, take screenshots, and more. No matter whether it's your first time using RecExperts or just want to know more about this recorder, this guide will meet your ultimate demands along with the instructions for installation as well as technical support.
Getting Started
This part outlines the basic parameters for using EaseUS RecExperts. It is to help you acquire a general understanding before you get started.
Hardware Requirements
1.0 GHz processor or faster
A minimum of 1 gigabyte (GB) RAM; A minimum of 2 GB RAM for Windows 7/8/8.1/10
A minimum of 1 GB of available space on the hard disk
CD-R/RW, DVD-R/RW, DVD+R/RW or DVD+R DL drive
Keyboard, mouse, and other compatible pointing devices
System Requirements
Make sure you are running any one of the listed operating systems:
Windows® 7/8/8.1/10/11
Mac OS X® 10.10 or higher
Activation
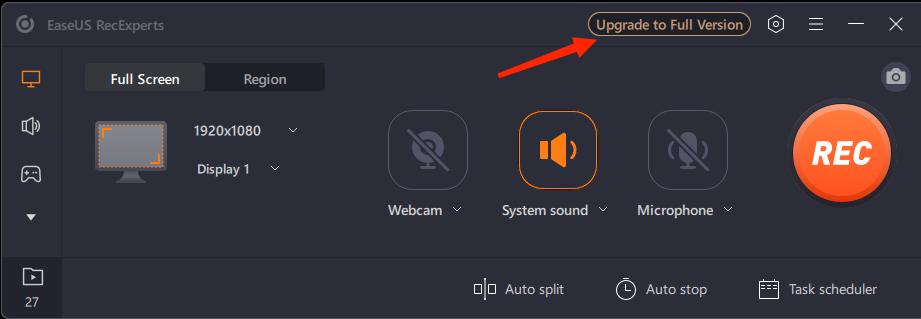
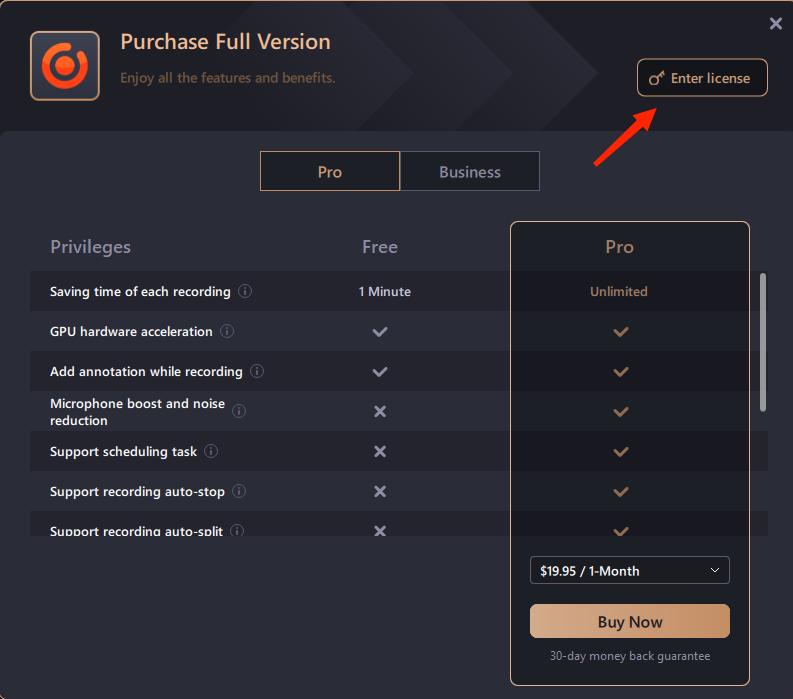
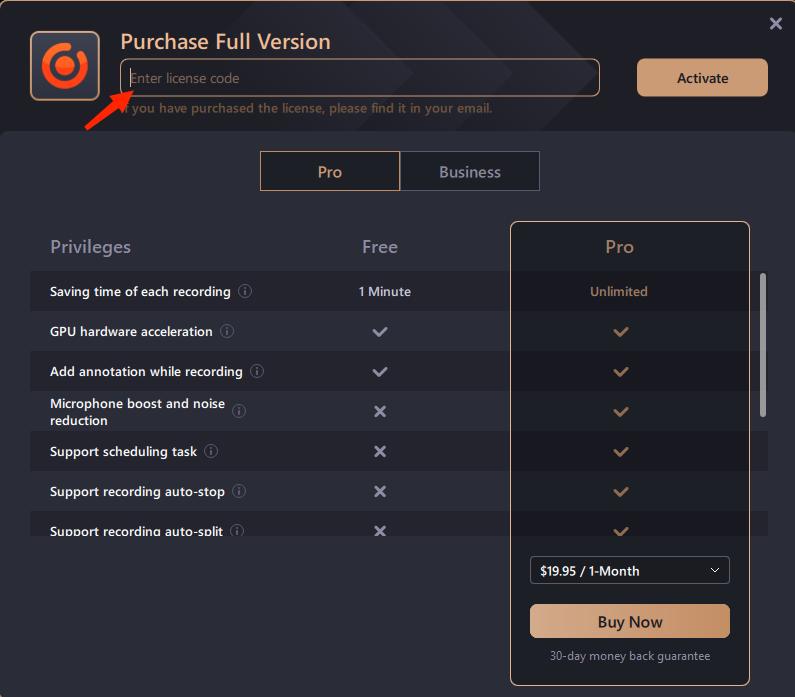
The trial edition can be used directly, however, there is a watermark in the exported video file, and also has some limitations. The Upgrade to Full Version button can be seen on the top right corner of the main interface in EaseUS RecExperts. Click on the button to trigger the Activation Window, then click the Enter License, copy your license code into the Activation box, and click on the Activate button. The Trial will be upgraded to the Professional edition once the license code is properly applied.
Set Preferences
This part helps you quickly learn how to use the basic settings of EaseUS RecExperts.
Floating Toolbar
The floating toolbar appears when the recording is started, however, you have the option to hide this toolbar during the recording in case you don’t want any other applications shown on the recorded screen.
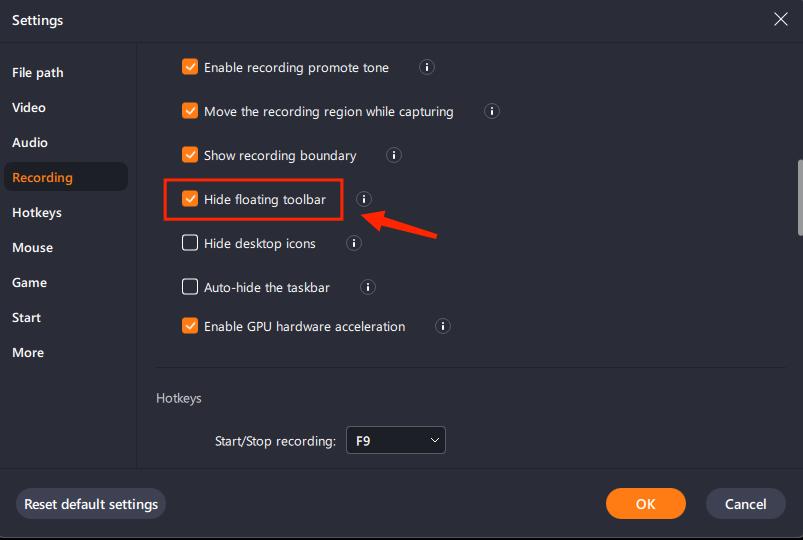
During the recording, a toolbar will appear on the screen providing various options including pause/stop, screenshot, zoom, and annotating features. If you don’t need the toolbar shown on your screen, just click and drag it to the edge of your PC screen and release your mouse. After that, the toolbar will hide behind the screen side, and you can pull it out by putting the mouse cursor in the original place.

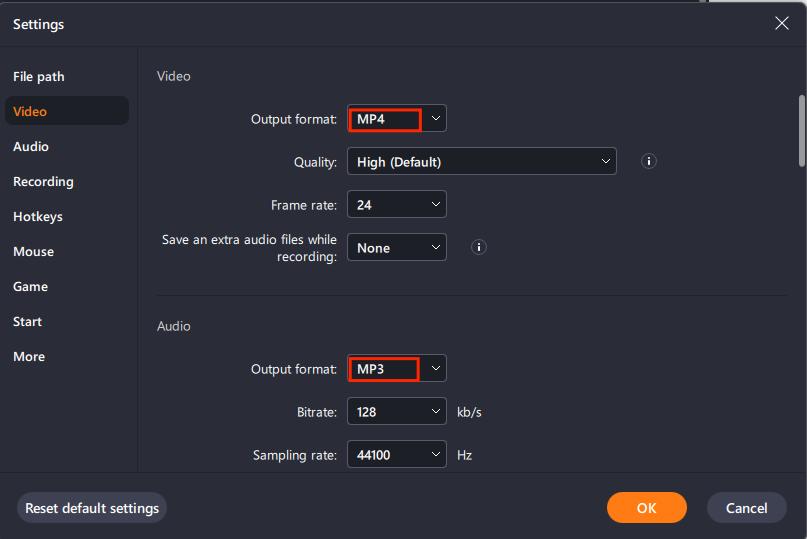
Output Format
Select the correct mode based on your original video aspect ratio. Multiple formats are also available for you to select for video output (MP4, MKV, AVI, MOV, FLV, etc.), and audio output (MP3, AAC, OGG, WAV, WMA, FLAC, etc.).
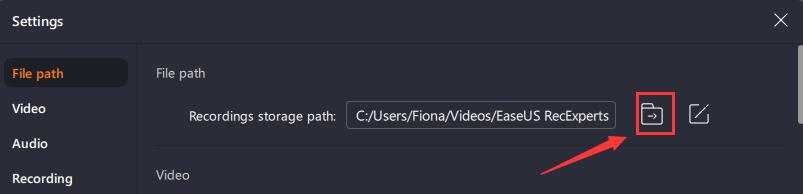
Output Folder
From settings, you can select a specific folder where they want to save all their recorded files. So, if you're looking for a certain recording, you can go directly to this folder and locate the file easily.
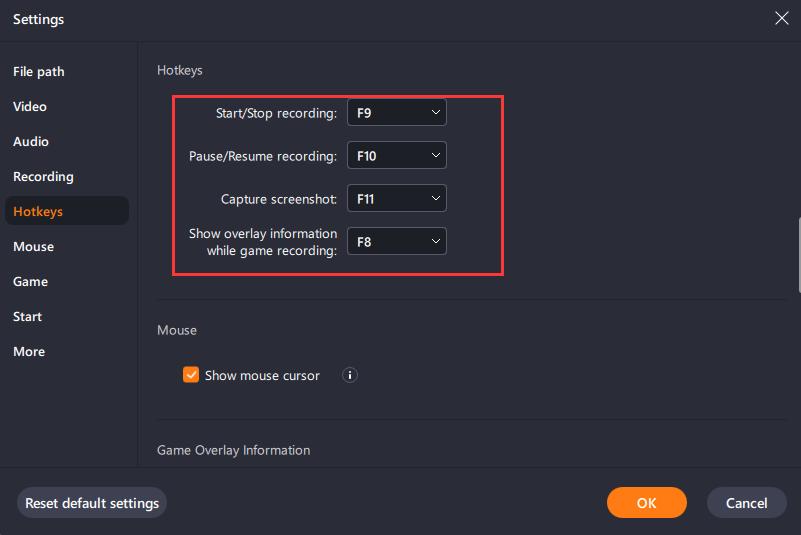
Hotkeys
If you are a shortcut-key lover, hotkeys would be your best choice rather than the recording toolbar. Although the program itself is already equipped with default hotkeys, you can still change those settings and set the hotkeys according to your preference.
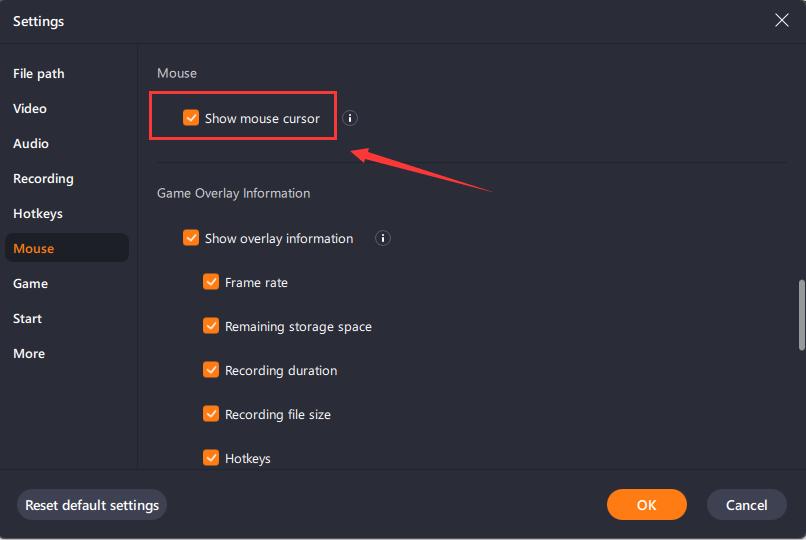
Mouse Settings
Not only you can decide how the mouse cursor will appear in your recording, but also you can choose whether you want to hide or show the mouse clicks as well as the mouse area. It is also possible to set up different colors for mouse clicks and add highlight effect.
Quality Settings
It's indeed precise work to adjust the video quality. From EaseUS RecExperts's video settings, various options are provided to you: Quality, Frame rate, and Bitrate. All these aspects depend on your PC configuration and what you are going to record.

Record Screen
With RecExperts, you're able to record the full screen, customized region, webcam or create a picture-in-picture video. System sound, microphone, or both can be included in the recorded video as well. Now, let's check how to start with the recording!
Start Recording
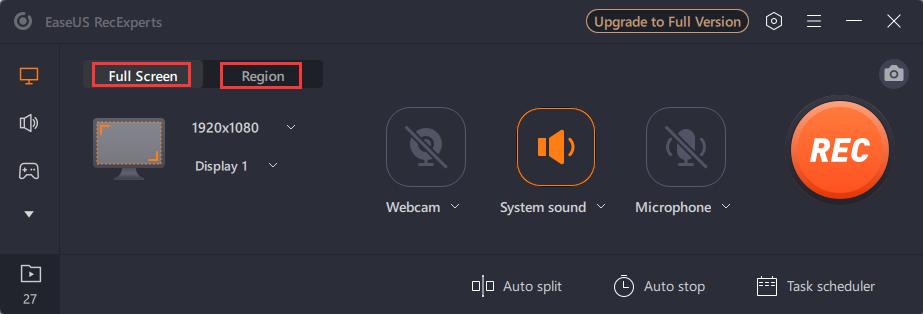
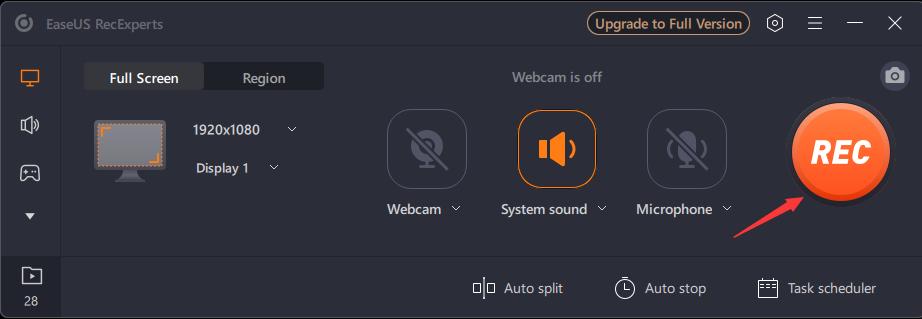
1. Select the recording area
To record the full screen, just click the first icon to set the fullscreen recording mode. It is possible to customize a recording area by clicking the crop icon on the main panel.
2. Select Audio
Click the sound icon to choose whether to record system sound, microphone, both, or no sound at all. Moreover, sound volume can be adjusted through Advanced options.
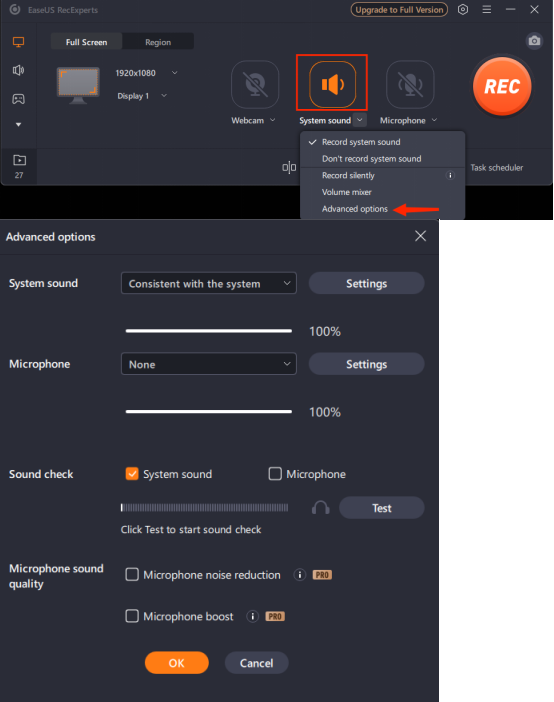
To record microphone, click Microphone and choose the device. More can be adjusted through Advanced options.


3. Record Webcam
To record your webcam along with your PC screen, simply click on the camera icon and select your webcam device. If the program is unable to detect your webcam, try plugging in the camera before starting RecExperts and then restarting the program. This should resolve any issues with detection.

Here, you can also adjust the camera parameters in Settings option.

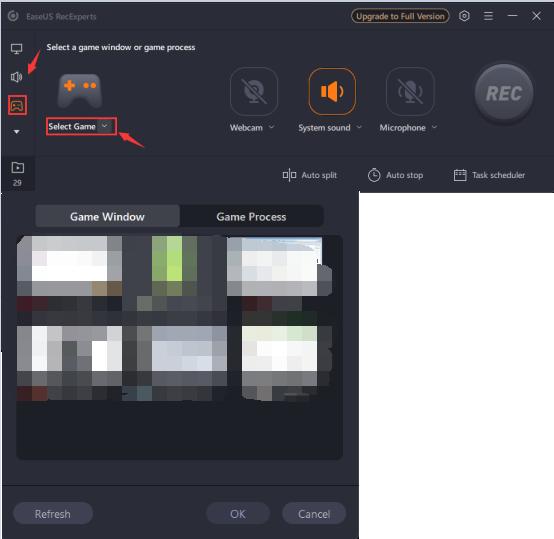
4. Record Games
This newly added function gives the capability to record the wonderful moments in your games. Just click the gamepad icon and choose a running game from the game window or game process.
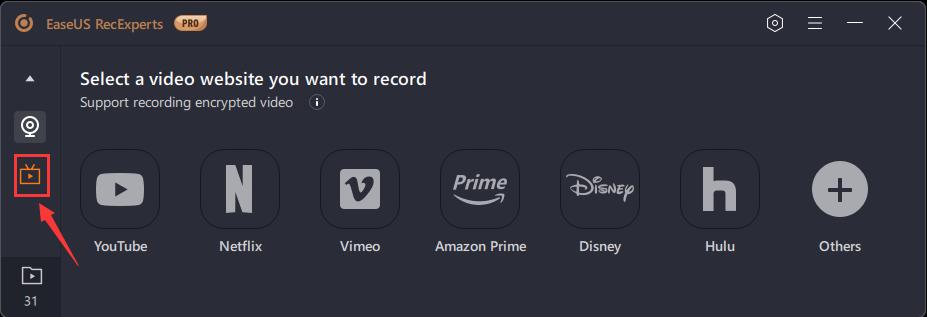
5. Record Online Video
This newly added function gives the capability to capture live-streaming videos from YouTube, Netflix, Vimeo, Amazon Prime, Disney, Hulu, and other websites for future playback or sharing on the web. Just click the TV icon and choose a website from the options.
6. Start the Recording
Click REC button or press the default hotkeys (F9) to begin the recording.
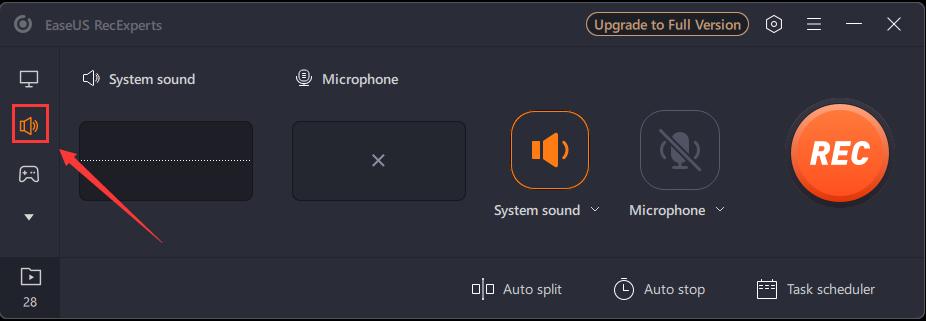
Note: If you want to record sound only, please choose Audio on the left side.
Stop Recording
To finish recording, you can manually click the stop button at the recording toolbar or use the default hotkey (F9) to end the video.
Once the recording is done, you will enter the preview window and you can play your recorded video or audio.
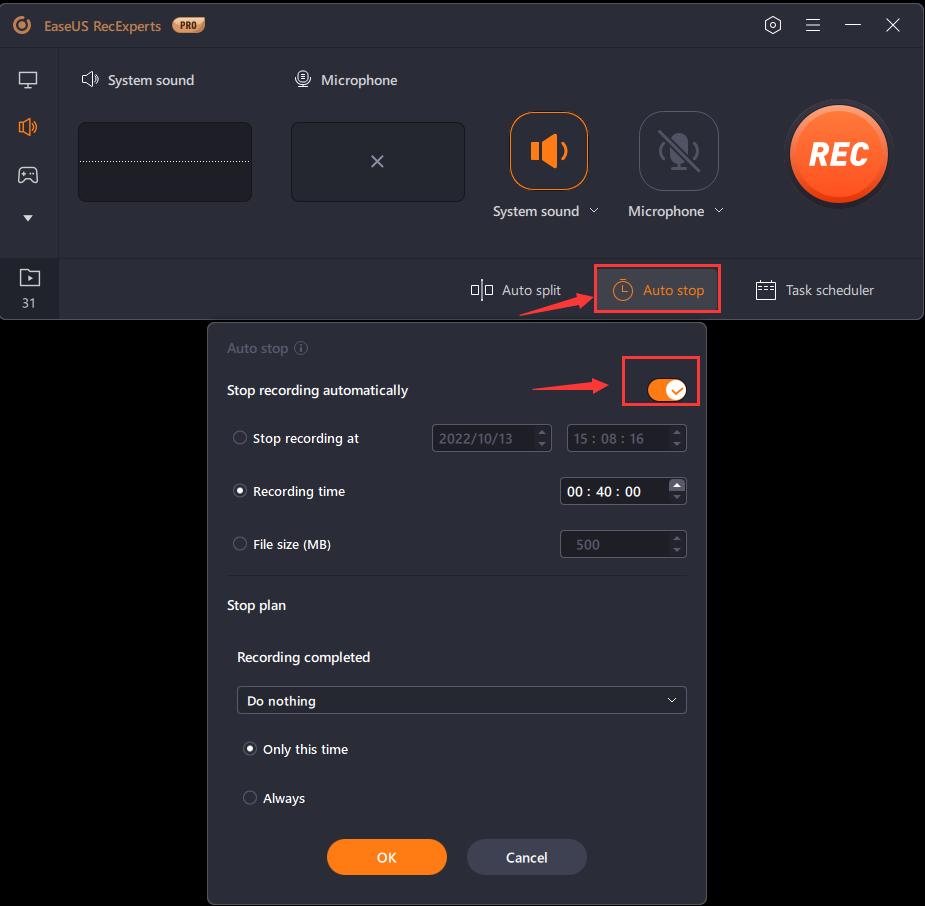
Auto Stop
Auto Stop function allows you to set the recording time and file size before starting so that the recording can be automatically stopped based on your preferences.
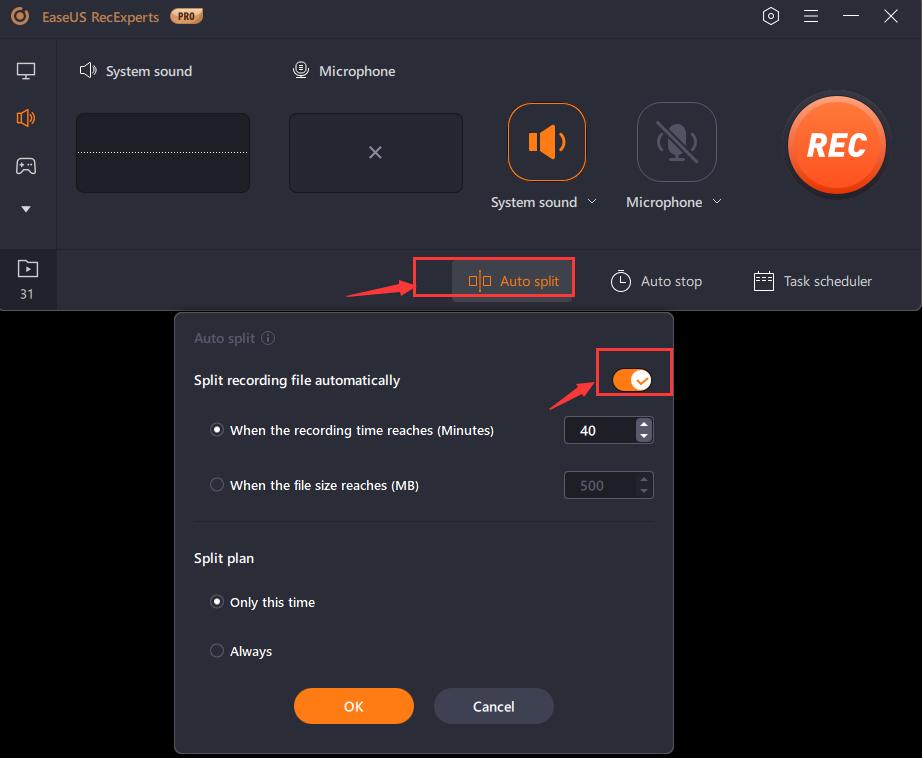
Auto Split
If you have any additional requirements for the video file or recording time, the Auto Split feature is optional. You can choose to split the video file when the recording reaches a certain time or when the file reaches certain limitations under the main interface.
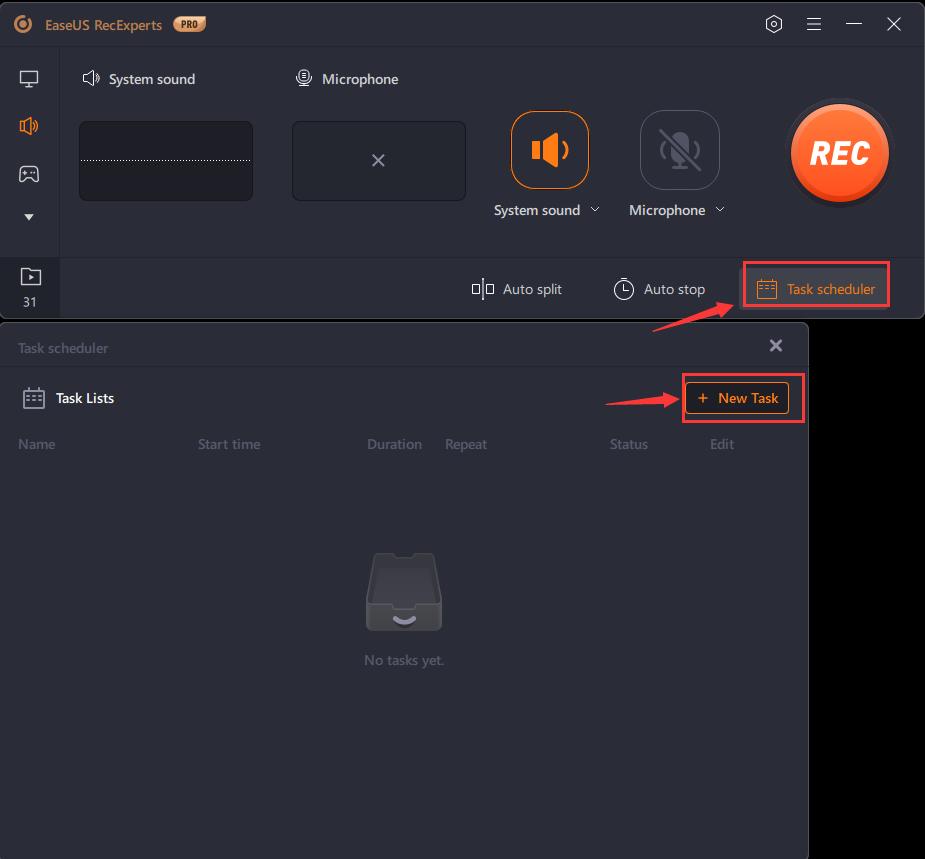
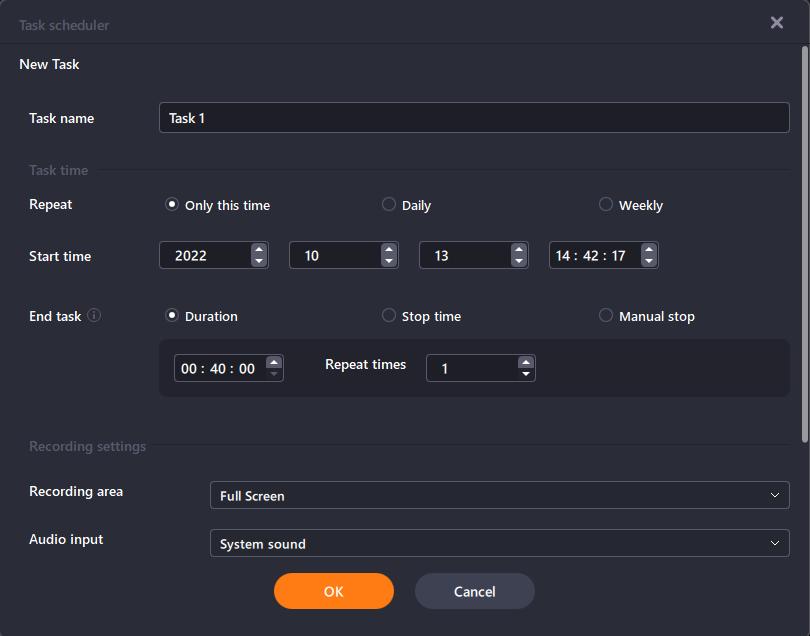
Task Scheduler
Task scheduler allows you to schedule the start time, duration, stop time, recording area, audio input, and more for your recording. By using this feature, you won't have to continuously monitor the recording process.
Watermark
The Watermark feature enables you to add a watermark to your recording, which can be either text or a picture.

Edit Recording
We provide several useful functions for editing your recorded videos, including Trim, AI Assistant, Compress, Convert to constant frame rate, Extract audio, and Add opening title/closing credits.
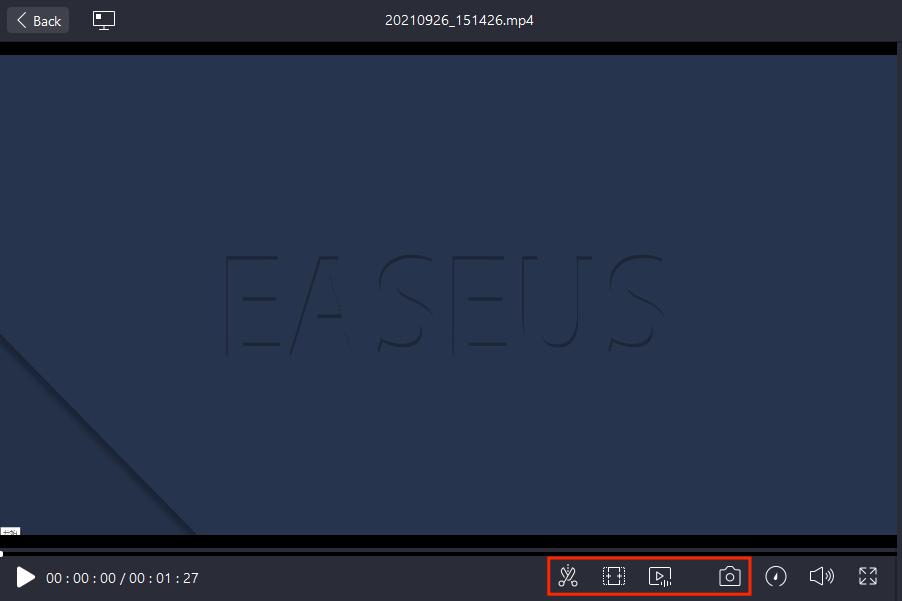
Trim the video
To trim a video, simply drag the two icons pointed out below to trim the video length.

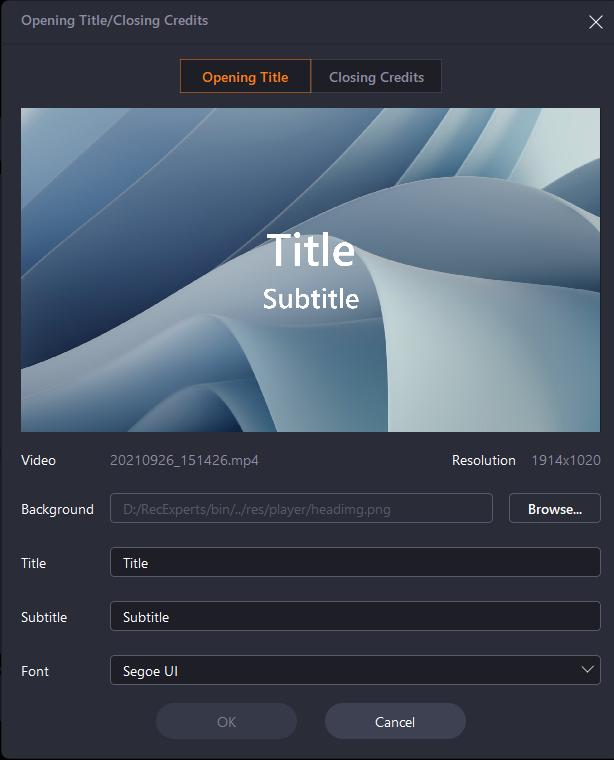
Opening Title/Closing Credits
No matter you are making a personal video or a public video shared on social media, the intro and outro can be added to the video during editing as well. Just click Opening Title/Closing Credits on top of the video management window and you will be able to enter the contents of the title and subtitle.
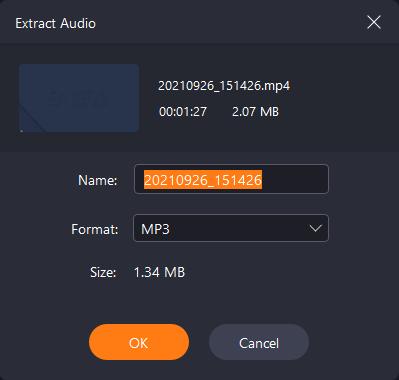
Extract Audio
To get the audio from the video separately, the Extract audio function can meet your requirements.
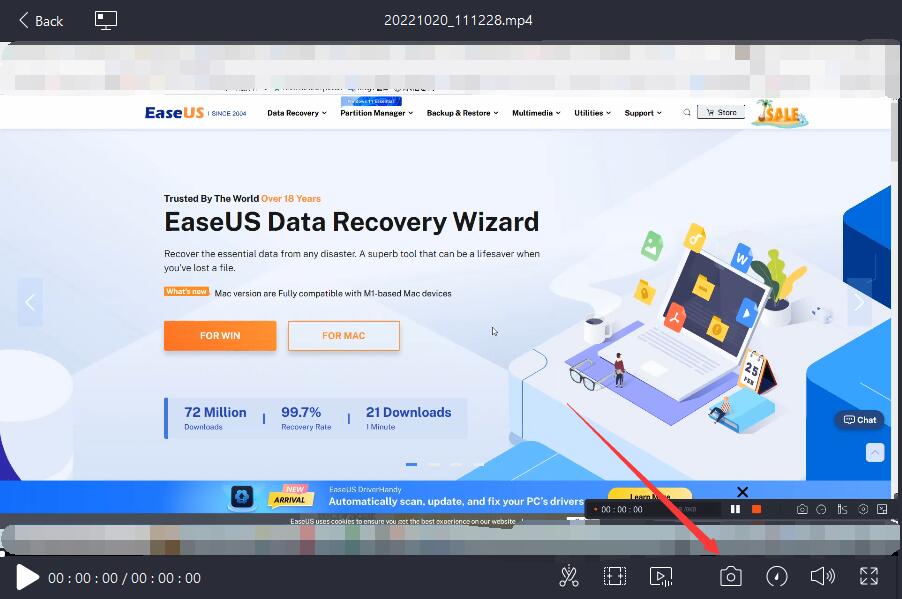
Screenshot
The screenshot button is easy to capture a screenshot from this video, Just adjust the video process and click the Screenshot button to get it.
Media Player
It is possible to load the media player separately from your desktop to manage the recorded files like importing or deleting multiple files in a batch.
Add Media Player
Click on the computer-like button to add this media player to your desktop. Afterward, you will be able to run the media player without needing to launch RecExperts.

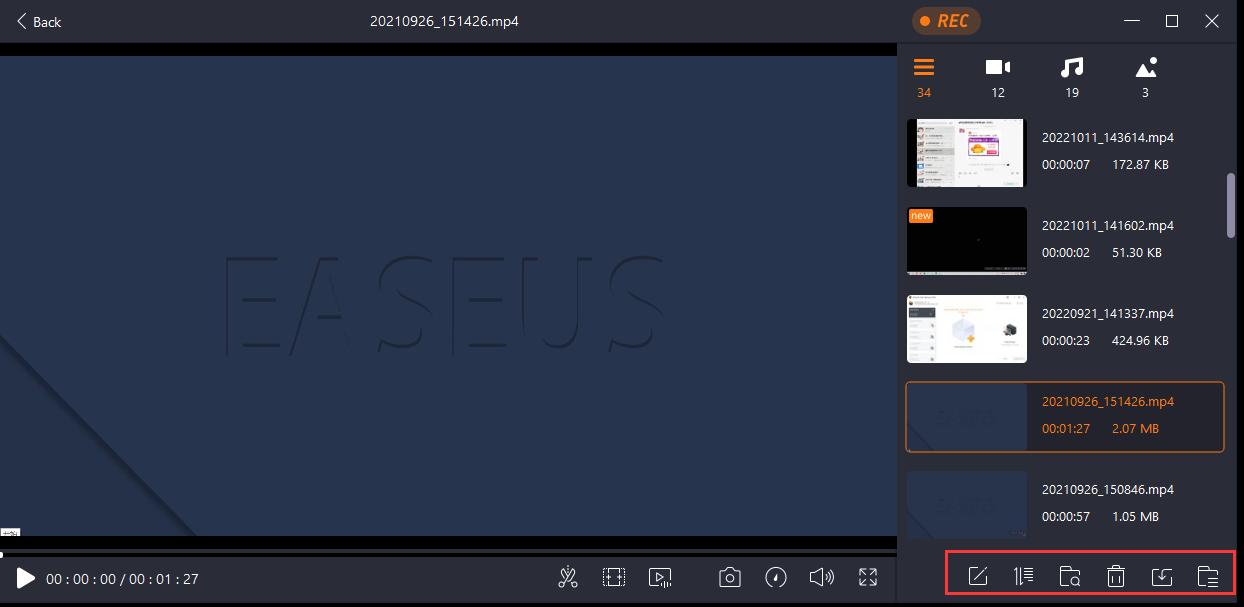
Manage Recording
This interface enables you to better manage the recordings. You may rename a recorded video or sort the recorded videos at your preferences. Furthermore, you may import or delete multiple videos in a batch or move them to another path.
Feedback and Support
Some accidental issues might happen when you are recording. If this happens, you need to describe the issue take some screenshots about the issue, and send them to us. Click Technical Support to submit the details to our support team.
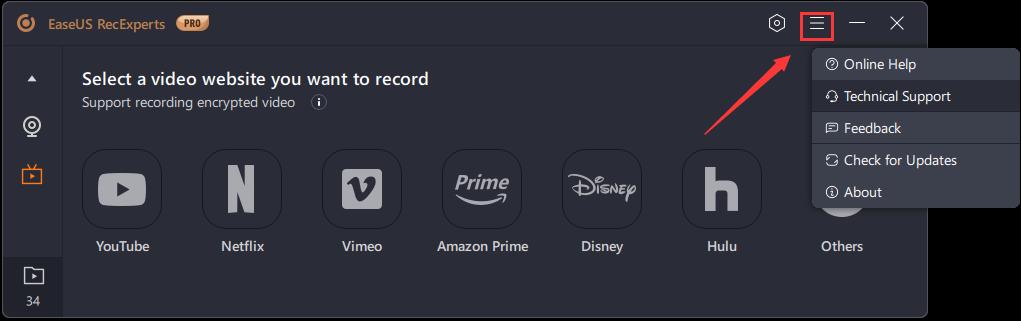
You can also directly send the details to [email protected] to receive efficient assistance.